Part 16 – Import Horizon Group Policy Templates for DEM
![]()
In this blog, we will launch our Group policy editor and create a new VDI desktop DEM policy to bootstrap the agent with configuration.
We will need to import the GPO templates we downloaded as part of our installation files into C:\Windows\PolicyDefinitions or \\domain.com\sysvol\domain.com\Policies\PolicyDefinitions on the group policy server.
Step 1- Extract the files.
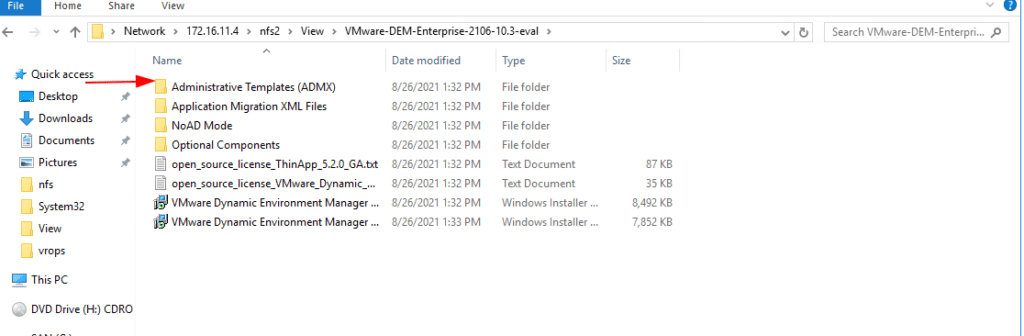
Step 2- Copy the .admx files and copy them to C:\Windows\PolicyDefinitions. Overwrite any older files.

Step 3- Copy all .adml files from en-us folder and copy them to C:\Windows\PolicyDefinitions\en-US. Overwrite any older files.

Step 4- We had actually created these two Horizon View Organizational Unit (OU) in our previous chapters so we will create a GPO here. If not, within our Active Directory Users and Computers, create a parent Organizational Unit (OU) to hold all Horizon components.
Step 5- Use the option to Create a GPO on this domain and link it here as shown

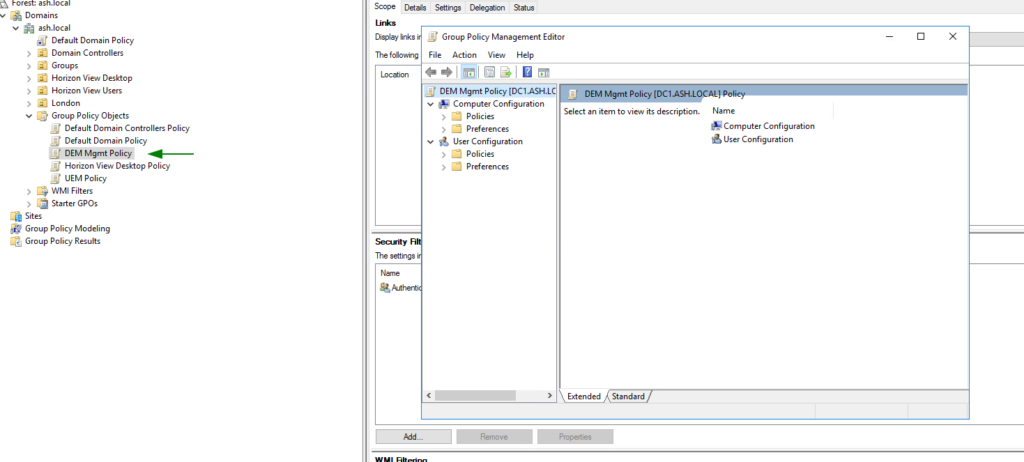
Step 6- Give our GPO a name as DEM Mgmt Policy

Step 7- Right-click the DEM Mgmt Policy GPO and select Edit.
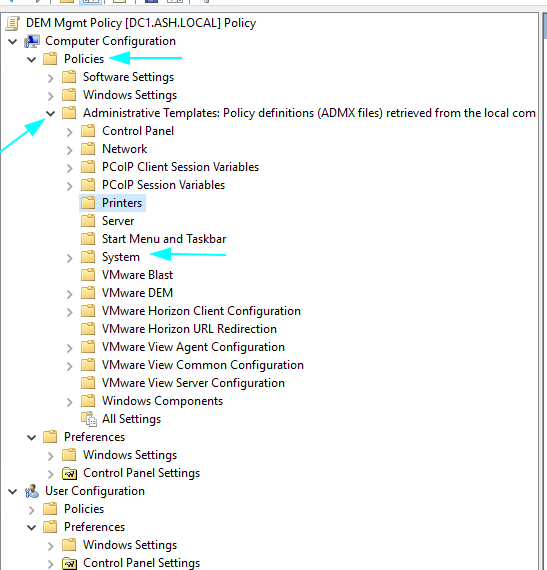
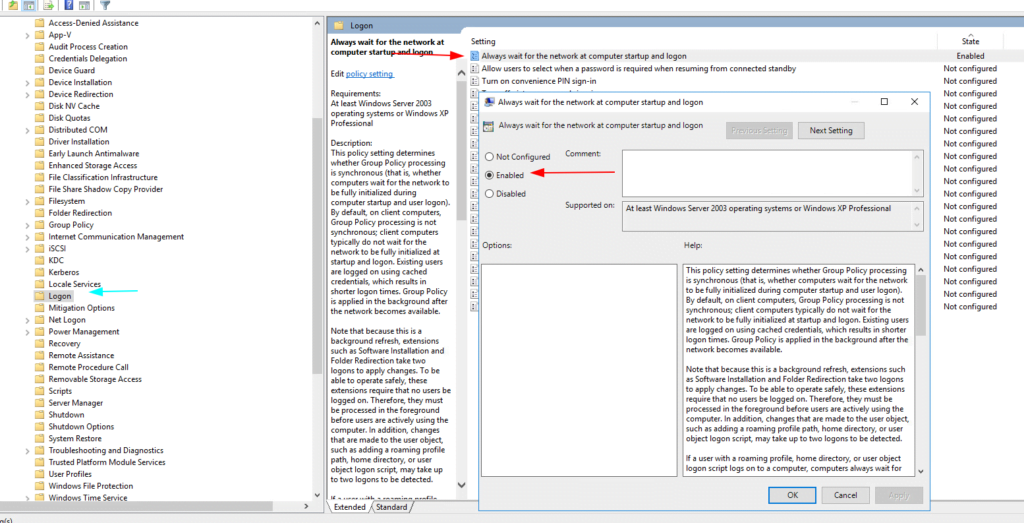
Step 8- Go to Policies > Administrative Templates > System > Logon and configure the following policies
Step 9- Under Logon – Enable the option to wait for the network at computer startup
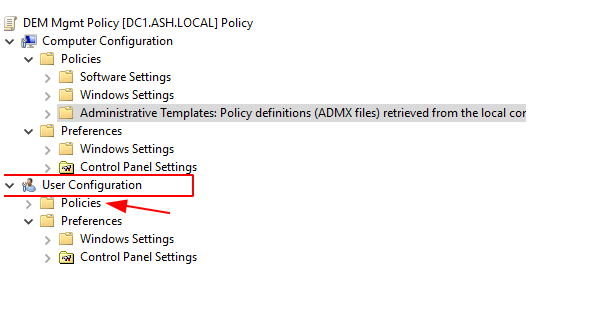
Step 10- Browse to User Configuration
Step 11- Browse to Policies> Administrative Templates> VMware DEM> FlexEngine
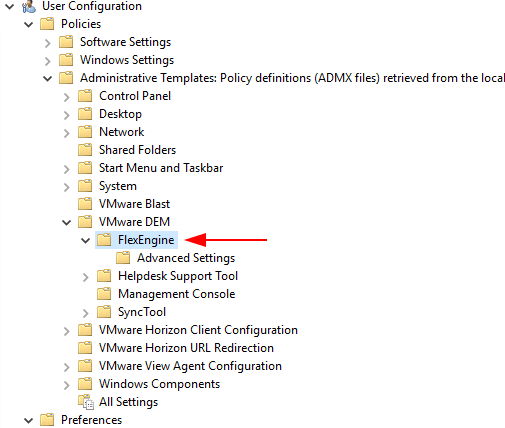
There are a number of tweaks we will need to apply here so let’s begin
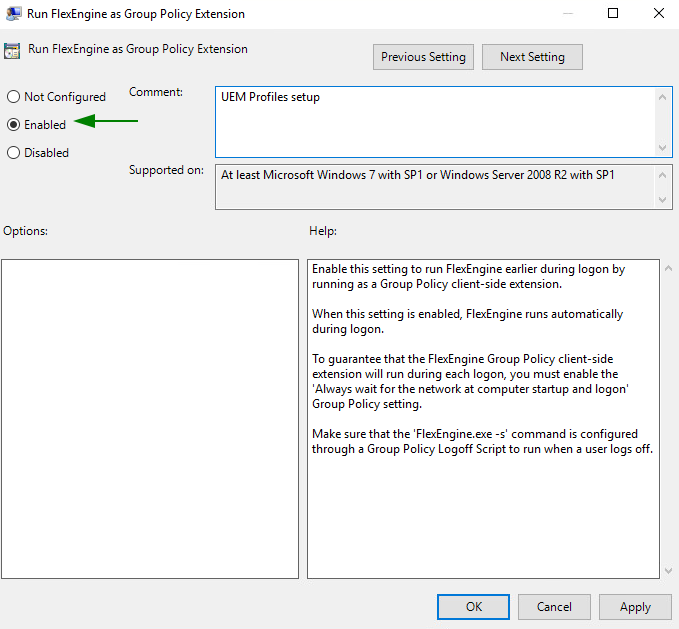
Step 12- Enable Run FlexEngine as Group Policy Extension

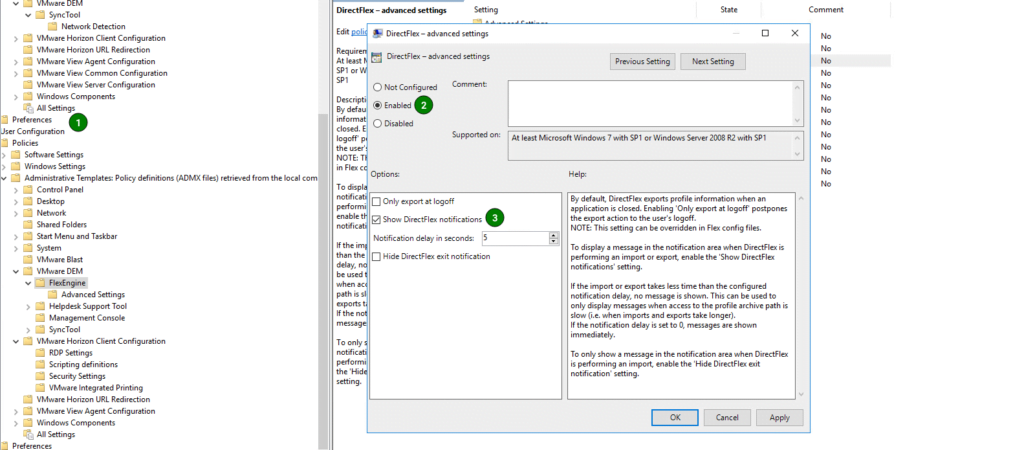
Step 14- Configure the following policies: DirectFlex – Advanced settings as Enabled
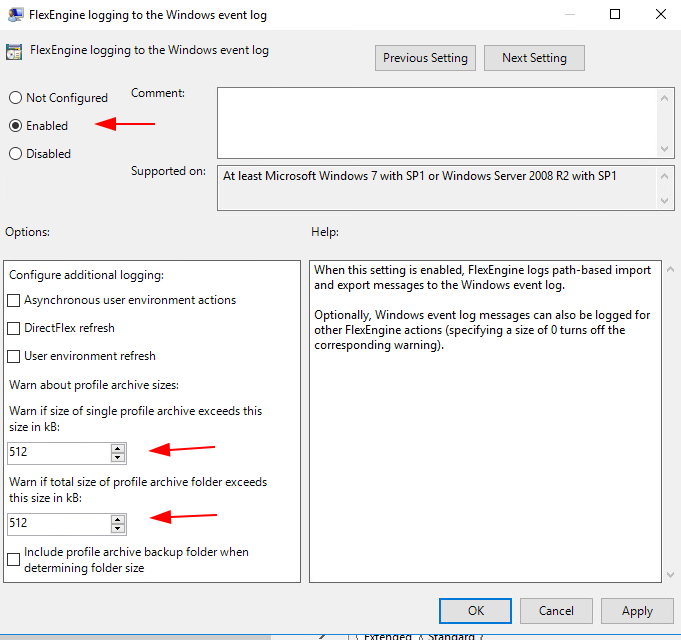
Step 15- Enable FlexEngine logging to the Windows event log
Step 16- Set Flex config files to Enabled and also specify the path to the DEMConfig share. We will create this folder and permissions in another blog.

Step 17- Set FlexEngine to Enabled and specify the path and filename of the log file (\\dc1\DEMProfiles$\%username%\Logs\FlexEngine.log). Select the desired Log level and max log size as shown

Step 18- Set Profile archive backups to be Enabled and specify the location to store user profile and archive backups. (\\dc1\DEMProfiles$\%username%\Backups) and specify the number of backups we wish to retain.

Step 19- Set Profile archives as Enabled and specify the location to store profiles archives in your remote server (\\dc1\DEMProfiles$\%username%\Archives).

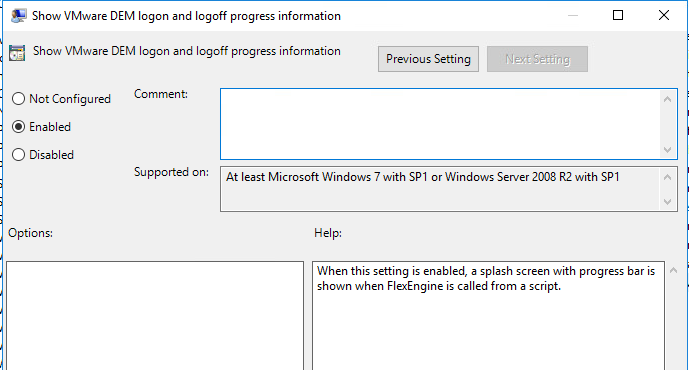
Step 20- Enable Show VMware DEM logon and logoff progress information
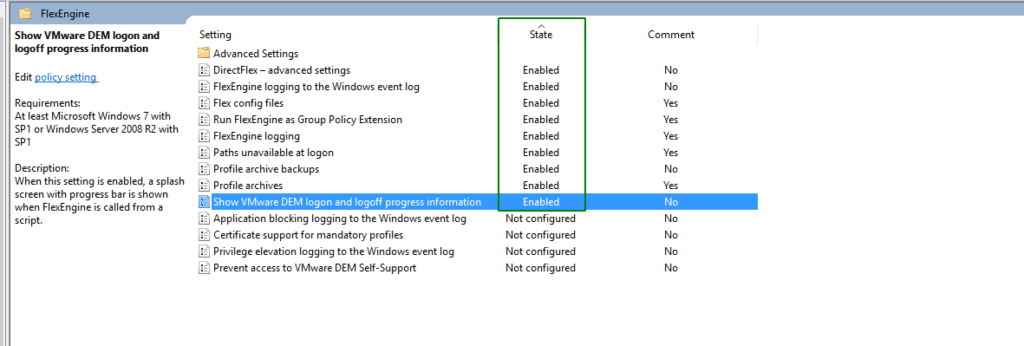
Step 21- Once all settings are enabled, we can see the status as shown.
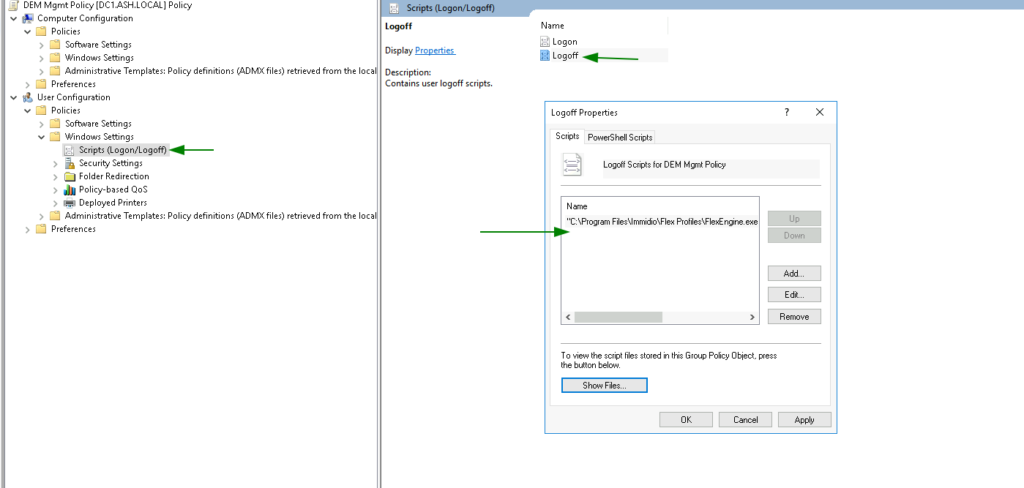
Step 22 –Go to Policies > Windows Settings > Scripts (Logon/Logoff) and under Logoff – enter the following parameters:
Script Name: “C:\Program Files\Immidio\Flex Profiles\FlexEngine.exe” & Script Parameters: -s
Step 23 –Go to System > Group policy
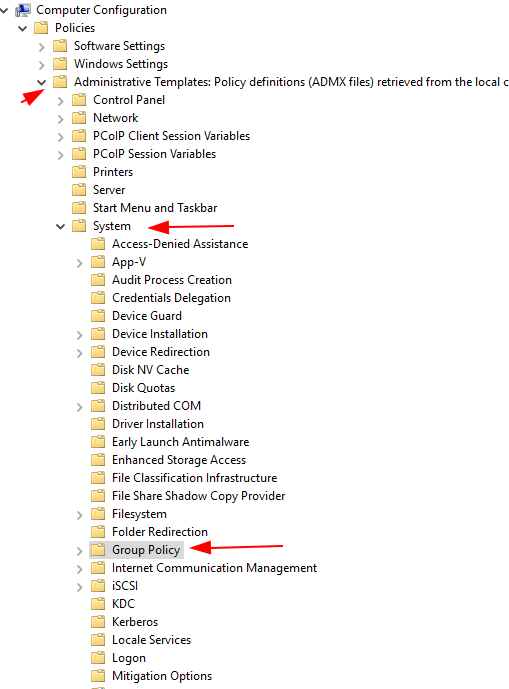
Step 24 –Set loopback processing mode as Enabled

With all the above parameters tweaked we will now apply our GPO
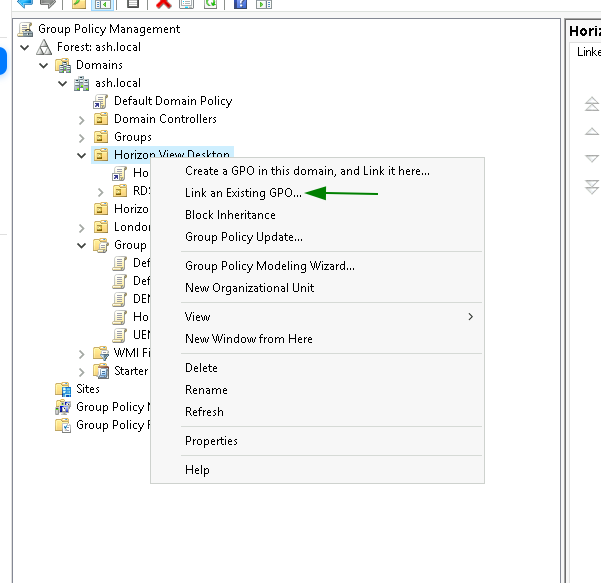
Step 25 Right-click the O and select Link an Existing GPO.
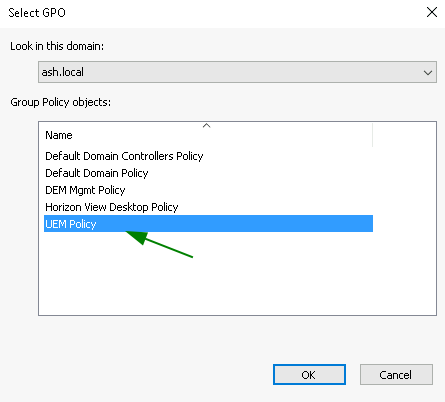
Step 26. Select the GPO UEM Policy and click OK.
Step 27. The GPO has been linked to the selected Horizon OU.
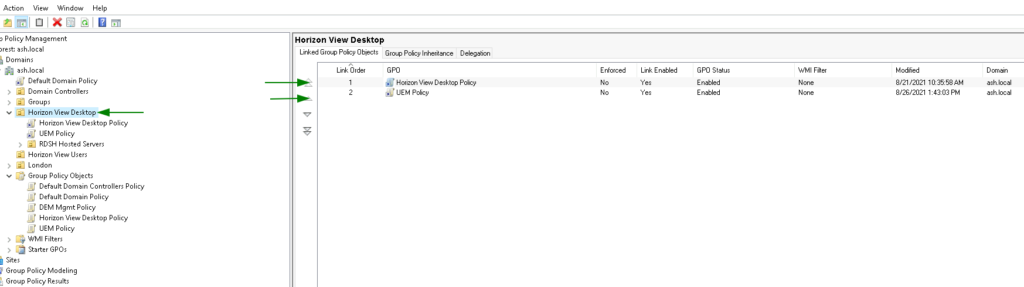
Step 28. For the GPO to work, make sure the GPO is linked to the OU where our Horizon Users are placed.