In this blog, we will take a deep dive into installing the IBM Spectrum Scale developer edition.Software has been downloaded to one of our ubuntu VM’s.

via chmod, let’s make the package executable.

Extract the Spectrum Scale package

Configure Setup Node
I’ve chosen the node named protocol node as the setup node. Basically, this node is where you run the software in simple terms.
./spectrumscale setup -s 172.16.11.160 --setuptype ss
This command displays the list of nodes in our GPFS system.
./spectrumscale node list
Configure Admin Node
- First is the node that will administer the installation so this will be our protocol node itself
- The admin node will need promptless ssh to and from all other nodes.
# ./spectrumscale node add 172.16.11.160 -a
Add GUI Nodes
The GUI node is also the admin node always and this node will grant us GUI access to the GPFS system.
./spectrumscale node add 172.16.11.182 -g -a
Adding the next GUI node for HA
./spectrumscale node add 172.16.11.161 -g -a Add Protocol Nodes
These nodes are what is responsible for NFS/CIFS protocols to be shared with clients. We add the protocol nodes with a -p flag

Let’s add 3 NSD nodes
These nodes hold our storage disks so we will add three nodes with a -n flag
./spectrumscale node add 172.16.11.157 -n
./spectrumscale node add 172.16.11.158 -n
./spectrumscale node add 172.16.11.159 -n
Add NSD Disks
Nsdnode1 & nsdnode2 share the same physical disks, we’ll alternate primary/secondary servers to keep things balanced
spectrumscale nsd add [-h] -p PRIMARY [-s SECONDARY] [-fs FILESYSTEM] [-po POOL] [-u {dataOnly,dataAndMetadata,metadataOnly,descOnly,localCache}] [-fg FAILUREGROUP] [--no-check] [-name NAME] primary_device [primary_device ...]spectrumscale nsd add: error: argument -p/--primary: Could not find the node: nsd-node1.
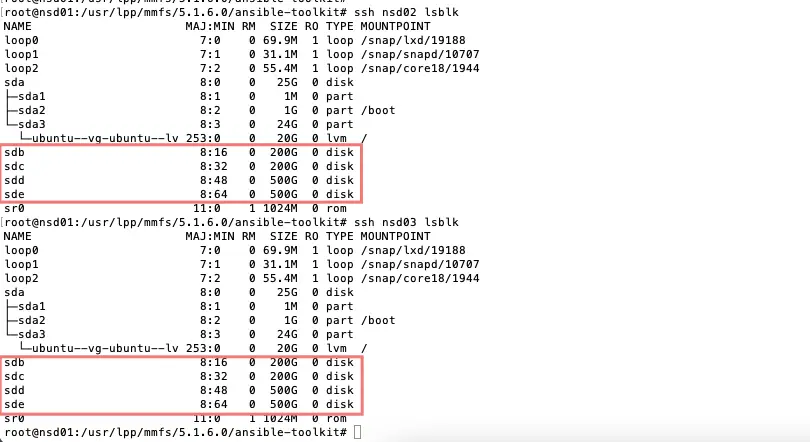
We will now create a folder SchoolData on our /dev/sdb partition and /dev/sdc partition.
# SchoolData
# ./spectrumscale nsd add -p nsd02 -s nsd03 -u dataAndMetadata -fs SchoolData -fg 1 “/dev/sdb”
./spectrumscale nsd add -p nsd03 -s nsd02 -u dataAndMetadata -fs SchoolData -fg 2 “/dev/sdc”

Here’s how the NSDs will be setup

Here’s how the file systems will be setup
File systems are created during the deployment phase if their NSDs already exist
./spectrumscale filesystem list
Verify the GPFS settings are as expected

Set the GPFS cluster name

Disable Call home settings

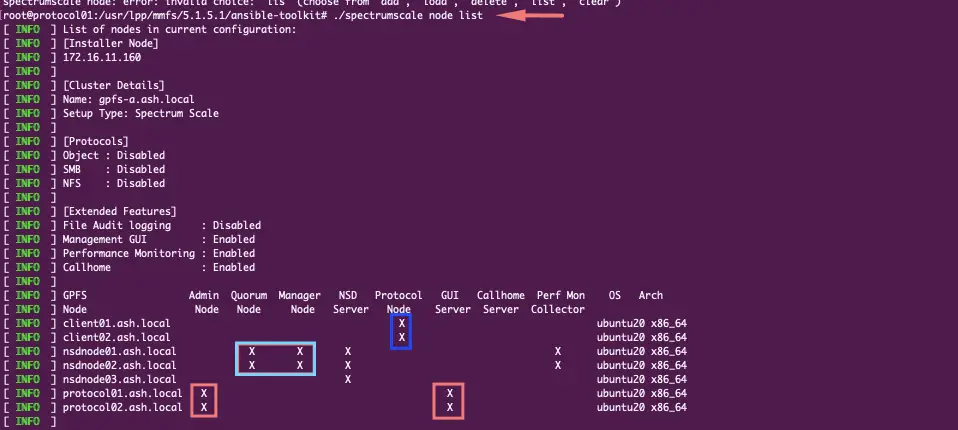
Finally, let’s review the output of our node list by running ./spectrumscale node list.
We have now 3 NSD nodes, 2 protocol nodes which are our GUI/admin nodes, and 2 client nodes which are serving as our actual protocol nodes.
With all configurations done, let’s run a pre-check first using ./spectrumscale install –precheck

If all our configs are correct, we should see a Success message.

Kick off our actual installation using ./spectrumscale install

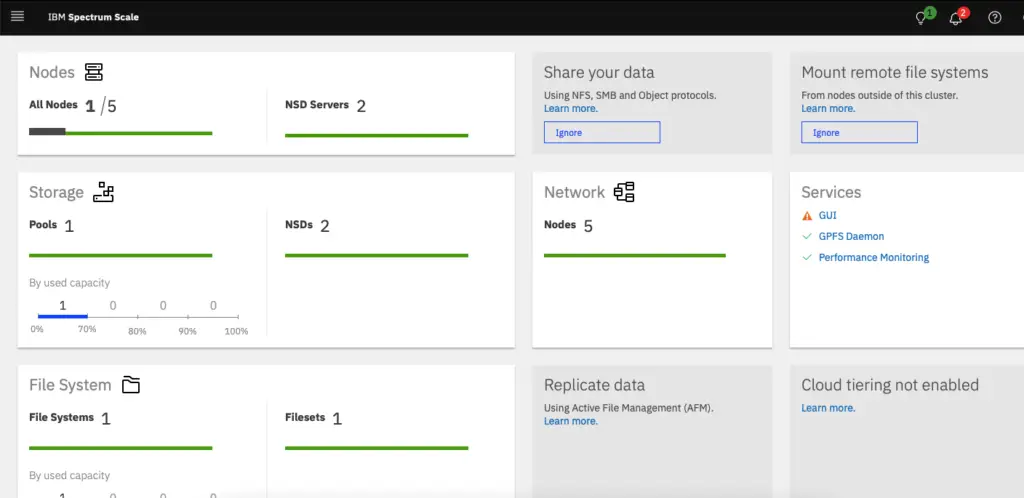
Our GPFS file system is active

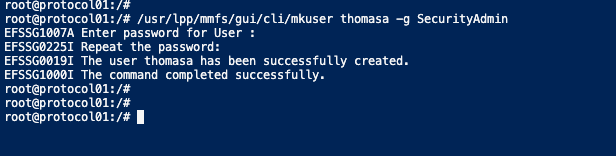
Create a user to login to GUI from the admin node
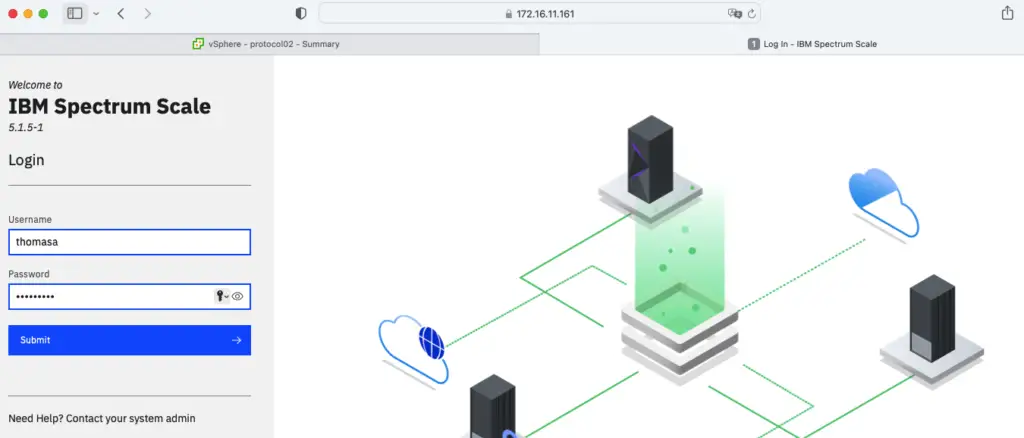
Launch a web browser and connect to the GUI node address via https://mgrip
Our GPFS cluster is installed