Azure Scalesets allows us to provision identical VMs based on attaining certain rules on resource usage such as memory & CPU bursts (ie: on-demand). It’s done to provide resilience and availability for an underlying application so this is a service for scaling the infrastructure. This is the same concept on AWS known as AutoScaling.
Azure Compute Gallery
We need a base image that has apps we need to install, the disk config we need, and a consistent configuration. A scale set is deployed from a base VM Image ( aka – VM clone ) that has apps we need to install and has a consistent configuration. The base images can be placed as part of an Azure Compute Gallery ( ie: Content library ) and using the Compute gallery we can share the images across our organizations so others can use the image.

| Specialized VM Images | Generalized VM images |
| Information about Users and Machine info is retained. | Information about Users and machine info is removed. |
| VM’s created from images will have the same computer name, admin user info | Perform a process of generalization by running sysprep. |
Create a Generalized VM Image
We can create our own specialized VM images with our apps and publish the image onto compute gallery.
1- I’ve my application installed on my VM so we will now hit the capture button to publish the master image onto our Azure compute gallery. Please ensure a Sysprep is run and VM is in a stopped state before we hit the capture button

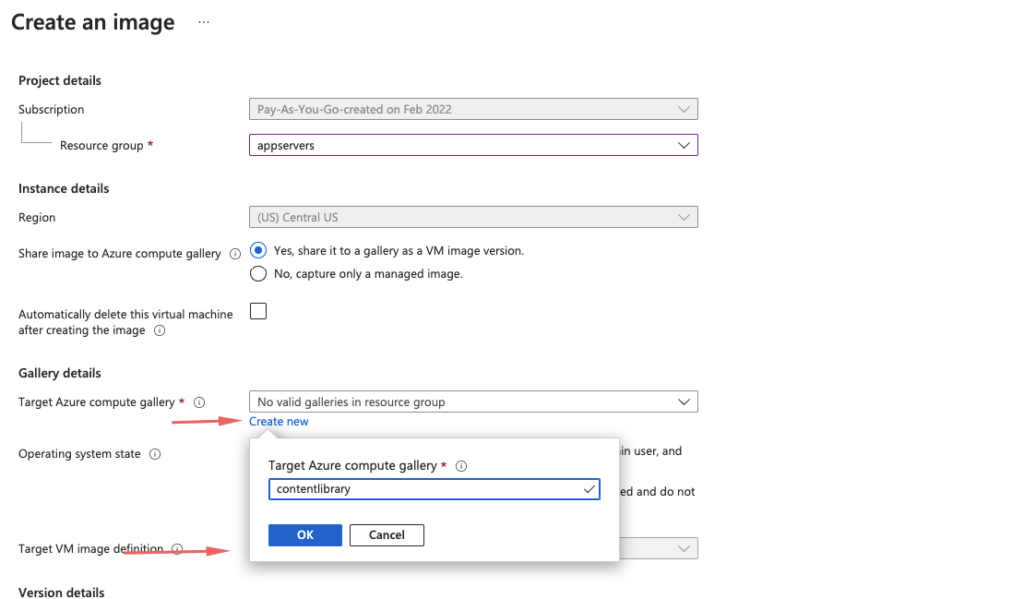
2- The capture option creates an image. Give the Azure compute library a name
3- Give the VM image a definition name such as appimage
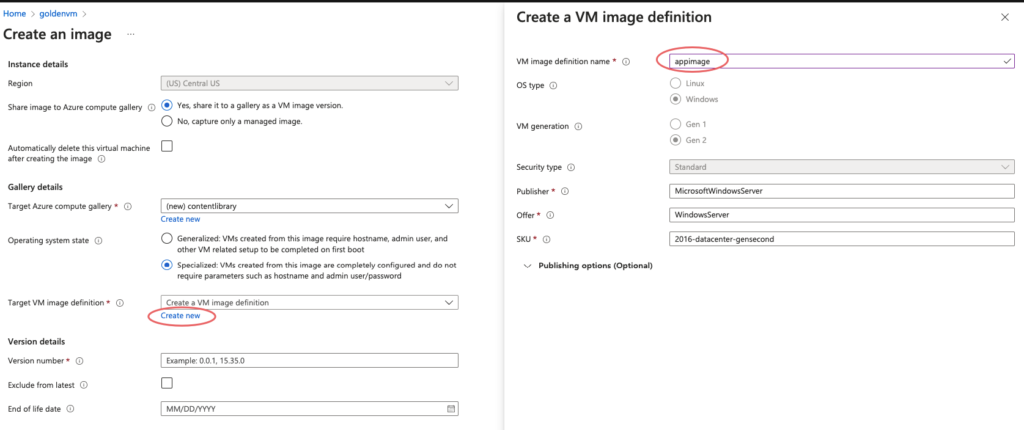
4- Give a version number for our image

5- Choose the replication mode as Premium SSD LRS

6- Create the image

7- Create the image

7- We have now an option of creating a VM from the image or Creating VM Scale set ( VMSS ) so we will choose VMSS for this example
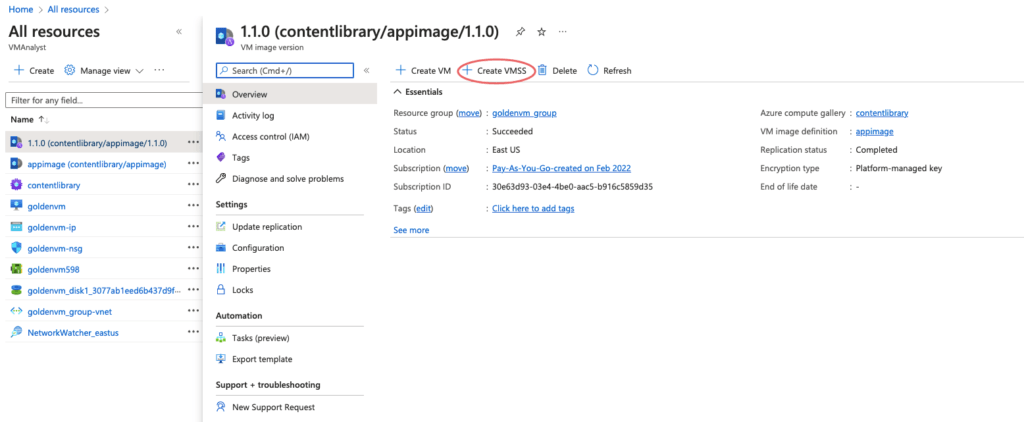
Create a Virtual Machine Scale set
1 – Once the base image is ready, search in the Azure portal for Scaleset and give our scale set a name.
Name – Type the name
Region – Select a region that is close to your area (East US).
Availability zone – None
Image In this example, I have chosen the Windows server 2019 datacenter.

2 – The key difference between these and we don’t want to manage them separately but if we wish to manage the VM separately we go for flexible. Orchestration modes for Virtual Machine Scale Sets in Azure. Choose the image we created.
On the Networking page and then select virtual network and under Load balancing
Use a load balancer – select No for this demo

Scaling policy – select custom
Minimum number of instances – choose 3
Maximum number of instances – choose 10

The spreading algorithm determines how VMs in the scale set are balanced across fault domains. With max spreading, VMs are spread across as many fault domains as possible in each zone. With fixed spreads, VMs are always spread across exactly 5 fault domains
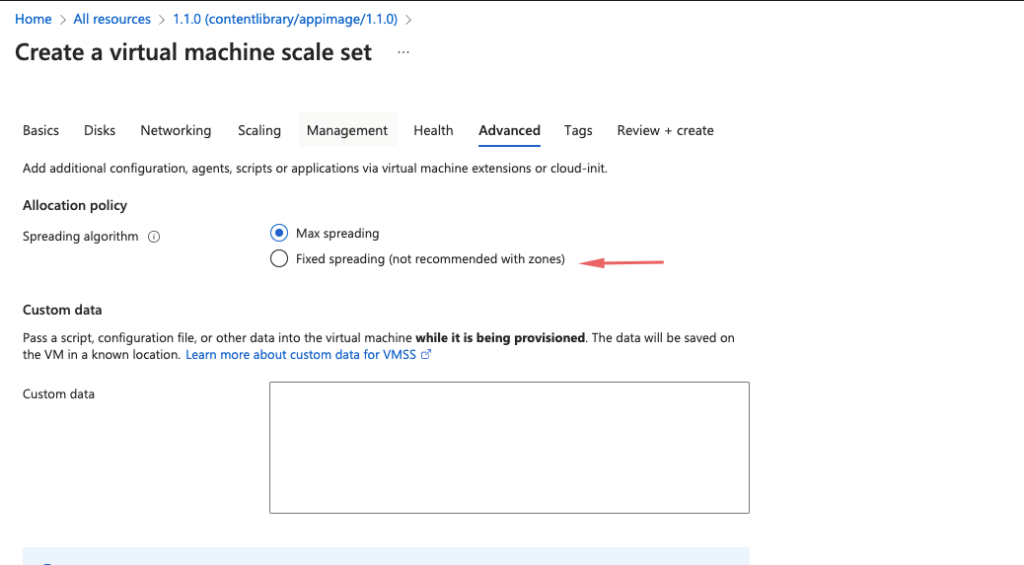
When you are done, then select Review + create.

Our scale set is now deployed

All our instances will appear inside our Scaleset

Scaleset in action as the orchestration mode is flexible which would mean we can add more VM’s to this scale set manually if we wish to

Scaling policy can be adjusted based on metric
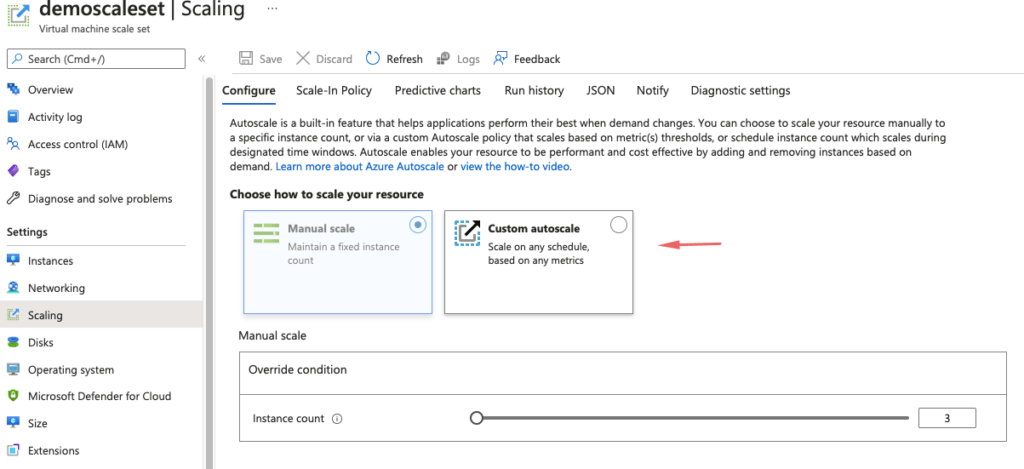
If we wish to scale the VM’s . Increasse the count by 2 if CPU > 50 and drop the instance count by 1 if CPU load drops below 25, we could add in a rule as shown

You can now add new VM to a scale set in Flexible orchestration model. Existing VM still can’t be added to a scale set….. You can make a new VM as part of a scale set in orchestration mode.

Our new VM is added


Our Scaleset thus shows the newly added VM as part of the flexible orchestration mode we selected.

Adding Custom scripts to Scaleset/VM
Should we wish to update scale, we can do so via the custom script extensions.


