

Load balancing allows access to multiple servers using a single VIP address. Load balancer gives an equal distribution of load across the backend servers and also provides higher HA than using a single server.
Blog Series
- Installing NSX-V 6.4
- Configure Controller Nodes and enable CDO mode in NSX-V 6.4
- One Page View of all NSX-V commands
- Configure VXLAN and Prepare ESX hosts for VXLAN traffic
- Configure the Transport Zone and Logical Switches
- Configure Distributed Logical Router
- Configure Edge Services Router (ESG)
- Verifying VXLAN Connectivity
- Regenerate Self-signed Certificate on NSX-V
- DLR VM SSH Access
- Backup NSX-V Manager
- Dynamic routing with OSPF in DLR
- Dynamic routing with OSPF in ESG
- VMware NSX Edge Load Balancer
- VMware NSX Edge Load Balancer SSL Offloading
- NSX-V Firewall & Microsegmentation
- NSX-V Firewall Service Composer
Terminologies
- VIP – Its a virtual P address plus a port to access the service eg : 192.168.10.5:80
- Backend pool – List of servers providing a service eg: webservers
- Service Monitor – Health check parameters for a service eg : ping checks
- Application Profile – Defines Service behaviour ( eg: Session Persistence )
What’s SSL PassThrough and SSL Offloading
NSX ESG supports protocols such as TCP, FTP, UDP, HTTP, HTTPS.
SSL Pass-through means certifcate is passed to the backend server and this takes care of certificate.
SSL Offloading means load balancer hands all certificate stuff.
NSX Load Balancer Deployment models
A load balance can be deployed either as One Arm Load Balancer or as an Inline Load Balancer.
One Arm Load balancer – Easy to deploy but should be on the same network as the backend servers. Using one armload balance increases the number of ESX edges so for every application we need to have one edge and it should be configured on the same network as backend servers. The NSX load balancer IP address acts as the VIP.

Deployment of Inline Load Balancer
Browse to ESG > Load Balancer > Global Configuration and click Edit.

Click Edit and enable Load Balancer as shown

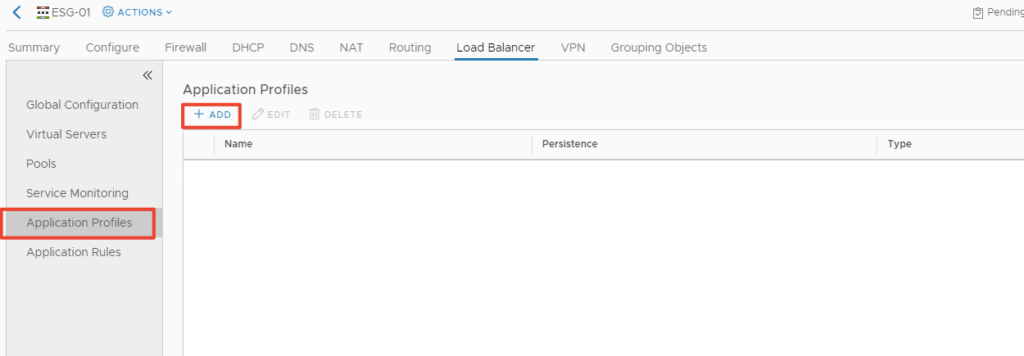
Go to Application Profiles and click Add
Application Profiles – An Application Profile is used to define the behaviour of a particular type of network traffic, and is associated with a virtual server (virtual IP address). The virtual server then processes traffic according to the values specified in the Application Profile. This allows us to perform traffic management tasks with greater ease and efficiency.
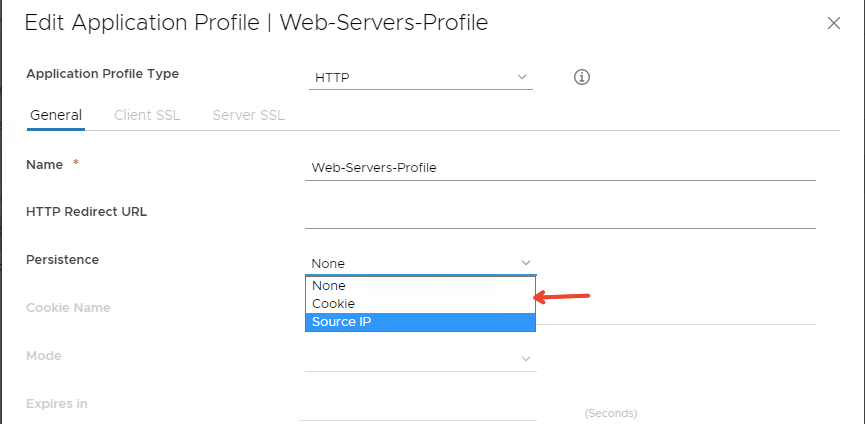
Give the profile a name and we will set the Application Profile Type to http and persistence set to non

Confirm creation of the web Application Profile

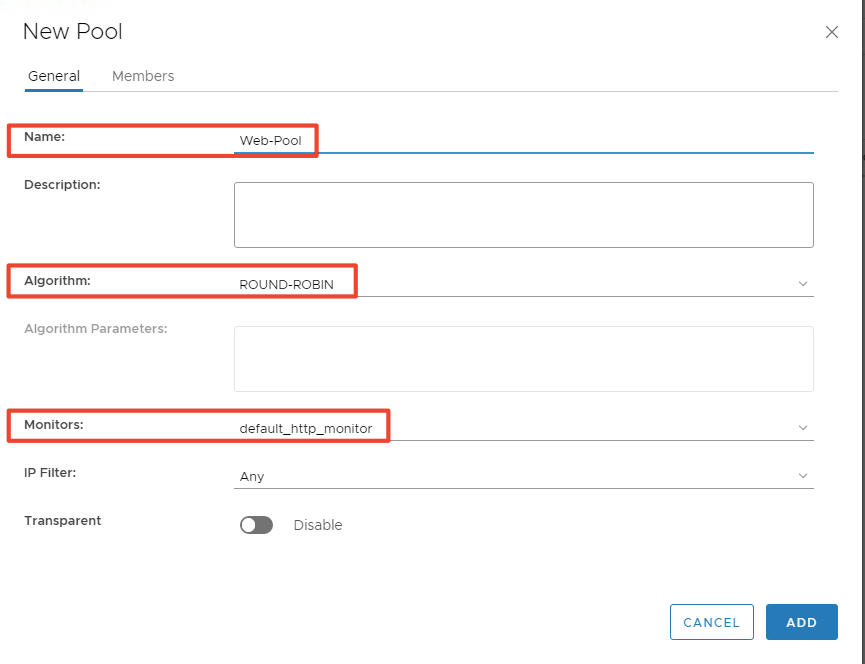
6. Browse Load Balancer > Pools and click Add
Pools are a bunch of web-servers we are interested in setting up behined a load balance

Give pool a name and choose its algorithm and monitor type.
Add backend web servers and provide the webserver IP and port number

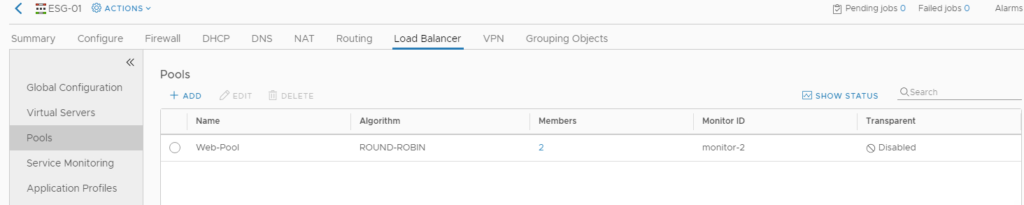
10. Confirm your configuration by clicking OK.

Confirm creation of our website pool.
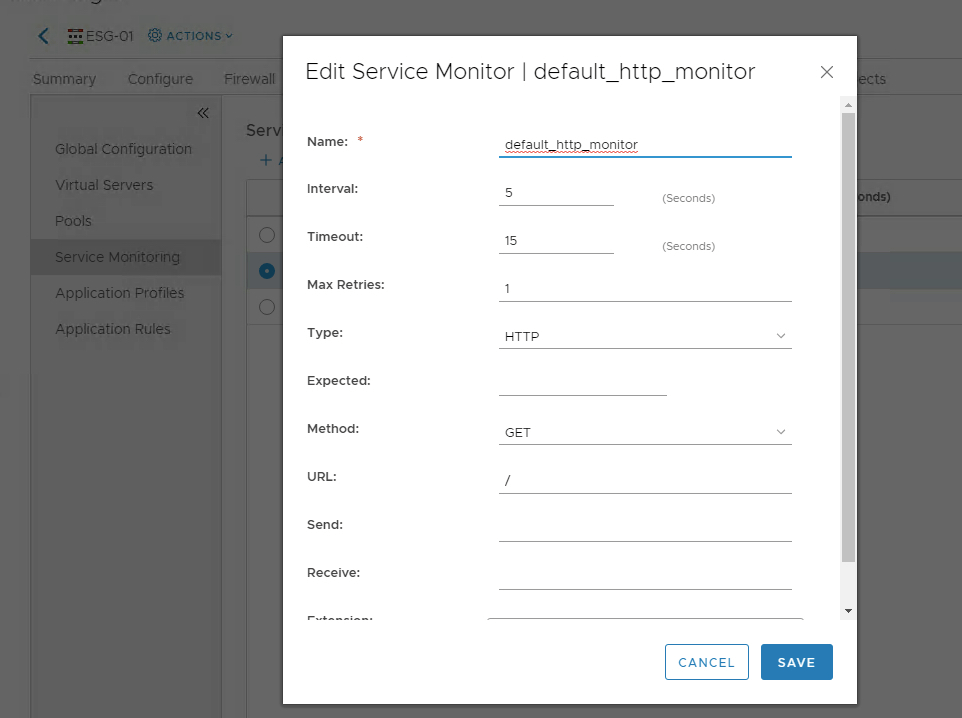
Under Service Montoring we will be able to set the behaviour of our health check pattern
Browse to Virtual Servers and click Add

Give the Virtual Server a Name,select the recently created Application Profile, and then click select IP address to select the IP address which was allocated to the internal LIF. Choose protocol to http, port to 80


Confirm creation of the Virtual Server.

Access to the Virtual Server IP address to confirm load balancing works to each of the web backend members

What’s Session Persistence
Enable Session Persistence
Session persistence means that if a device access a backend device, requests from the same client desktop will bounce back to the same backend server all the time.
Conclusion
In the next post, we will deploy a one-Arm Load balancer