This blog covers all aspects of virtual machine operations in Azure.
VM Creation WorkFlow
Similar to how virtual machines are deployed on-prem, they require a few additional info such as Location and Security Groups to be associated with a VM in Cloud which is as below.
- Create a virtual machine
- Choose VM name
- Choose Resource Group to put the VM into
- Choose Availability Set or Availability Zone
- Choose Region to deploy the VM to
- Choose the subscription model
- Choose an Image such as Windows 2019, Ubuntu etc
- Choose Disk Type and Size
- Specify admin and password
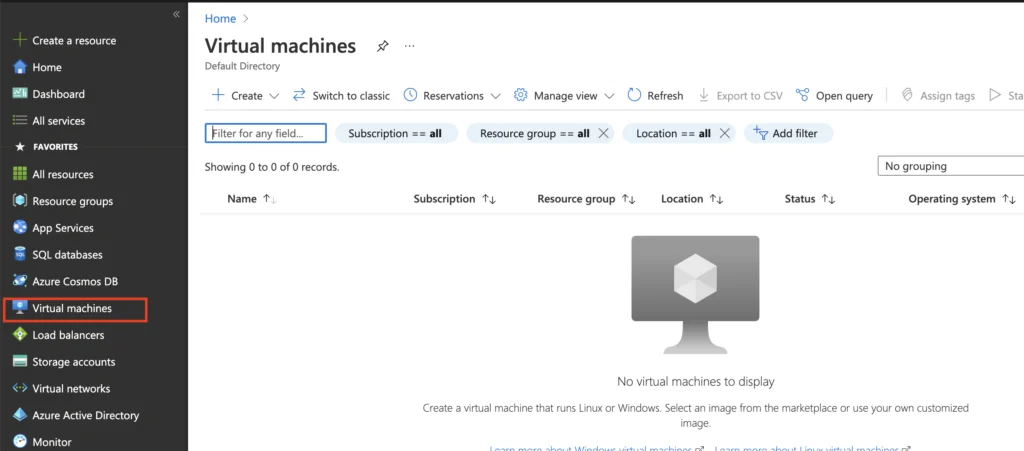
Once our storage accounts are in place, we can now start building our virtual machines in Azure.
How to create and connect Windows Virtual Machine in Azure
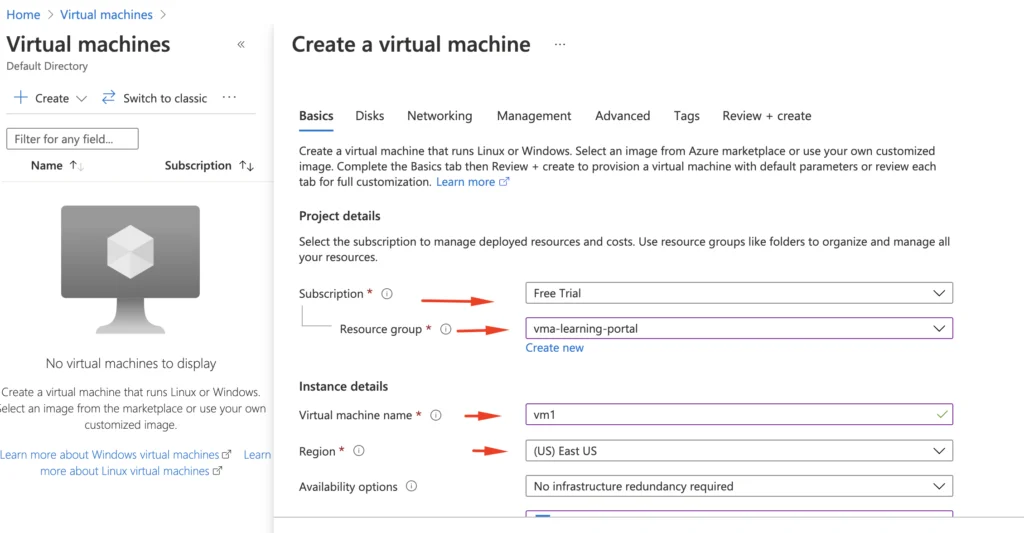
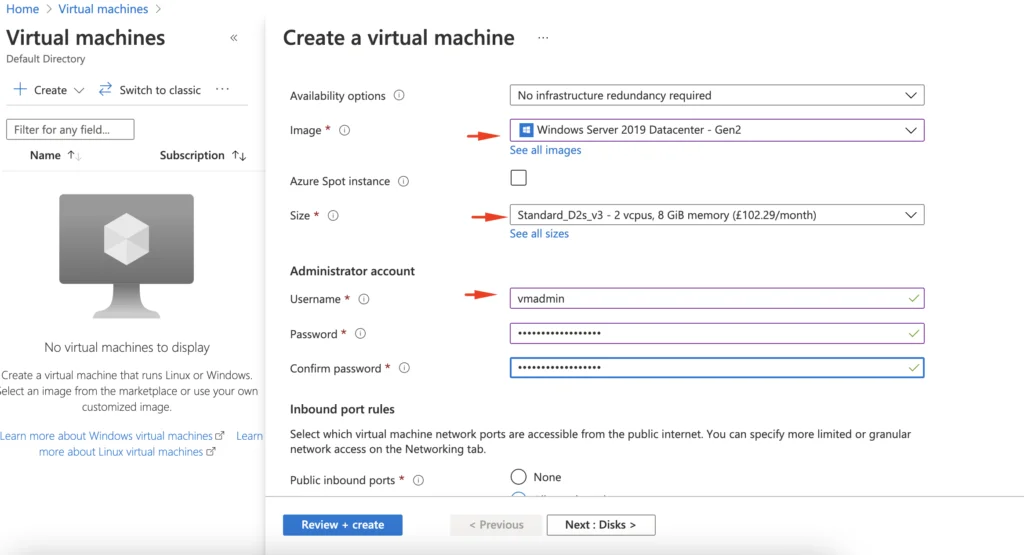
1- To create a virtual machine, go to Home – Virtual Machines – Click Create VM Button
- Choose Subscription
- Choose Resource Group
- Name for our VM
- Region to Deploy the VM to
- Choose Availablity Options if required ( Infra redudancy )
- Choose OS to deploy
- Choose Disk type and Size

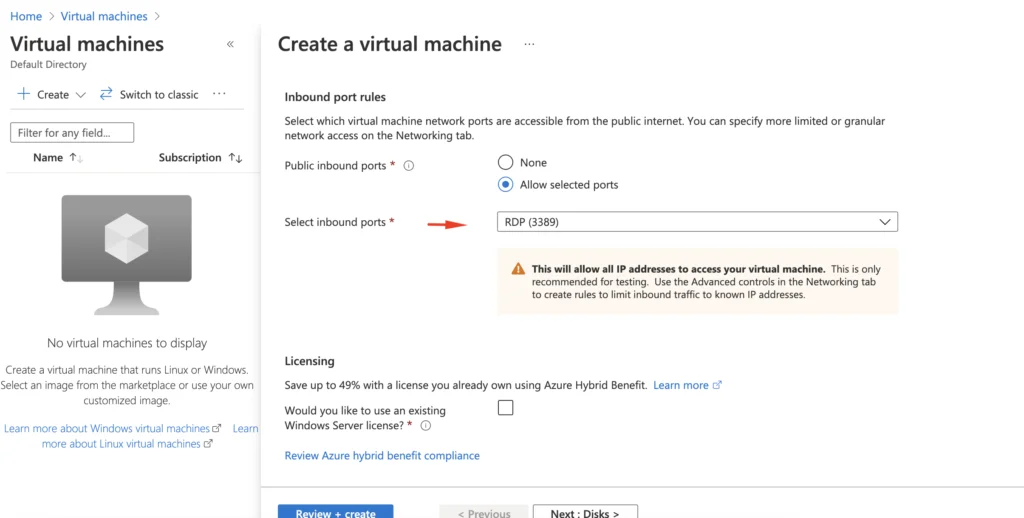
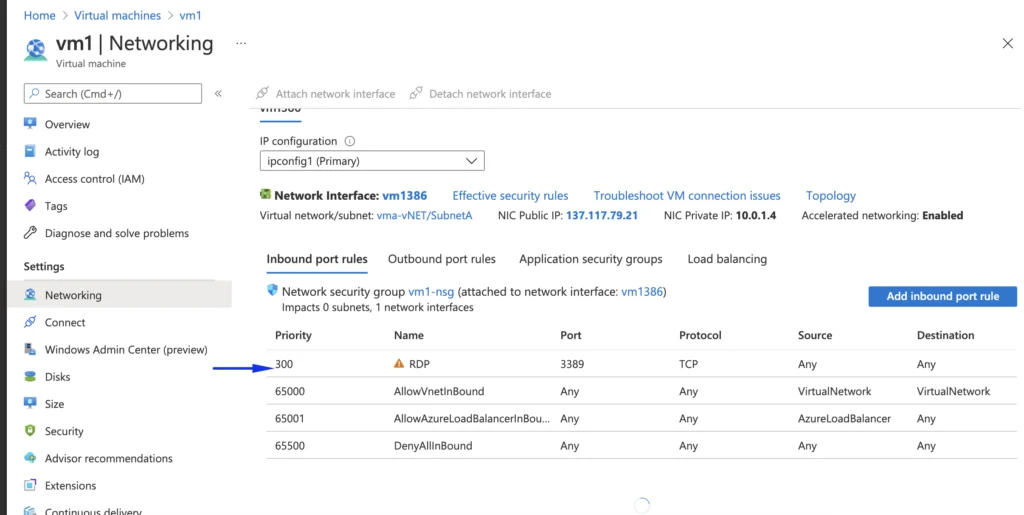
3- We will need to RDP into the VM so I’ve enabled RDP port 3389 as my inbound port. Click Next to Proceed
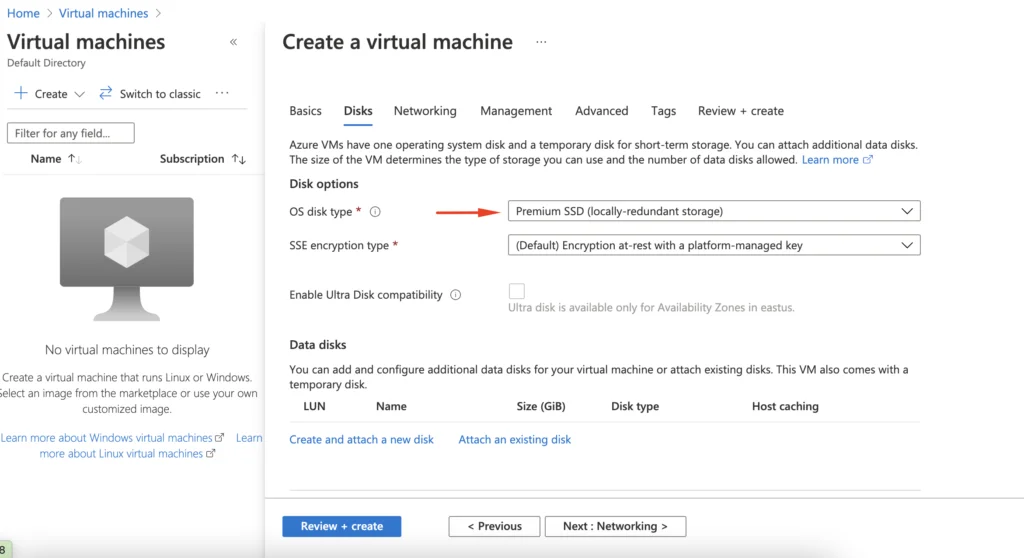
4- Choose the OS disk type as premium SSD
5- We will now select the virtual network we created earlier and choose to deploy the VM in our Subnet A. A public IP will be created for us by default but we could choose to make it permanent if needed.
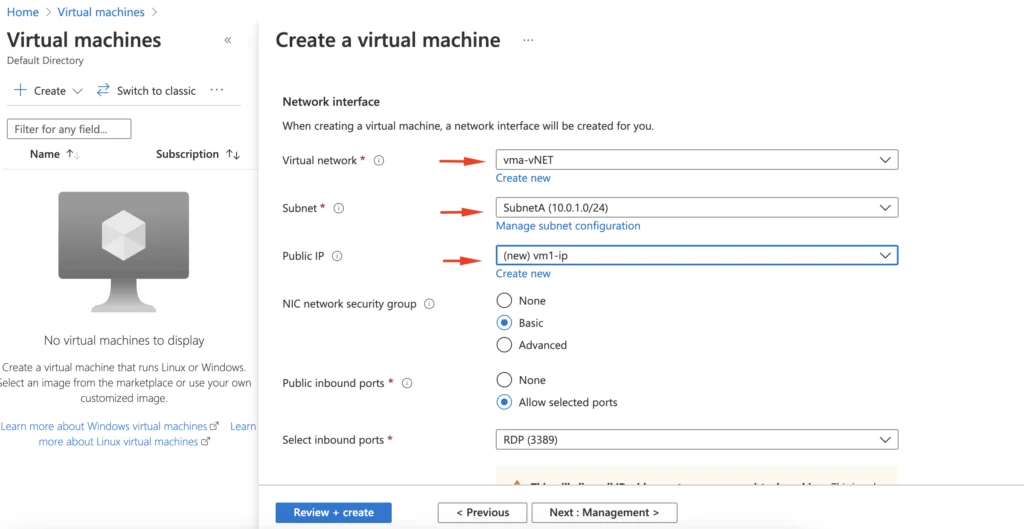
6- Leave everything else as default. After entering all the values, the VM creation will look like the following. Click on Review + create.

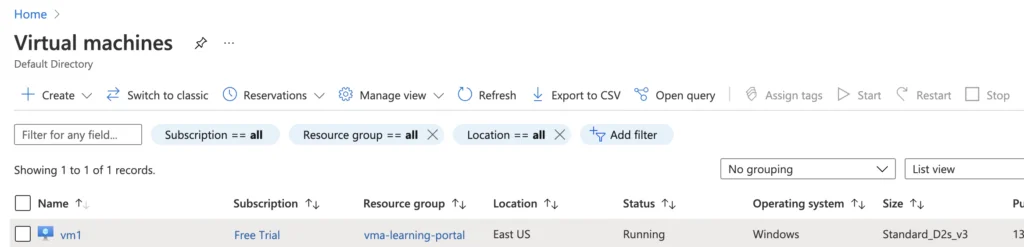
7- Once the VM is created, we will now see the VM Is powered up and running.
8- If you are unable to log in, verify if the RDP port is set to allow
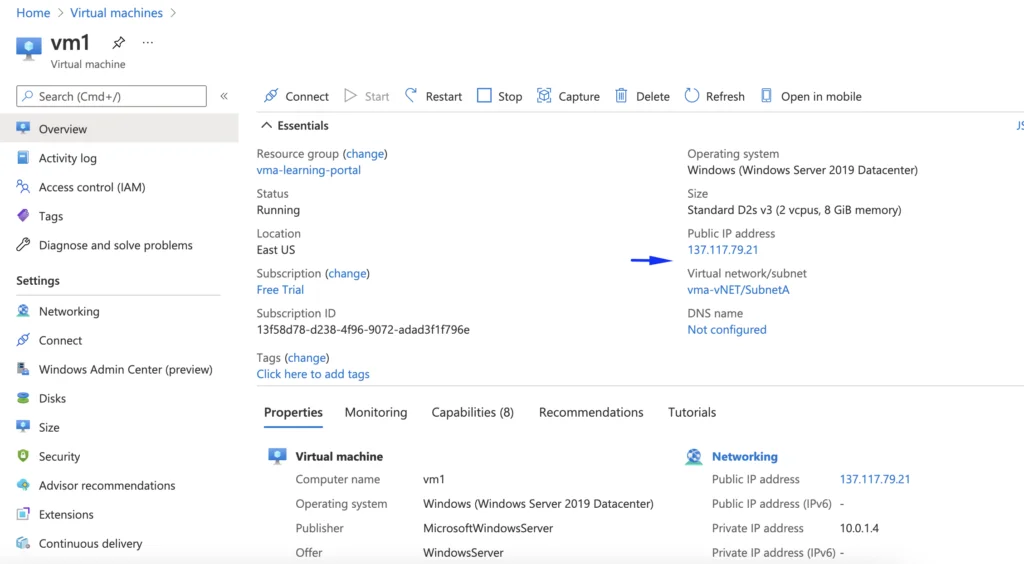
Let’s now log in to the VM and take a look at it. Establish an RDP Session to the Public IP of the VM. We can get the public IP of the VM from here
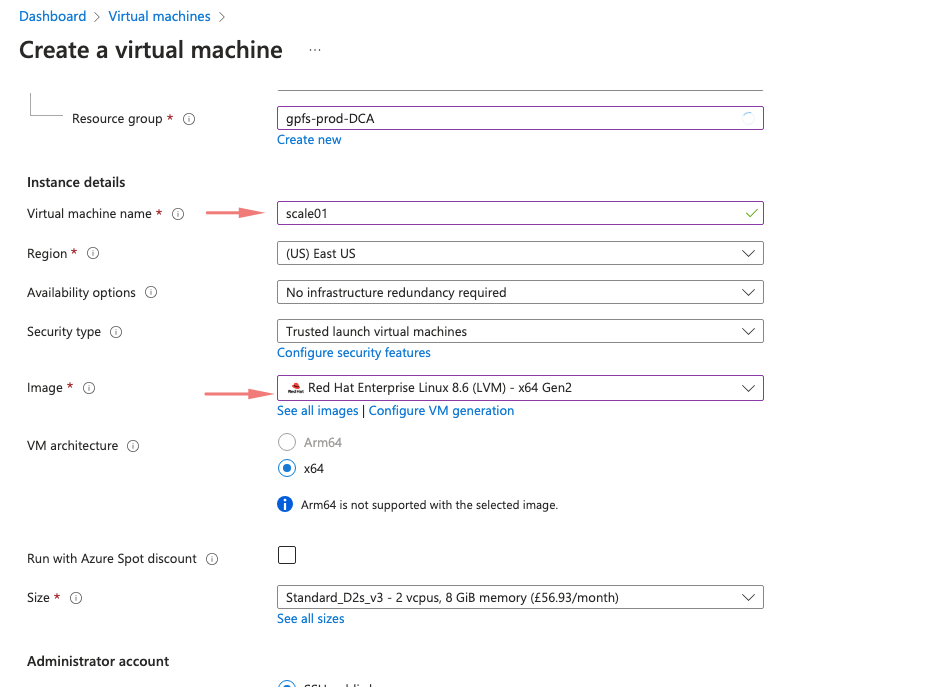
How to create and connect Linux Virtual Machine in Azure
1- To create a Linux virtual machine, go to Home – Virtual Machines – Click Create VM Button
- Choose Subscription
- Choose Resource Group
- Name for our VM
- Region to Deploy the VM to
- Choose Availablity Options if required ( Infra redundancy )
- Choose OS to deploy
- Choose Disk type and Size
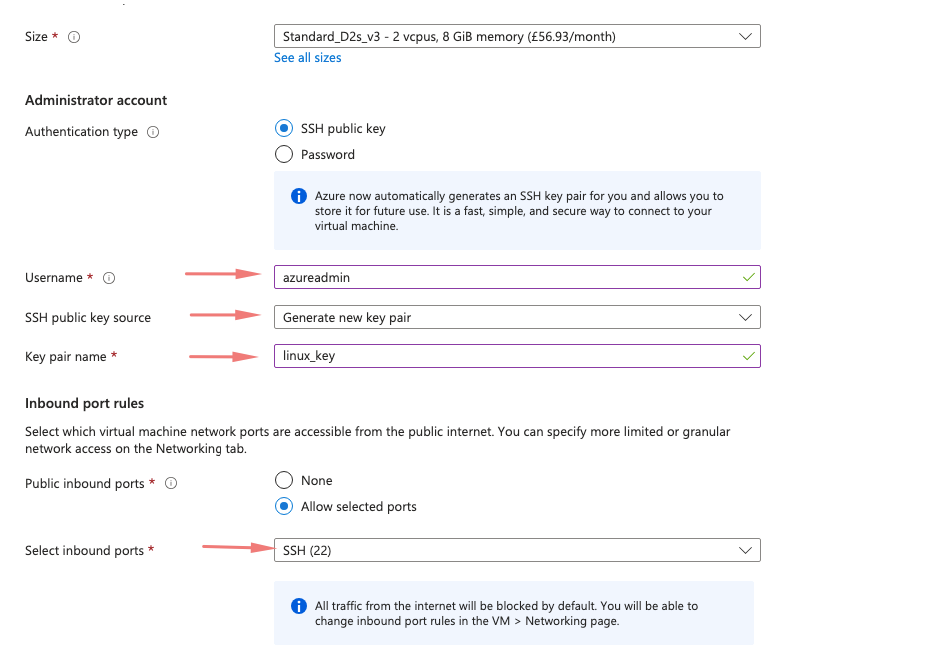
3- We will need to SSH access into the VM so I’ve enabled SSH port 22 as my inbound port. Click Next to proceed.
- Authentication Type: SSH Public Key
- SSH Public Key Source: Generate new key pair
4- Choose the OS disk type as premium SSD
5- We will now select the virtual network we created earlier and choose to deploy the VM in our Subnet A. A public IP will be created for us by default but we could choose to make it permanent if needed.
6- Leave everything else as default. After entering all the values, the VM creation will look like the following. Click on Review + Create.
7- Once the VM is created, we will now see the VM Is powered up and running.
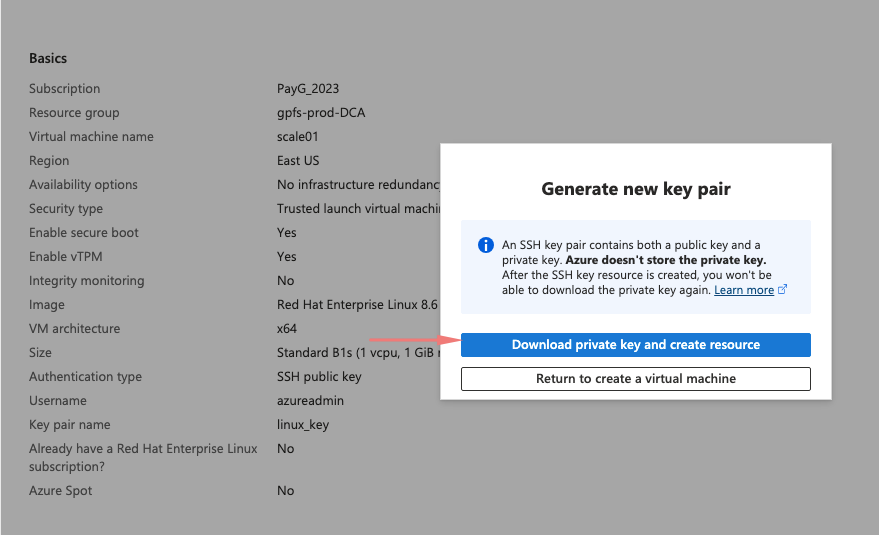
8- Download SSH Keys
- After you click on Create Azure will create an SSH Key Pair that we will be using to connect to our VM later. Make sure to download the private key and keep it somewhere safe.
- Azure does not store your private key and this is the only instance when you will be able to access your private key from Azure.
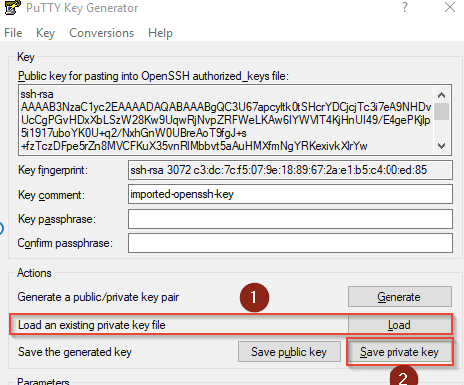
Connecting to Ubuntu Virtual Machine
As we have configured our VM to be accessible via SSH we will be using the PuTTY SSH client on our Windows machine.tallation file (32-bit or 64-bit as per your system) from the choices shown.
Open PuTTYgen & load the Azure key we downloaded and Click Save PrivateKey
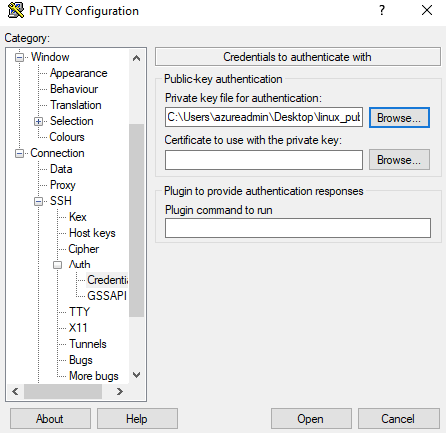
Enter the Host Name details in the following format: Username of VM@Public IP of VM
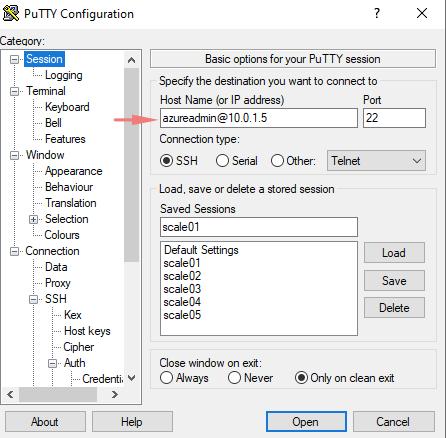
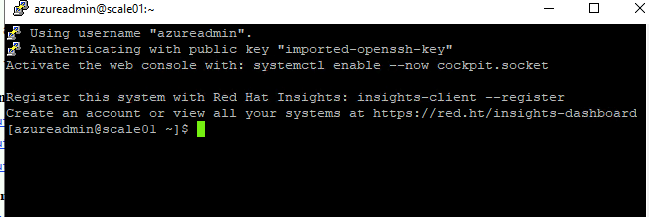
The SSH connection will be successful and you will be logged into the VM.
Virtual Machine Operations
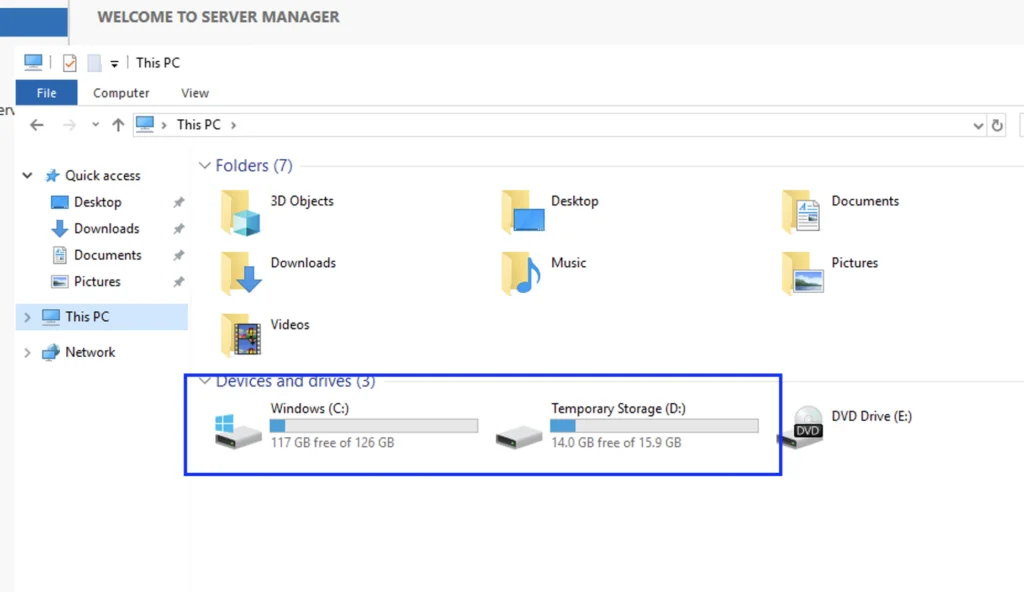
– Use of Temporary Storage
The first volume is an OS disk and the second one is a temporary Storage. Please do not use this disk for storing any personal or application data as that could be lost.
Let’s now create some folders in our temporary Storage Account and reboot the VM to validate it.
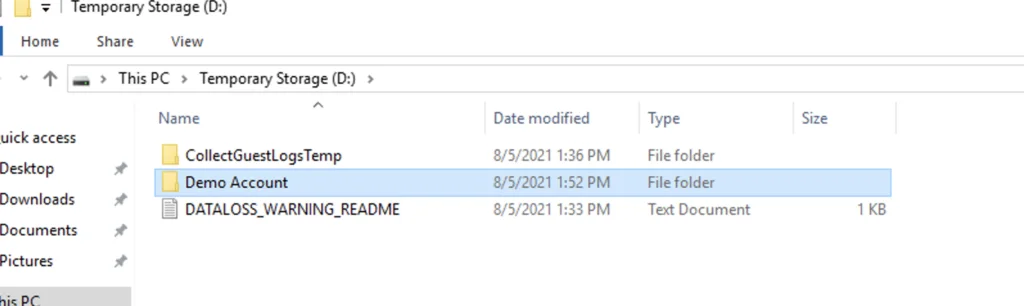
I will now validate the VM post-reboot to see if I can still see the Demo Account folder. You can do this reboot whilst logged onto the OS or via the Azure portal
As expected, the folder still exists and this is because resources haven’t been allocated yet
Let’s now shutdown the VM from inside the VM and see what happens
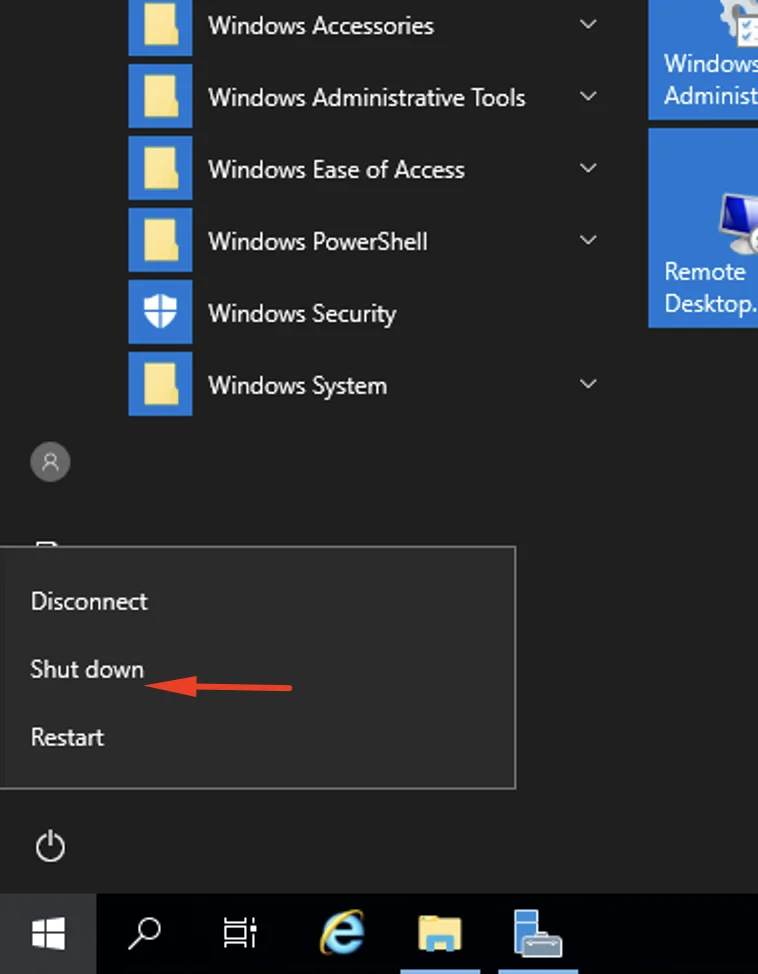
The VM has now been shutdown
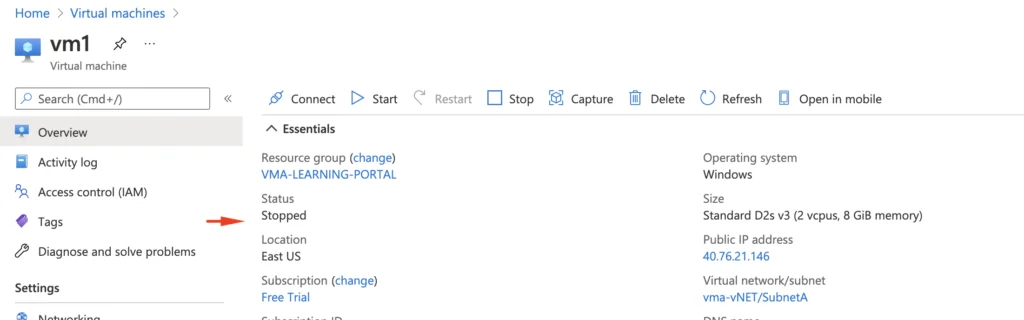
We will now start the VM, we now see the Demo Account folder missing.
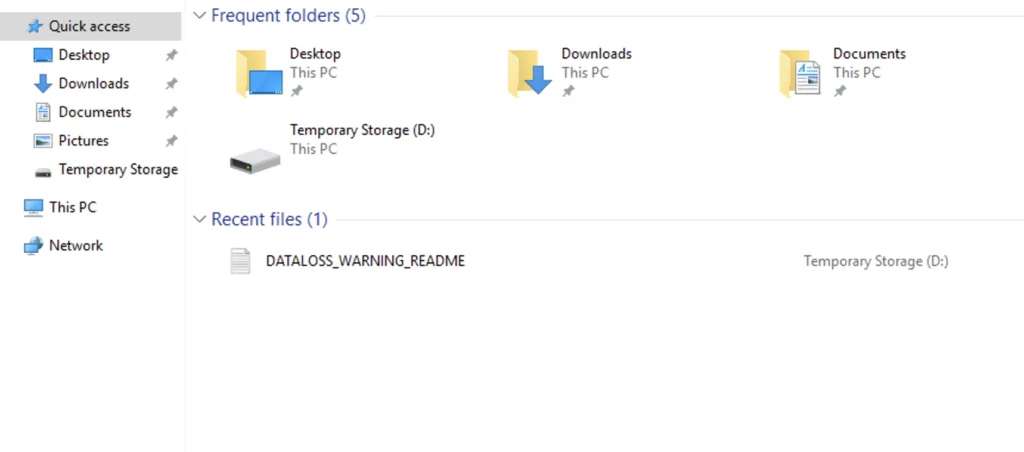
We must not store valid data inside our temporary storage as that will be lost during the OS shutdown
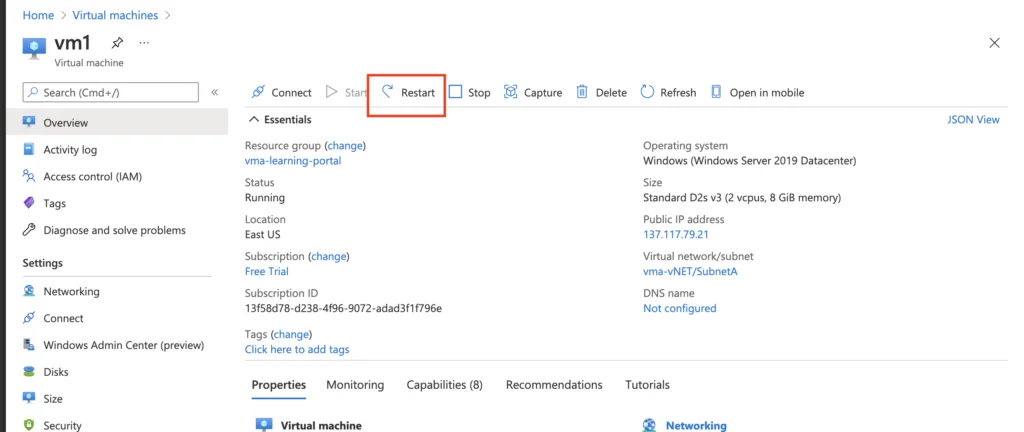
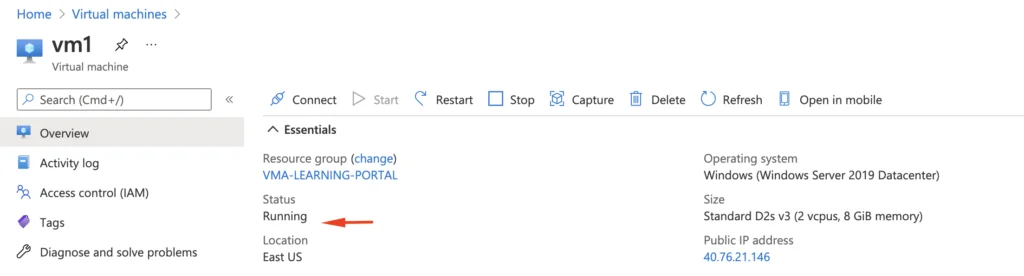
State of Virtual Machines – Restarts from OS and Azure Portal
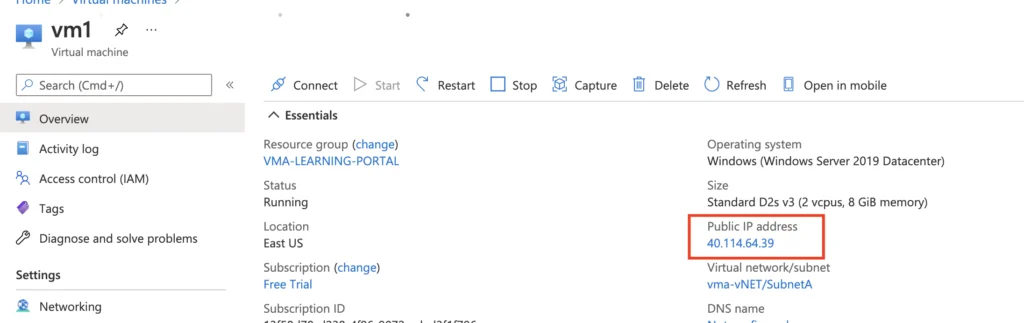
When you restart a VM from the Azure portal, the VM-IP does not get deallocated from a host. We will get this same behaviour if we are reboot the VM from the OS side as well.
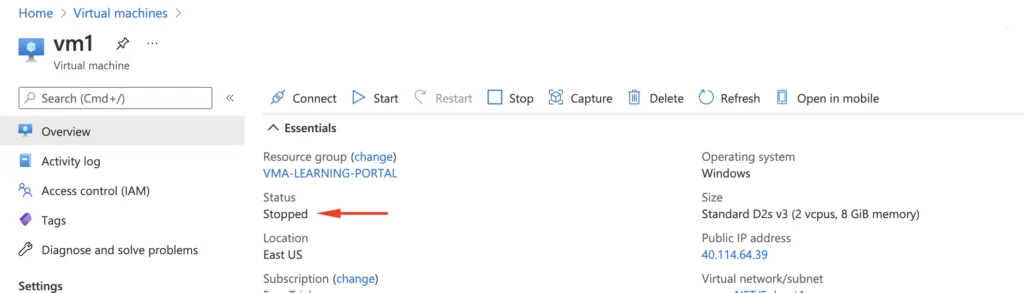
1 – Our VM has public IP as seen below
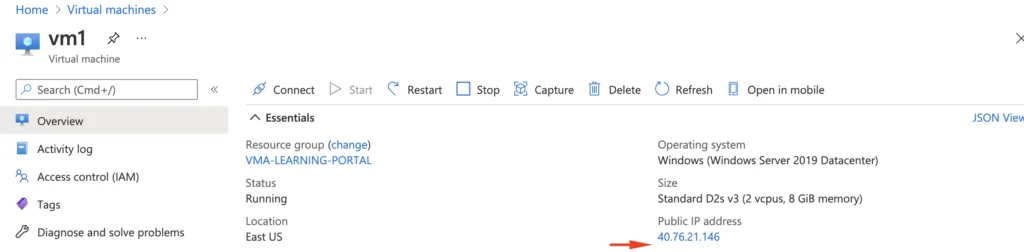
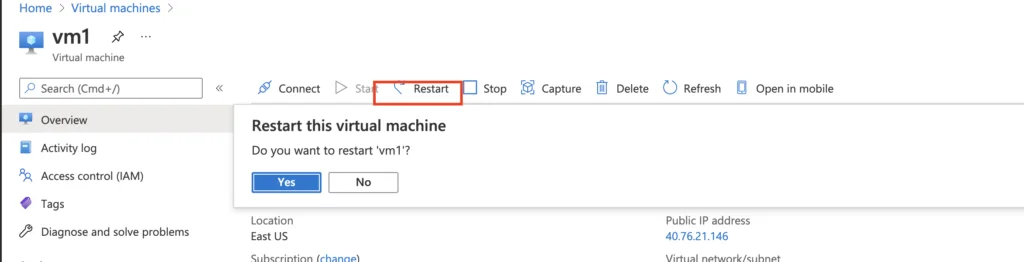
2 – Let’s restart the VM from Azure Portal and see if IP changes
3- As expected, the public IP assigned to the VM doesn’t change during reboots
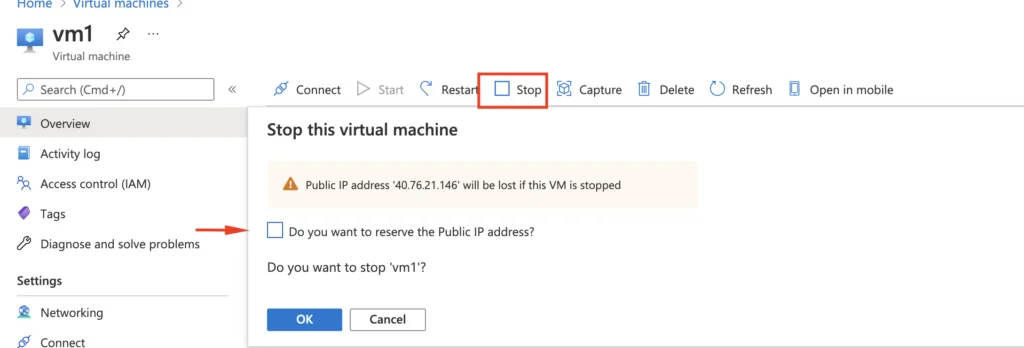
State of Virtual Machines – Shutdown from Azure Portal
If you shut VM from within VM Azure still reserves hardware for VM and it will incur charge.
When you shut down a VM from the Azure portal, the VM-IP gets deallocated from a host and the VM may get powered on another host depending on the Azure resources in the backend. This VM will now get a new public IP. Unless you have reserved the public IP, we will get a new Public IP and also the temporary disk will be changed as the VM gets powered on another available host.
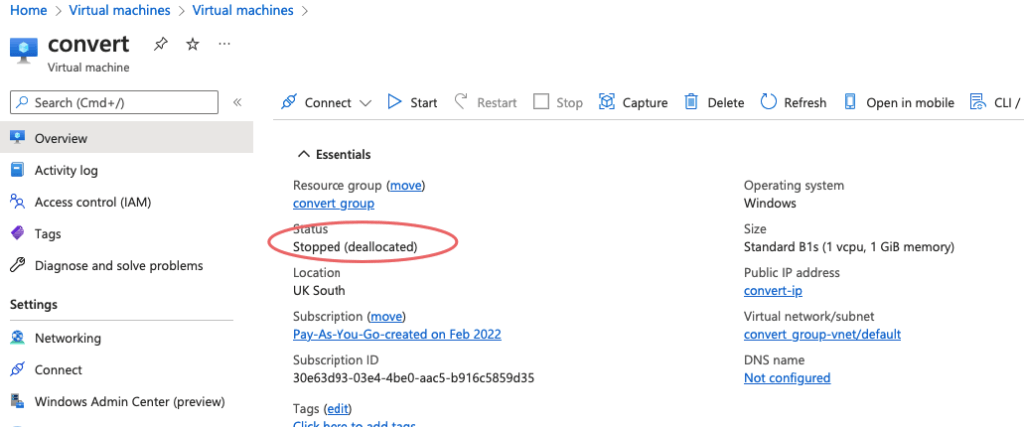
So if you dont need it, just shut it via portal and it should show as ( Deallocated ).
1- To shut down the VM, select the Virtual Machine and choose the Stop option

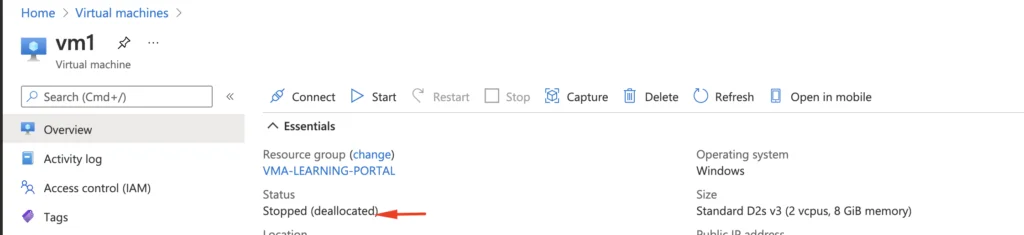
2- If we don’t reserve the Public IP, and stop the VM the IP gets deallocated
3- As expected the VM shows the Status is Stopped and says it’s deallocated
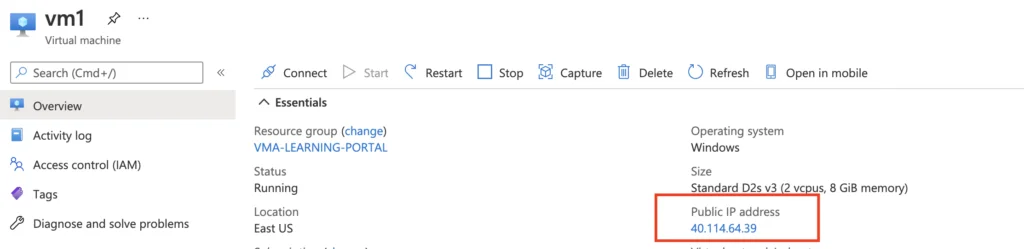
4- We will now start the VM
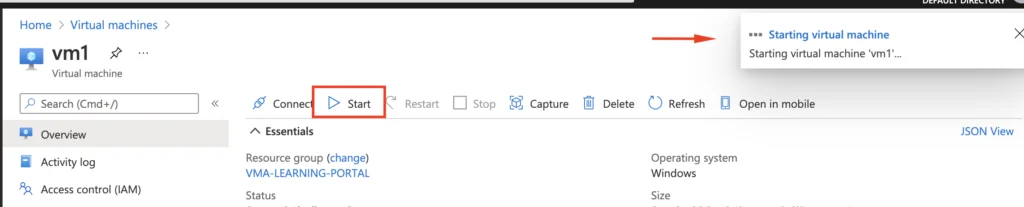
5- As we choose not to preserve our public IP we have lost the IP and we got a new IP
State of Virtual Machines – Shutdown from OS
1- Let’s now shutdown the VM from inside the VM and see what happens
2- The VM has been shut and the Status shows Stopped. This would mean the VM is now powered off and this will still retain the IP when it’s started up as the resources haven’t been deallocated.
3- Start the VM.

4- When the VM is shut down from the OS level the IP address remains unchanged.
Attaching a secondary network interface to a VM
You will just enable a secondary interface at times for security reasons. As in, your secondary NIC could be fetching security updates from another VM in a subnet A and feeding it back to live Subnet B.
For assigning a secondary interface to a virtual machine, follow these steps
- Stop the VM
- Add the secondary network interface
- Powerup the VM
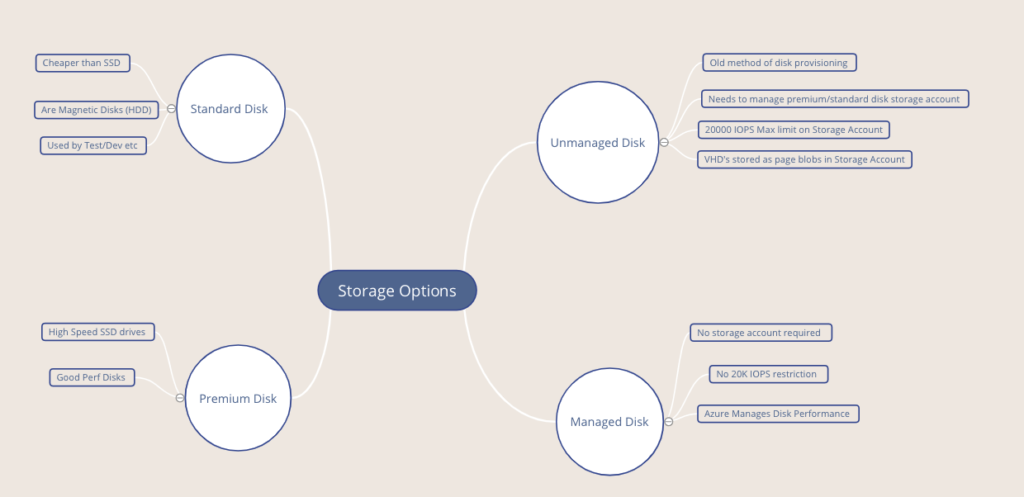
Convert disk from Premium to Standard SSD or HDD
Azure offers four disk types of managed disks and we can choose any type based on the business needs. Azure provides an option to switch between the three GA disk types premium SSD, standard SSD, and standard HDD based on your performance needs.
Let’s see how to change the disk type from Premium SSD to Standard SSD.
1. Login to Azure Portal and power down the Azure VM
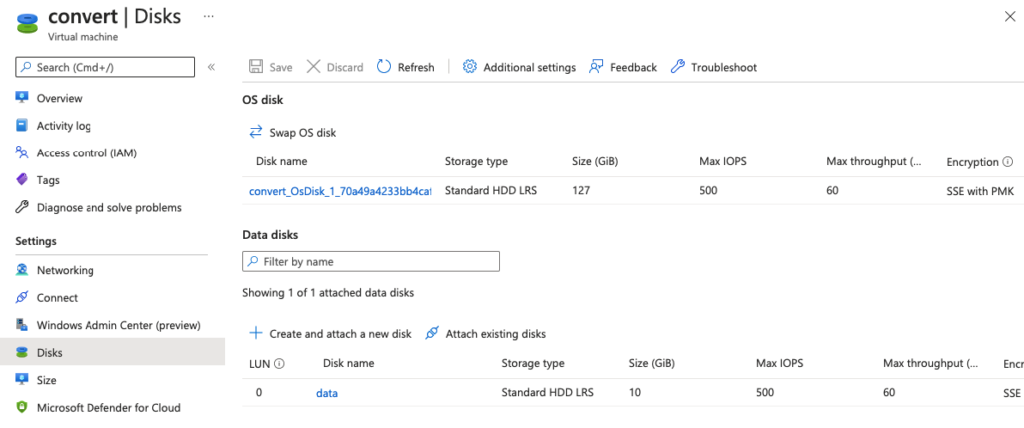
2. Select the instance and click on the Disks from the settings tab.
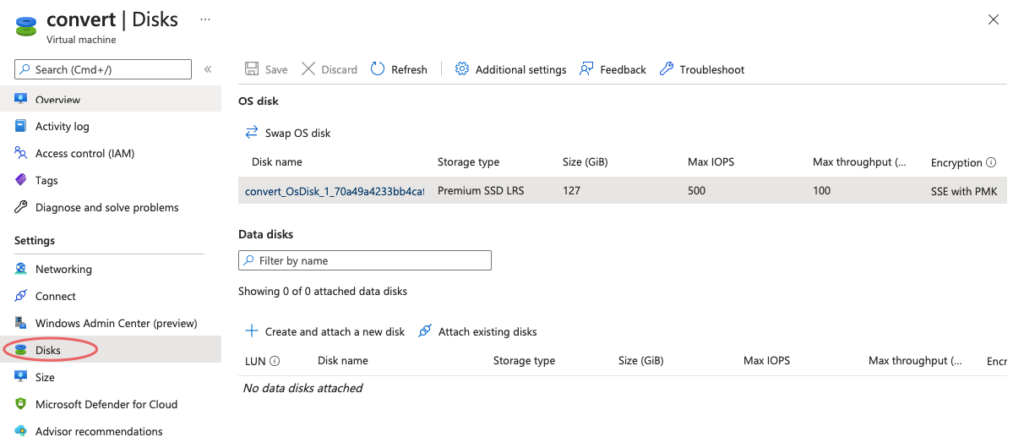
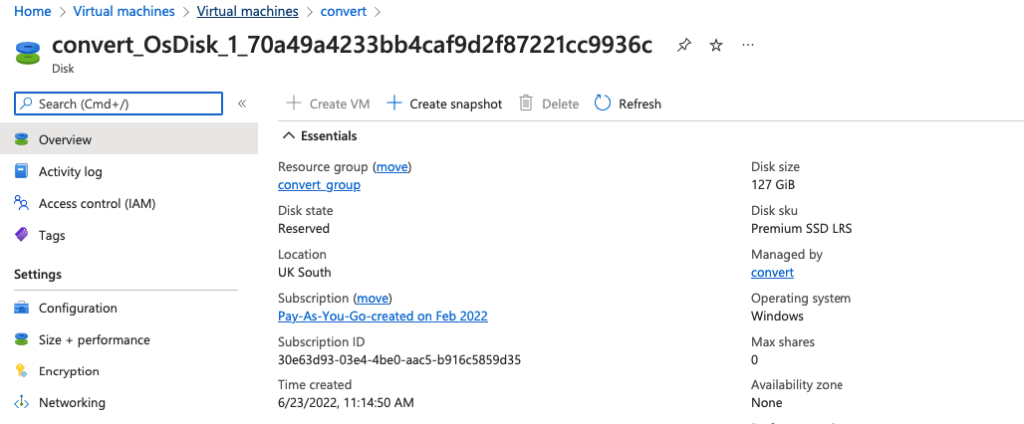
3. Click on the disk which needs to be changed from premium account type to standard or HDD storage account.
4. From the size+performance type, change to the desired account type.
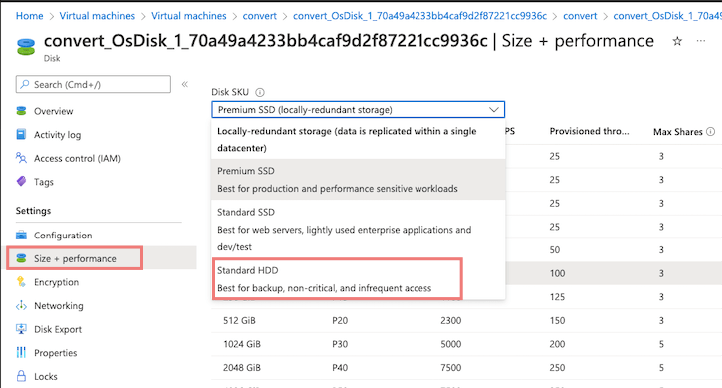
6. Here, I have changed the storage account type from premium SSD to standard SSD.
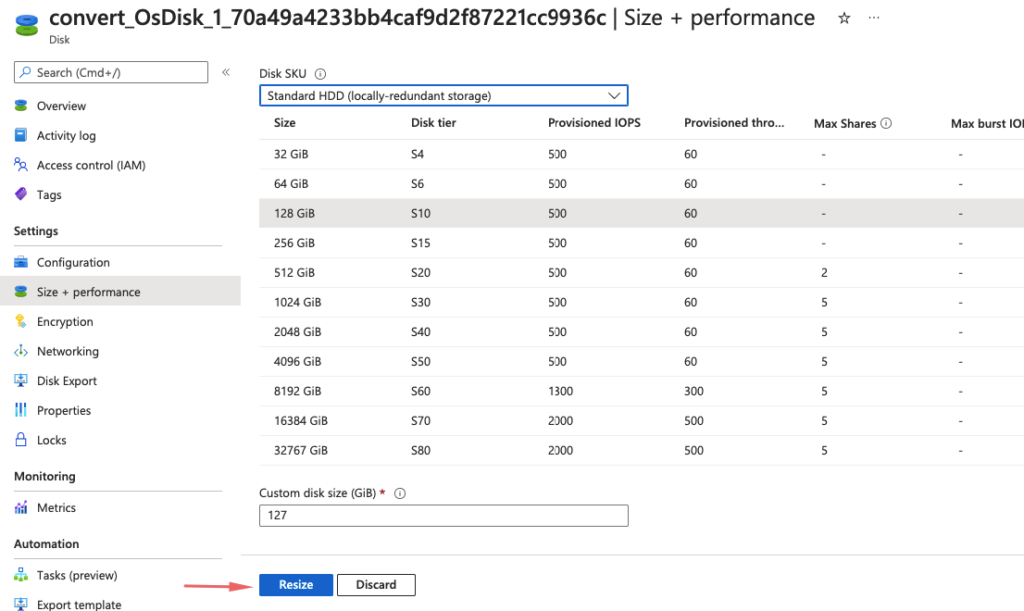
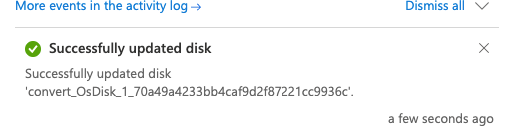
7. Changing the storage account type would not take more than a minute. You could see similar notifications once the account type got changed.
8. Start the VM.
We have successfully converted the azure instance’s managed storage account type from premium SSD to standard HDD.
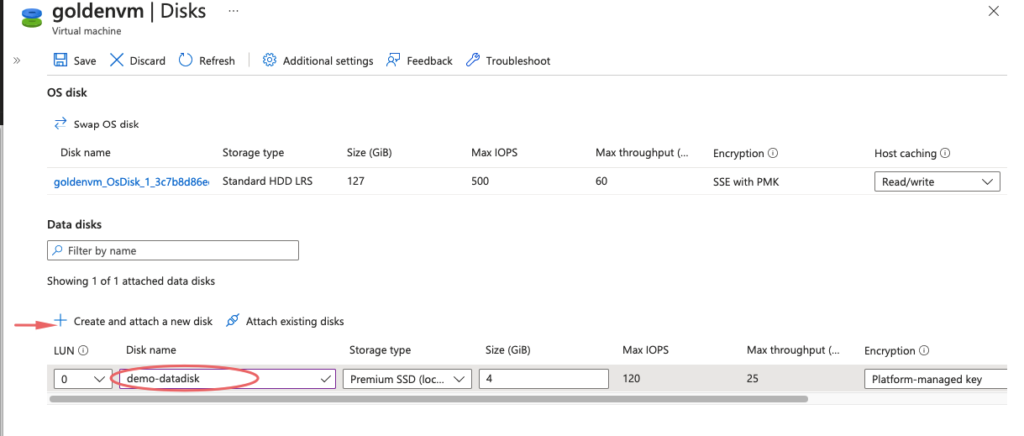
Adding new data disk
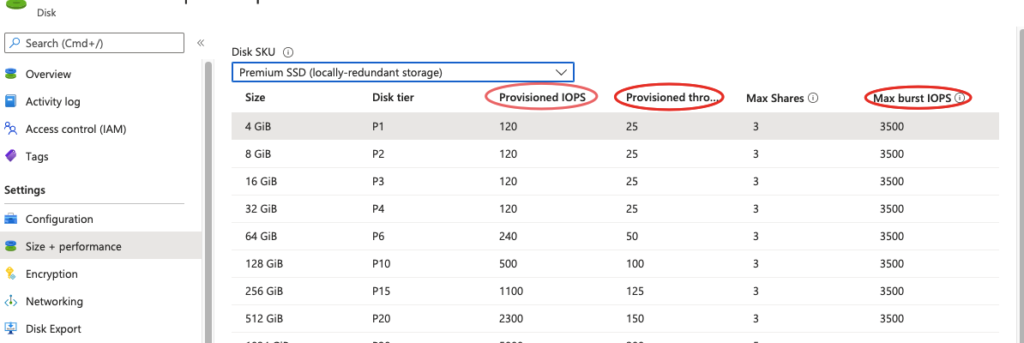
Understanding IOPS and throughput
IOPS is the number of I/O per sec. An IOPS of 120 means 120 i/o per sec. The number of times a disk is invoked but say data is less – 1 MB, etc
Provisioned throughput – data send to the disk. Eg: 1000 MB, here IO will not be much but the size of data is high Large data video file in MB/Sec
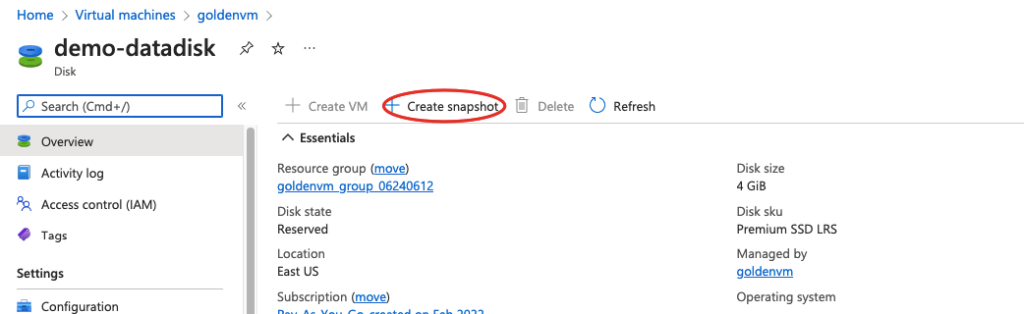
Working with Data disks snapshot
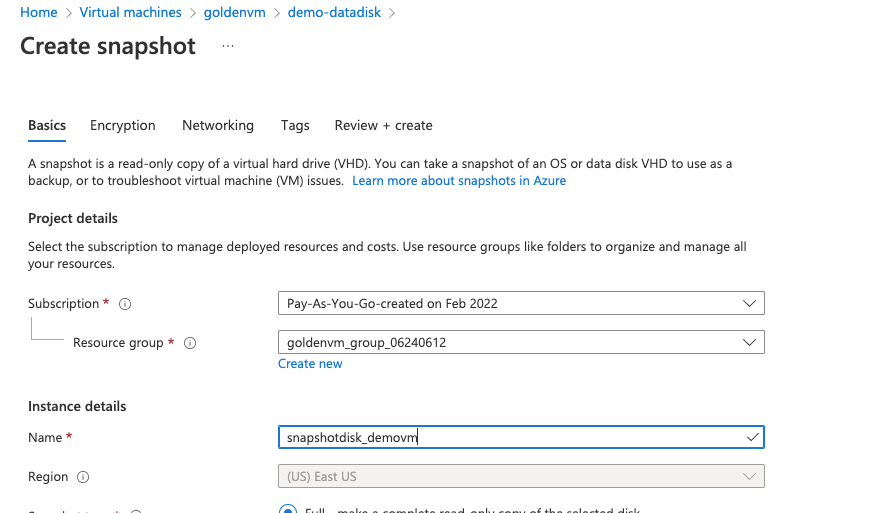
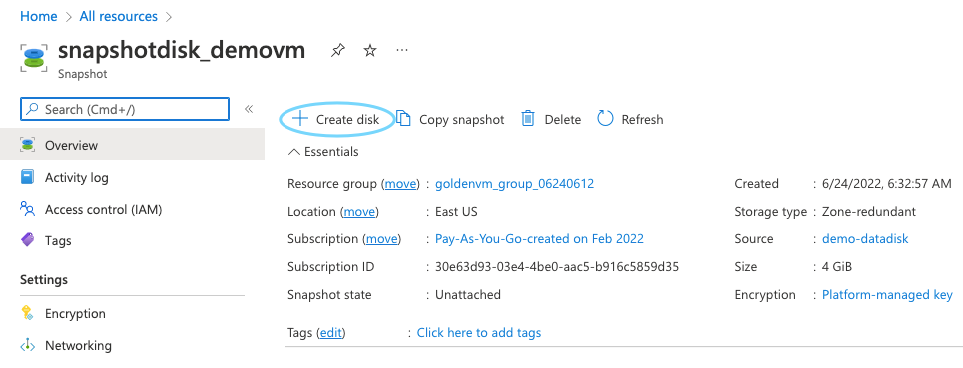
To create a VM disk snapshot, choose the disk and create a snapshot.
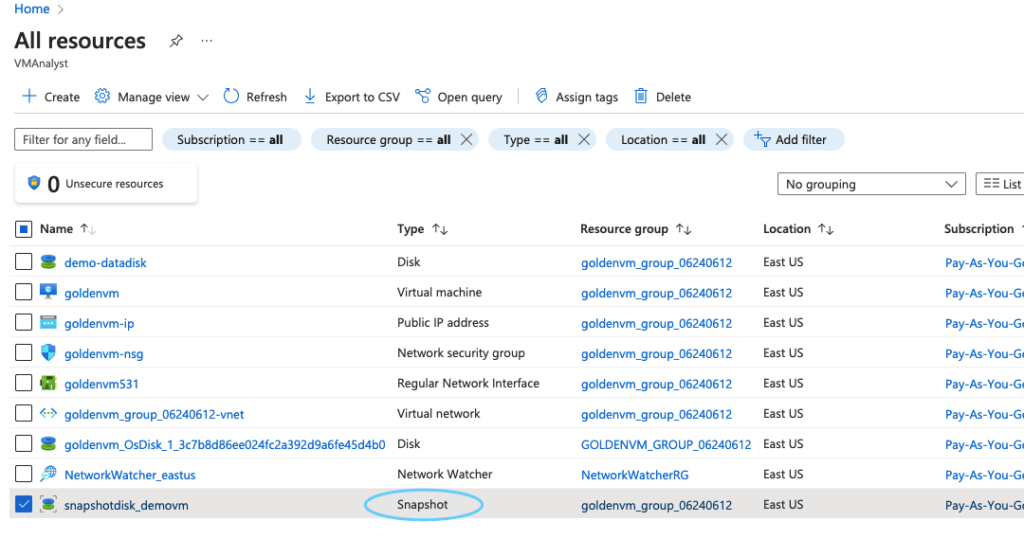
The snapshot is taken and appears in our resources section
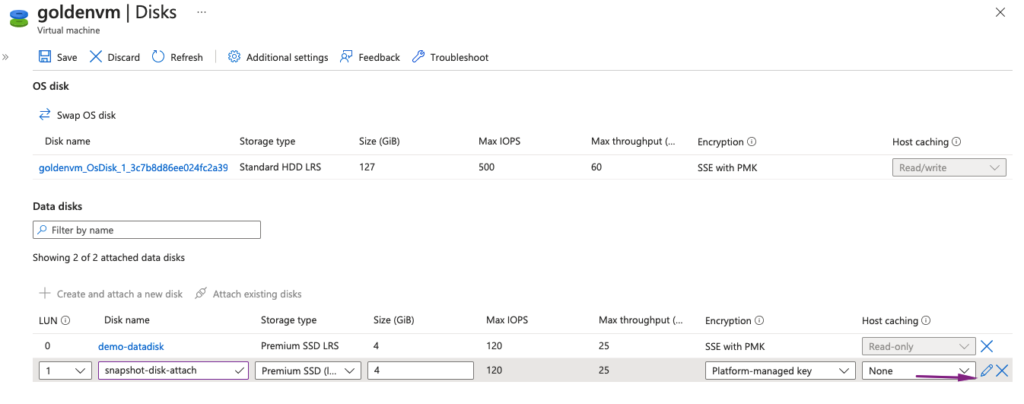
Snapshot can be attached to live VM as shown
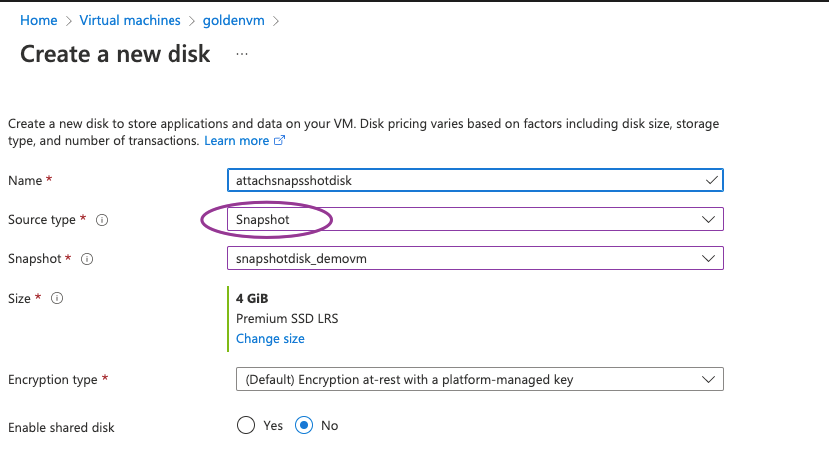
A new disk can be carved out of the snapshot as well.
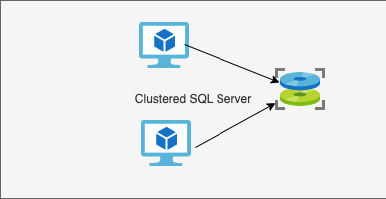
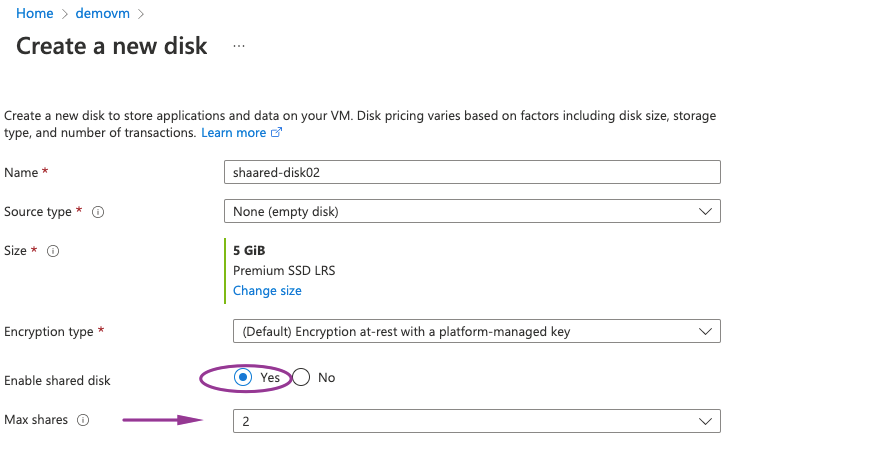
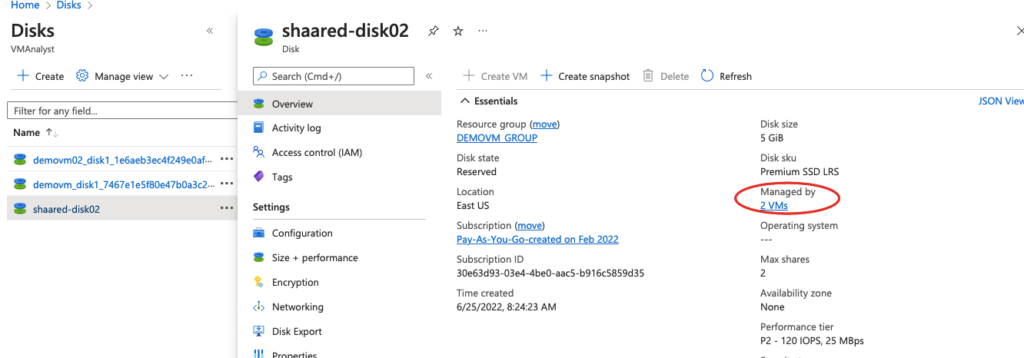
Azure Shared Disks
This feature allows a managed disk to be attached to multiple virtual machines such as with Windows Clustering. This can only be done for Premium and Ultra disks. There needs to be software on the VM that will understand clustering.
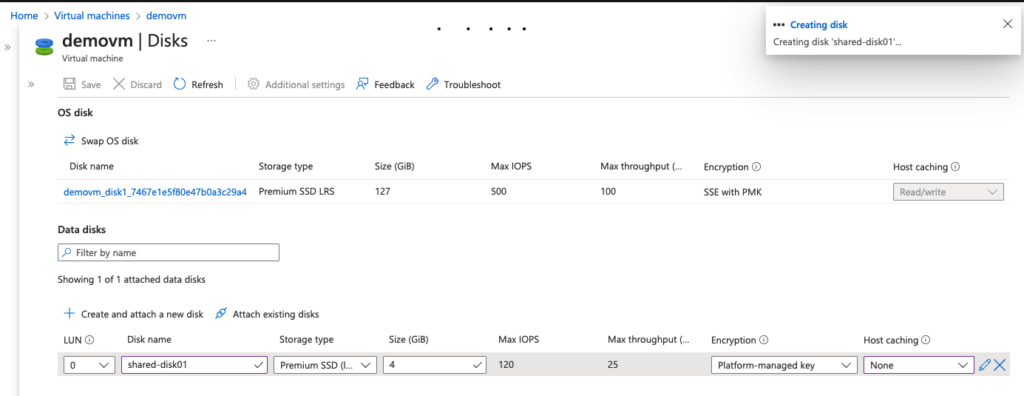
1- From our first VM, Choose the option to create and attach a new disk on the server.
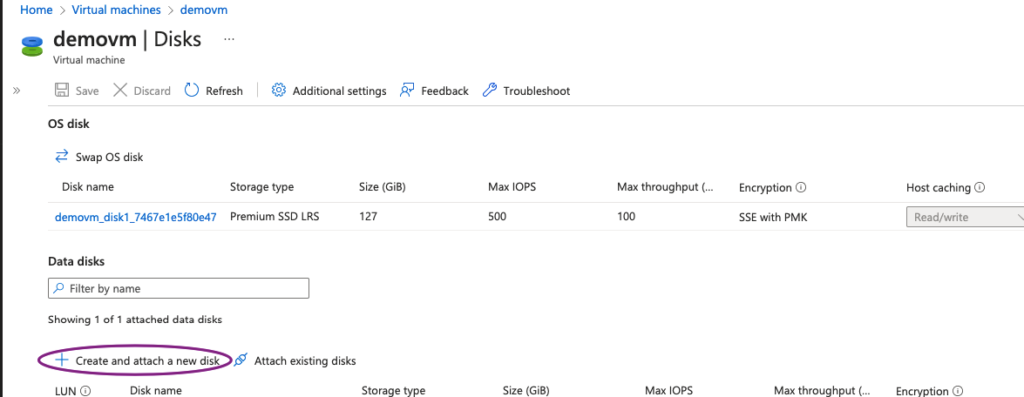
Attach the disk onto the first VM as shown and ensure host caching is set to None
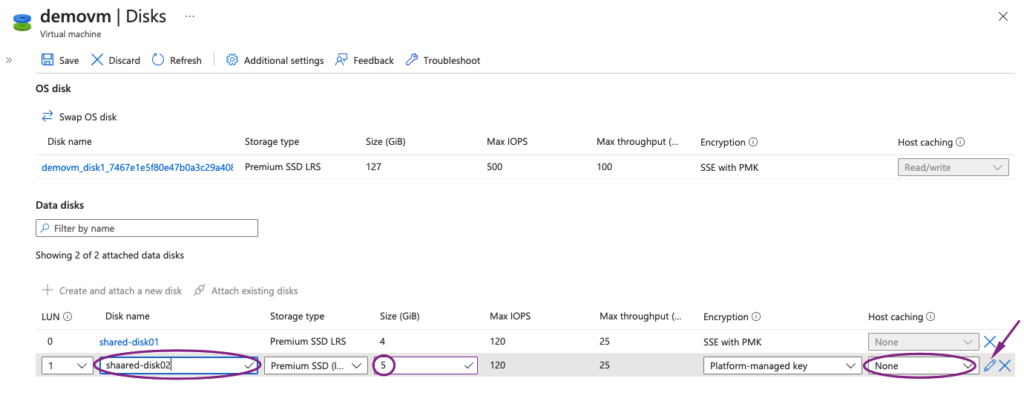
Click on the edit button and on next screen select the option to enable shared disk and change the max shares to the number of VM’s you are attaching the disk to
The disk is now attached to our first VM
Shutdown both VM’s

On the second VM, Choose the option of Attaching existing disks and ensure host caching is set to None
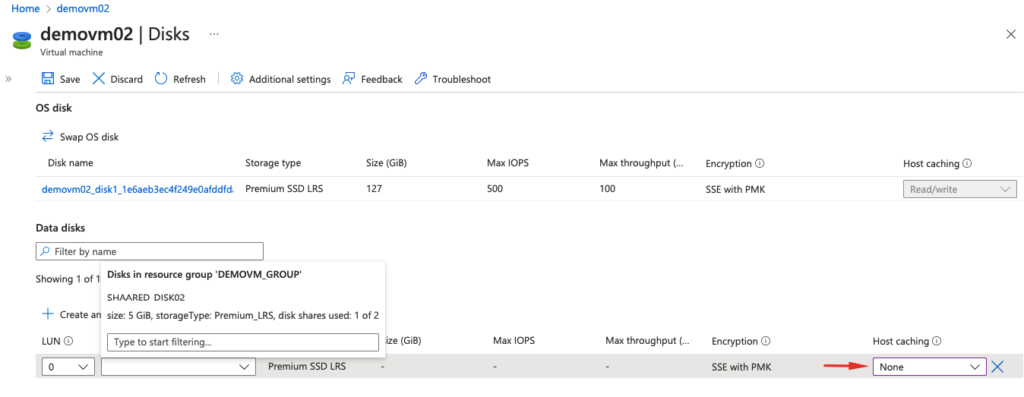
From the drop-down list, we can now select our shared disk

Our disk is now attached to both VM’s
Azure Disk Encryption
In Azure, data is encrypted at rest using 256-bit AES PMS ( Platform managed keys)
| Server Side Encryption | Platform-managed keys | Default encryption on Azure |
| Azure Disk Encryption | Managed by Customer managed keys | Uses KeyVault to set customer-managed keys |
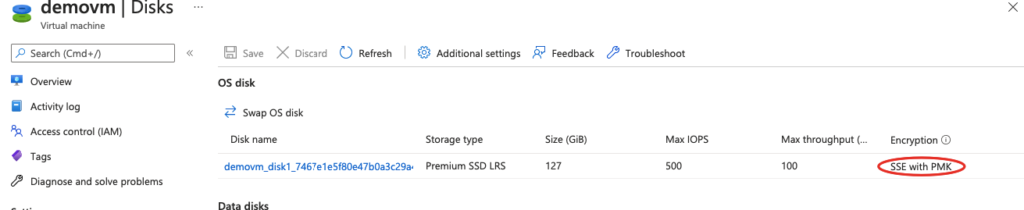
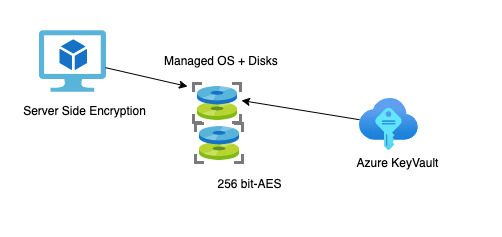
Server-Side Encryption means encryption at rest and automatically encrypts data stored on Azure-managed disk ( OS and data ).
KeyVault
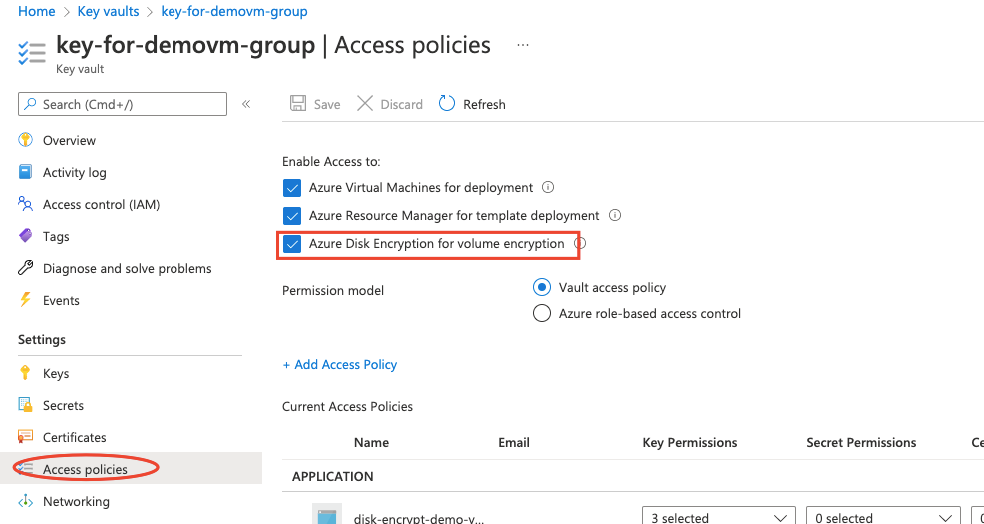
If PMS keys aren’t sufficient, Azure lets us create our own disk-level encryption using the Azure key vault. Key vault is a managed service in Azure where we can store our DB passwords, certificate, encryption keys, etc. The caveat to this is that, once the VM disk is moved to a customer-managed key it cant be reverted back to Platform managed key.
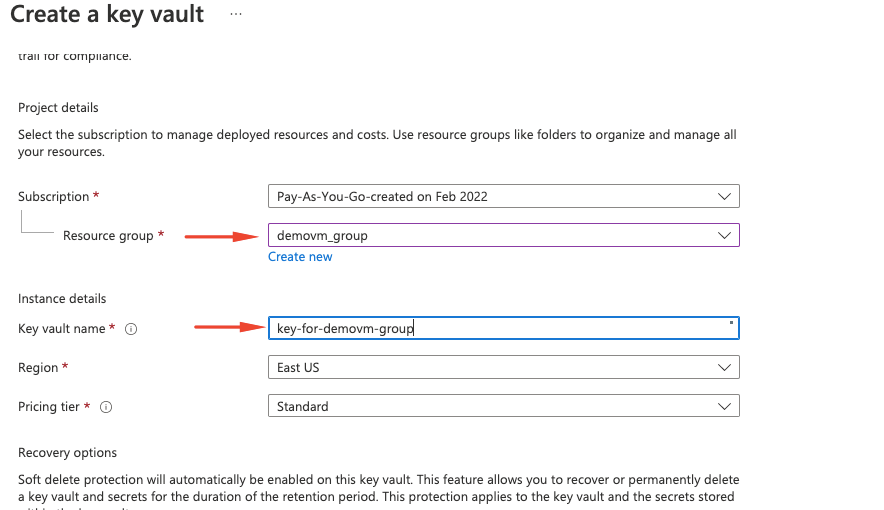
Choose a key vault name
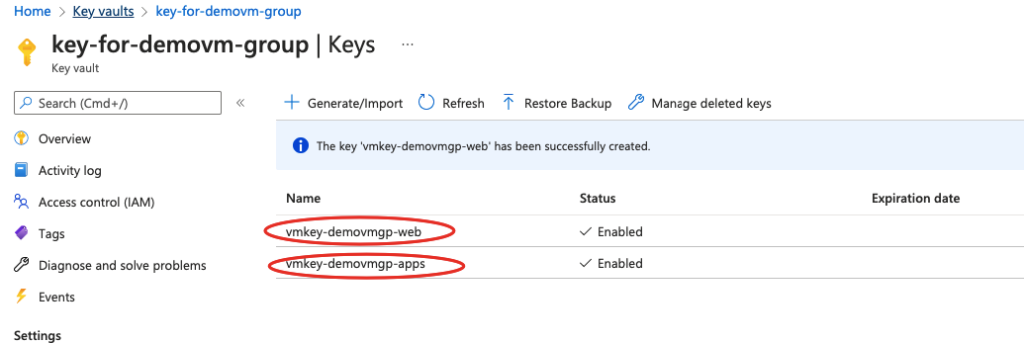
Give the key a name

Our keys are now generated and ready for use
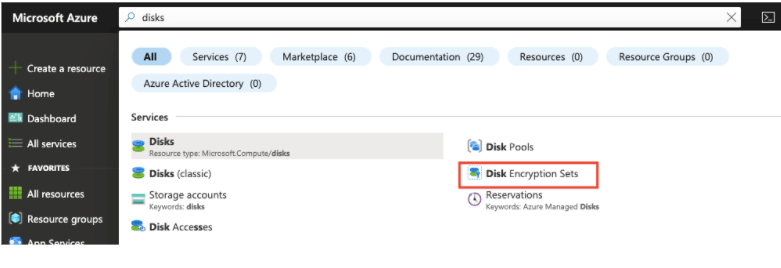
We will now need to search in Azure portal for Disk Encryption Sets
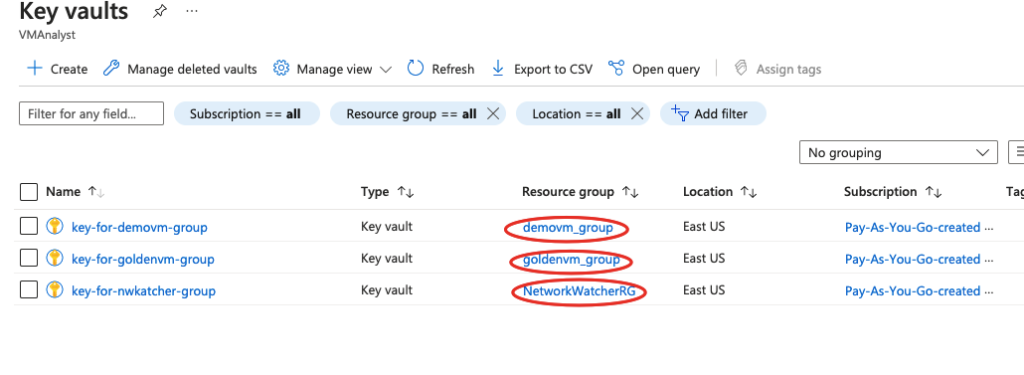
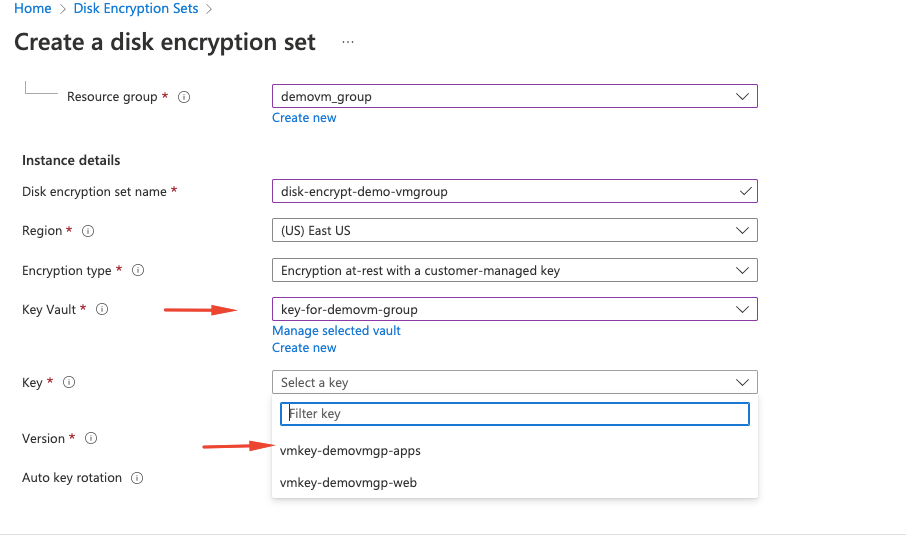
Choose the resource group and under the key section choose the keyvault we created.
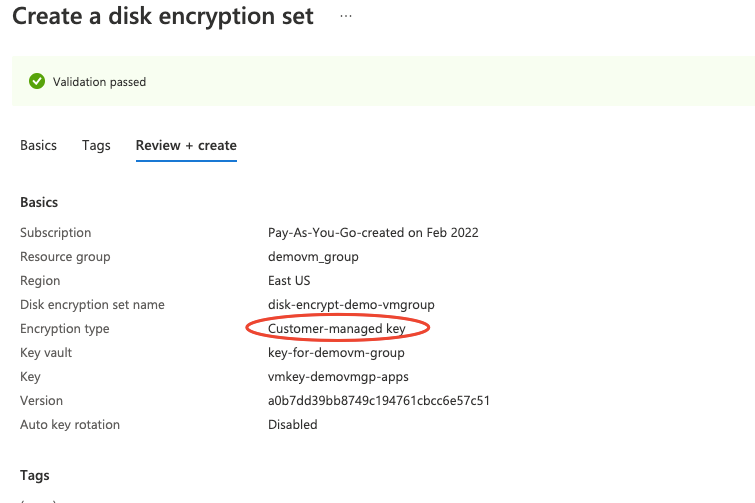
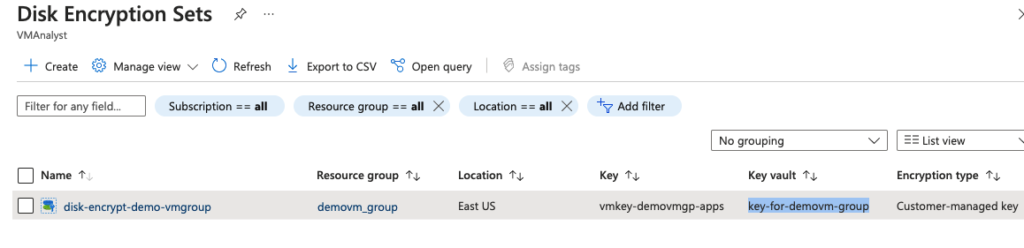
Our disk encryption set is ready and this can now be applied to VM disks.
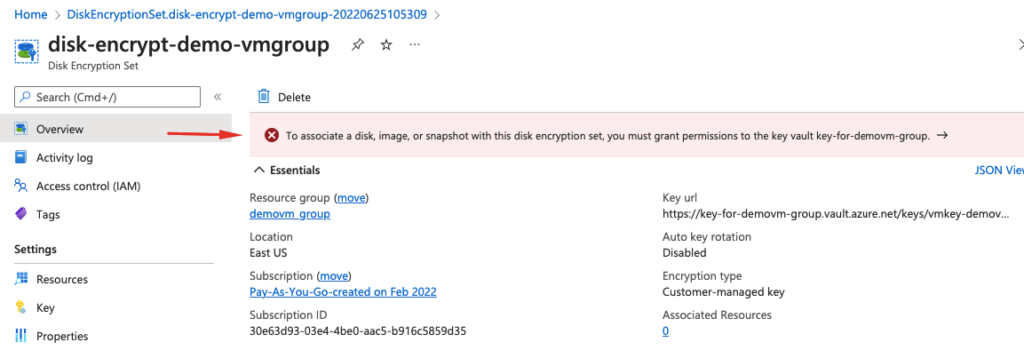
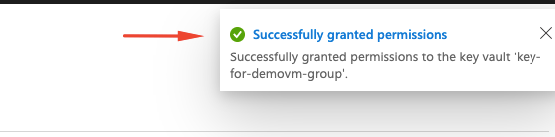
Go to the disk encryption set to assign permissions
To encrypt with our keys, stop the VM ( ie: deallocated state )

Go to the VM disk and change the encryption type to customer-managed key
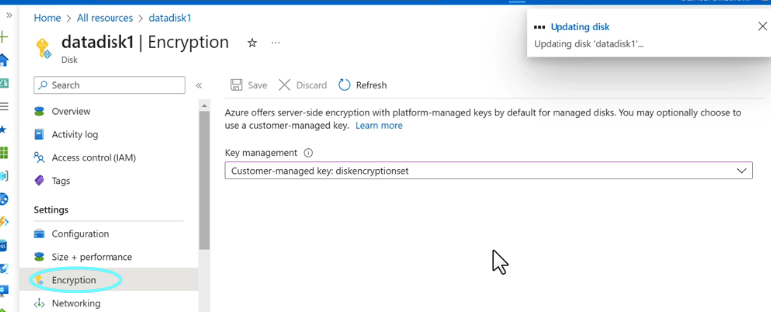
Once this is set to a customer-managed key, we won’t be able to switch the disk back to platform-managed keys.
Adding Custom Script Extension In Azure Virtual Machine
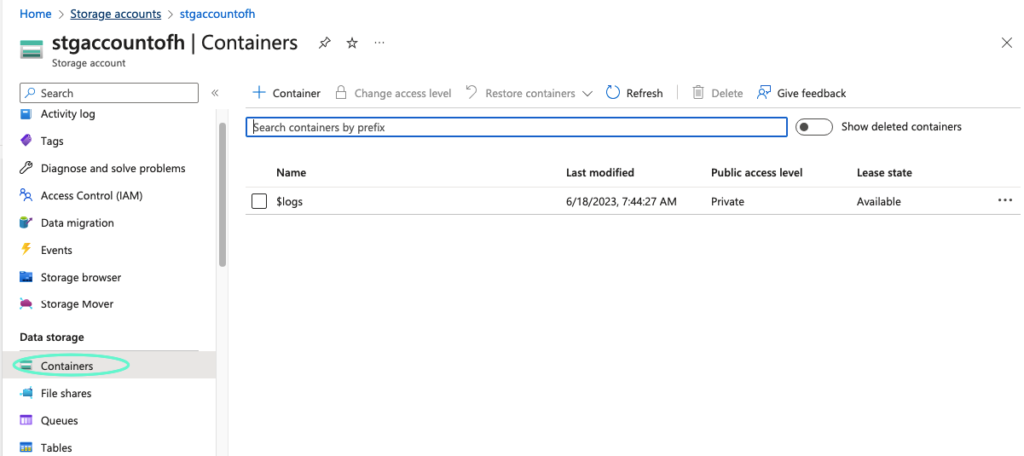
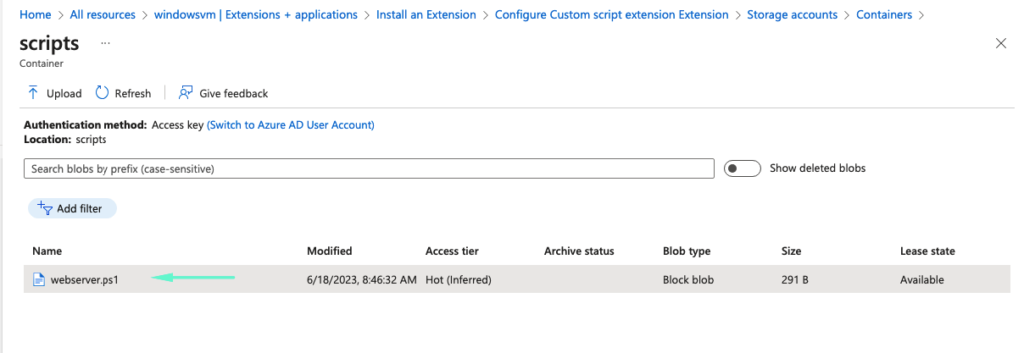
The custom script extension tool can be used on our Azure virtual machines when we want deployment in Windows. Open the storage account then select “Containers”
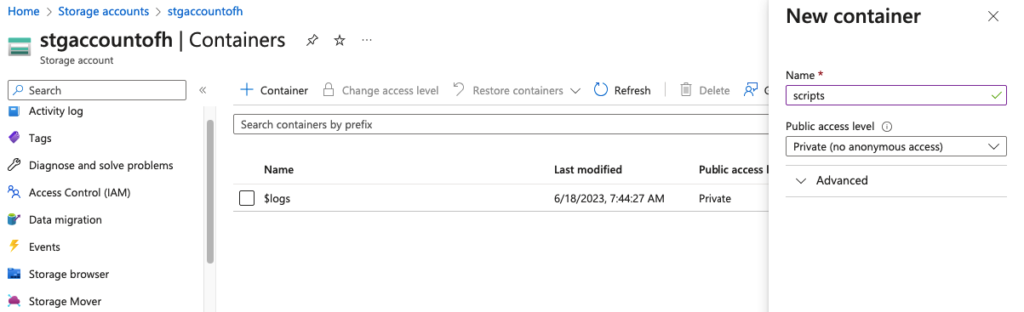
Enter the name of the container and click Create.
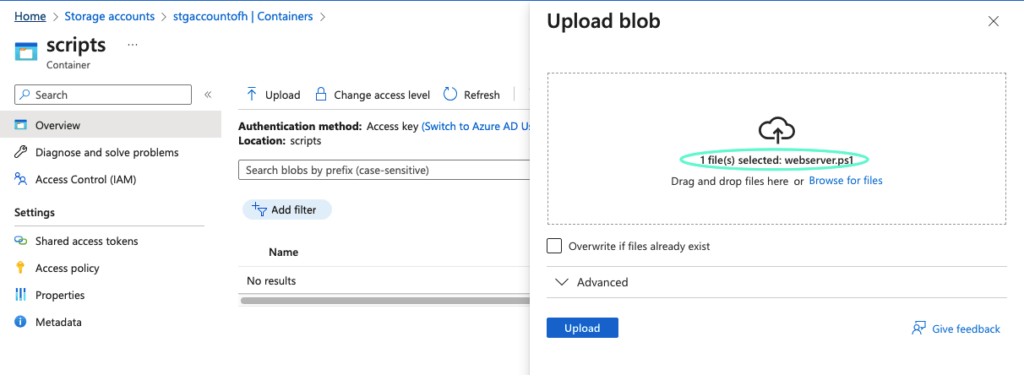
Upload our Script “iisscript.ps1” file
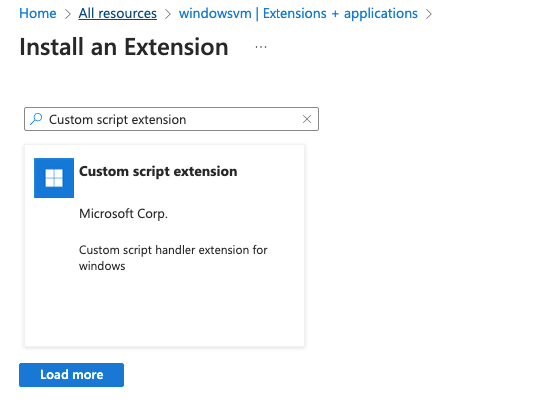
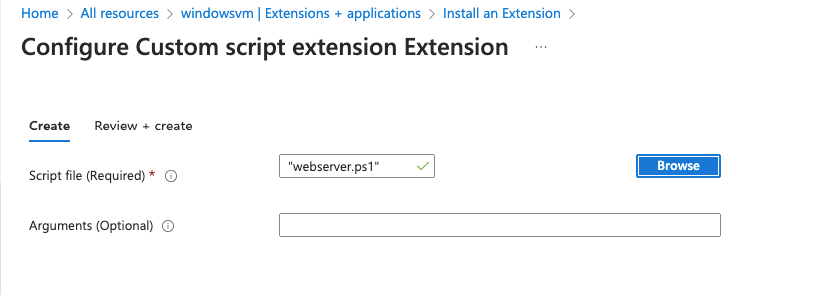
Select “Extension” and then click “+ Add”.

Now Select the Custom Script Extension and click the Create button.
Choose to add our script from our storage container
Click Apply
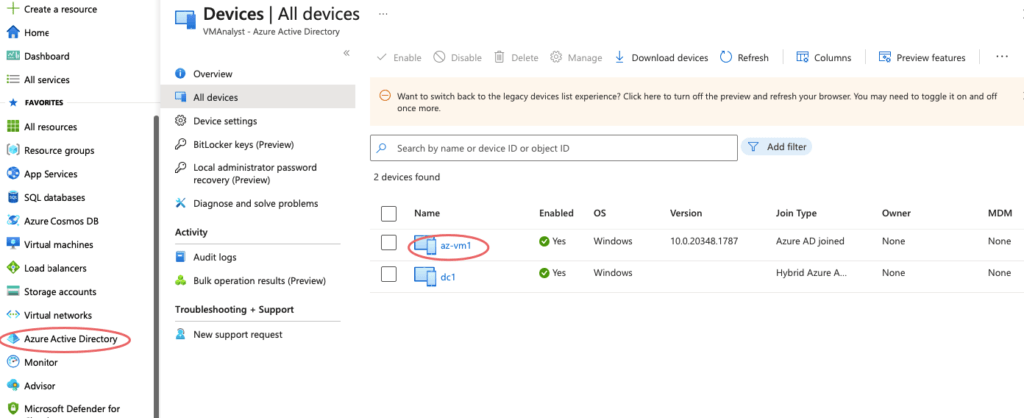
Joining a VM to Azure AD
When we create a virtual machine, we can just simply tick the button Login with Azure AD so our devices will be joined to our Azure AD.

Under the Azure AD Devices tab, we can see the VM being added.