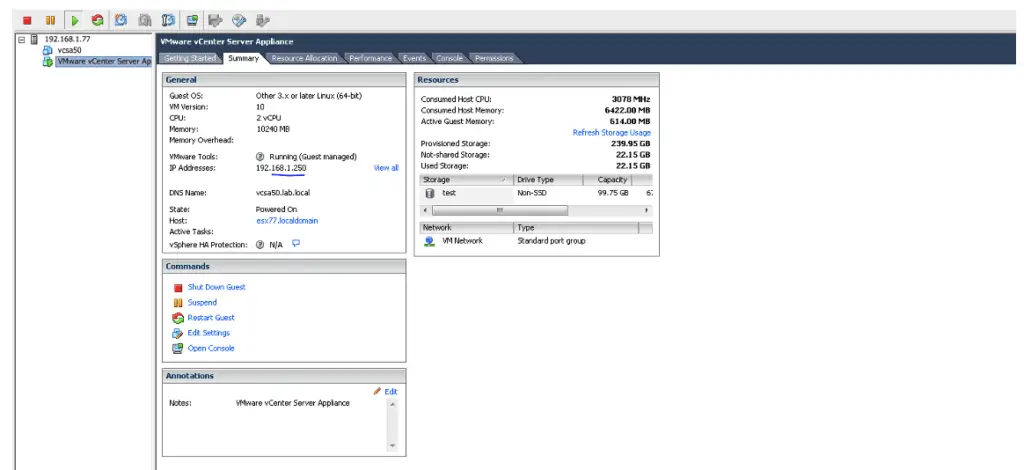
In this blog, we will discuss about how to upgrade a VMware vCenter Server Appliance 6.0 to VMware vCenter Server Appliance 6.5. I’ve covered the upgrade from 6.0 to 6.7 earlier but this is a specific scenario for a customer.
Blog Series
What’s new with vCenter 6.5
vCenter 6.5 introduces the below core features;
- HTML5 Client
- vCenter Backup/Restore
- Appliance Management
- Proactive HA
- HA Orchestrated Restarts
- HA Admission Control
- Network-aware DRS
- Additional DRS Options such as Predictive DRS
- VMFS-6
- NFS/iSCSI Updates
- vSAN 6.5
- Automatic UNMAP
- Integrated Update Manager and VCSA
- Encrypted vMotion
- Virtual Machine Encryption
Upgrade vCenter VCSA 6.0 to 6.5
VCSA upgrade to 6.5 is split broken into two stages,
The first stage is deploying a new vCenter Server Appliance, phase 1 creates a temp vm
The second stage is copying the data from the VCSA 6.0 to our newly created temp VCSA 6.5. The temp vm then becomes the original VC. VM retains all GUID etc as of the old on
Pre-Upgrade Checks
Make sure to make a note of the following configurations:
- The Installed vCenter | ESX | NSX version details and download an ISO locally and keep it ready.
- Allocate a temporary IP in the same range as your vCenter
- Make a note of all License keys
- User accounts and any custom permissions
- VM Tags
- VM Annotations
- VM folders
- Export VM Folder Permissions
- Distributed switch backups
- Network settings for vCenter server
- NTP settings
- HA and DRS settings
- DRS Rules ( Affinity and Anti Affinity rules )
- CPU compatiblity settings
- Are all your hosts running the same model of hardware?
- NSX Backups
- vCenter Backups
- vSAN config
- Backup Server Compatiblity
- SAN Compatiblity – VASA, vVols etc
- Run an RVTools Report
Preparing for the vCenter Appliance Upgrade
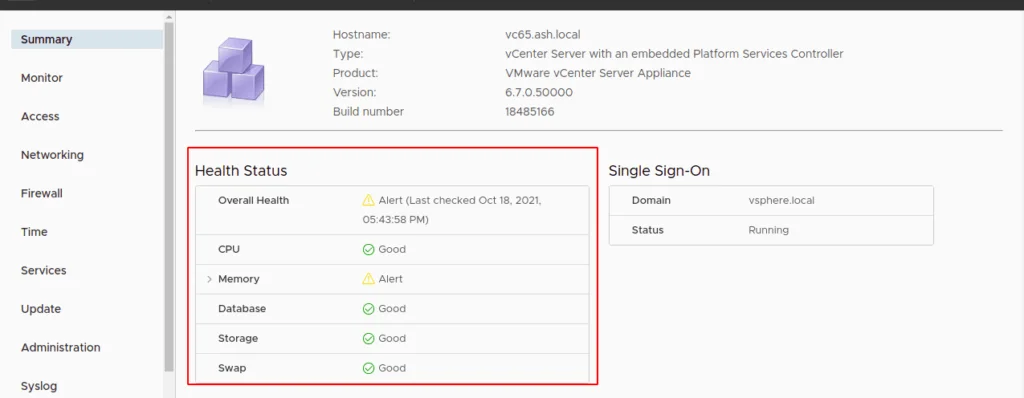
1- We begin by verifying the health of the vCenter appliance. As shown below, this is a quick indication that your vCenter will need more memory and the likely scenario will be vCenter upgrade will fail so I’ll add some additional memory to the vCenter.
2- With the compute raised, let’s now back up the appliance configs such as NSX, vCSA appliance etc. Log in into each appliance and backup the appliance configs
3- Login to the vCenter via vsphere-client to check if vCHA is enabled on your vCenter
4- Backup distributed switch config – Choose Export Config
5- Choose the option to include all port groups
6- Save the config to a local path
7- The next step to upgrade vCenter is to first remove our vCHA configuration from our vCenter. Go to Configure > Edit > Remove vCenter HA
8- Delete the Passive and Witness nodes
9- Validate if vCHA configuration is removed
10- We will now need to disable DRS to prevent our vCenter from being moved around during the upgrade. You might as well choose Affinity rules to tie the vCenter to a set of hosts.
11- Snapshot your existing vCenter server with the option to quiesce memory.

12 -Mount the ISO image and start the vCenter Server Appliance 6.5 installed located in \vcsa-ui-installer\win32

13 -Select upgrade option

14 -Click Next to continue

15- Accept the licence agreement and click Next to continue

16- We will now connect to our vCenter that needs to be upgraded. Enter the source appliance vCenter FQDN or IP address click Connect to the source. Input the SSO User name, SSO password and the vCSA Appliance root password. Locate the host we attached the vCenter to previously, enter the ESXi host where our source vCSA reside and click Next.

17- Specify the target ESXi host to deploy the new appliance to. In our lab, we will just deploy the new vCenter to our ESX-01 nested host

18- Give the new vCenter VM a name, we can choose any name here and there is no name resolution required. This name can be changed later

19- Specify the Deployment size as needed.

20- Select the datastore to use and click Next. I’ve chosen the disk type as thin disk

21- We will need to provide this new vCenter with a temporary IP address which is only used only during the deployment process to copy the data from our production vCenter The IP address of our production vCenter will be the same as the source appliance.

22- Review the summary and click on Finish.

23- The Stage 1 phase of our vCenter now begins and this will basically spin a new vCenter on the ESXi host with the temporary IP we created earlier.

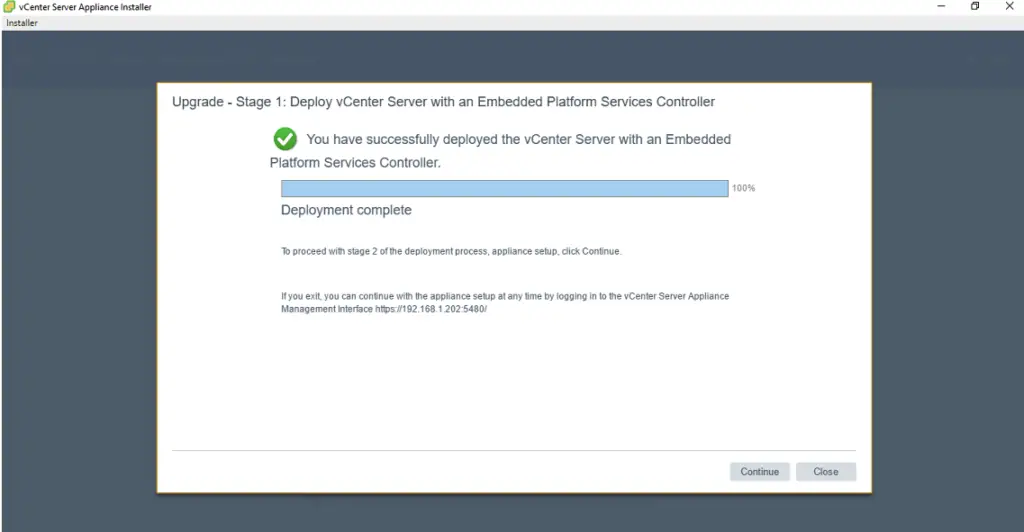
24- Once completed you will have the option to continue onto Stage 2 of the upgrade or close. If you close then you can finish the VCSA config by going to https://<TEMP_VCENTER_IP>:5480
Stage 2 – Copying data to VCSA 6.5
25- Once the newly VCSA 6.5 has been deployed we can move on onto Stage Click Next to Continue.
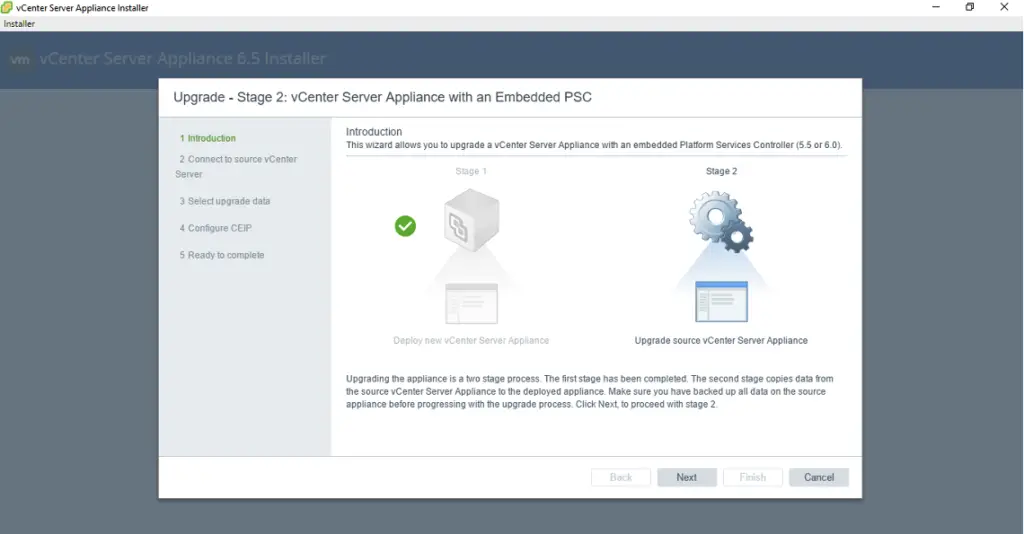
26- Select the data to be migrated and click Next. For this lab, I’ll just pick the configuration data to be moved over
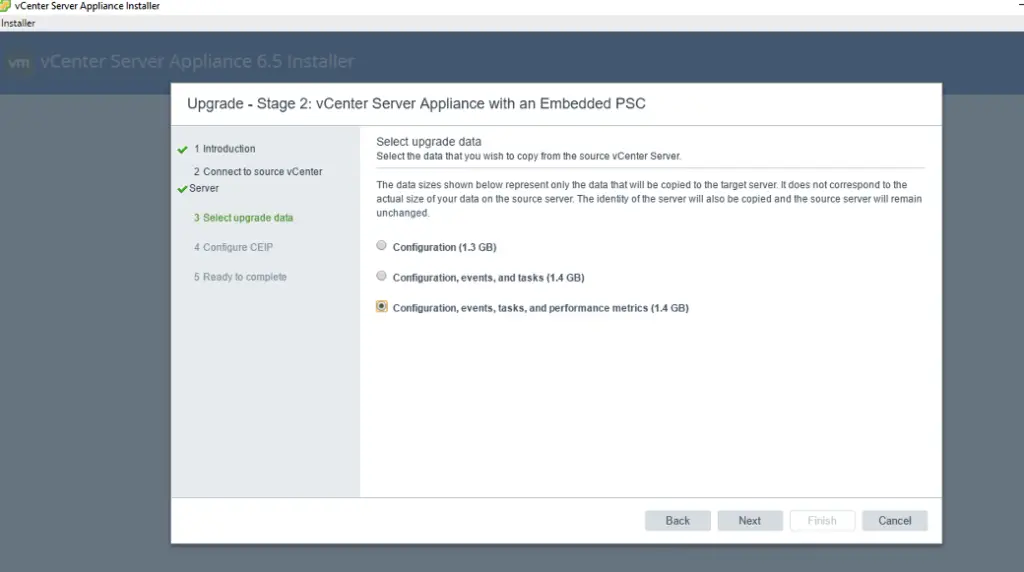
27- Skip Join the VMware’s CEIP option and click Next

28- Validate all settings and Click Finish
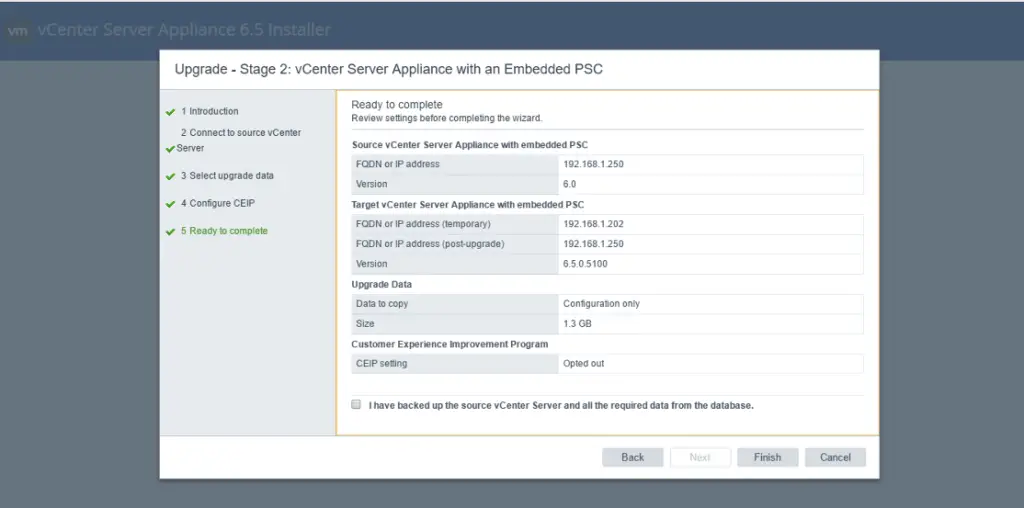
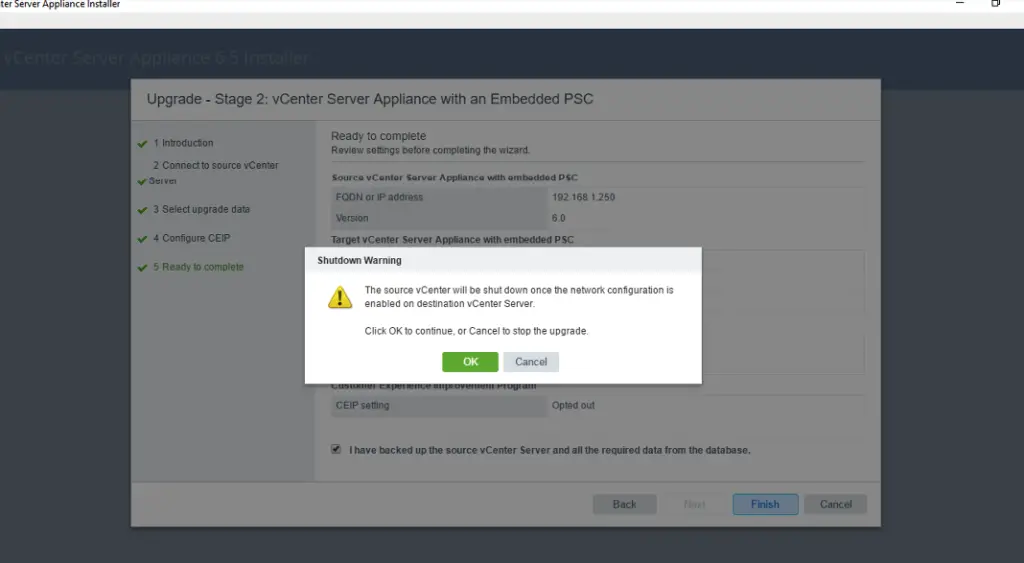
29- Click OK to proceed with the upgrade.
30- We have to wait a few minutes to copy the data. In step 1 data is copied from the source vCenter Server to the target vCenter
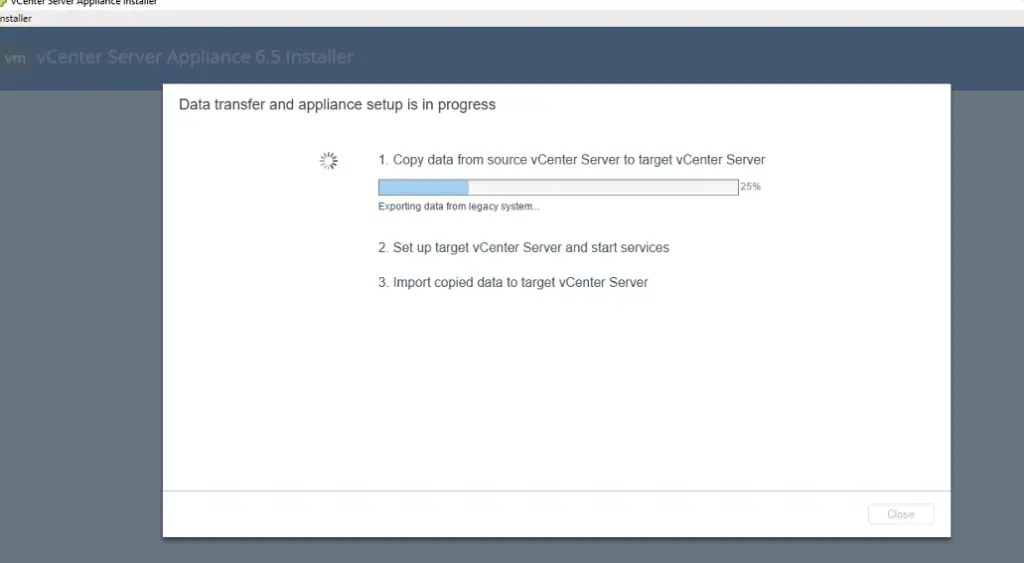
31- The upgrade is now complete
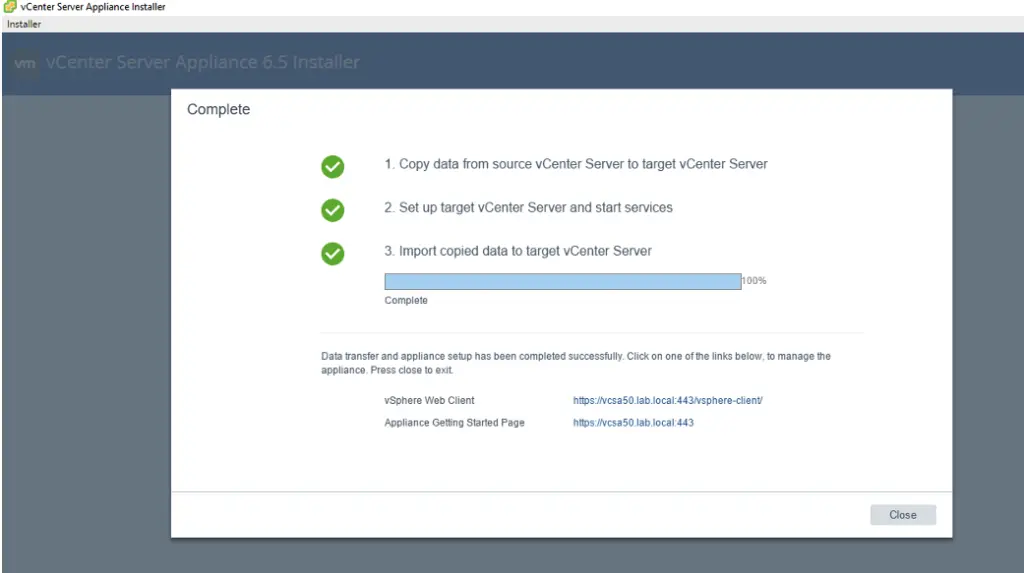
32- The new vCSA upgrade has been completed and should now be reachable at the same DNS name or IP address of the source vCenter Server.
