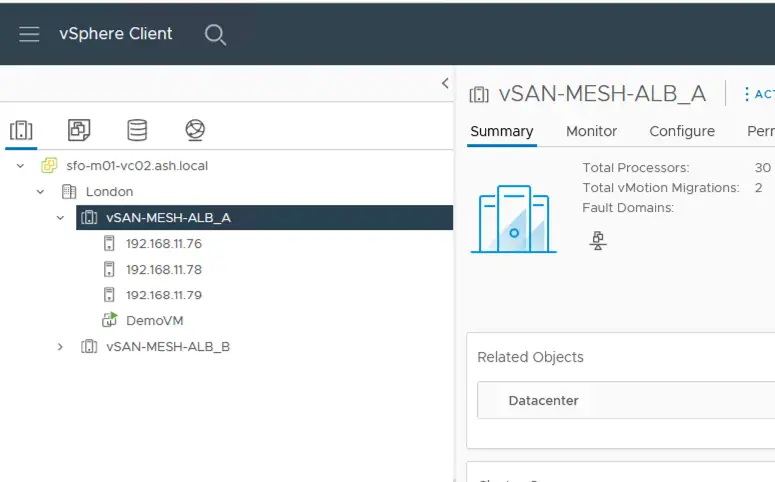
We will take a deep dive into the process to upgrade a vSAN-ready node from one disk format to the latest version.
Prerequisites
- Upgrade vCenter
- Upgrade ESX Hosts via Lifecycle manager.
- Upgrade vSAN disk format.
Tech Notes
Verify if the targetted vSAN version is compatible with your environment.
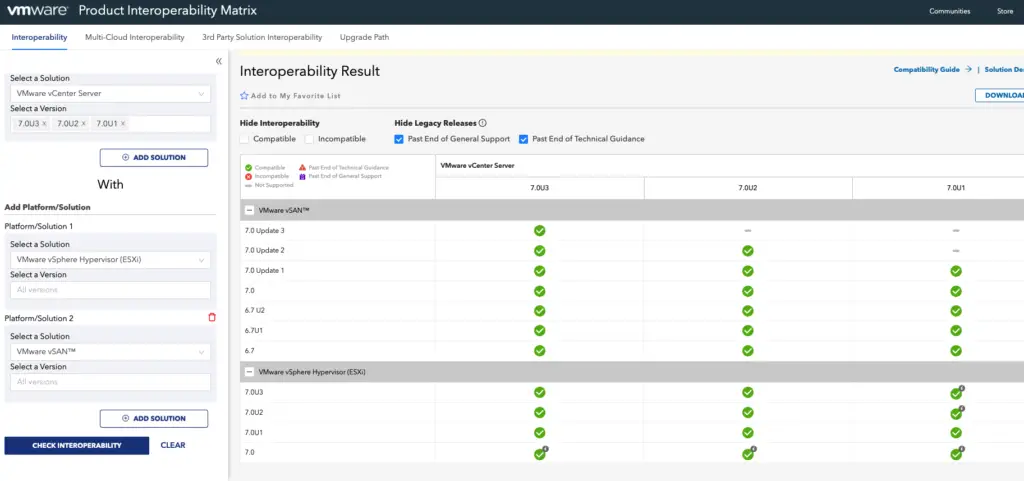
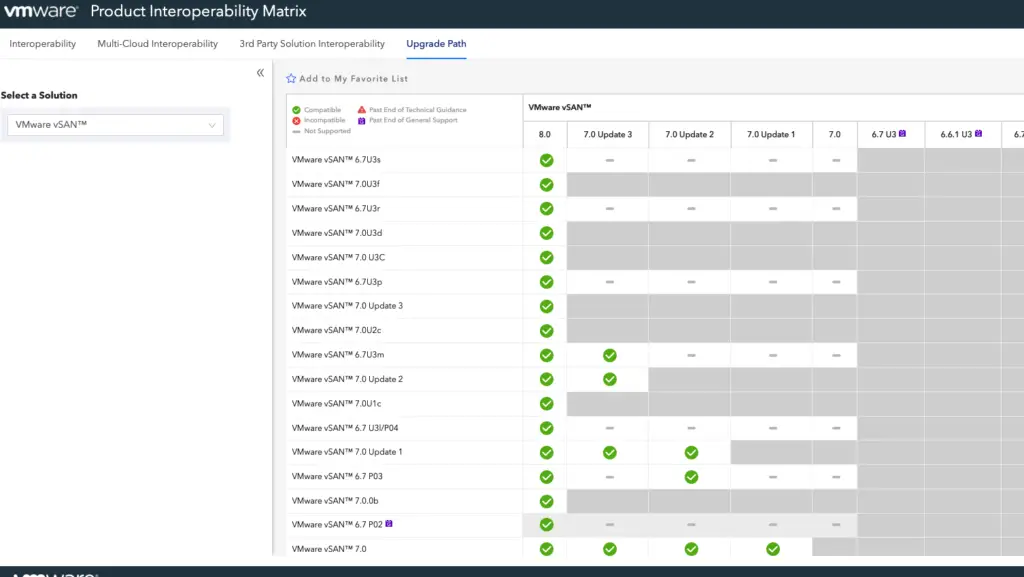
Our current vCenter version is on Build 1923570 and we will need to move this to the latest version.
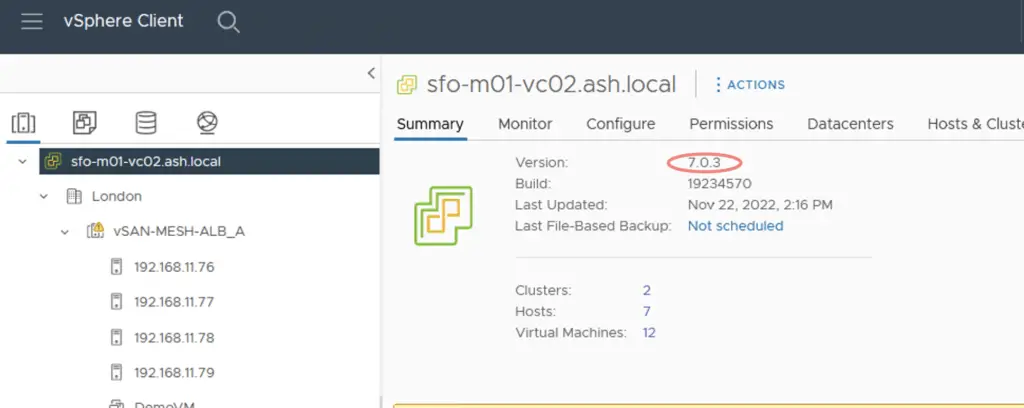
Our current ESX version is 7.0.1 and we will move it to 7.0.3

Verify the disks participating in vSAN disk group.

Run a Skyhealth check to verify if there are no health warnings.

vSAN Supported Data Migration Paths
The following data migration methods are supported with vSAN.
Full Data Migration – This is typically used for host decommissioning
Ensure Accessibility – This approach is the most favored route and the default option with vRLCM to do automatic upgrades.
No Data Evacuation – Not used or in very rare scenarios to shutdown the vSAN Cluster
Patching a vCenter
The first step to upgrading the vSAN environment is to bring the vCenter to the latest patch level. I’ve covered this upgrade process in several blogs but for sake of completeness, I’ll cover just the core steps & for the detailed guide, refer to the web link above.
Under the vCenter VAMI Interface – Stage the latest version

Run a pre-upgrade check
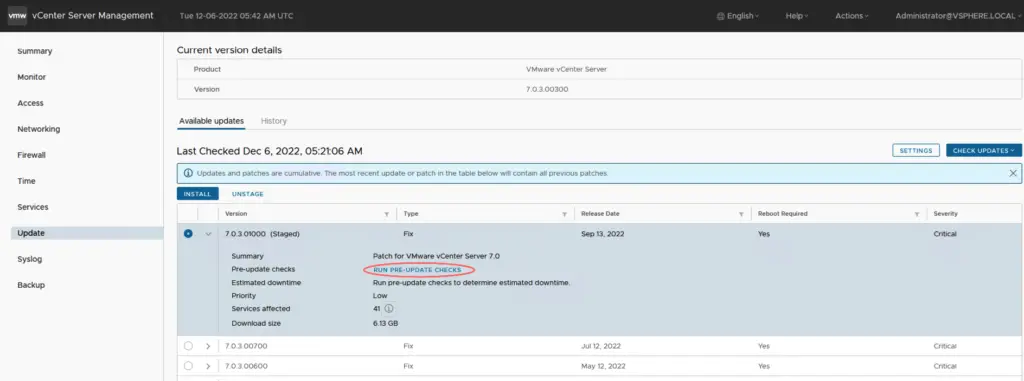
Click on Install

Accept the EULA

Click Finish to begin the upgrade

The total patching time for this will be around 90 minutes.

Once the vCenter is upgraded, we will now patch the ESXi hosts.

Patching ESXi host with vSAN ( Manual )
This procedure below has been replaced with the lifecycle manager.
With hosts that have vSAN enabled on them, the patch process previously would have been as follows
- Ensure the vCenter is upgraded and no new additional tasks are done during this period and this includes addressing disk failures on the vSAN hosts.
- If a disk was to fail during this upgrade, the new disk will need to be formatted with the old disk format.
- Ensure all the ESXi hosts are running the same version across.
- Ensure Skyline health report is clean.
- Ensure there are no resync objects
- Place the host in maintenance mode
- Choose the option for vSAN migration to ensure accessibility
- Prior to this upgrade, set the delay timer to a higher value ( ie: 120 mins ). The default object repair time is 60 mins and if the hosts fail to come back online, vSAN will automatically trigger a rebuild of all the missing objects based on the FTT set.
- Check if the vSAN Datastore has enough space.
Place the host into maintenance mode and choose the vSAN data migration to ensure accessibility.

Patching ESXi host with vSAN ( vRLCM )
Even thou the above process still exists, with the arrival of the vSphere life cycle manager, we longer need to do this step of manually placing the host in maintenance mode to do this work. The life cycle manager takes care of everything including evacuating data from hosts before hosts are placed in maintenance mode for patching.
- Ensure the vCenter is upgraded and no new additional tasks are done during this period and this includes addressing disk failures on the vSAN hosts.
- If a disk was to fail during this upgrade, the new disk will need to be formatted with the old disk format.
- Ensure all the ESXi hosts and the cluster image is compliant.
- Ensure Skyline health report is clean.
- Ensure there are no resync objects
- Place the host in maintenance mode
- Choose the option for vSAN migration to ensure accessibility
- Prior to this upgrade, set the delay timer to a higher value ( ie: 120 mins ). The default object repair time is 60 mins and if the hosts fail to come back online, vSAN will automatically trigger a rebuild of all the missing objects based on the FTT set.
- Check if the vSAN Datastore has enough space.
We’ve covered the patching of ESXi hosts via vRLCM but for sake of completeness, I’ll cover the most important steps – For the detailed guide, refer to this blog – How to Patch ESXi 7. x with vSphere Lifecycle Manager
In summary, the process will be to hover over to the Cluster > Updates > Baselines > Choose the ESX image that we need and click Start Remediation and wait for the cluster to finish its remediation.
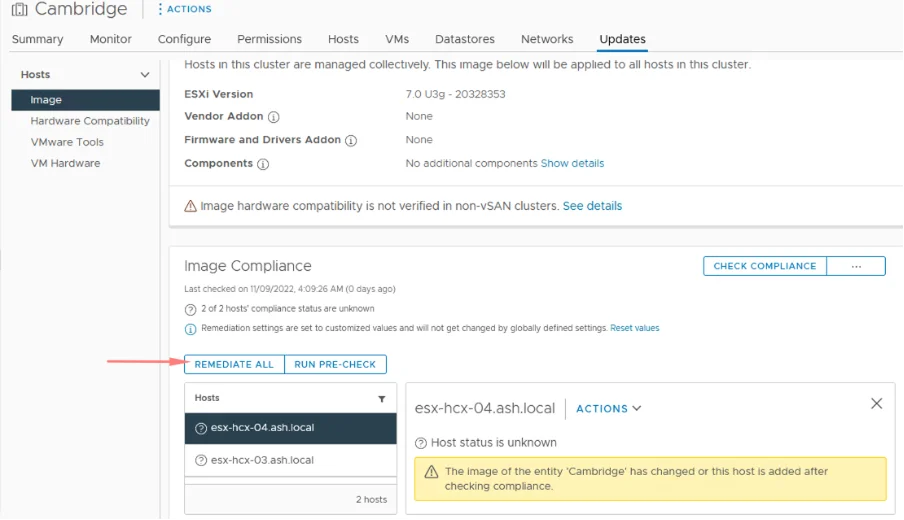
Hosts will enter maintenance mode one after the other to finish their patching. I’ve gone ahead and patched all my hosts with the above procedure.

vSAN On-Disk Format Upgrade Procedure
The on-disk format is based on the vSAN version currently running on the hosts.
Read this guide to understand the vSAN disk formats

Once the ESX hosts are moved to later releases, the vSAN cluster will detect the disk format is outdated and will need an update.
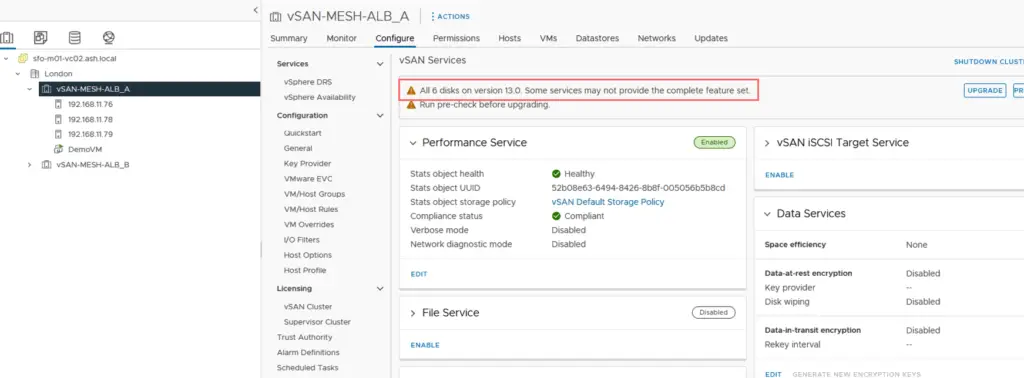
VSAN upgrade is all about changing on-disk format so objects in the vSAN will be realigned which will cause performance impact during the work.
Keep the following points in mind when planning the on-disk upgrade
- Ensure the vCenter is upgraded and no new additional tasks are done during this period and this includes addressing disk failures on the vSAN hosts. If a disk was to fail during this upgrade, the new disk will need to be formatted with the old disk format.
- Ensure all the ESXi hosts are running the same version and the cluster is compliant with the image.
- Prior to this upgrade, set the delay timer to a higher value ( ie: 120 mins ). The default object repair time is 60 mins and if the hosts fail to come back online, vSAN will automatically trigger a rebuild of all the missing objects based on the FTT set.


Check if the vSAN Datastore has enough space to tolerate host failures. When the vSAN host is in MM mode, the cluster capacity is also reduced so ensure we have enough capacity.

Validate the vSAN Disk version running on it.

Run a Data Migration Pre-check to ensure that vSAN data migration can be supported with the capacity available.

Once all these pre-requisites are met, go to vSAN – Services – Pre-check Upgrade
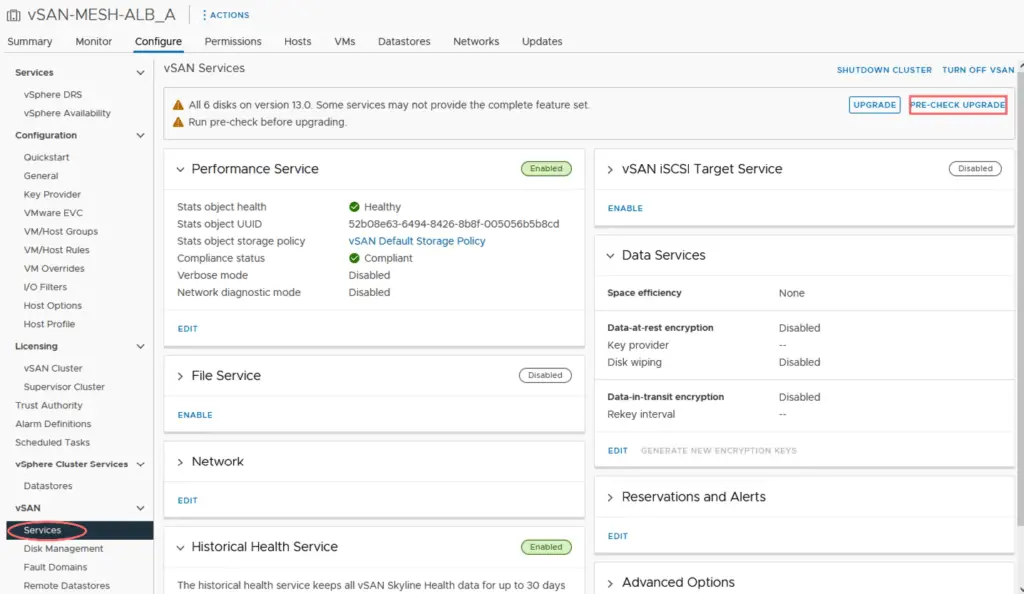
The pre-checks detects that we are good to go with this upgrade.

Click Upgrade to Start the vSAN on-disk format upgrade. Note that once you upgrade the on-disk format, you cannot rollback software on the hosts or add certain older hosts to the cluster

This process runs as a background task and will take few moments to complete.

Once the disk format is completed, verify the state of the disks from the Skyline tab.

The disk upgrade has been completed successfully.

Summary
During the walkthrough, we went through checking the prerequisites for this upgrade by cross check if our existing infrastructure components are compatible with the targetted ESXi version and the vSAN version. We started off by upgrading the vCenter followed by the ESXi hosts and then the vSAN on-disk version as well.
In the next blog, we will configure the Mesh Architecture on vSAN 7.X.

