Windows versions are not yet supported for in-place system upgrades in Azure, so this workaround should hopefully serve the purpose.
There is no console console access to an Azure based IAAS virtual machine so when things go wrong you cannot fix it and we will have to resort to restoring a backup.
Prerequisites
- Collect the systeminfo
- Take a backup of VHDs (OS & data disks), make note of extensions, NIC.
- Enable boot diagnostic
- Take Screenshot of Disks from Portal
- Backup the VM to Azure Backup
- Disable and remove the disk encryption.
- Take the snapshot or full backup of the C drive and Other data drives
- Log in to the server and uninstall System Center Endpoint Protection (SCEP) if installed.
- A second VM with HyperV installed and configured
- Download the OS drive C:\ on to a hyperv VM.
- Download Windows server 2019 bit (Windows Server 2019 Standard and Datacenter) volume licensing edition. (Evaluation wont work)
- Start the in place upgrade.
- Mount the VHD back to Azure
- Swap the old OS disk with the upgraded disk
- Power on the VM
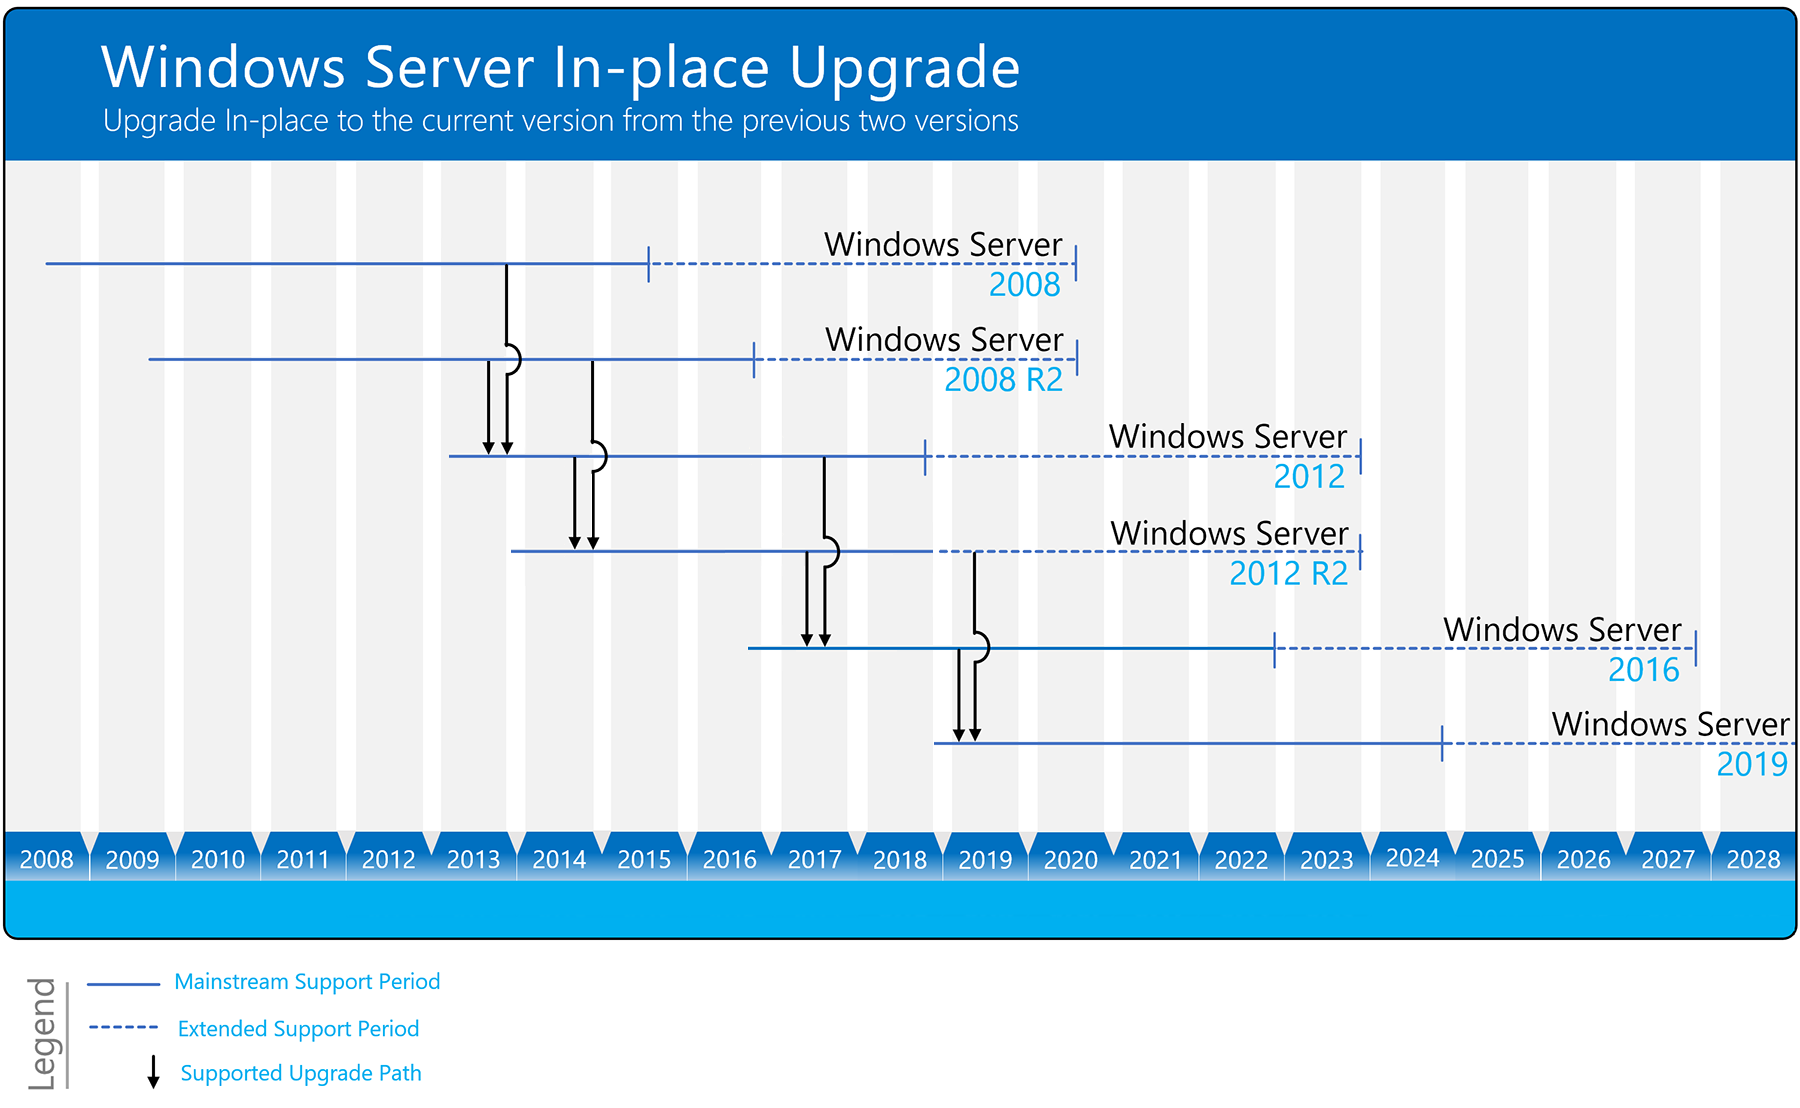
Windows Server Upgrade Matrix
You can use the following diagram to figure out which Windows Server version you can upgrade to, based on the version you’re currently on:
- Step 1: The following VM’s are built in Azure and we will be looking to upgrade our rds-01 vm from 2012 to 2016/2019.

- Step 2: We are going to need a storage account inorder for us to do this job so I’ve created one here.

- Step 3: Enable boot diagnostic on our VM to the storage account we created earlier, so we can see the screenshot of the VM console. Go to the diagnostic settings tab on our VM.

- Step 4: Enable boot diagnostic on our VM to the storage account we created earlier.

- Step 5: Login to the server and note the disk and lun id number, disk drive letter etc
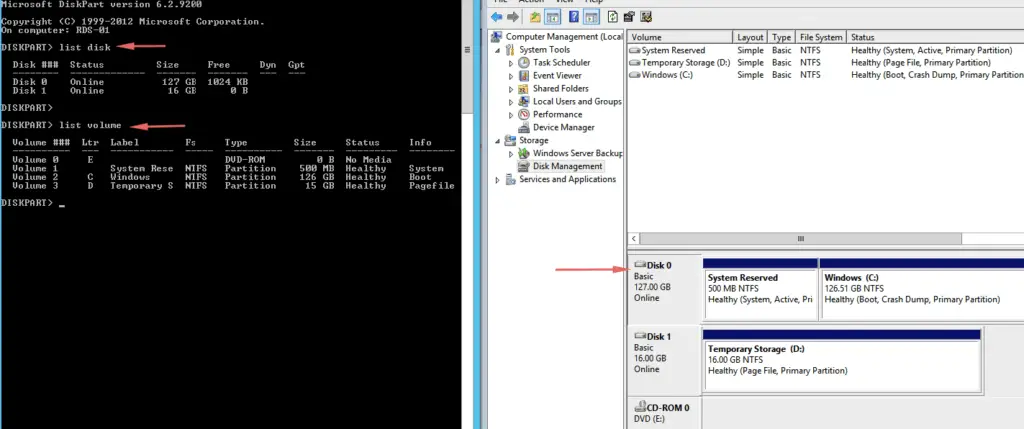
- Step 6: Disable the disk encryption
# Disable the disk encryption
$rgName = "resource-groupname"
$vmName = "rds-01"
Disable-AzureRmVMDiskEncryption -ResourceGroupName $rgName -VMName $vmName -VolumeType All - Step 7: Remove the disk encryption
#Verify bitlocker status
Get-BitLockerVolume

#Remove Encryption
Remove-AzureRmVMDiskEncryptionExtension -ResourceGroupName $rgName -VMName $vmName
- Step 8: Capture diagnostic data from VM
# Capture Windows OS edition
Get-ComputerInfo -Property WindowsBuildLabEx,WindowsEditionID | Out-File -FilePath windowsinfo.txt

# Capture Windows OS edition
systeminfo.exe | Out-File -FilePath systeminfo.txt

# Capture Windows OS edition
ipconfig /all | Out-File -FilePath ipconfig.txt - Step 9: Stop the VM

- Step 10: Wait until the VM status is fully deallocated

Attaching the Snapshot VHD disk to a local Hyper-V VM
- Step 11: Choose the OS disk and take screenshot of disks from portal

- Step 12: Choose the OS disk and create snapshot

- Step 13:Wait for snapshot operation to complete and click on Go to resource.

- Step 14: Go to the snapshot disk and export the disk using Snapshot export. Ensure the URL expires TTL Is set to a higher value.

- Step 15: Copy the URL, we will download the VHD disk from this URL.

- Step 16: Login to our Hyperv server, copy to Google Chrome and download the VHD disk.

- Step 17: Once the VHD disk is downloaded to our Hyperv disable the snapshot disk export process

- Step 18: Rename the file name to servername.vhd

- Step 19: On our Hyperv machine, click create VM

- Step 20: Choose Generation 1 option if your IAAS VM version was on Gen 1 if not choose Gen 2

- Step 21: Assign the same memory you had on the other VM if possible.

- Step 22: Network card is not required for OS disk conversion

- Step 23: Choose the option to use the exisiting virtual disk and point it to the VHD snapshot disk we downloaded from Azure portal

- Step 24: Validate all settings and click Finish

- Step 25: Once the VM is created, change the CPU to match what was on the original VM

- Step 26: Mount the latest Windows OS image

- Step 27: Start the VM and login as local admin

- Step 28: Follow Upgrade Guide to upgrade the OS
- Step 29: Power off the VM

- Step 30: Go to Containers and create a new blob container
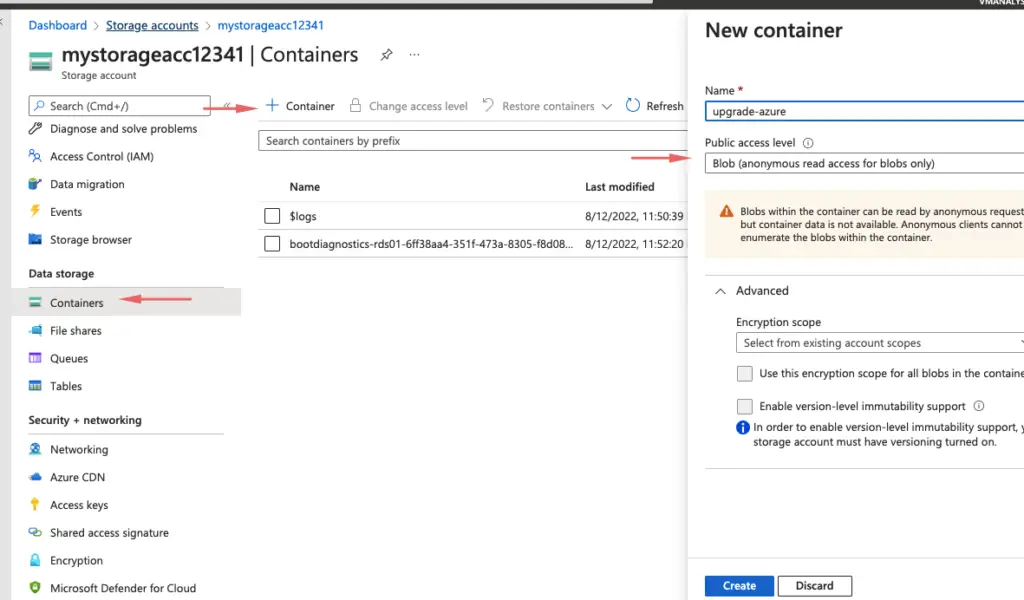

- Step 32: Upload the vhd using storage explorer to the blob container we created.

- Step 33: VHD disk is now uploaded to the blob container we created.
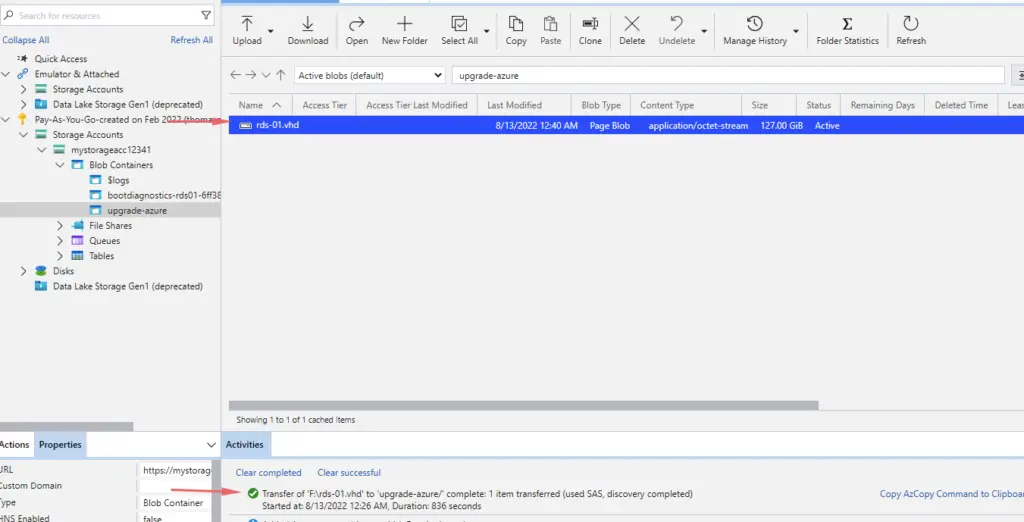
- Step 34: On our Azure portal, we can see the VHD disk uploaded.
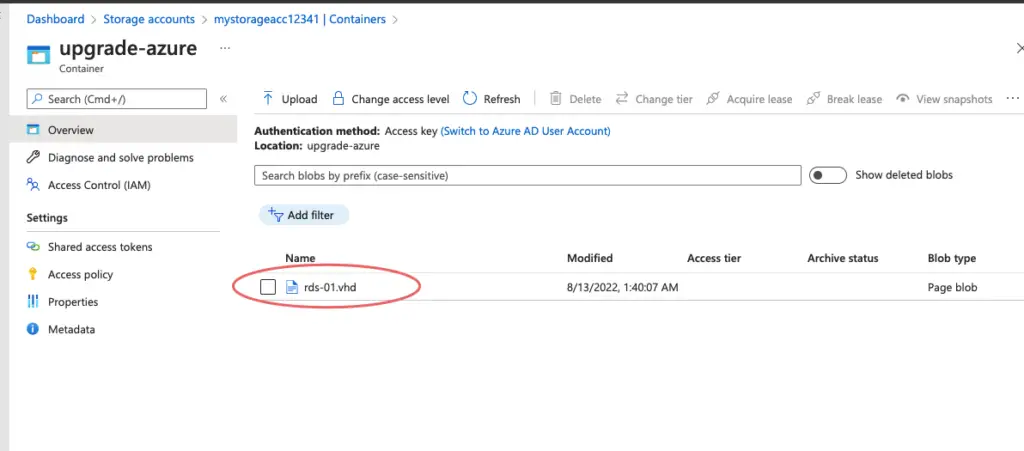
- Step 35: Copy the url
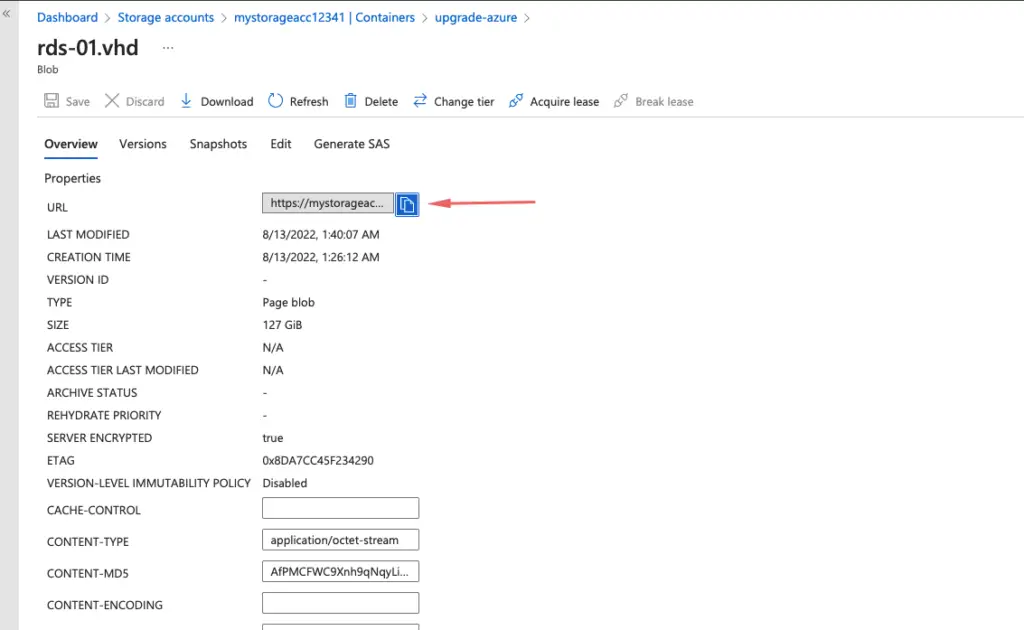
- Step 36: Create a managed disk from the url

- Step 37: Create a managed disk from the url
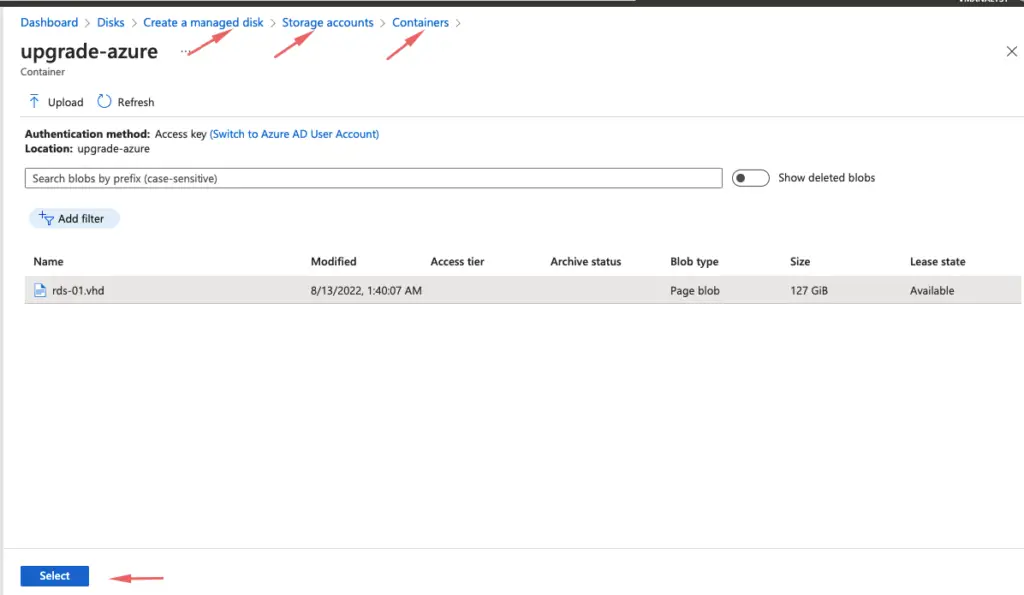
- Step 38: The default size as you create a managed disk is 1024GB so we need to change it. Choose disk size – remember size cant be decreased after and remember to also set OS type as Windows

- Step 39: Choose disk size to match the original VM OS disk size

- Step 40: Click create managed disk

- Step 41: Our managed disk is ready

Step 42 : Now we can swap the os disk . Go to disk and swap os disk as shown
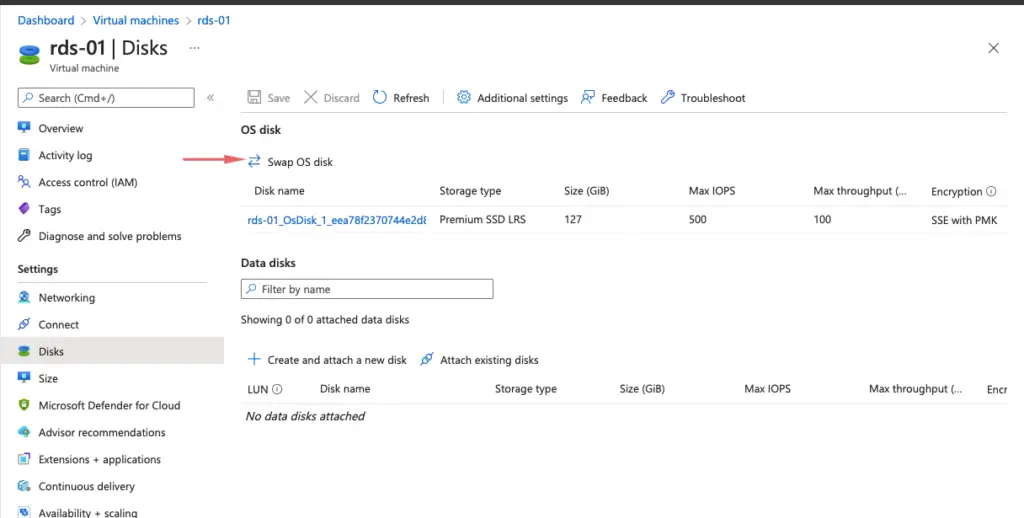
- Step 43: Swap os disk as shown

- Step 44: Confirm the action

- Step 45: Disk has been swapped

- Step 46: Disk has been swapped

- Step 47: Power on the VM

- Step 48: Watch the stats via boot diagnostic screen

Step 49: Checking if your upgrade was successful
Get-ComputerInfo -Property WindowsProductNameWe have thus successfully upgraded our OS to latest version.
References
- https://docs.microsoft.com/en-us/windows-server/get-started/upgrade-overview
- An in-place system upgrade is not supported on Windows-based Azure VMs.
- Overview of Windows Server upgrades
- Upload a generalized VHD and use it to create new VMs in Azure

