In this blog, we are going to take a look at how to install clustered SQL Server instances, failover the active SQL install, and add a new disk to the cluster.
Blog Series
- Create/Add a Raw Device Mapping (P-RDM) to a VM Cluster
- SQL Server Failover Cluster Installation
- Expand a Virtual and Physical RDM LUN
- How to Set Up and Configure Failover Cluster On Windows Server 2022
Prerequisites
The process of SQL Server cluster installation involves two stages, first is to install SQL Server on one node and once this installation is successful then you need to install SQL Server on the other nodes of the cluster by launching the SQL Server setup on the other nodes
| Name | IP Address | Purpose |
| SQLServer01.ash.local | 172.16.11.20 | Primary Node |
| SQLServer02.ash.local | 172.16.11.21 | Secondary Node |
| SQLCluster.ash.local | 172.16.11.22 | Microsoft Failover Cluster VIP |
| SQL-GLOBAL | 172.16.11.201 | SQL Server Cluster VIP |

The following accounts are needed in order to achieve a successfully clustered SQL Server instance installation:
| ASH\SVCSQLEngine | SQL Server Engine service account |
| ASH\SVCSQLAgent | SQL Server Agent service account |

Create the SQL VIP Server computer name SQL-GLOBAL as an AD Object and keep the computer object as disabled.

- Under the security tab of the SQL-GLOBAL computer object add the Microoft cluster computer SQLCluster with full access to the SQL Server as shown

Storage
For a clustered instance we need to use shared storage so for this sample demo I’ve created the sample disks as RDM’s following this doc
| Volume | Purpose | Size | Disk Provisioning |
| E | SQL Server Binaries ( Local Disk ) | 19 | Thick provision eager zeroed |
| F | Data Files ( RDM- Shared) | 10 | Thick provision eager zeroed |
| G | Log Files ( RDM- Shared) | 17 | Thick provision eager zeroed |
| H | Backups ( RDM- Shared) | 40 | Thick provision eager zeroed |
| I | TempDB ( Local) | 30 | Thick provision eager zeroed |
All the shared disks need to be shown as “Available Storage” in the Failover Cluster Manager, as you can see

We are now ready to install our SQL cluster
SQL Server Cluster Installation
Step 1: Mount the SQL server ISO, run the Setup.exe as Administrator.

Step 2: Choose New SQL Server failover cluster installation as shown

Step 3: Give the license key here

Step 4: Accept the licensing

Step 5: Skip the Windows Update for now

Step 6: We have the option to download the updates for a most updated installation
Step 7: The next window will check failover cluster rules.

Step 8: Choose the first option (SQL Server Feature Installation) selected and proceed to the next step.
Step 9: Choose the features you want to install on your SQL cluster server. and choose where the binaries will be placed.

Step 10: .NET Framework 3.5 features are needed so our installation will fail

Step 11: Install NET Framework 3.5

Step 12: After the successful .Net Framework 3.5 installation go back to the SQL Server Setup Wizard and click on the re-run button. Give the SQL Server Network Name ( this the computer AD object we created earlier)

Step 13: Change the cluster resource group name if needed. Its usually changed to reflect the instance computer name, instead of the ID. Click Next.

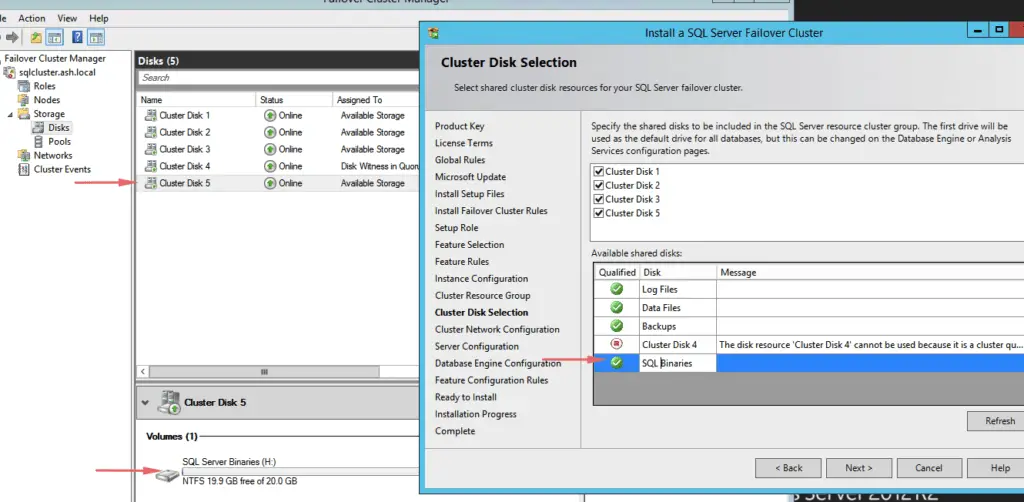
Step 14: List of all shared disks will now be available so choose the clustered disk that are to be added to the SQL Server cluster resource group
Step 15: Enter the cluster VIP IP we created in our DNS

Step 16: Enter the SQL Server service accounts and their passwords to run the SQL Server services for SQL Server DB and SQL Agent

Step 17: Select the authentication mode of the SQL Server. Choose Mixed Mode and enter an sa password.

Step18: Under the “Data Directories” is where we specify the location to keep the data directories, user database, temp DB, backup etc

Step19: A local disk is required for instaling TempDB files. This TempDB directories need to be created manually on all our failover nodes else during failover, the SQL Server resource will fail to come online.The below screen will appear to have you confirm that you are putting TempDB files on local drives.

Step 20: I’ve created the temp directory on my secondary node so click on Next to continue.

Step 21: Choose Install to begin the SQL server installation

Step 22: SQL Server installation begins

Step 23: Installation has been completed succesfully.

Validate the Cluster Installation
Our SQL Server has been installed succesfully on our primary node

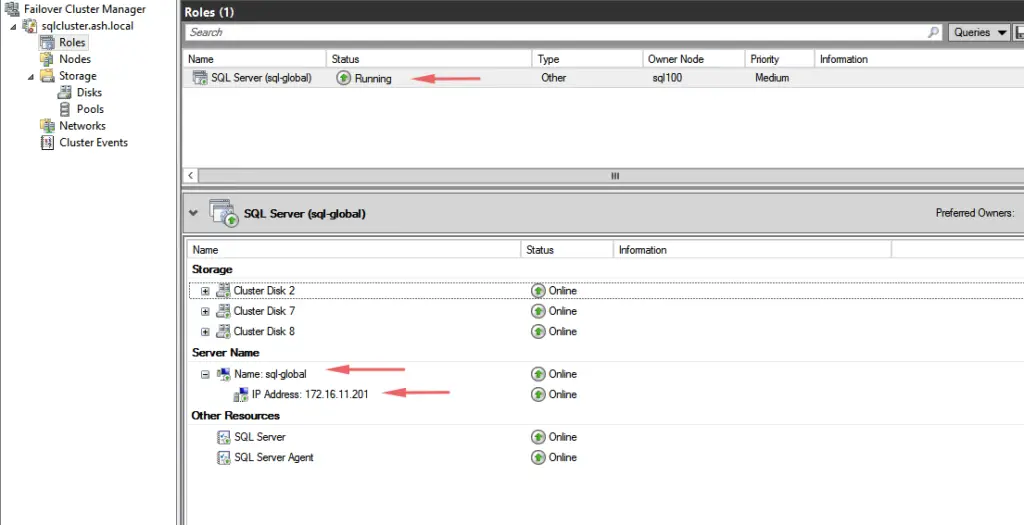
We will be able to see that the SQL Server default instance SQL-GLOBAL has been added. You can also see the SQL Server Network Name “SQL-GLOBAL” along with the IP address
Adding a node to a SQL Server clustered instance
The purpose of adding a secondary node to the SQL is to provide HA so we will be able to successfully perform a failover to the other node.
Mount the SQL Installation CD and choose the option “Add node to a SQL Server failover cluster”

Choose the license key

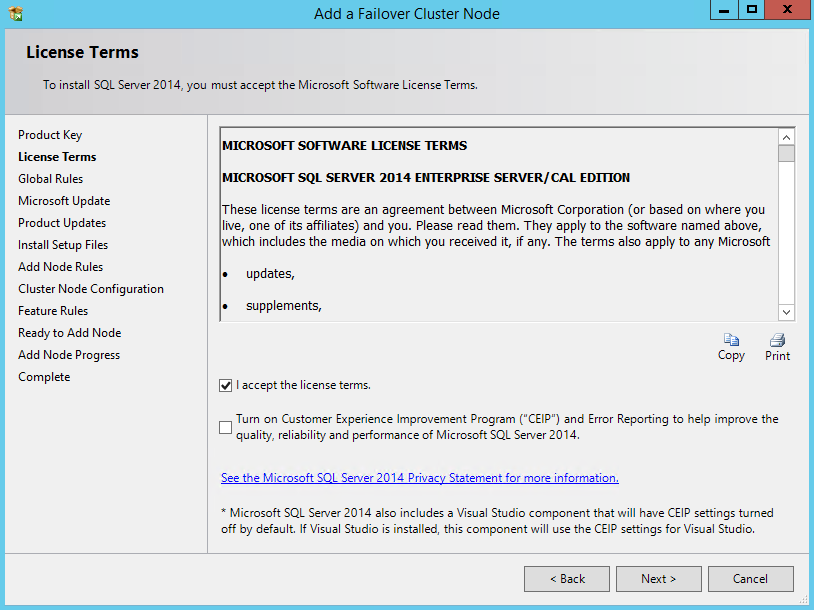
Accept the license terms to proceed
Leave Windows update unticked for now
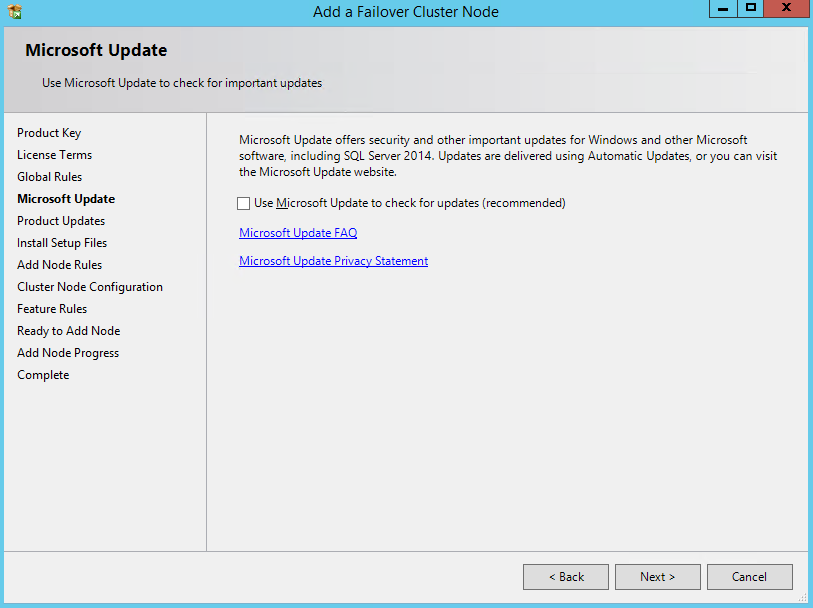
Vaidate if all the rules passed the test

Choose the SQL Server instance that you want to add the node

Choose the network settings for the SQL cluster

Confirm the password for the SQL DB Engine and SQL Agent service account

Click Next to continue, you will get this error if .NET 3.5 is not installed yet.

Install .NET 3.5

Click on Install to start the SQL Installation on our secondary node.
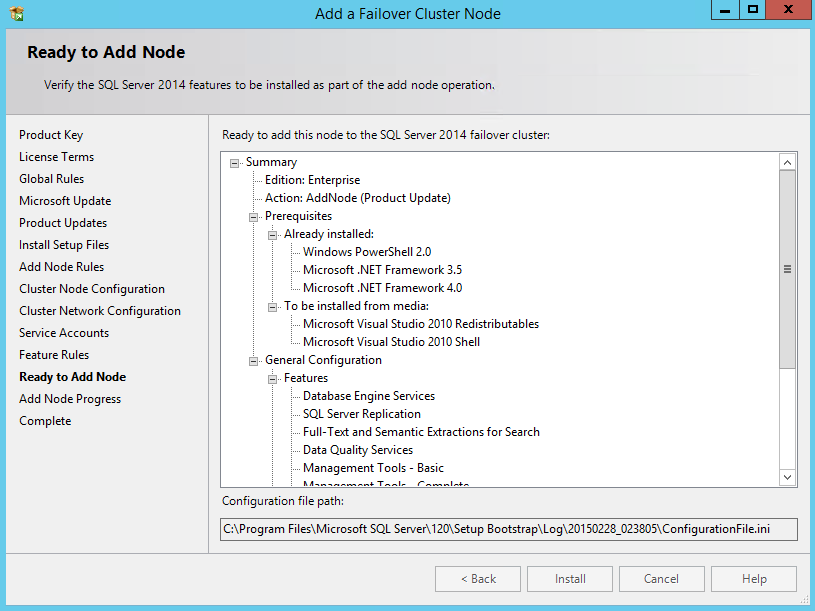
SQL Server installation begins

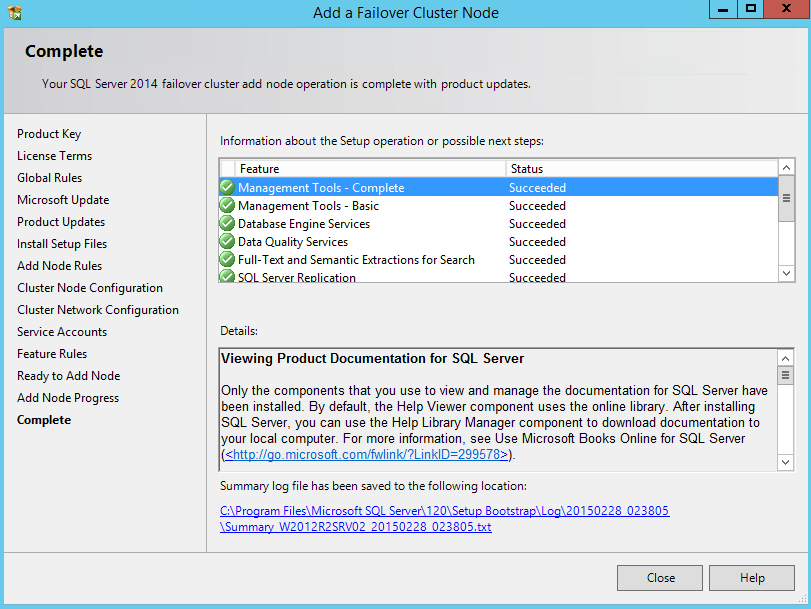
Installation has been completed succesfully. The second node has as well joined successfuly.
Login to SQL management studio to verify the SQL database

Test a Failover Process
Both our nodes are now operating okay so let us test it by doing a failover

As expected our primary node is on SQL100. For us to switch roles, click Roles > Move Clustered Role > Move to Second Node
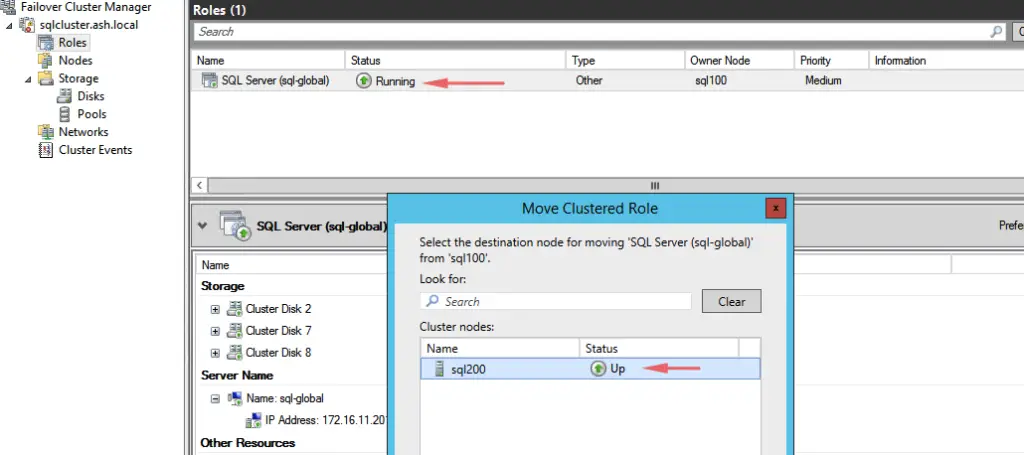
The Microsoft failover cluster will switchover all services from SQL100 to SQL200
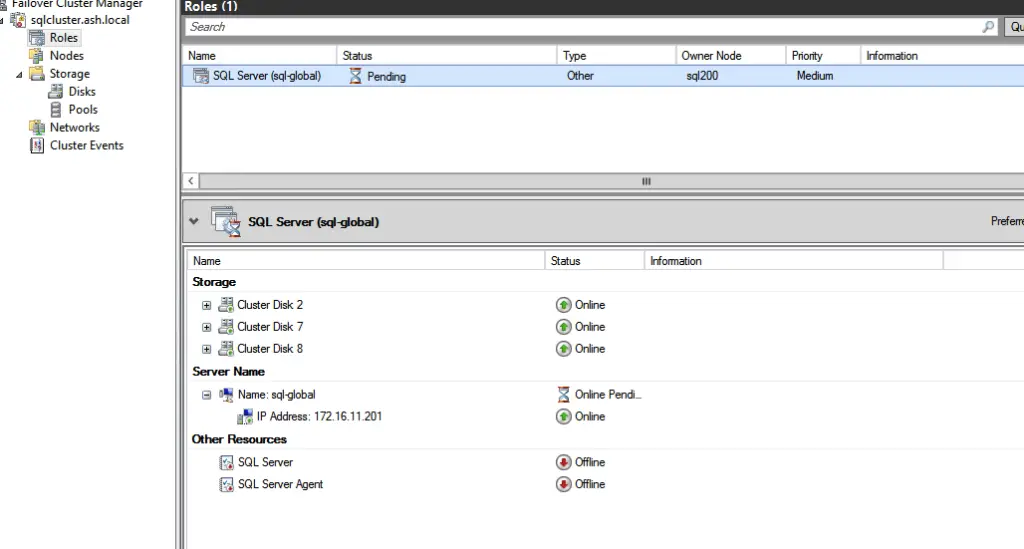
Our roles have thus been switched over to SQL200

How to add a new disk to an existing SQL Server failover clustered instance
Complete all steps as per – Attaching RDM Disk
Open Microsoft failover Cluster Manager, Choose Add Disk to add new drive to Windows failover cluster

Failover cluster manager will automatically detect eligible storage. Choose the disk and Add disk as shown

Our new disk is now admitted in to Windows Failover Cluster Configuration

Moving on to the next step, add the newly created disk which is listed as available storage in the above screenshot to SQL Server Role.In order to do that, Select SQL Server Role, choose Add storage and select the newly created disk as shown below.
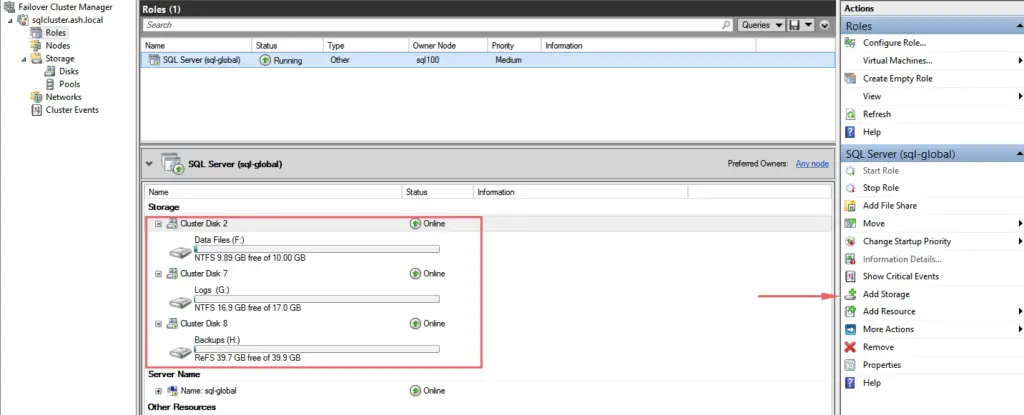
Choose the disk to add into SQL Server role

Once cluster disk 9 has been added to the SQL role, below is what my SQL Server role looks like in the failover cluster manager.
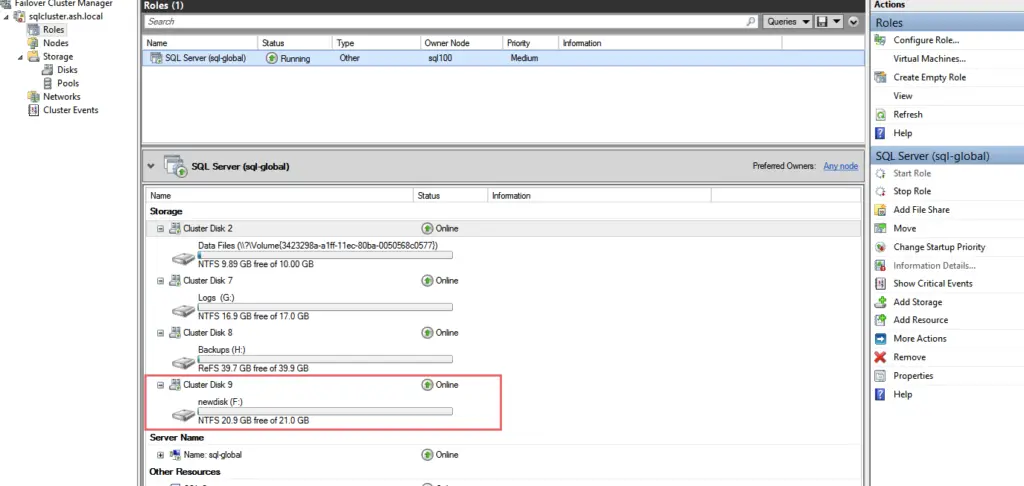
There is now one extra step that needs to be done so let’s first run the dependency report

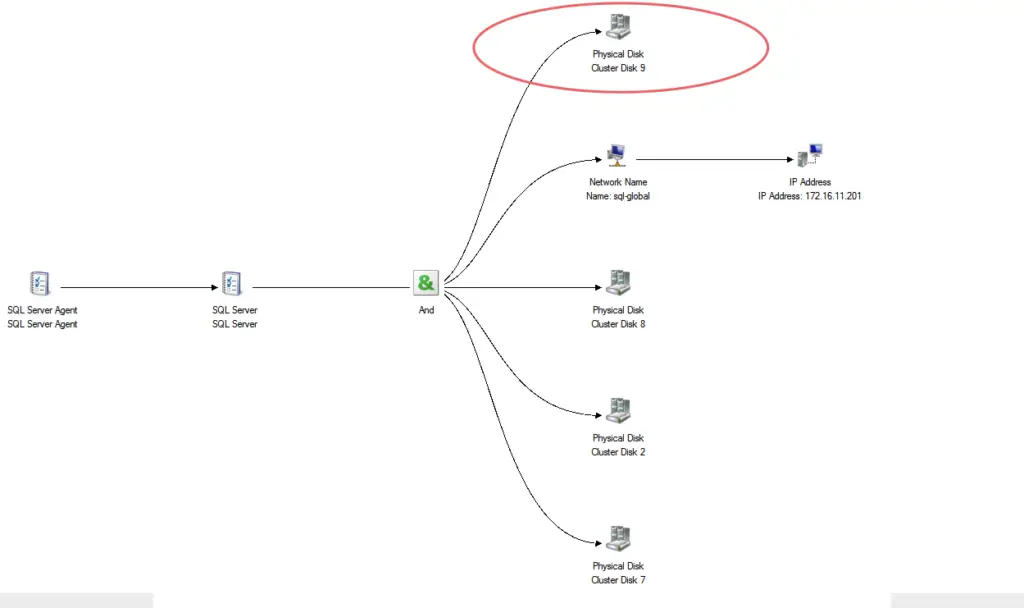
As seen the newly added disk even thou part of SQL Cluster is still not part of SQL dependencies and this would mean if a backup was run this disk will be omitted from backups.
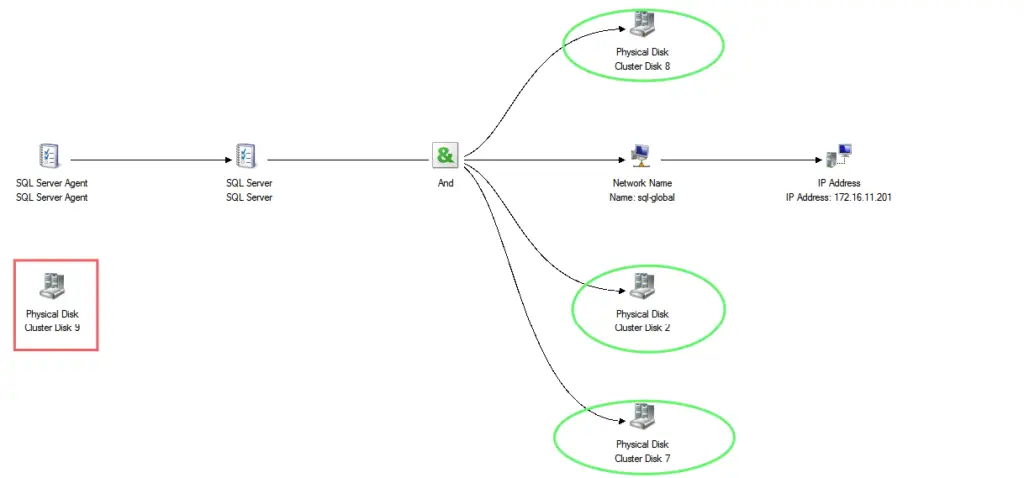
To add this dependency for your newly added physical disk, navigate to SQL Server Resource> Properties
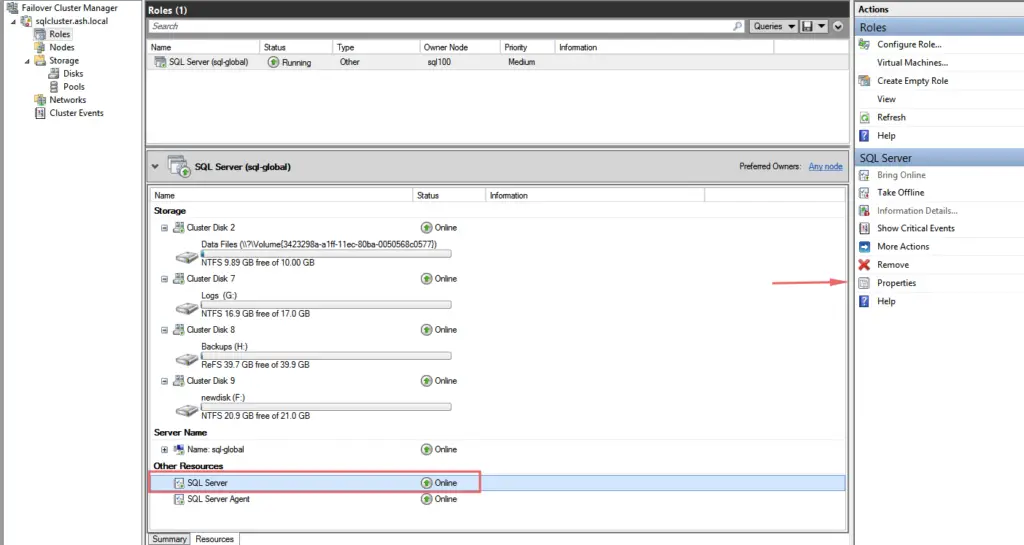
Go to the Dependencies tab

Add the newly created disk as add dependency as shown

Lets re-run the dependancy report to see if everything works.
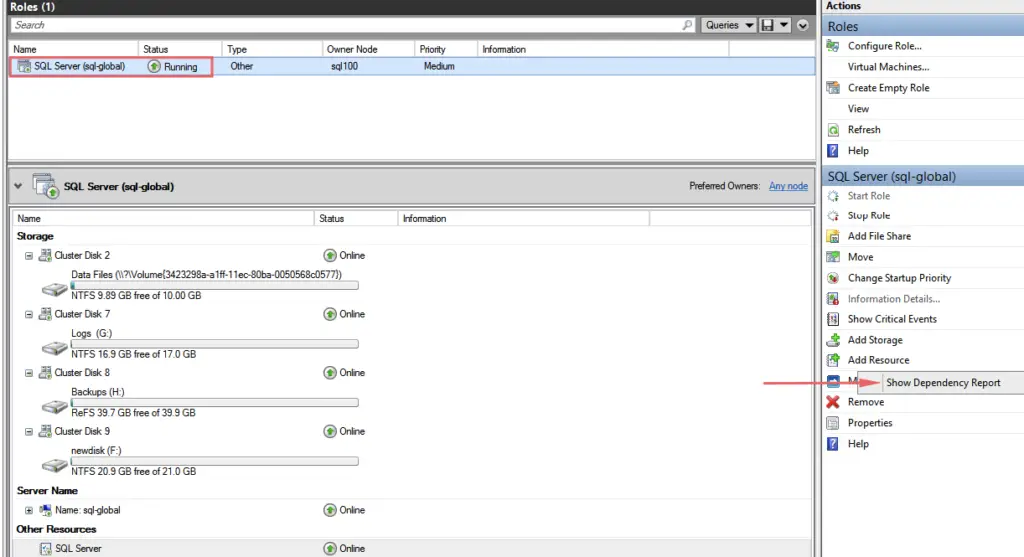
Our SQL Server dependency report now picks up the new disk added so now we should be able to run backups.
