In this blog, we will take a look at the site-to-site VPN configuration on Azure.
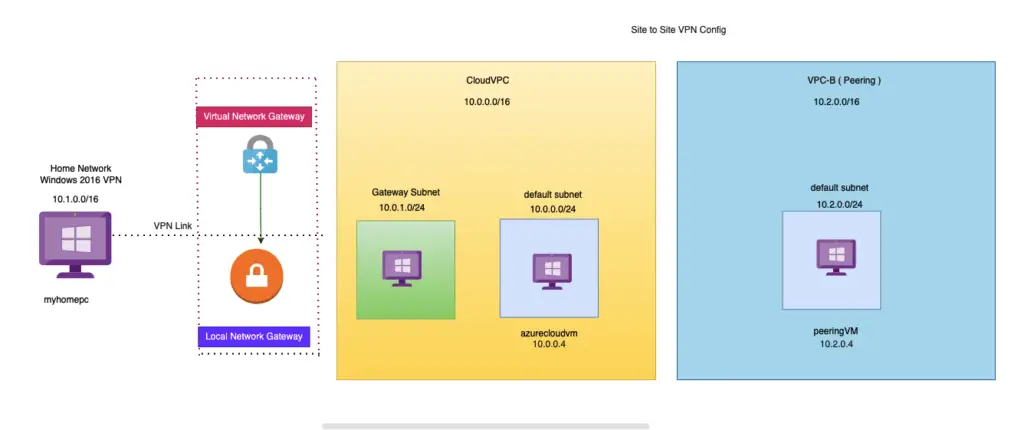
When you want to connect a handful of devices, we usually go for point to point VPN as we discussed earlier but when you want to have an entire dc connect to the Azure vNET securely, we use site-to-site VPN.
Prerequisites
- On the on-premise side, you need to have a VPN device that can route traffic via the Internet onto the VPN gateway in Azure. The VPN device can be a hardware device like a Cisco router or a software device ( e.g Windows Server 2016 running Routing and Remote services). The VPN device needs to have a publically routable IP address.
- The subnets in your on-premise network must not overlap with the subnets in your Azure virtual network
- The Site-to-Site VPN connection uses an IPSec tunnel to encrypt the traffic.
- The VPN gateway resource you create in Azure is used to route encrypted traffic between your on-premise data center and your Azure virtual network.
Provide the internal IP range as well from the company vm
1- I’ve created two vPC’s here – Home Network is just to mimic my home office environment

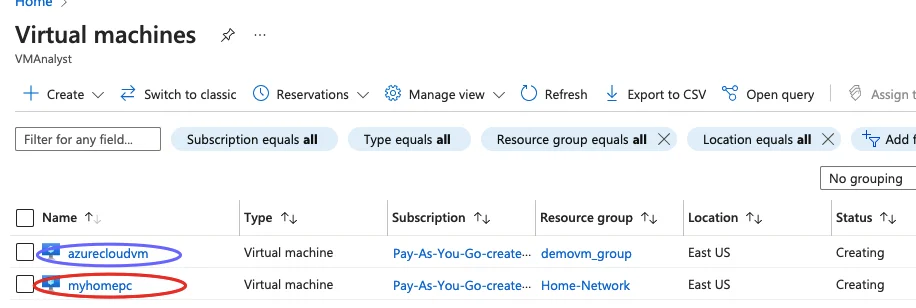
2- A VM is created in both these vPC’s
Site-to-Site VPN – Setting the gateway
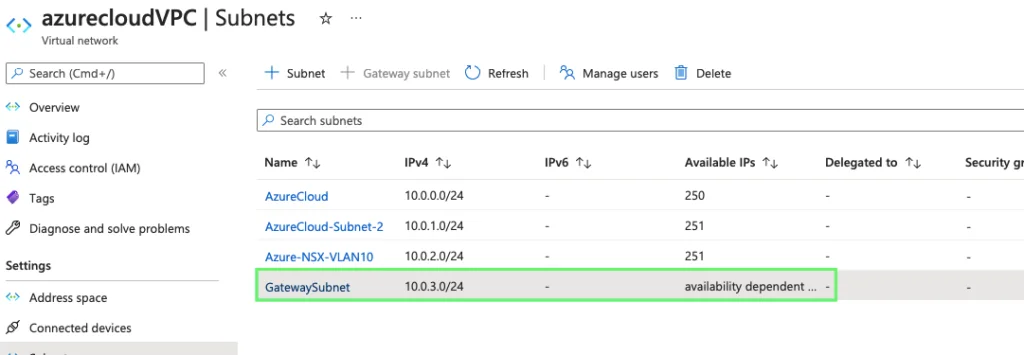
3- A gateway subnet is used to host gateway VM and services. The VMs in the gateway subnet is configured with the required VPN gateway settings. A gateway subnet is required for P2P VPN
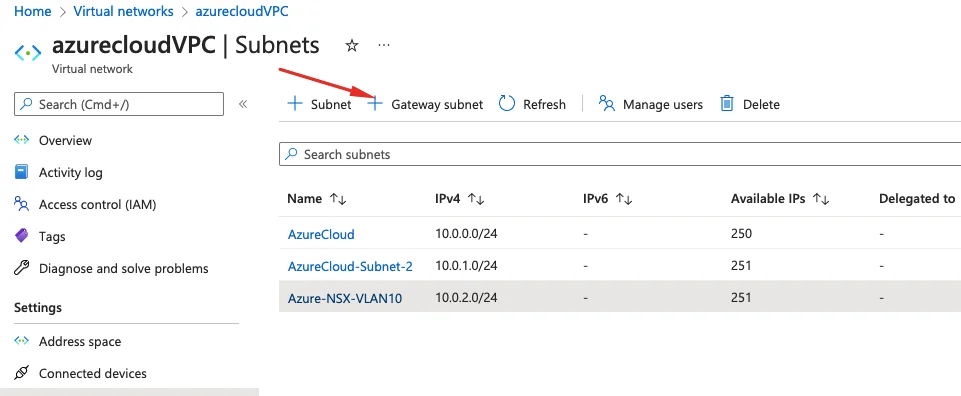
4- Define a subnet range
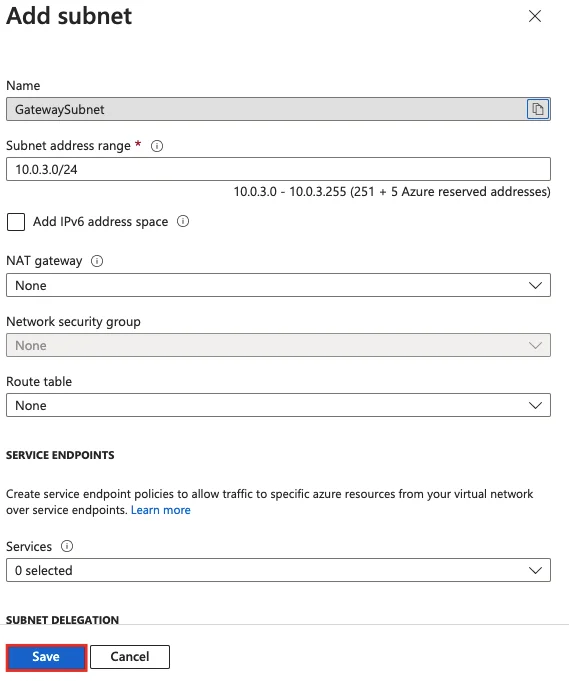
5- Our Gateway subnet is now ready
6- Go to the virtual network gateways and click Create

7- Virtual network gateway is a managed service from Azure.
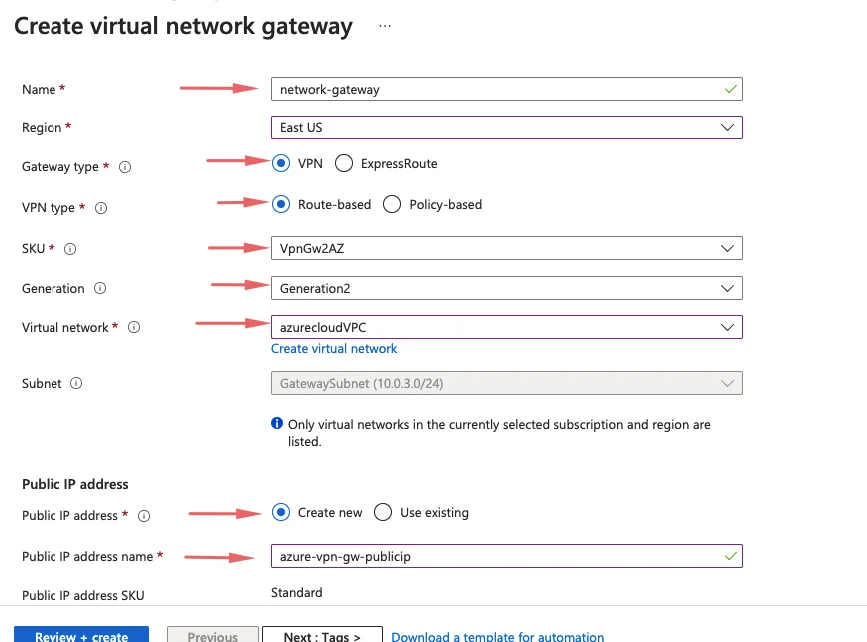
- Give a name – network-gateway
- Choose Gateway type as VPN
- Choose VPN type as Route-Based
- Select the SKU
- Choose the AzureCloud VPC as our virtual network to add the network gateway
- Add a public IP for our virtual network gateway
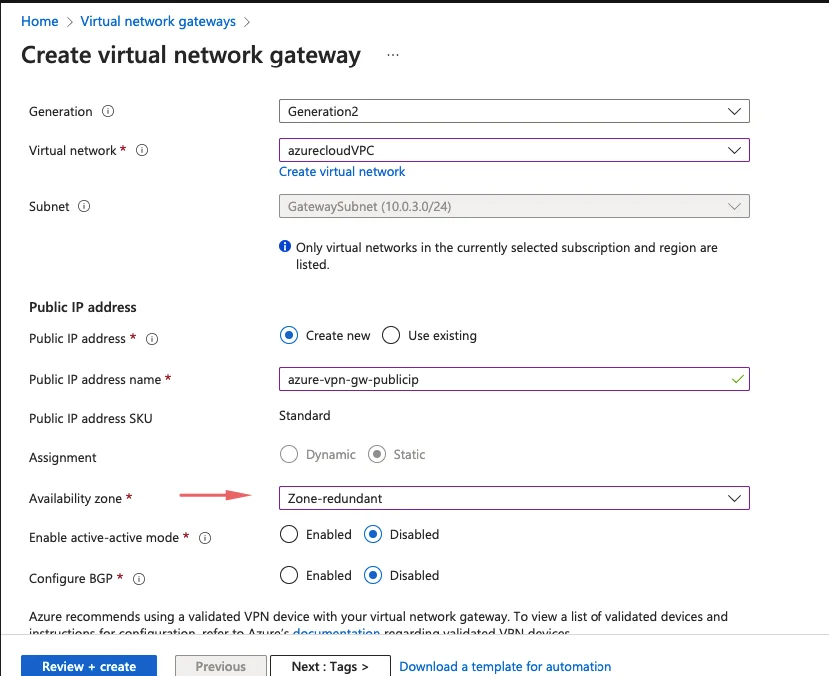
8- Choose the AZ as needed
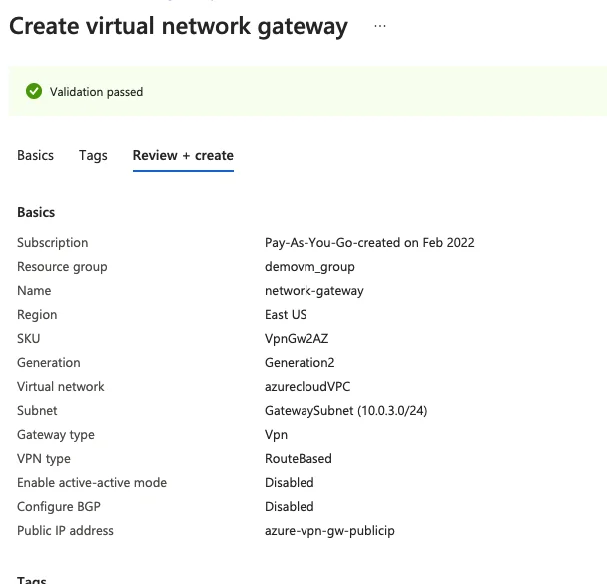
9- Validate the settings and create the virtual network gateway.
10- Our network gateway has been created

11- On the on-premise side, you need to have a VPN device that can route traffic via the Internet onto the VPN gateway in Azure. The VPN device can be a hardware device like a Cisco router or a software device ( e.g Windows Server 2016 running Routing and Remote services). The VPN device needs to have a publically routable IP address. On our Windows VM in our home network, we will install the Remote Access role.

12 – Enable Routing & Direct Access VPN

13 – Click Install

14 – Once that’s done, our next step will be to create a local network gateway.The local network gateway is going to have the info of our company set up so it understands the client network when it comes to the site-to-site VPN. The local network is going to the attached to the vNetwork gateway
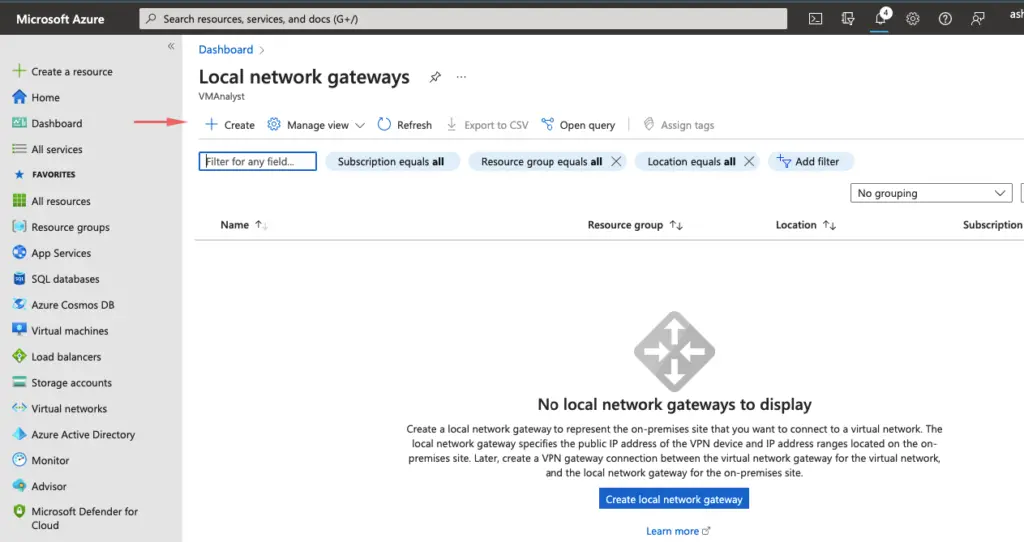
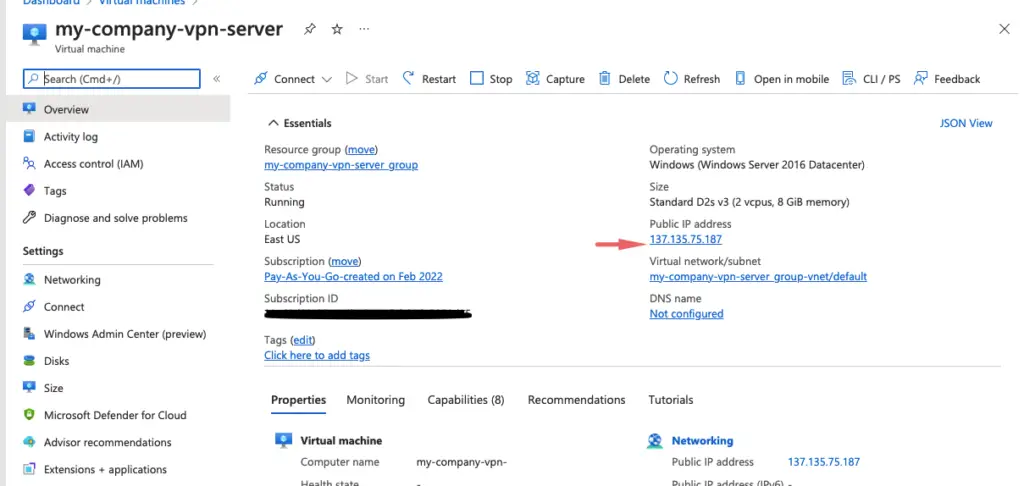
15- Give public routable IP of our company router so here it’s our VM. Give the public IP of the local server. local network gateway has a full idea of our company setup.
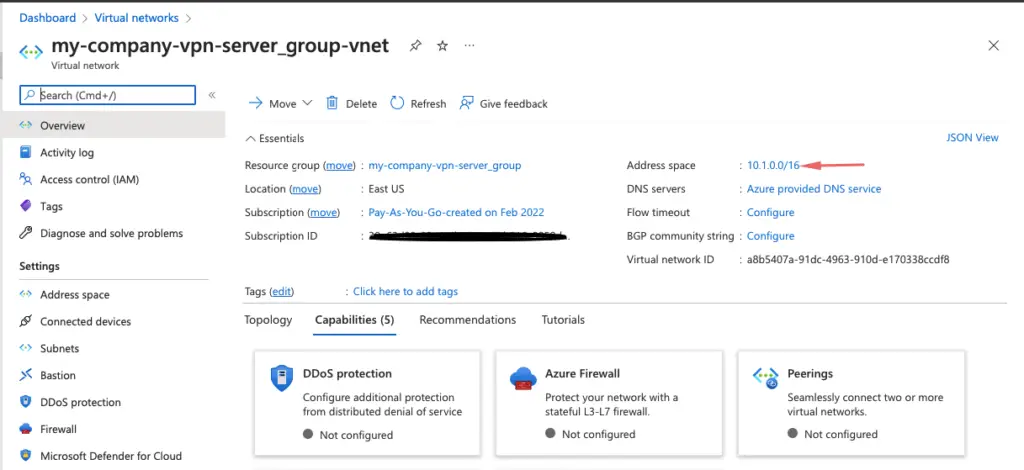
16- Copy the VPC CIDR block range
17- Give the public IP and the CIDR Block range
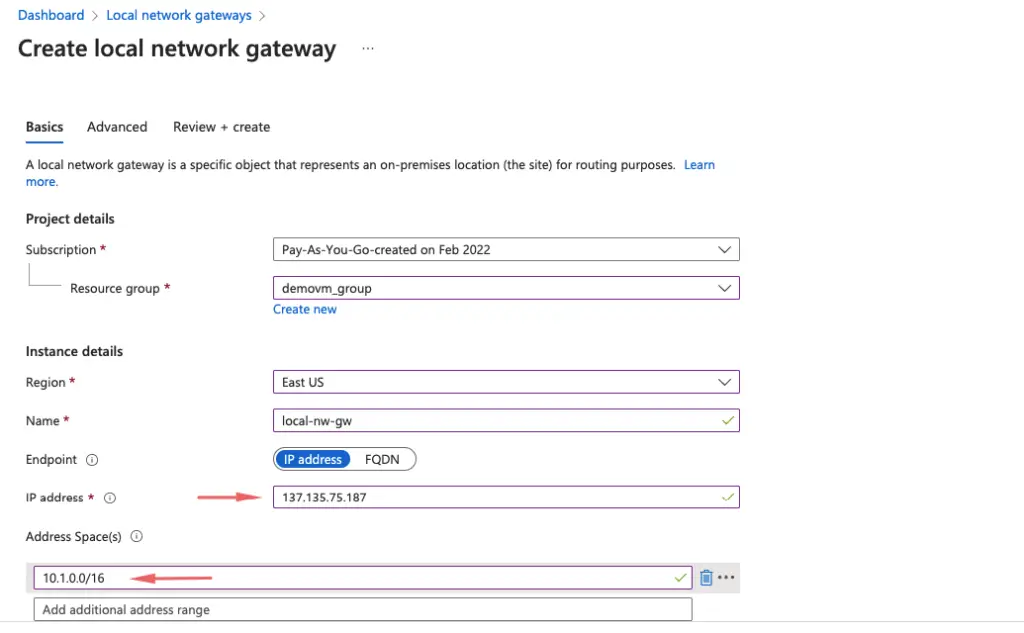
18- Click on create to finish creating a local network gateway.

19- Our local-nw-gw is thus created
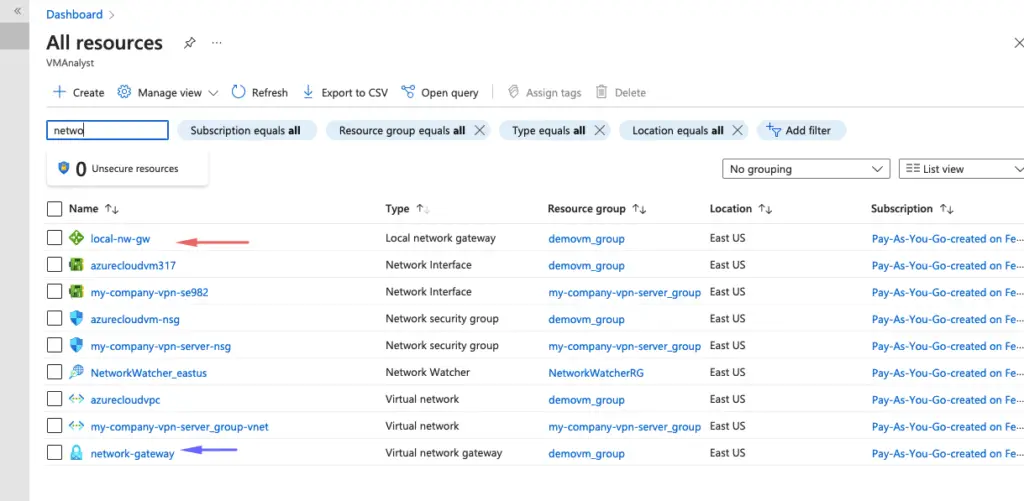
20- Under our network gateway, we will add connectivity between our virtual network gateway and local network gateway.
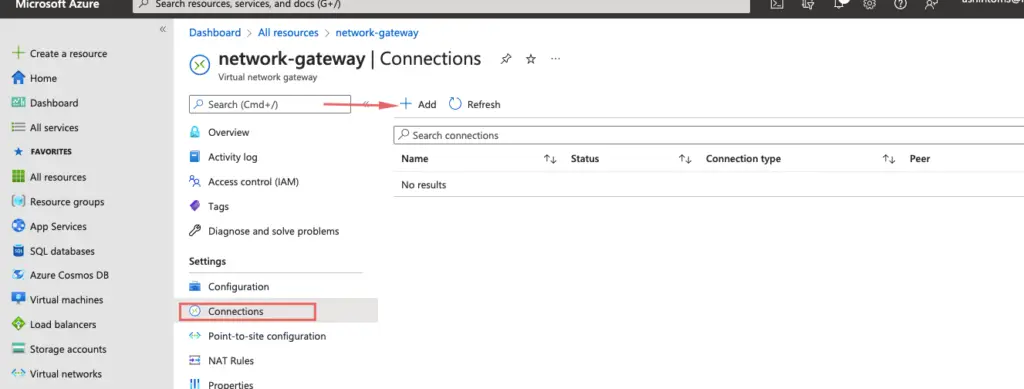

21- Choose the connection type as Site to Site ( IPSec ) and choose the shared key we created earlier.

22- Back on our home office VPN server, we will deploy our software VPN

23- Choose Deploy VPN

24- Choose custom configuration

25- Choose dial-up access and lan routing

26- Enable VPN service

27- Enable LAN and demand-dial routing

28- Choose the option to create a new dial interface.

29- Click Next to continue

30 -I’ll give my connection a name as Towards-Azure-VPC

31- Choose connect using VPN

32- Choose IKEv2

33- We will now need the public IP of our network gateway.
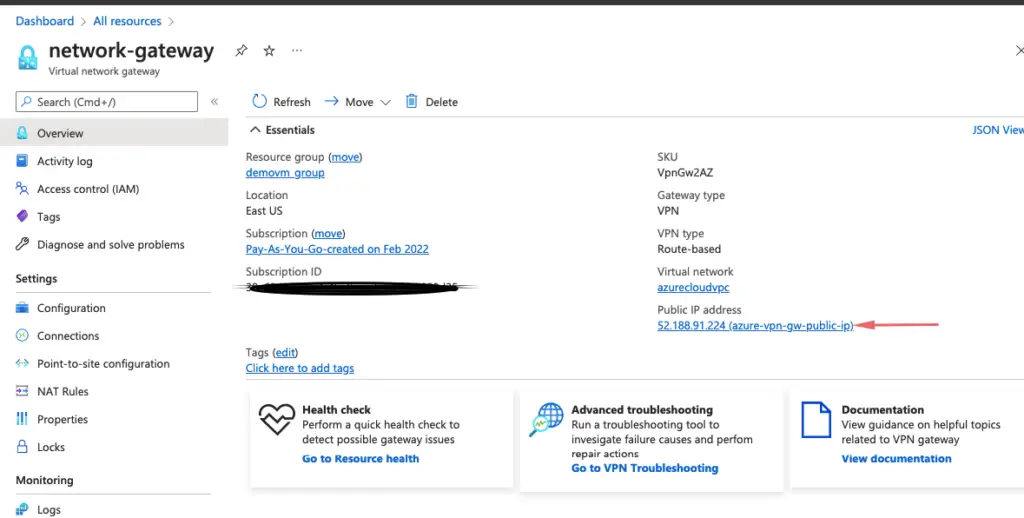
34- Provide the public IP

35– Choose option to Route IP packets on this interface

36 – We will now need to provide all the CIDR blocks on Azure so our home office VPN has knowledge of the networks in Azure.

37 – Give the CIDR range,network mask and metric as some value

38 – Validate the config

39 – We will just skip this section

40 – Click on Finish

41 – Our VPN link is thus established

42 – We will need to give the pre-shared key we created in Azure so they can exchange info
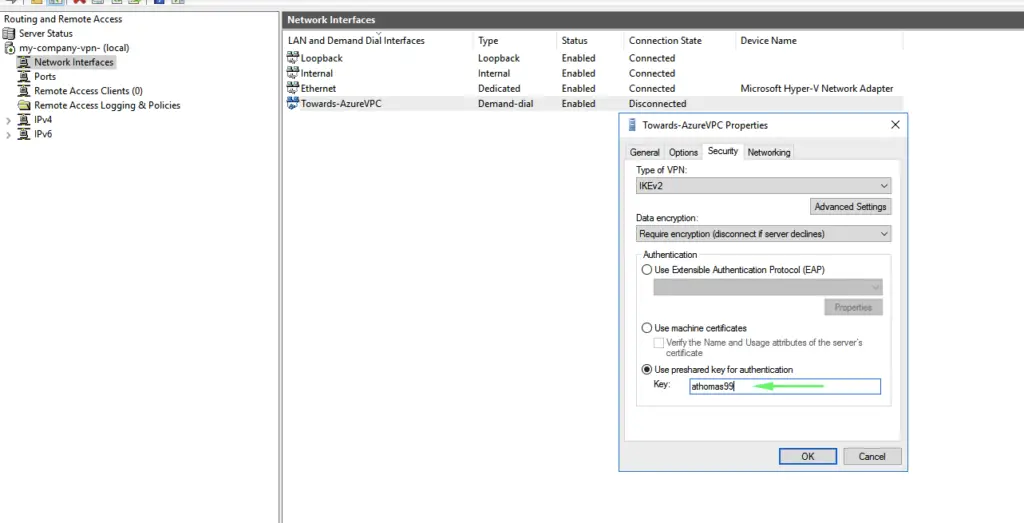
43 – Click on Connect

44 – Our VPN link to Azure is thus established so we have effectively connected our on-prem environment to `Azure vNET.


44 – From our home network, we are able to reach our Azure cloud VM

Site-to-Site VPN – Peering
This write-up would cover what’s needed for our company VM to understand a new VNET that’s being joined.
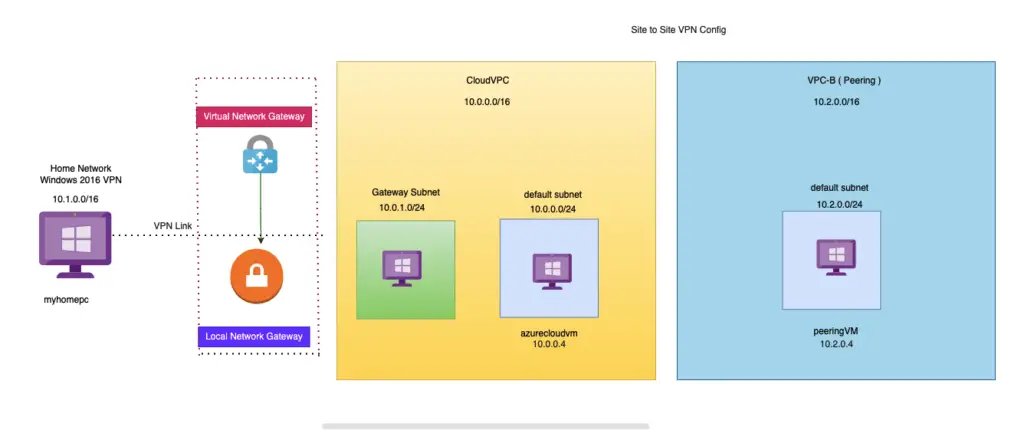
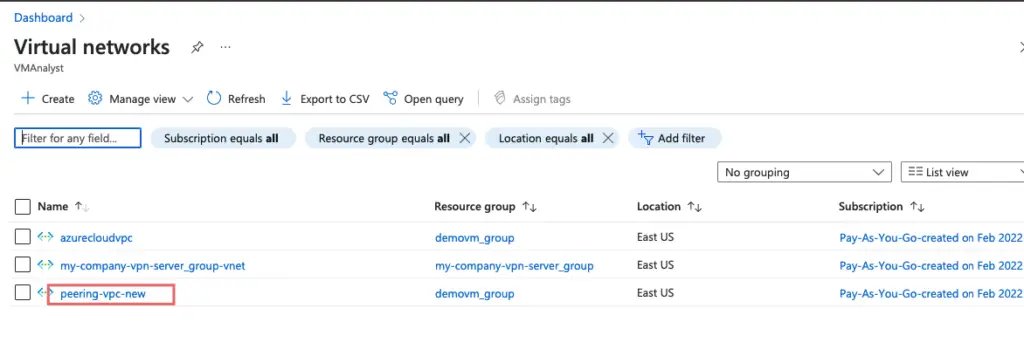
1– A new vNET named peering vpc is added and we will need to talk to this `VPC via our home office VPN.
2 – A VM is created inside our peering VPC

3 – The peering VPC has peered as well to our AzureCloud VPC
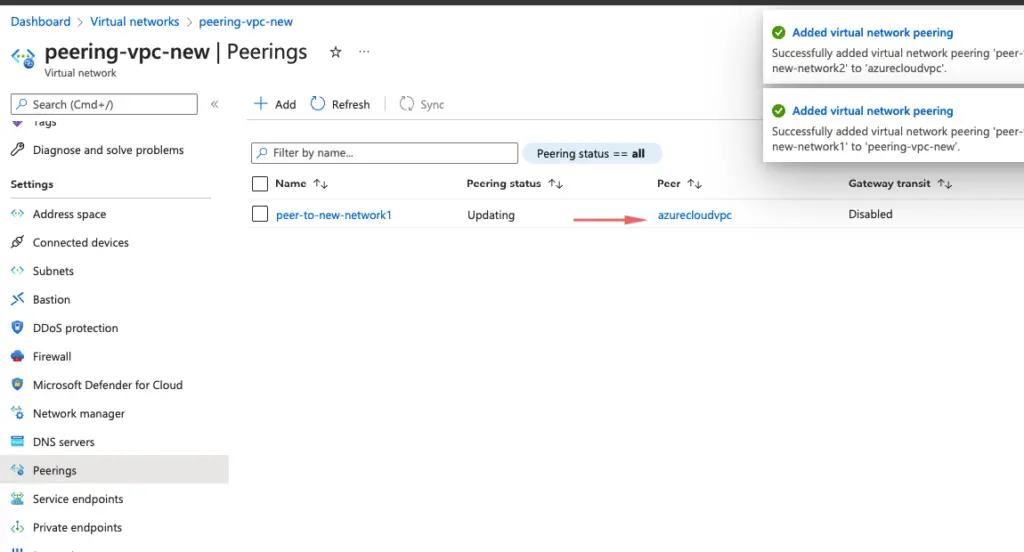
4 – A link has been established between AzureCloud VPC & peering VPC

5 – We now will not be able to talk to any servers inside our Peering VPC from our home office network as we need to make our home office VPN as well aware of this network.
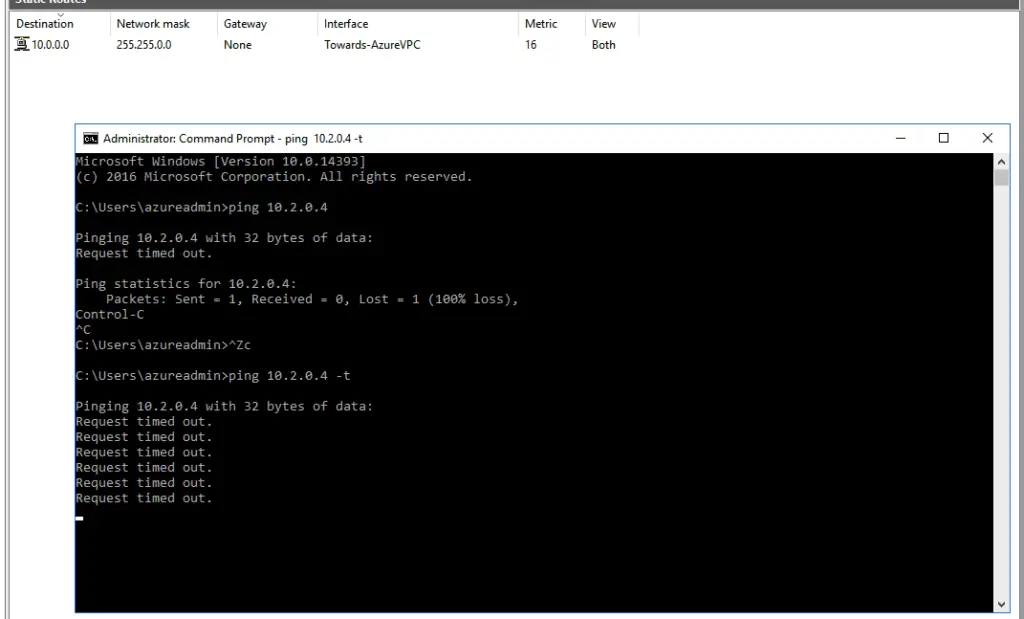
6 – Under the VPN Config on our Windows Home network VPN machine we will add the new VNET

6 – Give the new VNET CIDR range

7 – We should now be able to talk to our peering VM as well from our home network.

