

This guide explains how to remove a vSAN node from a healthy cluster so it can be repurposed for new VMware Cloud Foundation (vCF) deployments. To reuse the host for vCF vSAN deployments, it’s essential to remove the old partitions; otherwise, the host cannot be repurposed.
Ensure the cluster has enough space for one host removed by running pre-check.
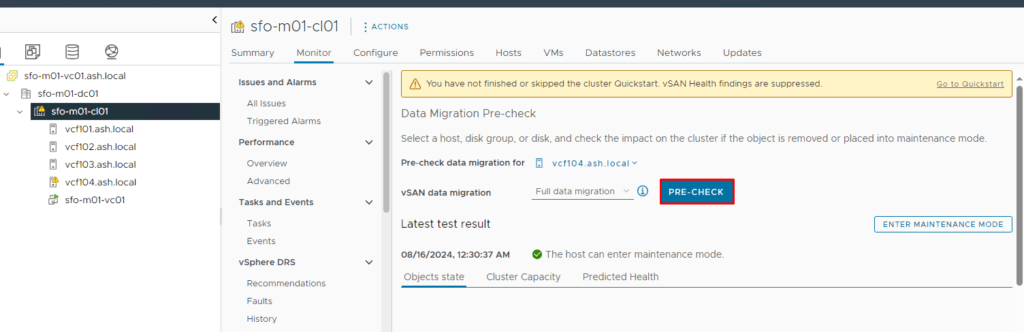
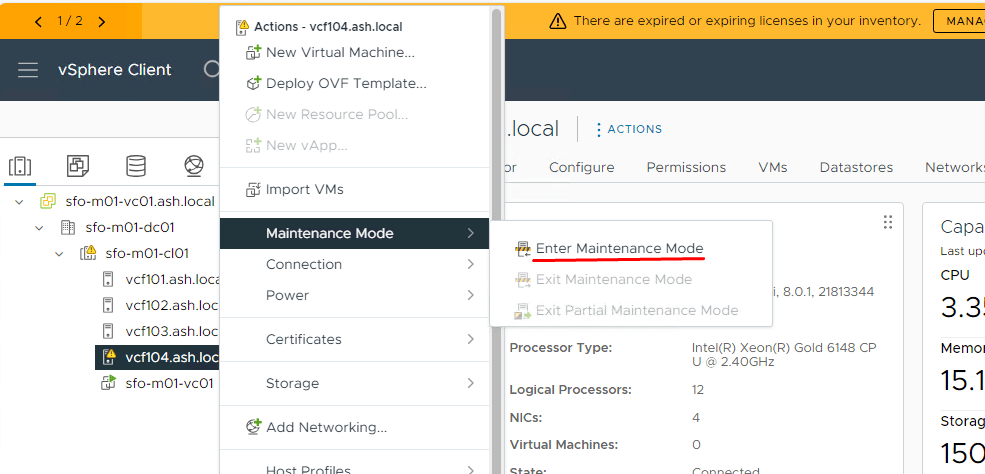
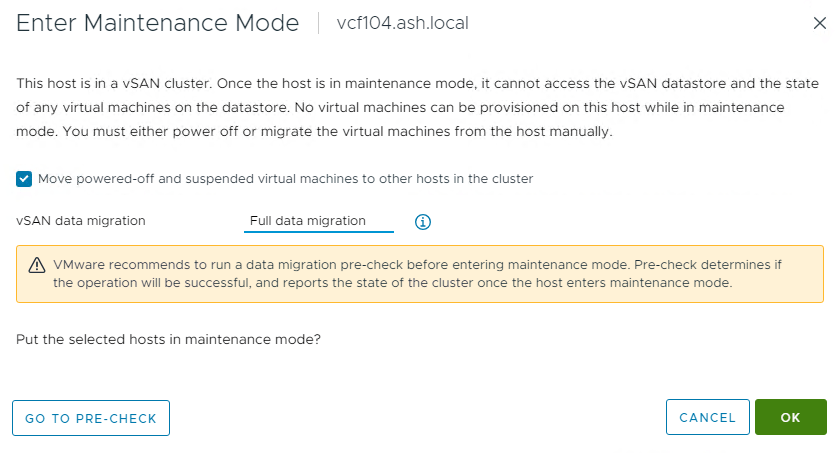
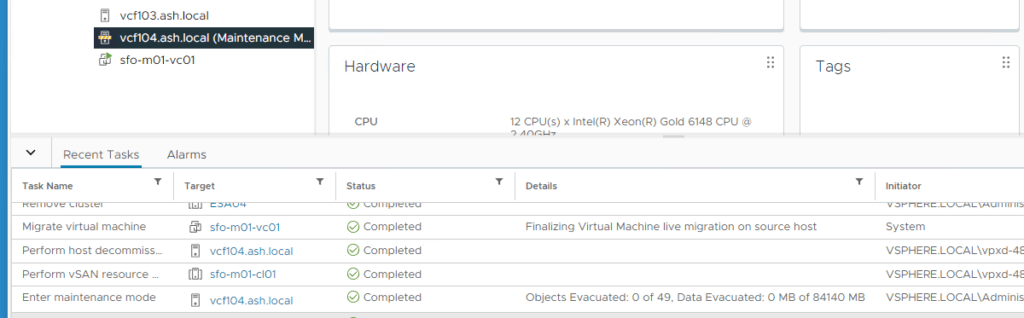
Place the host into maintenance mode
Choose Full data migration from the drop-down list as we’re going to decommission this host. Tick the box to move the powered-off and suspended VMs out from the host as well.
Monitor the progress of evacuation in the task pane. This operation could take a while depending on the amount of data to be removed from the host.
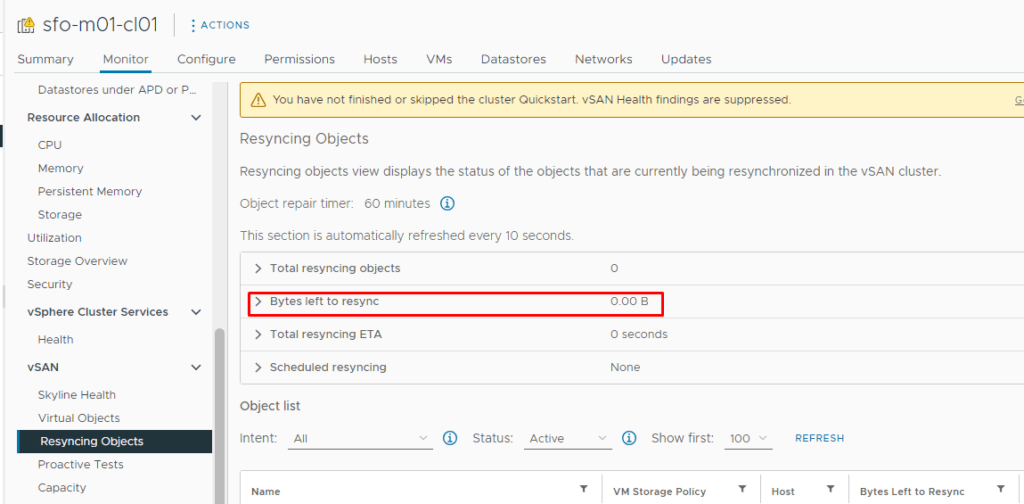
Monitor the status of Resyncing Objects
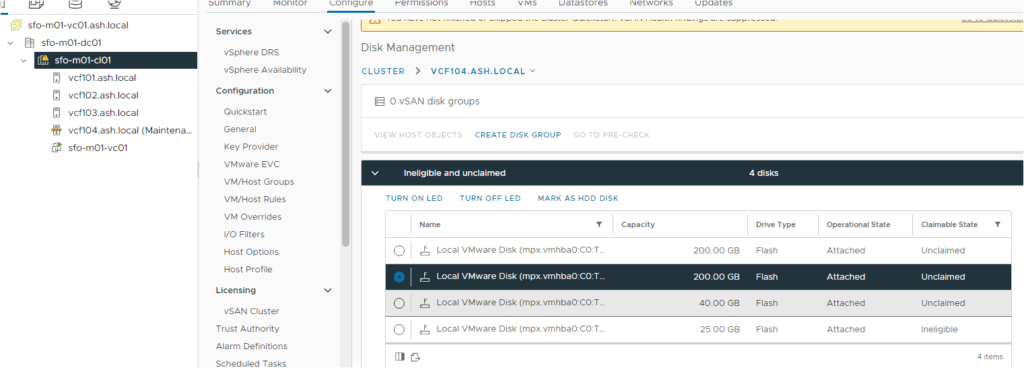
For vSAN 8 ESA remove the disks that reside on the host you want to decommission. Select the vSAN cluster>Configure>Disk Management>Select the host to be decommissioned>View Disks>Select the capacity disks>Remove Disk
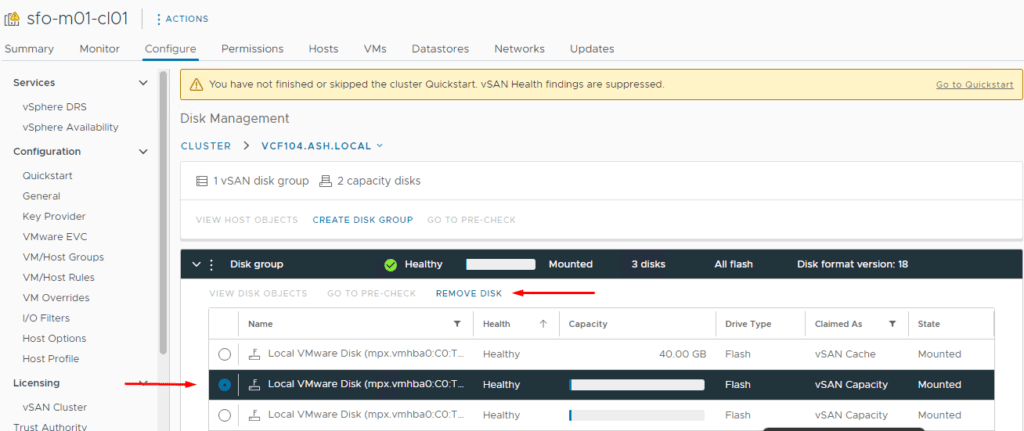
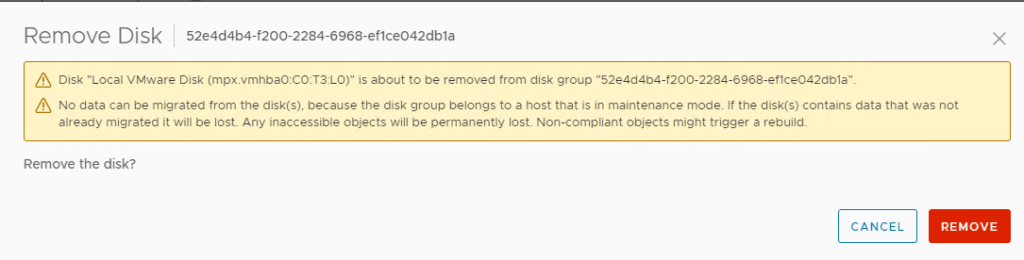
Select the capacity disk and click Remove Disk. Repeat this step if you have more than one disk that should be removed from the vSAN cluster.
Monitor the status of the removal
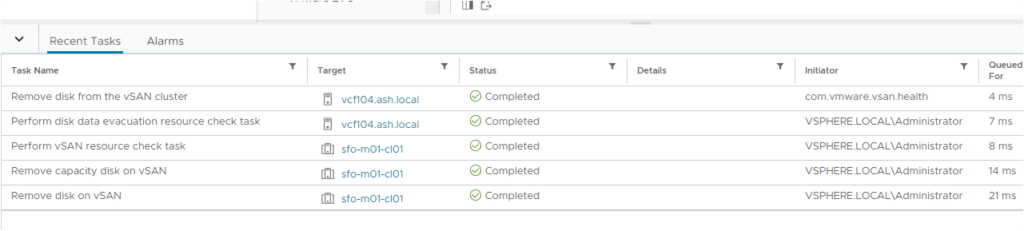
We should see that all the disks we just removed are now marked Unclaimed. The cache disk will automatically be removed once the last capacity disk is removed.
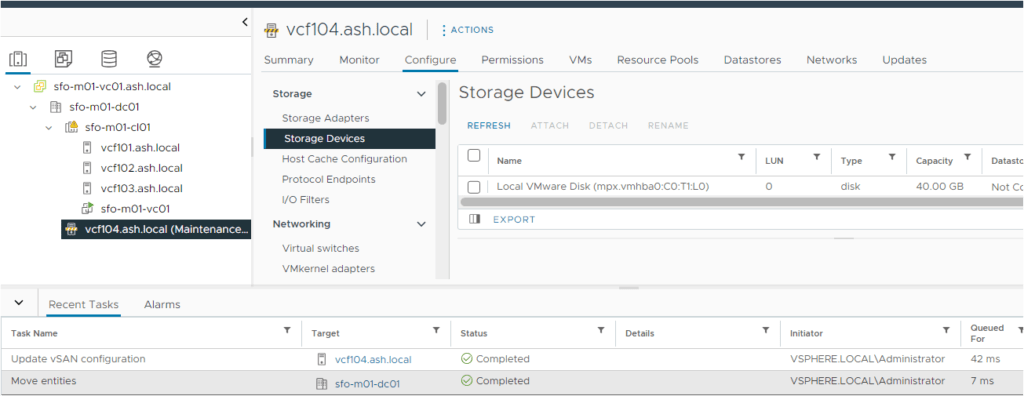
Remove the host out of the cluster
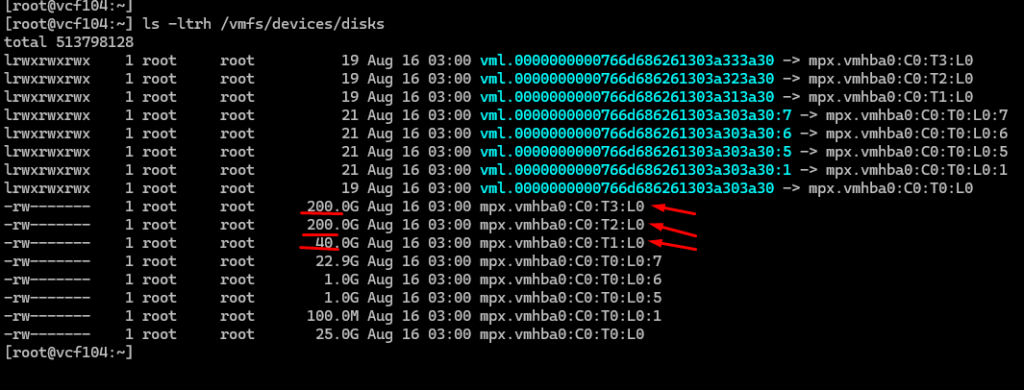
Reboot the host, log in via SSH, and run the following command. The output should be null.
esxcli vsan storage list | grep -i "vSAN Disk Group UUID"
The vdq -qi command provides detailed information about physical disks attached to an ESXi host, specifically their vSAN configuration and status.
root@vcf-esx402:~]
[root@vcf-esx402:~] vdq -qi
[
   {
      "Name"     : "eui.7ee6eebea1aa9310000c29696f854d19",
      "VSANUUID" : "52c25335-59e4-0b2d-8e96-b888326798ae",
      "State"    : "Ineligible for use by VSAN",
      "Reason"   : "Disk in use by storage pool",
"StoragePoolState": "In-use for Storage Pool",
"StoragePoolReason": "None",
      "IsSSD"    : "1",
"IsCapacityFlash": "N/A",
      "IsPDL"    : "0",
      "Size(MB)" : "26624",
    "FormatType" : "512e",
   "IsVsanDirectDisk" : "0"
   },

   {
      "Name"     : "eui.c5008a4bac798c08000c296bf37daa3a",
      "VSANUUID" : "5213e083-3a9d-957c-fc85-56657e16b5cd",
      "State"    : "Ineligible for use by VSAN",
      "Reason"   : "Disk in use by storage pool",
"StoragePoolState": "In-use for Storage Pool",
"StoragePoolReason": "None",
      "IsSSD"    : "1",
"IsCapacityFlash": "N/A",
      "IsPDL"    : "0",
      "Size(MB)" : "26624",
    "FormatType" : "512e",
   "IsVsanDirectDisk" : "0"
   },

   {
      "Name"     : "eui.3ca2cb5679a6366c000c2964207ed7c4",
      "VSANUUID" : "",
      "State"    : "Ineligible for use by VSAN",
      "Reason"   : "Has partitions",
"StoragePoolState": "Ineligible for use by Storage Pool",
"StoragePoolReason": "Has partitions",
      "IsSSD"    : "1",
"IsCapacityFlash": "0",
      "IsPDL"    : "0",
      "Size(MB)" : "25600",
    "FormatType" : "512e",
   "IsVsanDirectDisk" : "0"
   },
To display all partitions and disks on the ESXi host, you can run the following command:
esxcli storage core device listThis command lists all storage devices along with their details.
If there are vSAN partitions present, the disk will have a partition ID appended to the suffix, indicating the presence of a partition.
If there are no vSAN partitions on the disk, you’ll see the disk listed without any partition ID.
Get vSAN Partitions Manually
partedUtil get /vmfs/devices/disks/
Remove vSAN Partitions Manually
[root@vcf-esx401:~] partedUtil delete /vmfs/devices/disks/eui.0ed2fc0e07843cde000c296b2373cf77 1
[root@vcf-esx401:~] partedUtil delete /vmfs/devices/disks/eui.0ed2fc0e07843cde000c296b2373cf77 2
Verify the Disk is Clean
partedUtil get /vmfs/devices/disks/Finally, reboot the host