In this blog, we will take a look at the point-to-point VPN configuration on Azure.
A Point-to-Site VPN connection is used to establish a secure connection between multiple client machines in your customer sites/on-prem to the private network in Azure via our Internet. This sort of connectivity is used when you have a few staff connecting to Azure VMs ( say 10 users ). If a more dedicated connection is required, we go for another VPN called a Site to-Site VPN.
Prerequisites to Establishing P2P VPN
- The connection needs to be private and secure
- Point-to-Site VPN – Initial Setup
- Point-to-Site VPN – Setting the gateway
- Point-to-Site VPN – Certificates for authentication
- Point-to-Site VPN – Establishing the connection
Point-to-Site VPN – Initial Setup
Below is a diagram from the Microsoft documentation on a sample scenario
https://azure.microsoft.com/en-us/pricing/details/vpn-gateway/

- This sort of connection is based off certificates for authentication.
- You need to have a root certificate in place that needs to be uploaded to Azure for the point-to-site connection.
- A client certificate needs to be generated from the root certificate. This client certificate needs to be on each client computer that needs to connect to the Azure virtual network via the Point-to-Site connection.
- To generate the certificates, you can use a Certificate authority or generate a self-signed certificate using PowerShell. Some commands are given below
1- I’ve created two vPC’s here – Home Network is just to mimic my home laptop

2- A VM is created in both these vPC’s

Point-to-Site VPN – Setting the gateway
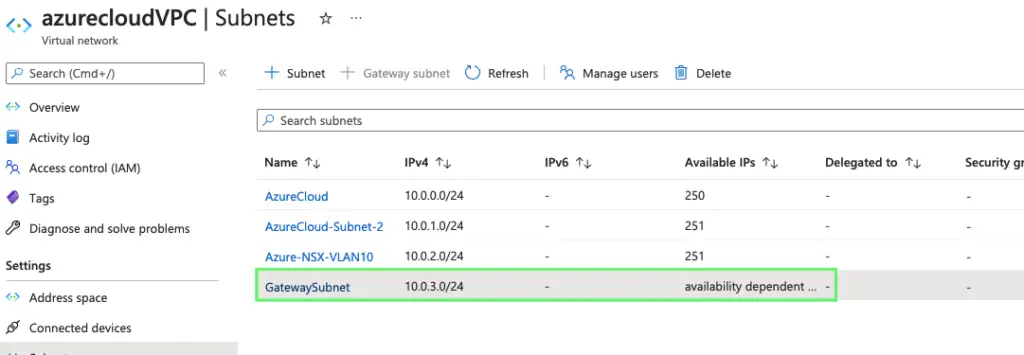
3- A gateway subnet is used to host gateway VM and services. The VMs in the gateway subnet is configured with the required VPN gateway settings. A gateway subnet is required for P2P VPN

4- Define a subnet range

5- Our Gateway subnet is now ready

6- Our Gateway subnet is now ready

7- We will now need to create a virtual network gateway. It’s a managed service from Azure.
- Give a name – network-gateway
- Choose Gateway type as VPN
- Choose VPN type as Route-Based
- Select the SKU
- Choose the AzureCloud VPC as our virtual network to add the network gateway
- Add a public IP for our virtual network gateway

8- Choose the AZ as needed

9- Validate the settings and create the virtual network gateway.

10- Our network gateway has been created

11- Choose Point to point site configuration > Configure new

Point-to-Site VPN – Certificates for authentication
12 -Trusts are established by client laptops using certificates
We will create our root cert and create a client cert from the root but normally this is created from a central CA but for the lab we are good.
https://docs.microsoft.com/en-us/azure/vpn-gateway/vpn-gateway-certificates-point-to-site
/ To generate the root certificate

$cert = New-SelfSignedCertificate -Type Custom -KeySpec Signature ` -Subject "CN=VPNrootcert" -KeyExportPolicy Exportable ` -HashAlgorithm sha256 -KeyLength 2048 ` -CertStoreLocation "Cert:\CurrentUser\My" -KeyUsageProperty Sign -KeyUsage CertSign

// To generate the client certificate out of the root cert

New-SelfSignedCertificate -Type Custom -DnsName P2SChildCert -KeySpec Signature ` -Subject "CN=VPNclientcert" -KeyExportPolicy Exportable ` -HashAlgorithm sha256 -KeyLength 2048 ` -CertStoreLocation "Cert:\CurrentUser\My" `-Signer $cert -TextExtension @("2.5.29.37={text}1.3.6.1.5.5.7.3.2")

13 -Under Certificates, we can see both the certificates listed

14 Right-click the root cert and choose to export the cert

15- Choose to not export the private key

16- Choose Base-64 encoded key

17- Save the cert to our desktop

18- Finish the wizard

19- Open the cert file in notepad and copy the section highlighted

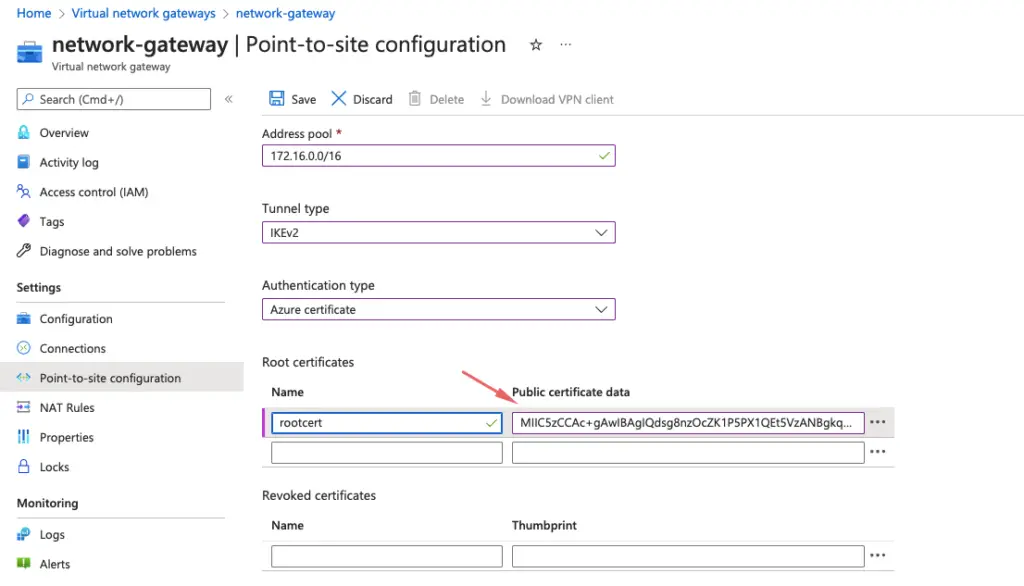
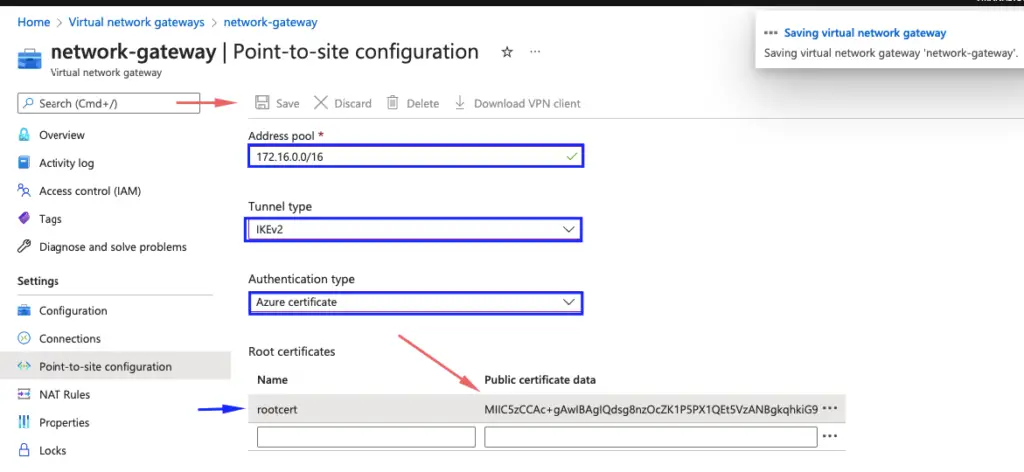
20- Paste the certificate data in the section as shown

21- We will need the following details here
- Address pool – This is the range of IP our client machines will get for VPN
- Tunnel type – IKEv2
- For authentication – use Azure certificate in our case

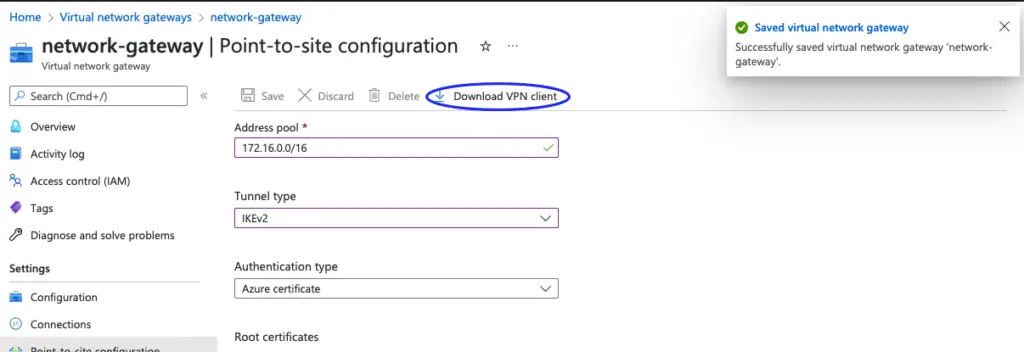
22- Once its saved, we will have an option of downloading the VPN Client

Point-to-Site VPN – Establishing the connection
23- Download the vpn client and install it on your PC

24- Our Point to Site has been established

25- Ping to the peer VM private IP


