
In this blog, we will attempt to patch a vCHA-enabled vCenter 6.5 which has a slightly different process than patching a vCenter 7 vCHA cluster which is documented here – for vCenter7.0 vCHA Patching follow this blog
Prerequisites for Patching vCHA enabled vCenter 6.5
At a high level, the process to patch a vCHA enabled vCenter 6.5 is that we follow this approach
- Patch Witness Node
- Patch Passive Node
- Failover from Passive to Active Node
- Patch Active Node
We will need to ensure the following tasks are done in right order for patching the vCHA enabled vCenter 6.5
- Single Sign-On administrator password
- vCHA cluster mode must be enabled and healthy.
- Ensure your vCenter Appliance UI is healthy
- Ensure you backup your vCenter appliance.
- Snapshot your vCenter.
- Export of your vDS switch config
- Make a note of the esx host running the vCenter.
- Verify if the vCPU/vMEM is enough for the vCenter, if not increase it.
- Network latency between vCHA and vCenter management should be under 10 ms.
- Disk latency between vCHA and vCenter management should be under 10 ms.
Patching
It’s always a good idea to do your research before upgrading or patching your vCenter . Along with reading the release notes, verifying the VMware compatibility Matrix of esxi, vDS switches, vCenter, and NSX-T/V are essential just to rule out if the current topology has some existing incompatibility issues.
Here are the relevant web links
- vCenter and ESXi Compatibility Matrix
- NSX and vCenter Server Compatibility Matrix
- VMware Patch Download Center
- Official vCHA Patching Guide
- Tips for Patching
- Build numbers of vCenter and ESX
The write up below covers the process to patch a vCenter deployed as VCHA Basic Deployment in vCenter 7.0.X.
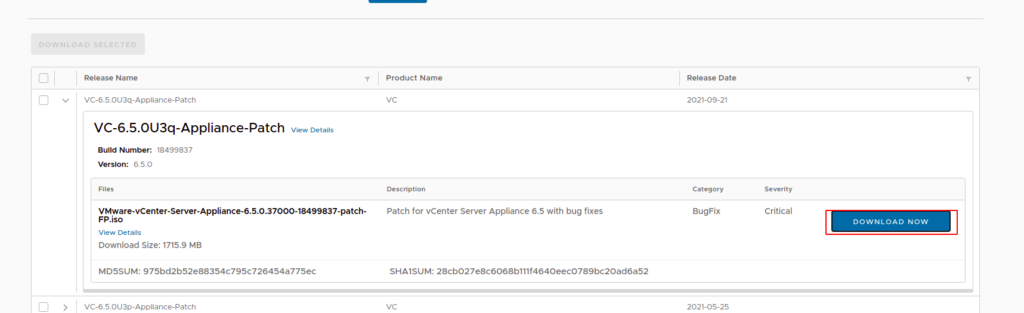
Download latest vCenter 6.5 patch
Login to the vCenter appliance mode as https://sfo-m01-vc02.ash.local:5480/#/ui/summary to show the version of vCenter
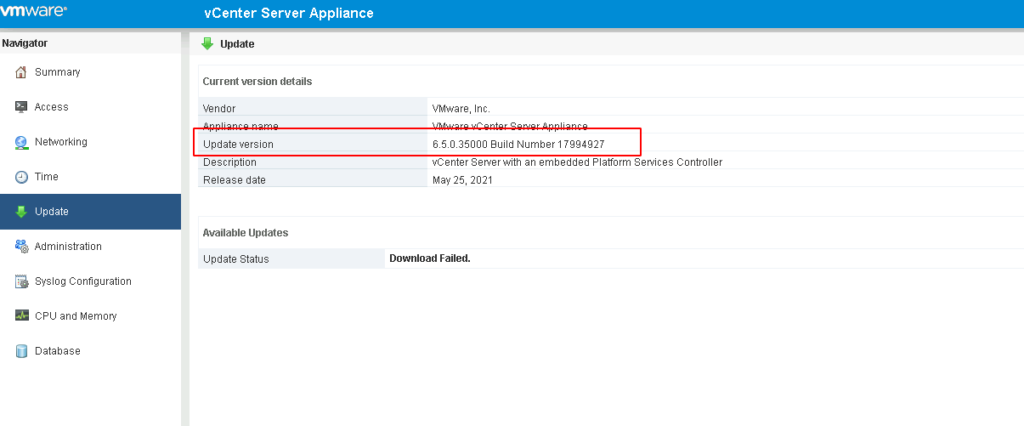
To download the patch from our vCenter, browse to the VMware Patch Download Center and search for our version of vCenter
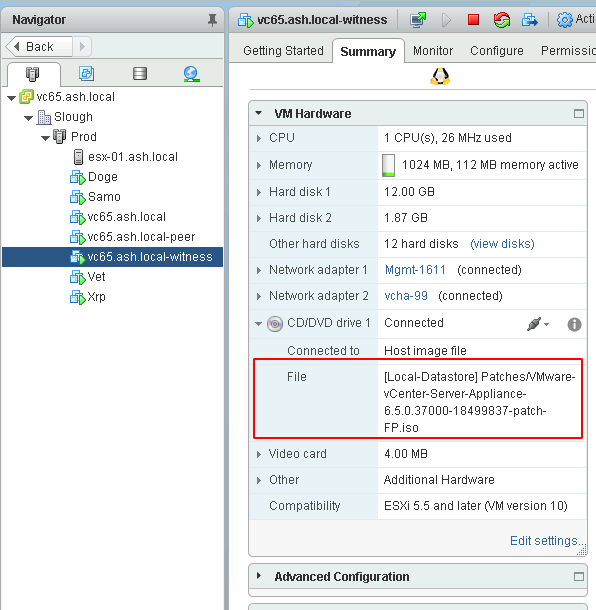
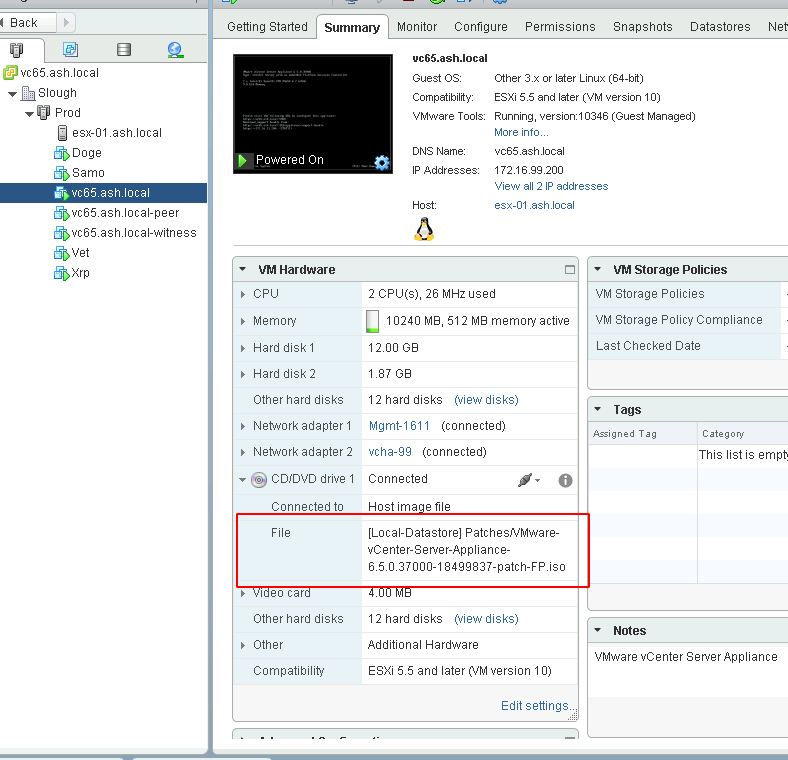
Upload the ISO file to a location on your datastore
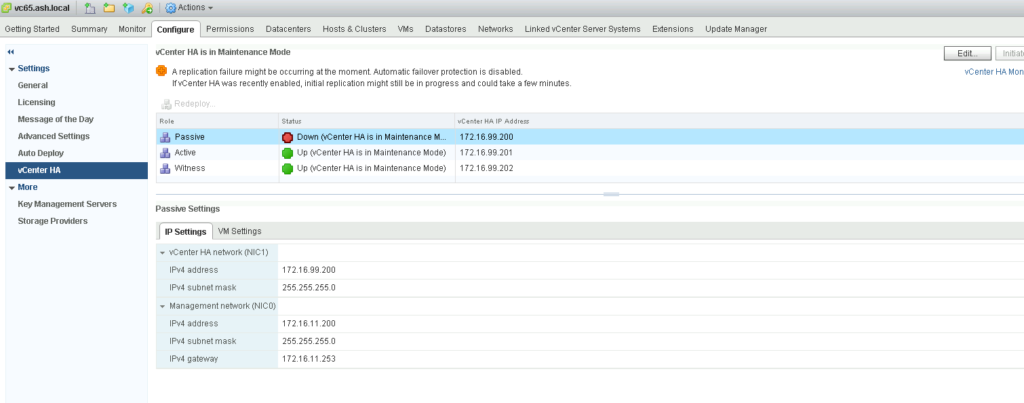
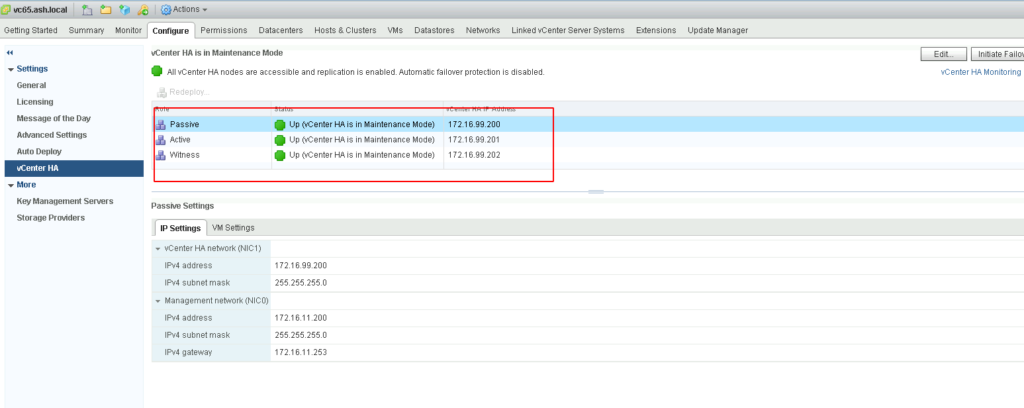
Put the HA cluster in Maintenance Mode
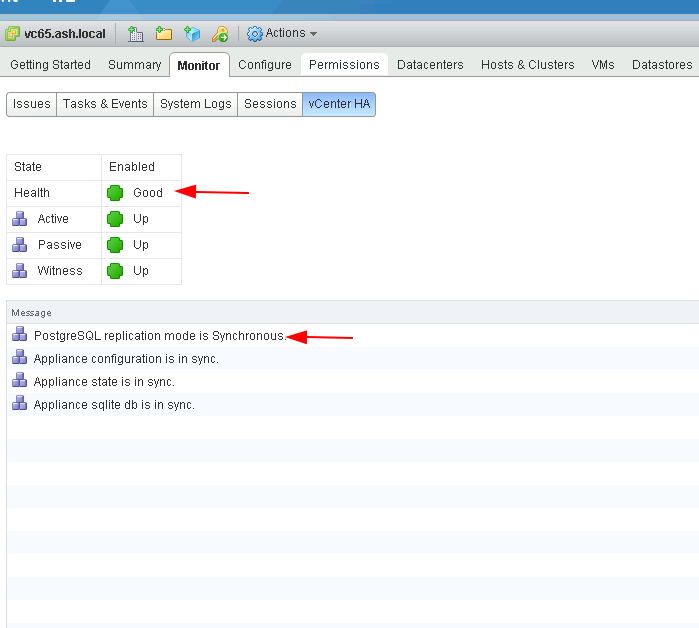
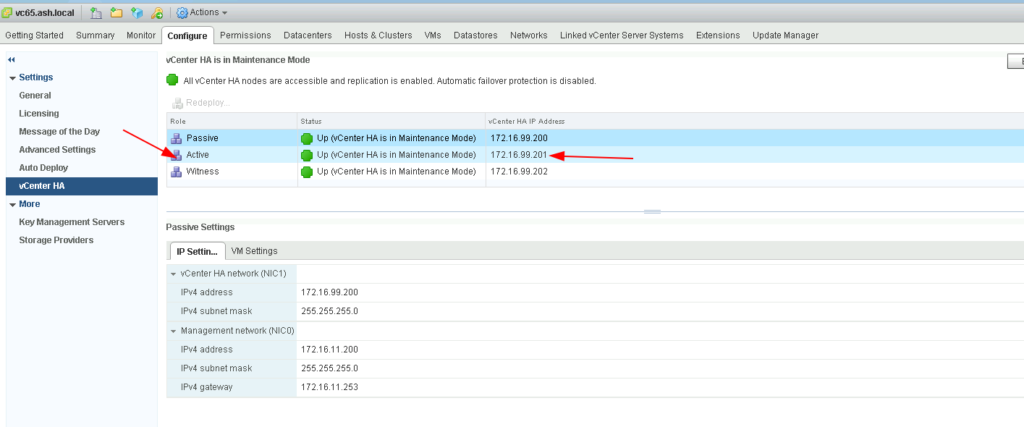
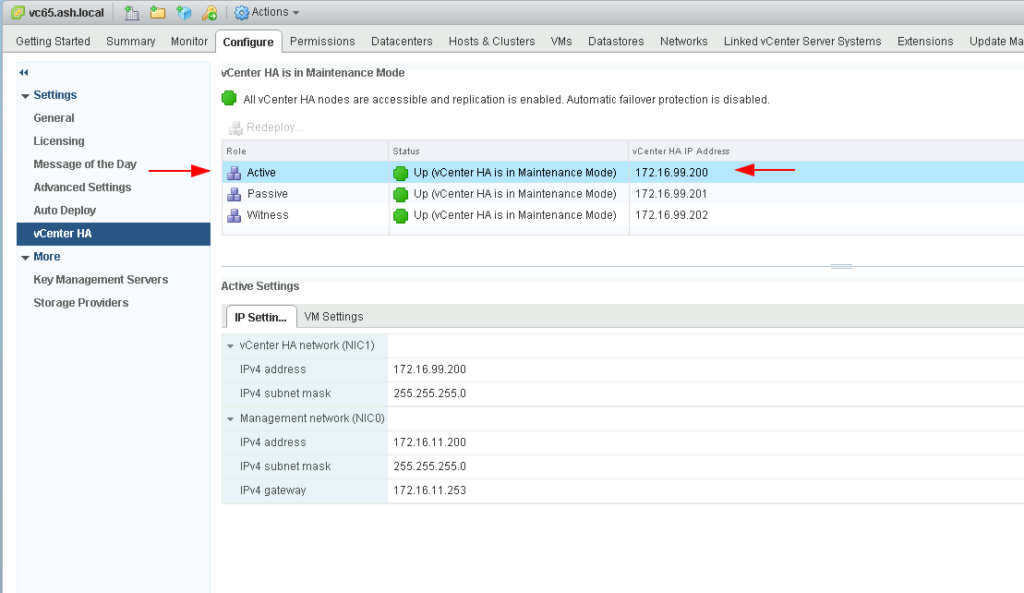
Log in to vCenter 6.5 using the Web Client to see the vCHA configuration. If you are logged in via the UI, you will not see the vCHA configuration in 6.5 version
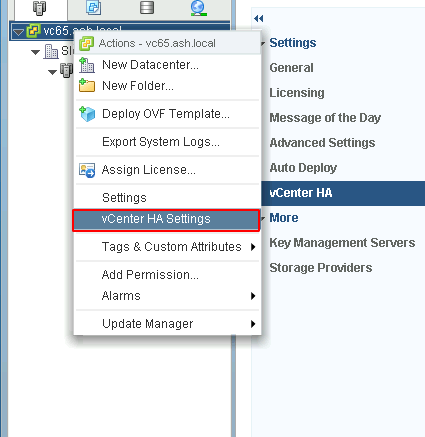
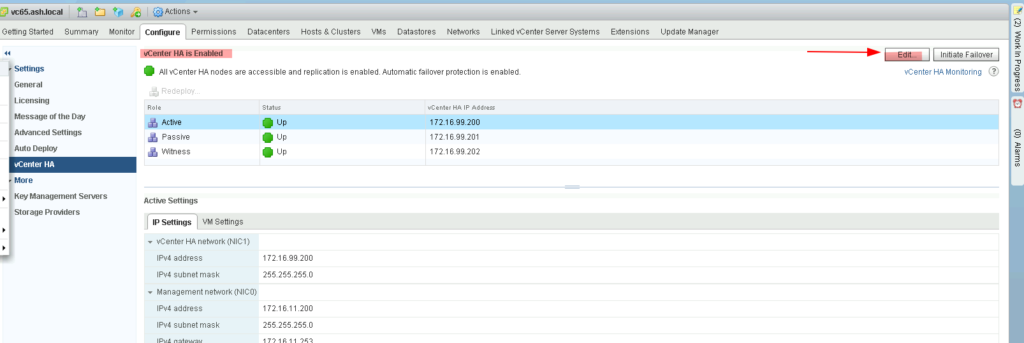
If your vCHA cluster is configured correctly, you will see vCenter HA as enabled and everything will show in Green
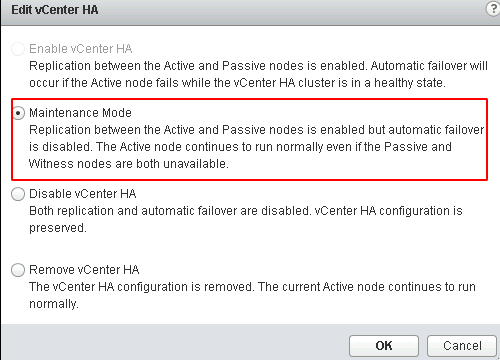
Select Maintenance Mode then click OK.
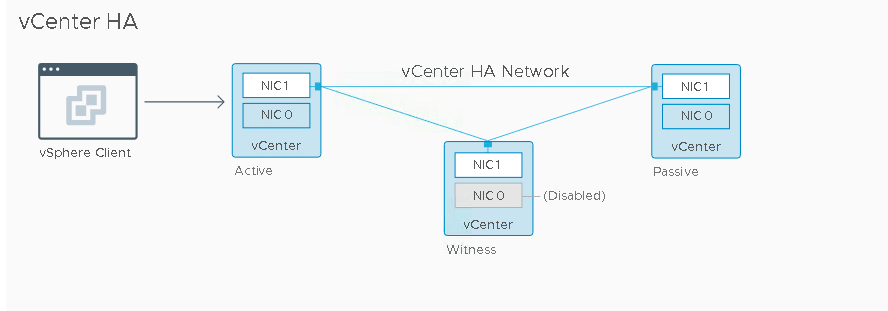
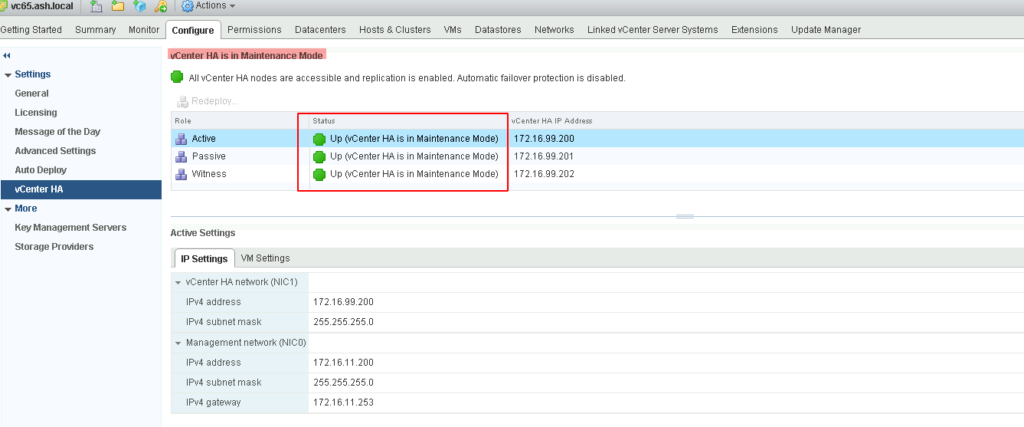
Make a note of the IP address of the Active – Passive and Witness node as we need these shortly to login via ssh. vCenter HA is now in Maintenance Mode, replication still works but automatic failover is disabled.
Patching the Witness node
The first action for patching a vCHA enabled cluster is to patch the Witness Node so lets mount the ISO we downloaded earlier to the witness vCenter
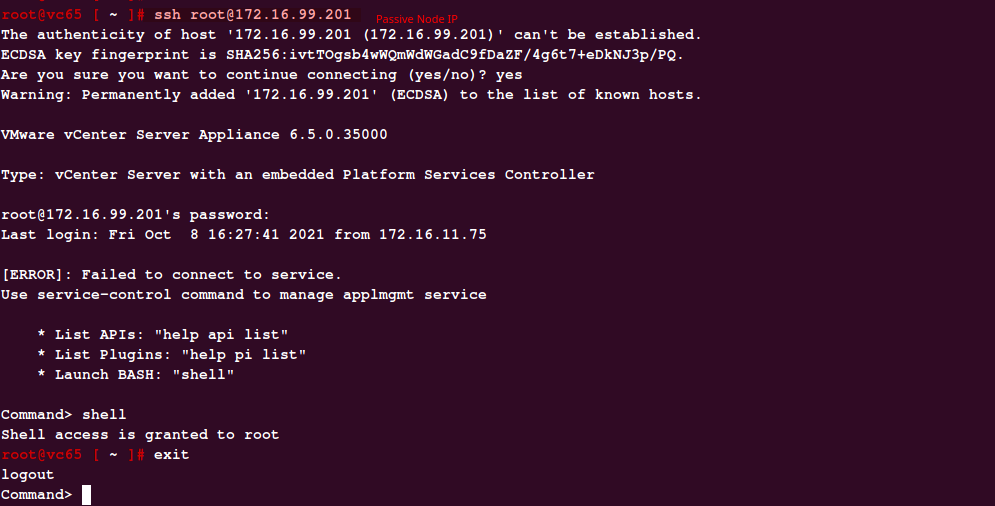
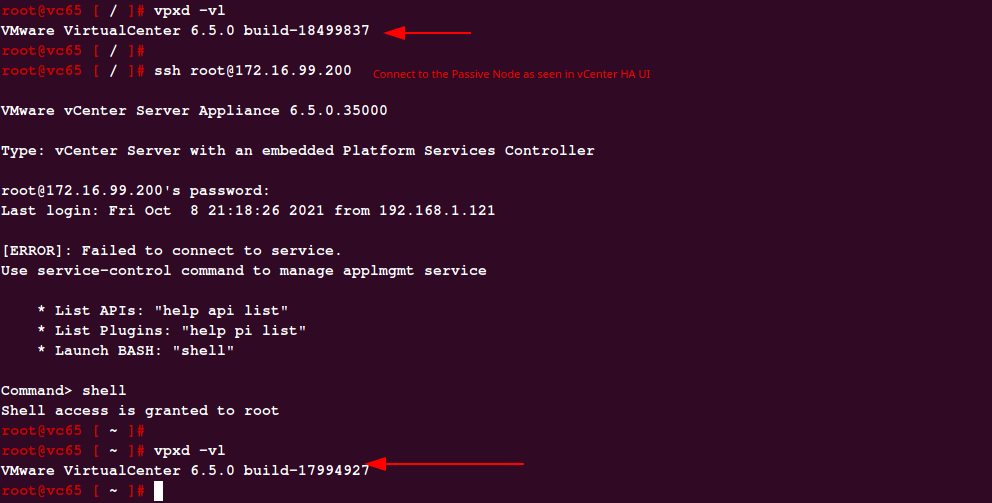
Establish an ssh to the actiive vCenter as shown
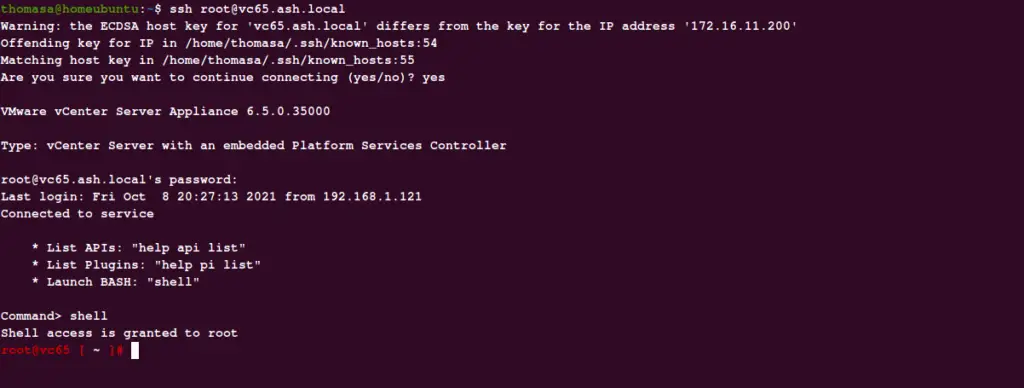
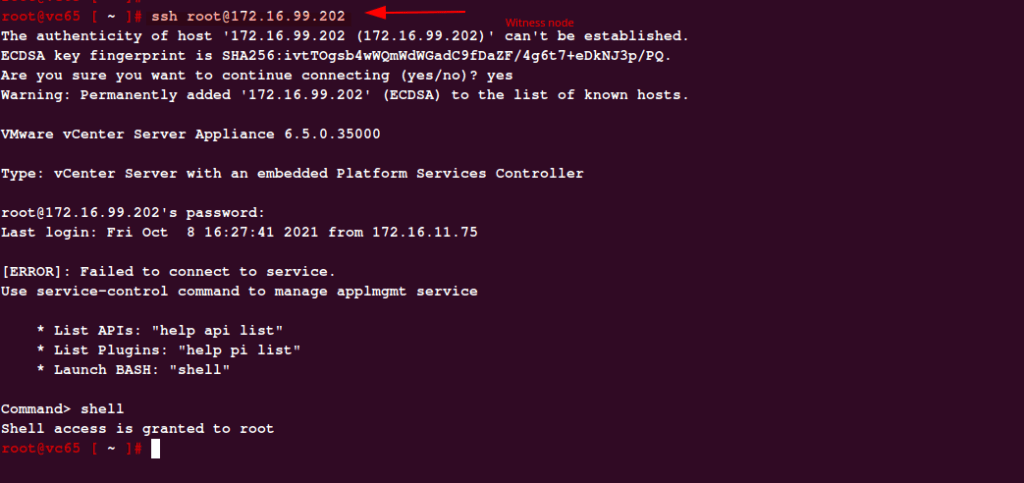
From the SSH console of the Active node, connect the Witness node via SSH
# ssh root@ip_address_witness
To install the patch bundle, all we need to do is to run this command
# software-packages install –iso –acceptEulas
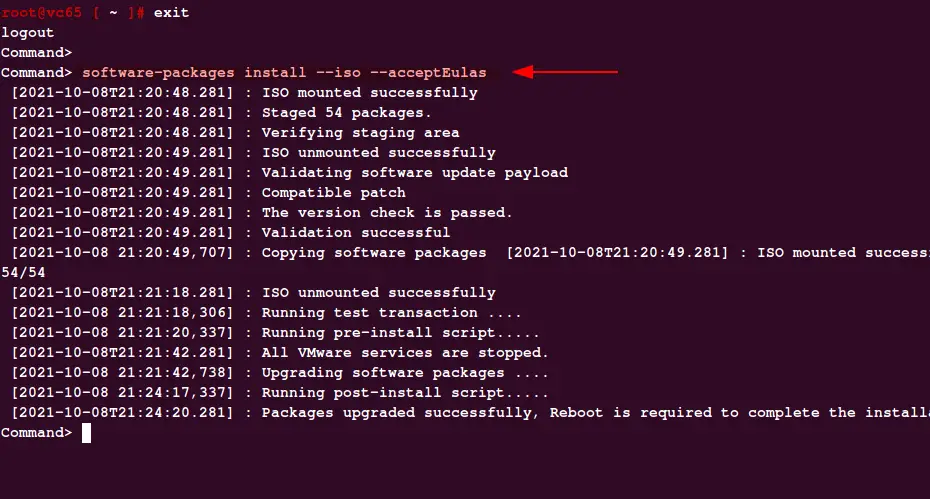
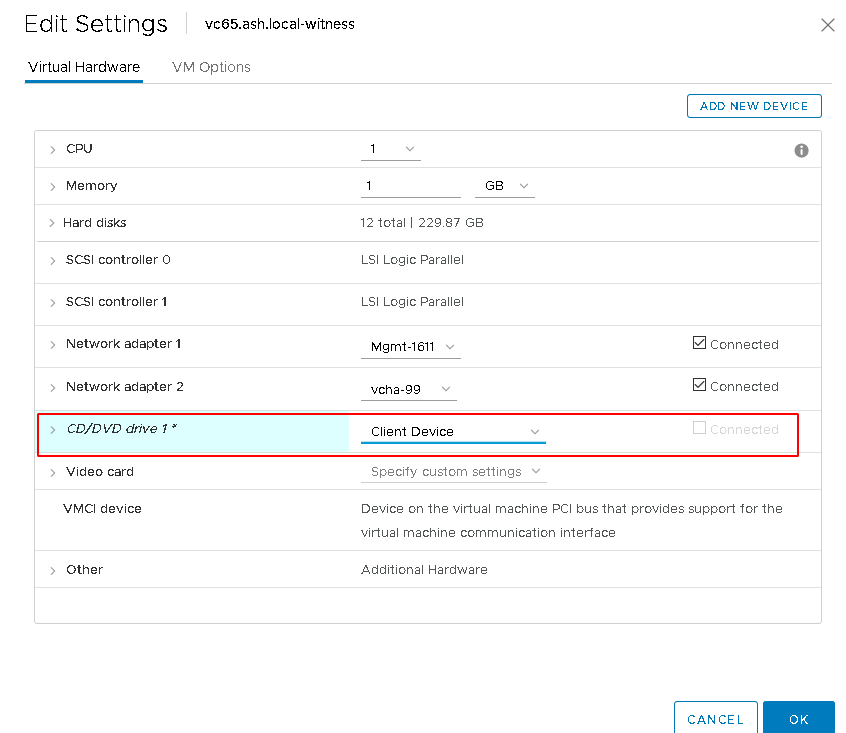
Once the patching is done, disconnect the ISO drive from the witness VM
Reboot the witness vCenter VM
# shutdown reboot -r “VCHA CVE Patch”

Patching the Passive node
The next step in our process it to patch the Passive node, and this is just similar to the above process.
I’ve mounted the ISO Image to the Passive Node.

From the Active node, connect the passive node via ssh as shown
# ssh root@ip_address_passive
Install the patch on the Passive node by running the command
# software-packages install –iso –acceptEulas
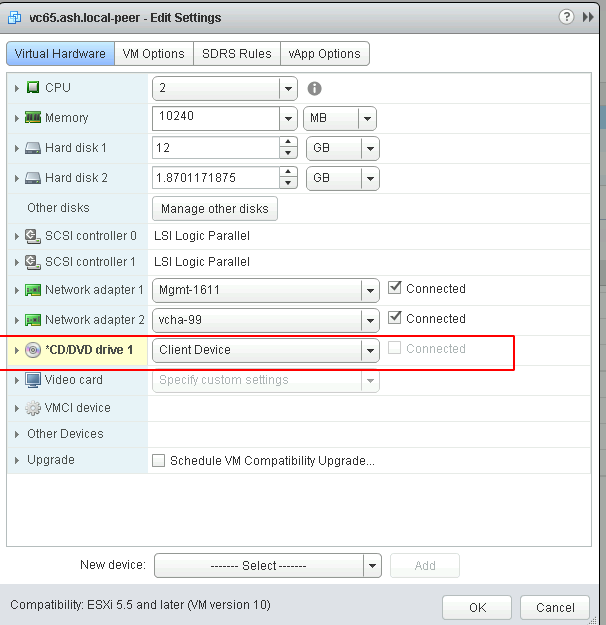
Once the patching is done, disconnect the ISO drive from the Passive VM
# reboot

Patching the Active node
To patch the last node, we will now need to perform a failover to switch the patched Passive node to an Active node so we then continue patching.
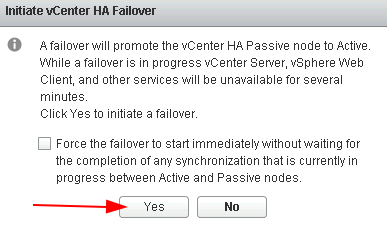
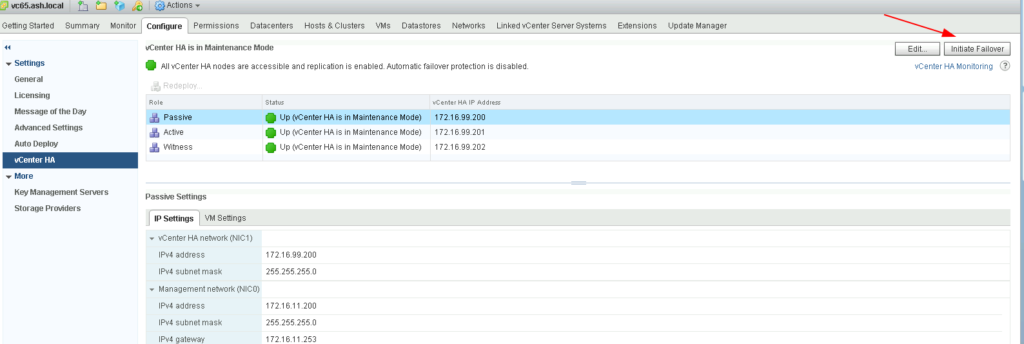
Perform failover
Choose vCenter HA Settings and Click Initiate Failover . Although vCenter HA is in Maintenance Mode, the manual failover still works.
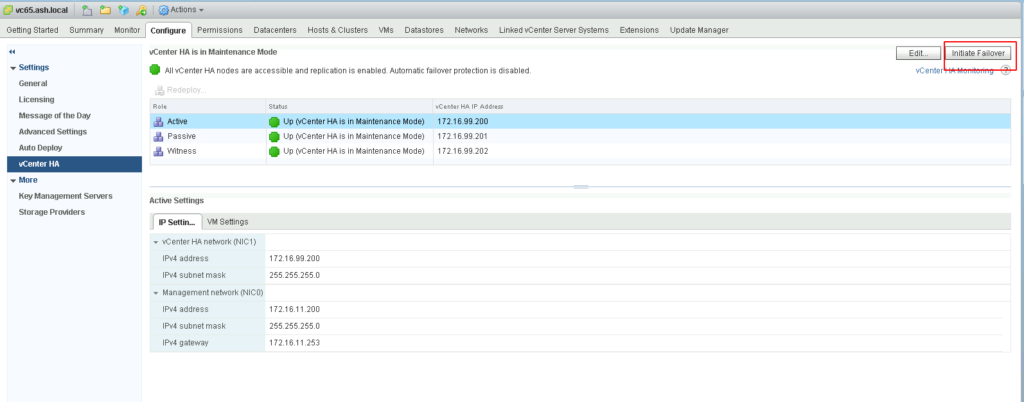
Click Yes to proceed with failover.
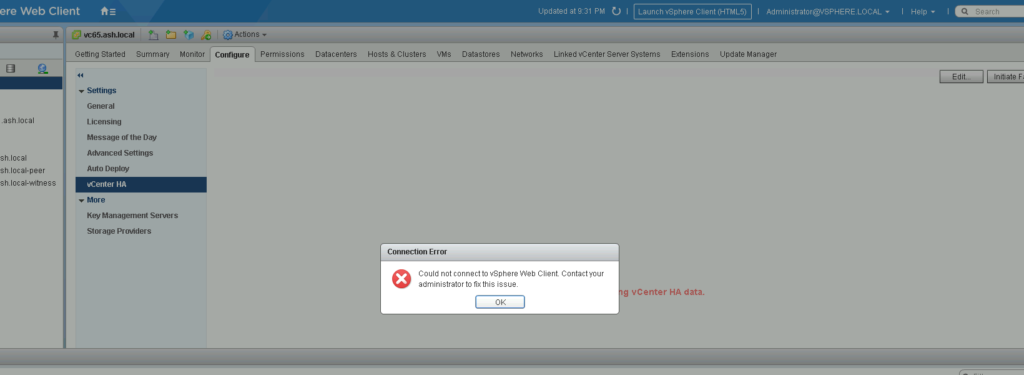
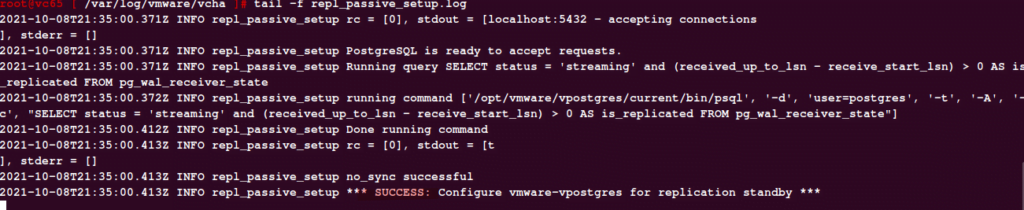
Check the logs to see if the failover is happening
root@vc65 [ /var/log/vmware/vcha ]# tail -f vcha.log

root@vc65 [ /var/log/vmware/vcha ]# tail -f repl_passive_setup.log
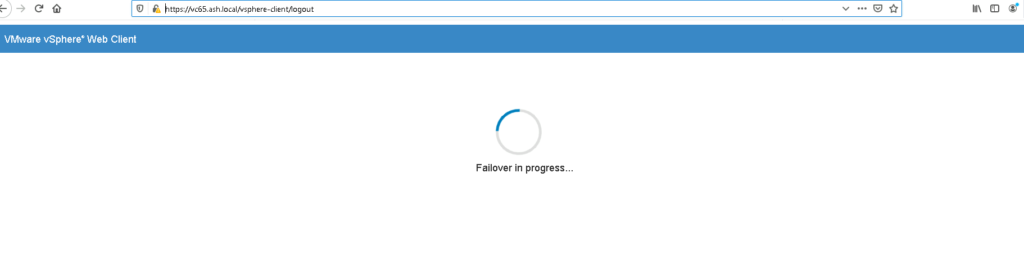
Wait some minutes until the failover process completes and make sure Active and Passive nodes have been switched
.
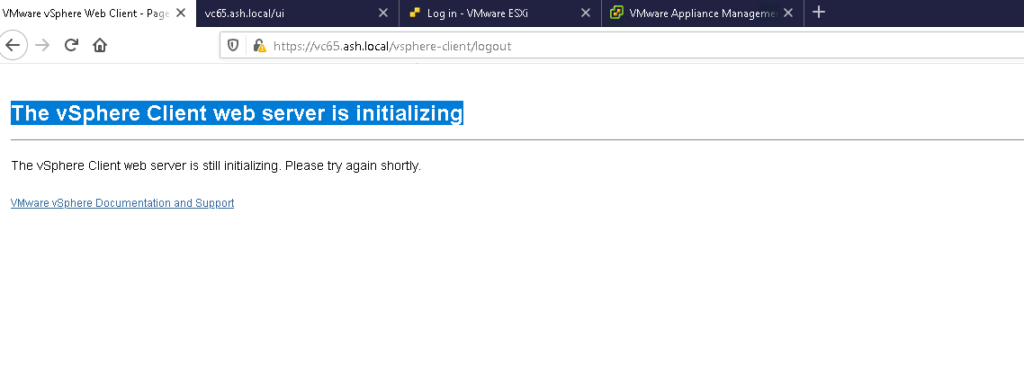
In a few more minutes, we can see the vSphere Client web server is initializing
Verify if the Active/Passive nodes have switched
Install the patch on the Active Node
The next step in our process it to patch the last node, and this is just similar to the above process.
I’ve mounted the ISO Image to the last Node. This node now is our passive node as we failed over all our services.
Connect the active node via ssh and run the command:
# ssh root@ip_address_passive to switch to the now passive node
Install the patch on the Last node with the command:
# software-packages install –iso –acceptEulas
Once the patching is done, disconnect the ISO drive from the last VM
# reboot
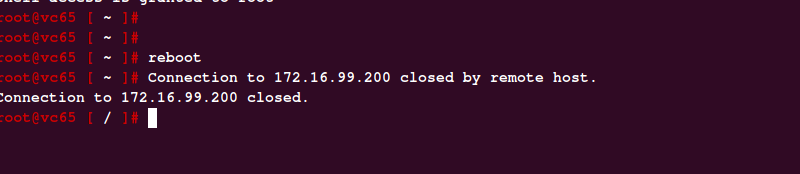
The last node goes offline
Wait until vCHA reports Green on all nodes before moving over to the FailBack operation.
FailBack Process of vCHA Nodes
Finally once all the nodes are patched, we can perform a failback to restore the state of a cluster to the original state. We do that again doing an Initiate Failover.
The failback process will take around 10 minutes so be patient
Wait for the failover to finish
Once the failback process is complete, we should see the Active Node has returned to the same state when we started the work.
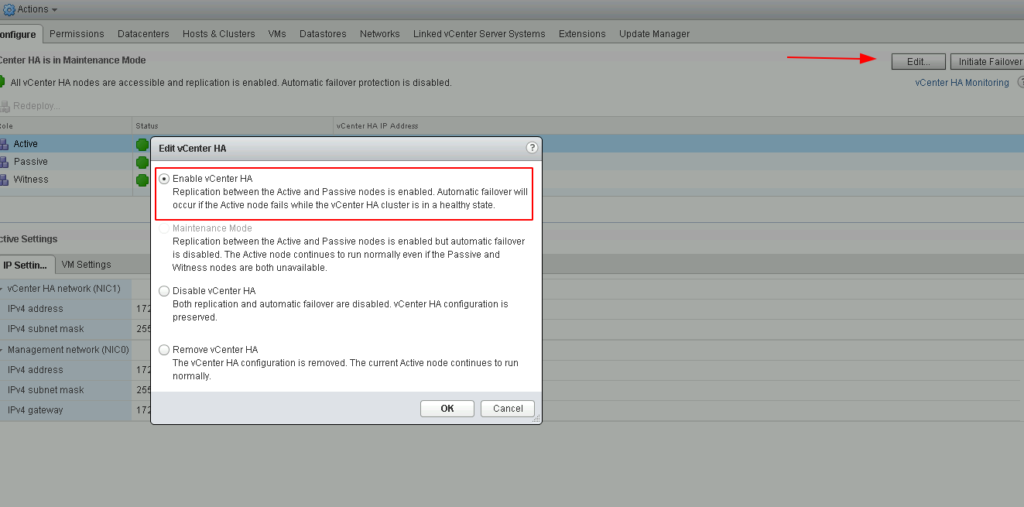
At this stage we can exit the HA cluster from Maintenance Mode to restore normal operation.Select option to Enable vCenter HA.
Replication between Active and Passive nodes is enabled and automatic failover feature is enabled as well.
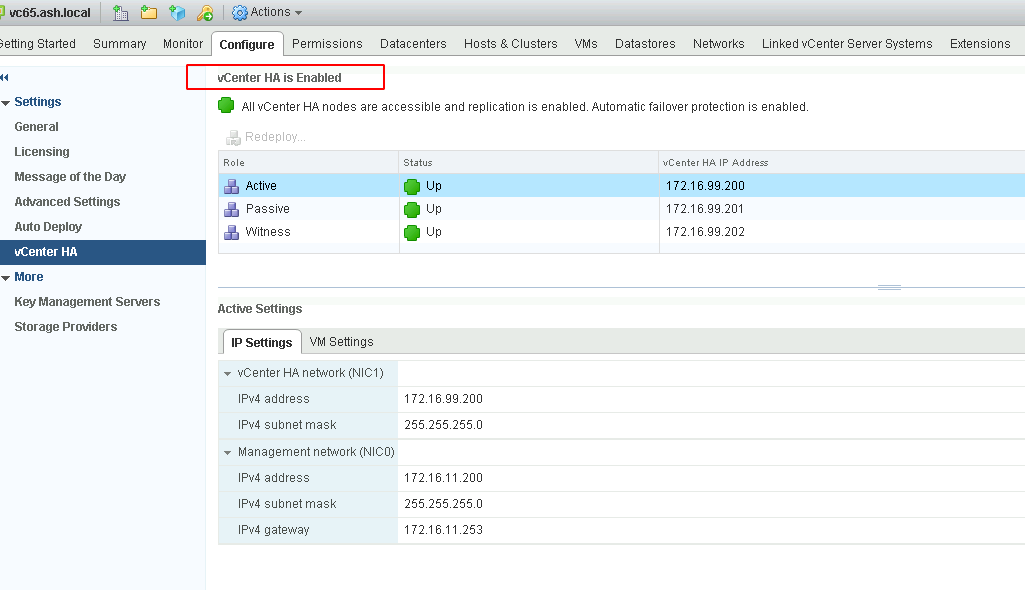
HA cluster is now operating in a normal status.