
A vNET is just a master subnet that is defined per region. Each region has different availability zones. Within each AZ we divide networks into subnets. Each subnet communicates with AZ using routing

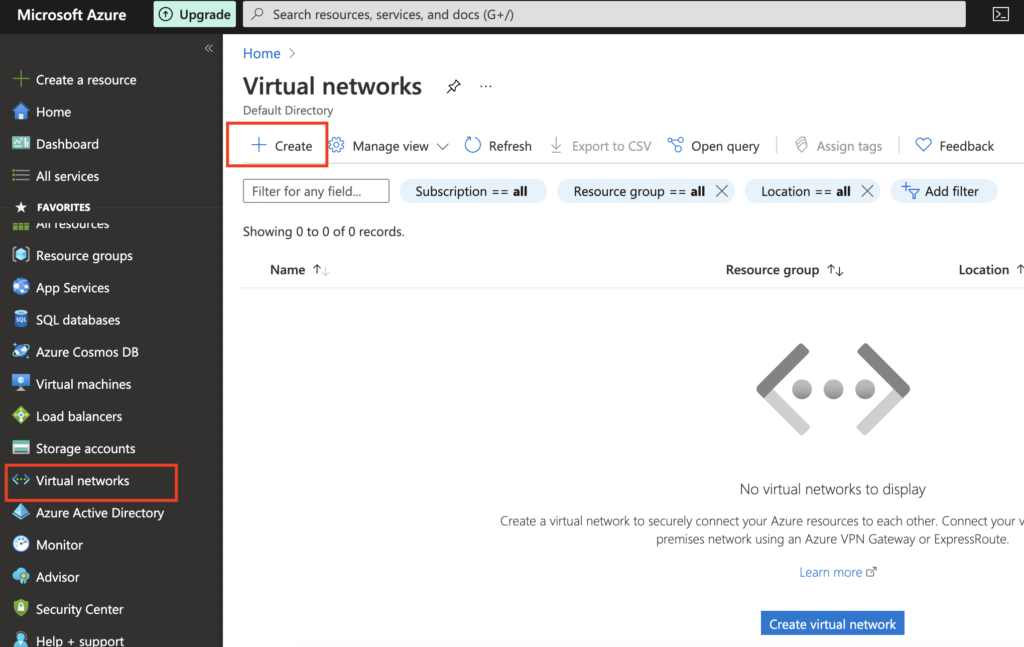
1- We will first start with creating a virtual network on Azure for our environment.

2- Click Create
3- Choose a subscription, resource group, region to deploy the virtual network, and finally give the virtual network a name.

4- We will create our IPV4 space in 10.0.0.0/16 two subnets here
- Address space – 10.0.0.0/16
- SubnetA – 10.0.1.0/24
- SubnetB – 10.0.2.0/24
This would mean the first two bits are for our network identifier and the remaining two bits for our host addresses.

5- Click Add to create our vNET and subnets

6- Leave everything as default

7- Once validation has passed, click on Create

8- Finally our virtual network vma-vNET is now ready

Once our virtual network in Azure is created, we can now start to deploy our resources within the vNET we created

Creating Network Security Groups ( NSG )
This is used to filter traffic that’s coming inside the virtual machine and traffic leaving the VM by using some rules.

A default network security group is created by the VM creation wizard and will be applied directly to the virtual machine network interface itself. Likewise, NSG can be created directly on the subnet that contains the virtual machine also. Rules at the NSG subnet level will be evaluated first
Default rules on Network Security Group

| AllowVnetInBound | Allows all traffic in a subnet to talk to each other and this would mean in the private IP range a Subnet A can talk to Subnet B |
| AllowAzureLoadBalancerInBound | Allows all VM’s in that load balancer to talk to each other |
| DenyAllInBound | Denies all other types of traffic. |
Adding Rules to Network Security Group
Inbound rules – These are the rules that allow traffic to the VM. For example, the source would be my laptop public IP ( Bastion Host ) and it will RDP via my ip.

A lower priority rule gets evaluated first before moving on to the higher rules so in this example our port 80 traffic will be blocked and rule 200 gets evaluated first before moving on to the next one.

This rule below would mean we will access RDP from our source laptop IP and it connects itself to the private IP of the VM in Azure. This works as the public IP on Azure does the NAT over the private IP.

Outbound rules – These are the rules that are initiated from the VM to the outside world. For example, if we wish to access the Internet from within the VM so this rule has the source IP as its private IP and the destination as the Internet.

Understanding NSG assignment at NIC vs Subnet level
In production, we create separate NSGs for every subnet as shown and for every NSG we create inbound/outbound rules are added. These subnet NSGs are then associated with the subnets so every VM will have two NSGs on it – one at the subnet level and another at the NIC level.


Go to the subnet NSG we created and associate the new NSG to the desired subnet.

This shows our Subnet A NSG assignment
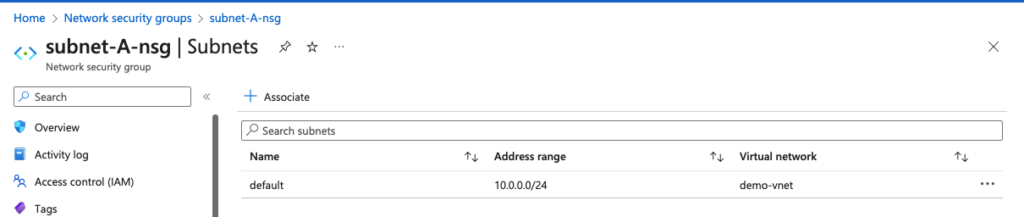
Security rules are applied to the NSG at the subnet level. So in this example, I’ve allowed RDP access at the subnet level too.

Back on my VM, I can now see two NSGs applied. – NSG at the subnet level and also the default NSG on the NIC level that was created during the VM Build phase.

The NSG rules at the subnet level will be evaluated first, and then it will move to the NSG applied at the NIC level so if no Allow-RDP rule exists on the NSG at the subnet level we won’t be able to RDP to the VM even thou we have an Allow-RDP rule in the NSG at the NIC level
Creating Application Security Groups
This is an NSG when it comes to filtering traffic between the source and destination.
