In this blog, we’re going to walk through the process of converting a 2-Node vSAN cluster into a 3-Node vSAN cluster. This is a common scenario when you want to scale up your vSAN environment for higher availability, redundancy, and performance.
In a 2-Node vSAN setup, you typically have two ESXi hosts and a Witness Appliance to act as the tiebreaker. This works fine, but when you add a third host, you’re transitioning to a standard vSAN cluster, where the Witness Appliance is no longer needed.
Here’s how you do it:
First, add the third ESXi host to the existing vSphere cluster. Make sure the new host has vSAN enabled and is properly connected to your vSAN network. Once added, the third host will show up in the vSphere Client under the cluster.
Next, you need to reconfigure the vSAN cluster. Go to the vSphere Client, navigate to your cluster, and check the vSAN services. The cluster will automatically detect the third host and start balancing the data. With three hosts, vSAN can now distribute your data using a standard Failures to Tolerate (FTT=1) policy without requiring the Witness Appliance.
Blog Series
- Confgure vSAN in Single Site
- Create vSAN SSD Disks from HDD
- Remove an esx node from the vSAN cluster
- Scaling vSAN by adding a new esx node
- Two nodes vSAN7 Configuration
- Convert 2-Node vSAN to 3-node configuration
- VMware vSAN Stretched Cluster
Prerequisites
- Follow Steps 1-13 to prep a new ESX node ready
- Disable DRS and HA on the vSAN Robo Cluster
- Disable Stretched clustering
- Delete the fault domain in place
- Configure and add the 3rd host into the cluster
- Wait for the vSAN background operations to finish.
- Perform a VM creation and Network tests after new node joins In
- Shutdown the witness node
Procedure
1– Disable DRS and HA on vSAN Robo Cluster

2- I’ve completed Steps 1-13 and connected a new host to our vCenter Cluster
3– Under vASN Configuration- Disable Streched Cluster

4– Click Remove to remove witness host from our vSAN configuration

5-The vSAN configuration type now shows a single site instead of stretched.
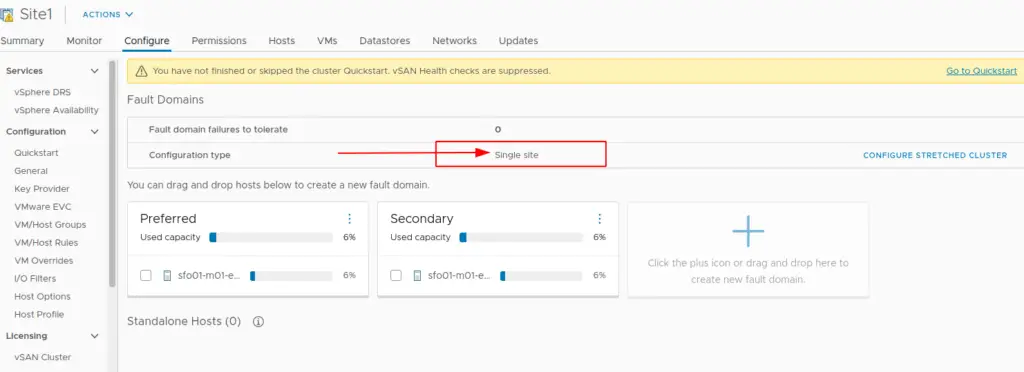
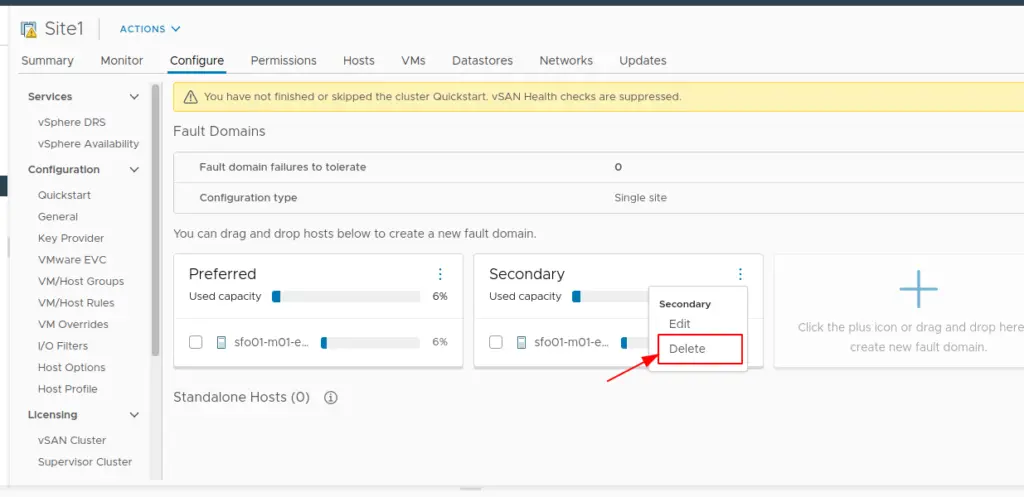
6– We will now need to delete the Fault domains. Choose the Secondary and Delete
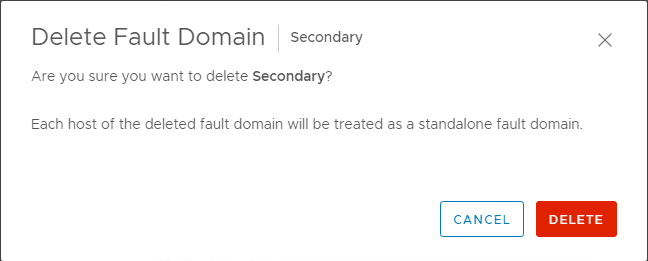
7– Confirm the deletion

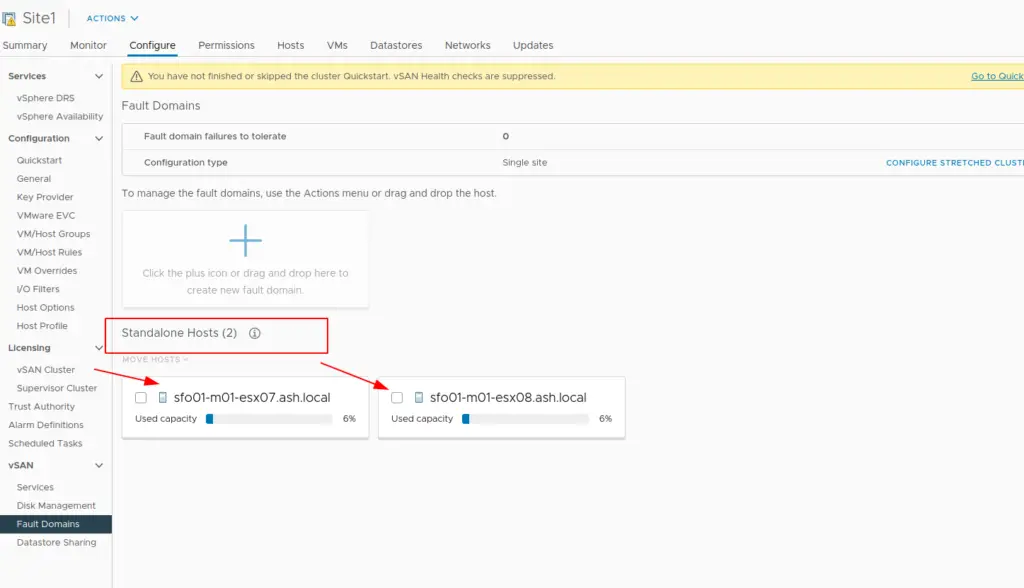
9- After deleting the fault domains, we will now have our esx hosts listed under the Standalone hosts.
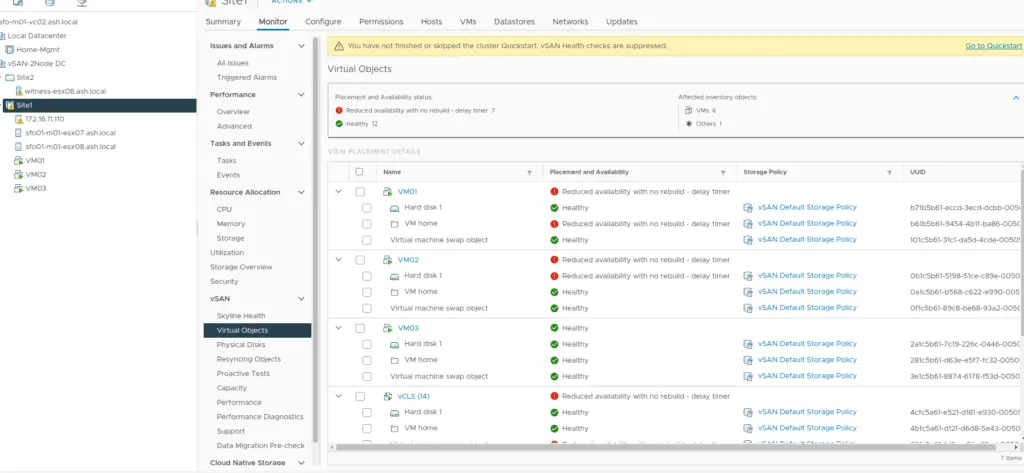
10- We will notice on the vSAN health configuration that our nodes are now operating under reduced redundancy as our witness is removed
11- Move the new host into the cluster


13- From here, we can create a new disk group or choose the option to claim unused disks. I’ll choose the option of Creating a new disk group
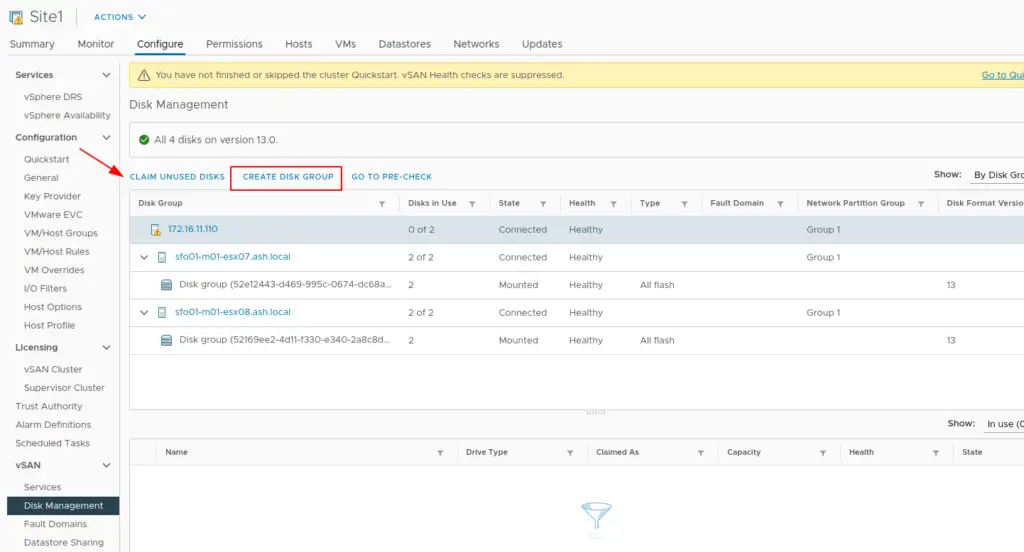
14- Pick the disk for capacity and cache tier.

15- The 3rd node will now become a part of our vSAN datastore configuration
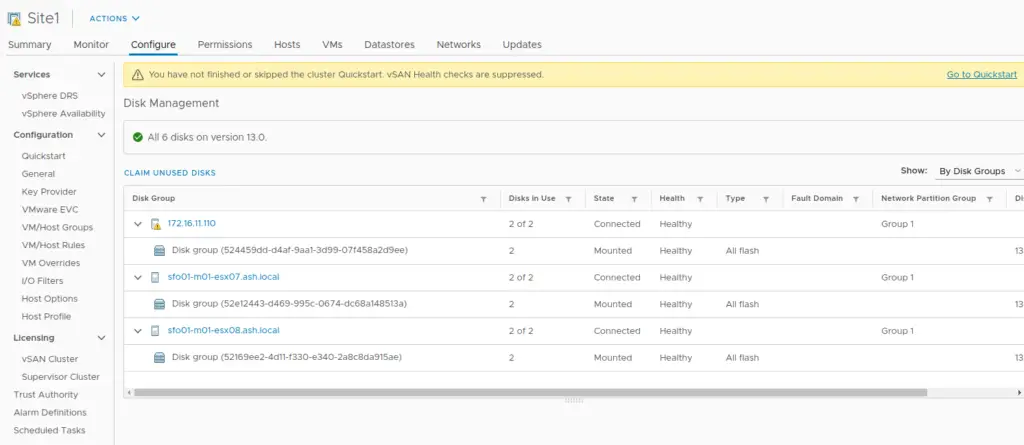
16- Navigate to the Monitor > Skyline Health > vSAN object health > Repair objects immediately to kick off the objects repair immediately.
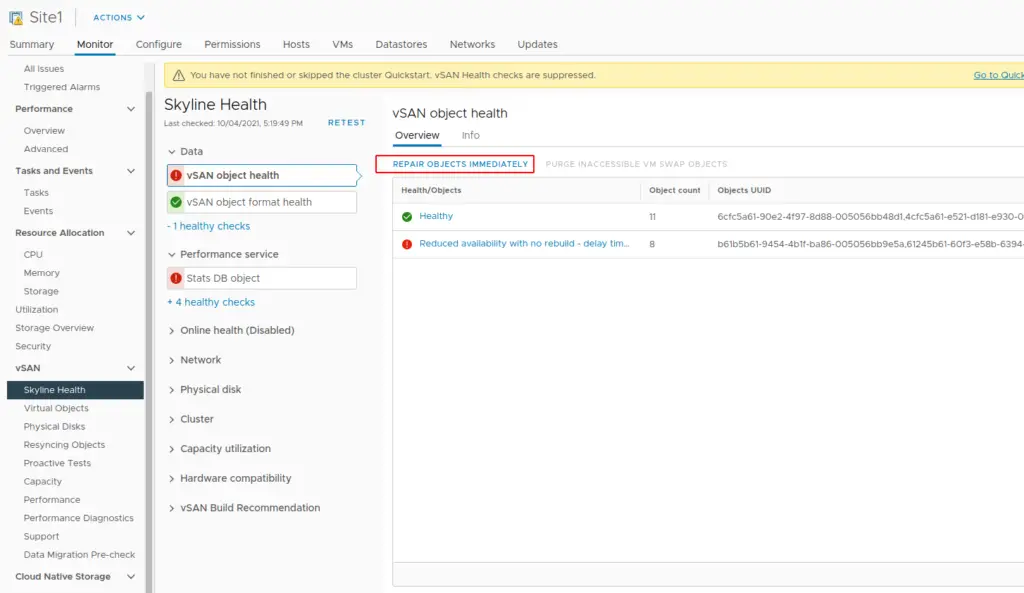
17- Monitor the object repair status and in a few moments your data will be spread across the new node.
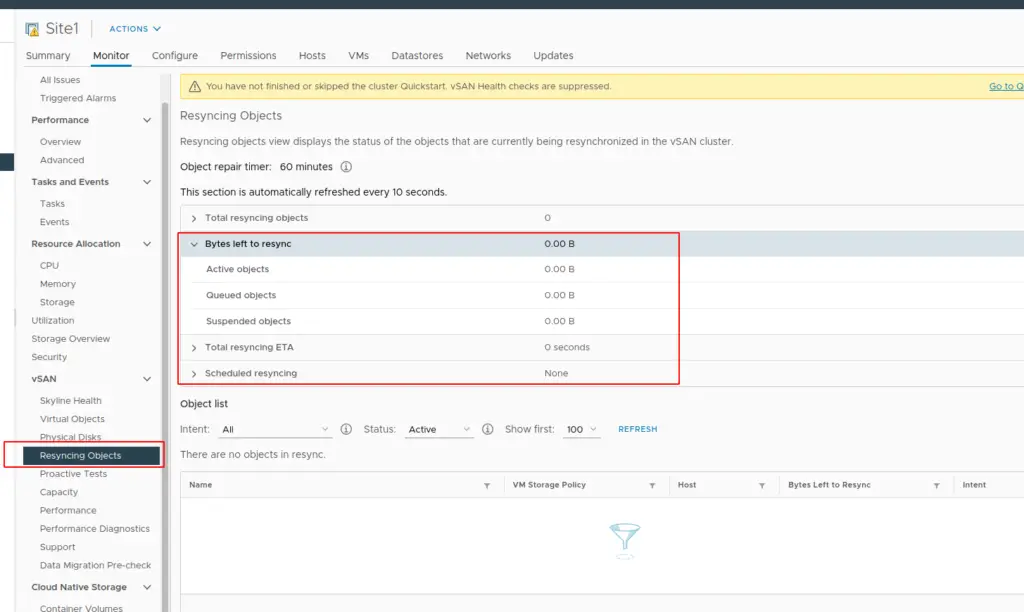
18- Verify the status of vSAN disks
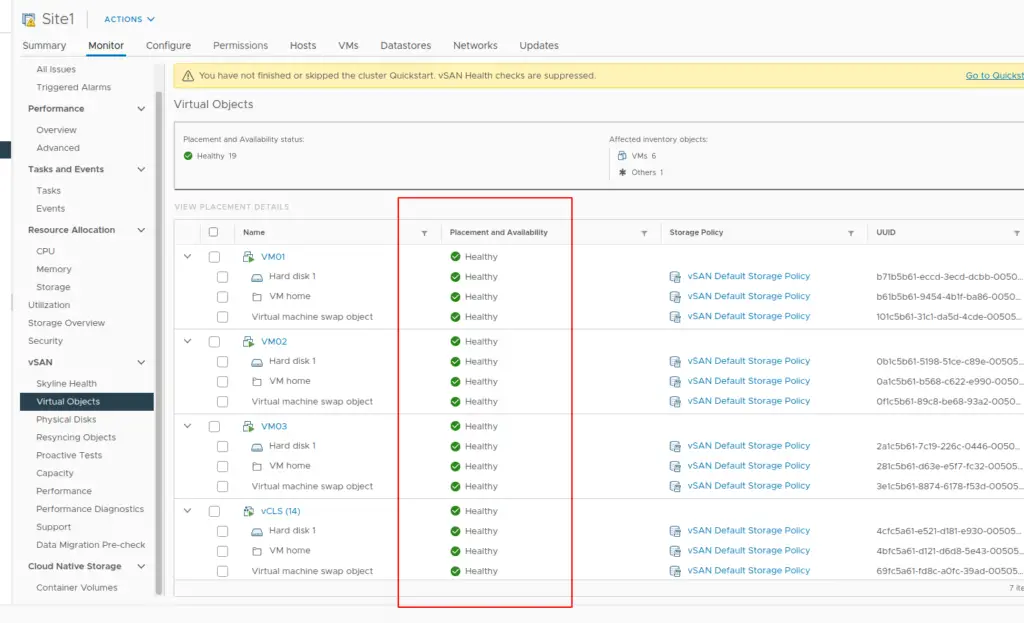
19- After confirming that data resynchronization is complete, you can safely remove the Witness Appliance since it’s no longer needed in a 3-Node configuration. At this point, vSAN uses the three hosts to replicate data across the cluster for redundancy.

And that’s it! You’ve successfully converted your 2-Node vSAN cluster to a 3-Node vSAN cluster. This upgrade not only improves data placement and redundancy but also sets the foundation for further scalability.

