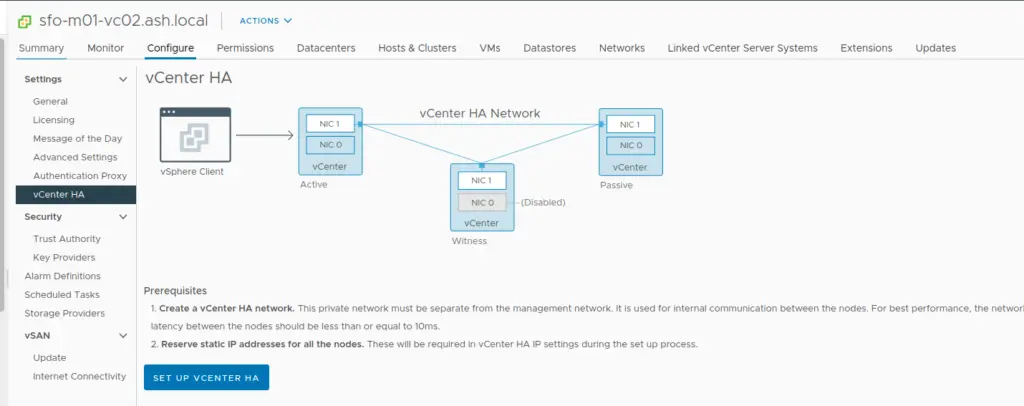
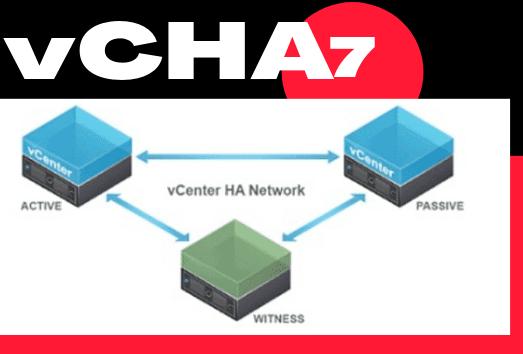
Configuring vCenter7 HA
https://vmanalyst.com/vcenter-high-availability-vcha/
vCenter7 HA Failover
https://vmanalyst.com/vmware-vcenter-7-failover/
Patching vCenter7 with vCHA
https://vmanalyst.com/patching-a-vcenter-server7-ha-cluster/

Placing vCHA7 in Maintenance Mode
If you click on Maintenance Mode, you will be placing the HA cluster into a Maintenance mode state. You can still perform a manual failover, but Automatic failovers will not happen. This is very useful when you need to perform various maintenance tasks on the vCenter appliances such as critical updates.

We can see the Mantainence mode is set to Manual

Perform vCHA Backup
We only need to backup up the vCenter HA Active node. Backups of Passive and Witness nodes aren’t required.
Recover a failed vCenter HA
This section covers how to recover a failed vCenter HA when vCHA cluster goes out of sync and nodes fail to communicate with each other affecting vCenter Availability
Check for connectivity issues
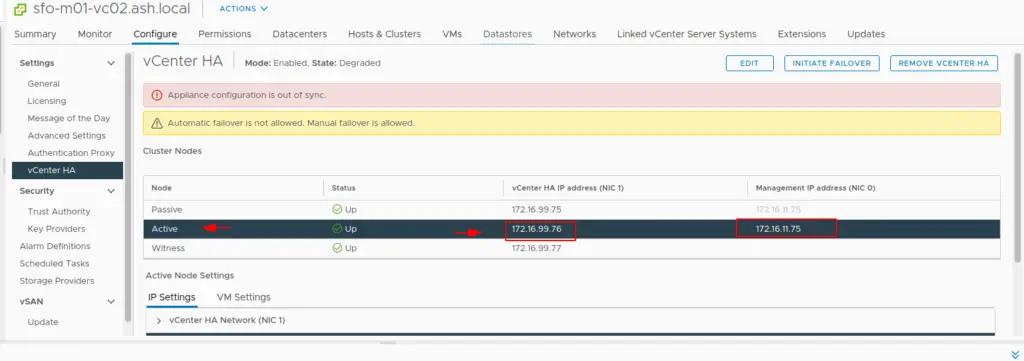
Locate the Active vCenter, the easiest way to find it is via the UI.
Prior to this exercise, I did failover my vCenter nodes to verify connectivity so based on this picture below my active vCenter is now 172.16.99.76

Login to the Active vCenter node and run the command ifconfig -a and note if our eth1 is showing 172.16.99.76 and eth0 will our management NIC IP
# Run ifconfig -a

Run the following command to check the vCenter’s NICs operational status
# networkctl

As shown in the screenshot, Eth1 is not operational and shows configuring so let’s execute the following command to get additional details about Eth1
# networkctl status eth0

At this moment, you can try to vMotion the VM onto a peer ESXi host to see if that will fix this problem, if not try a restart of the network services by executing the command
# systemctl restart systemd-networkd

If the connectivity issue cannot be solved, you need to recover the vCenter availability.
Remove the HA cluster configuration
The write-up below shows the procedure to remove vCHA configuration administratively.
If connectivity is not restored, the solution is to remove the HA cluster to have the Active node up and running again.
Click Remove vCenter HA

Choose the option to power off and delete both Passive and Witness nodes.

If the approach to remove vCHA won’t work via the GUI , log in as root to the Active node via Direct Console and run the following command to remove the HA cluster configuration:
# vcha-destroy -f

When the procedure has been completed, reboot the node
# reboot
Login to the vCenter server to check if our vCHA configuration is removed.

Once the vCenter availability has been restored, the vCenter HA cluster can be rebuilt once again
vCHA Logs and Useful Commands
There are few logs that can help in troubleshooting vCHA Issues
All vCHA logs are available under /var/log/vmware/vcha
Shows the install or configuration logs of vCHA cluster
tail -f /var/log/vmware/vcha/prepare-vcha.log
Shows the live state of vCHA cluster
- tail -f /var/log/vmware/vcha/vcha-.log | grep -i exit
Shows the replication state of vCHA cluster
- tail -f /var/log/vmware/vcha/repl_passive_setup.log
Run this command from Active node to destroy the vCHA Cluster
-f stands for force
- destroy-vcha
- destroy-vcha -f
Shows the destroyed state of vCHA cluster
- tail -f /var/log/vmware/vcha/destroy_vcha.log
vCHA Restore Operations
- Before you restore the vCHA enabled vCenter cluster, power off and delete all vCenter HA nodes.
- Restore the Active node.
- The Active node gets restored as a standalone vCenter Server Appliance.
- Once it’s restored, reconfigure HA and reboot All vCenter HA nodes to verify if they all come back online.
vCHA Shutdown Operations
In order to shutdown a vCHA enabled cluster, shut down the nodes in this order.
- Passive node
- Active node
- Witness node
vCHA Restart Operations
We can restart vCHA nodes in any order we prefer.

