In this blog, we will deploy our first host pool using the image we created earlier so we will use it to create our hub & spoke environment.
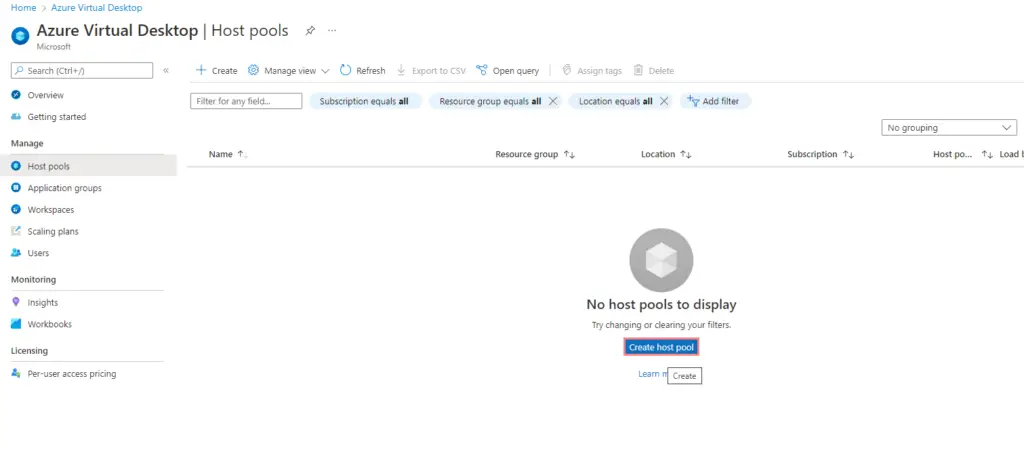
Step 1 – In Azure Portal, search for Azure Virtual Desktop.
Step 2 – Click on Create a host pool.
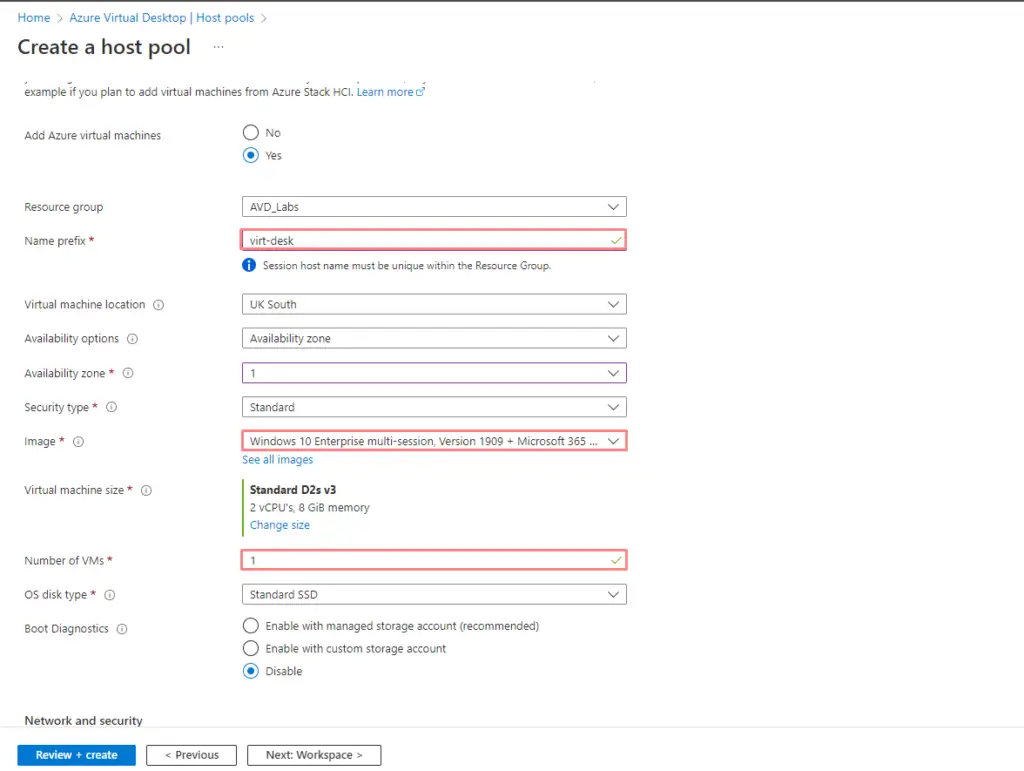
Step 3 – Give the following details here
- Host pool a name
- Location.
- host pool type- select pooled.
- load balancing algorithm
- Max session limit
If you choose personal that a dedicated desktop, automatic means floating desktops. Choose load balancing algorithm to breadth-first. Breadth means just distributing load among all vms available.
Choose max session limit- number of parallel users
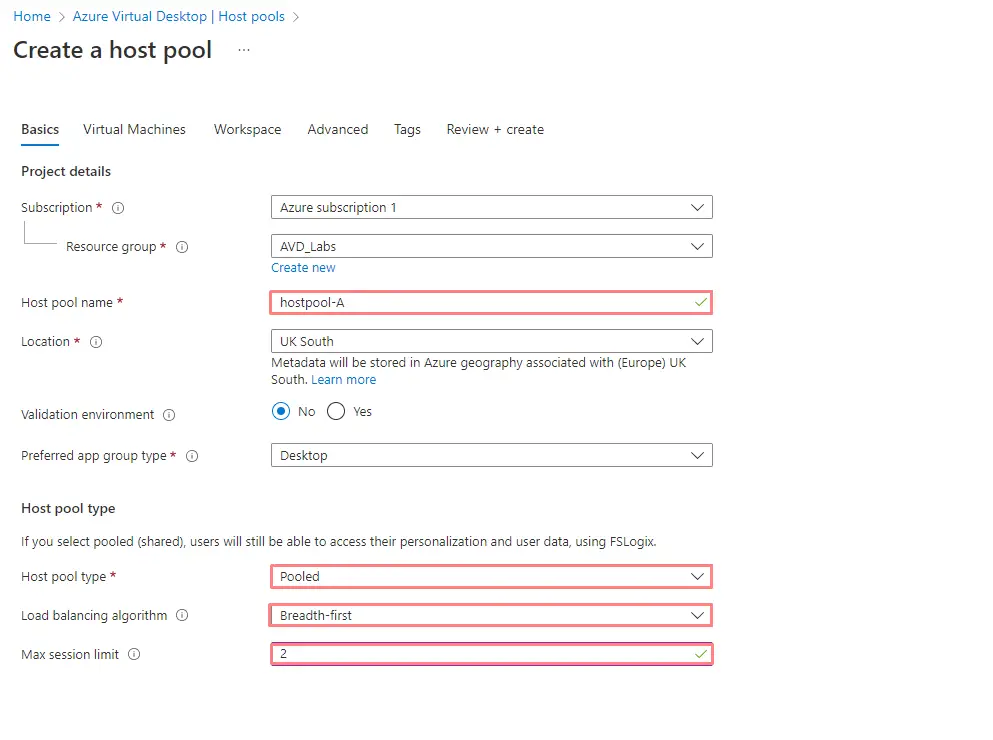
Step 4 – Give the host pool a name and location. Under host pool type, select pooled.
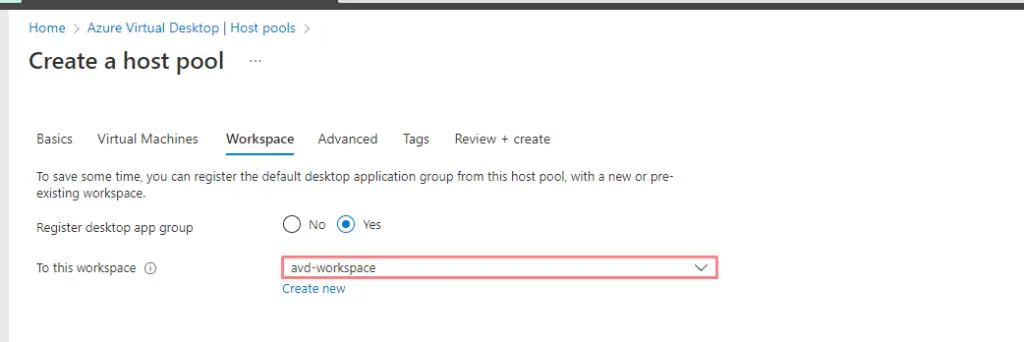
Step 5– Create a new workspace as shown.
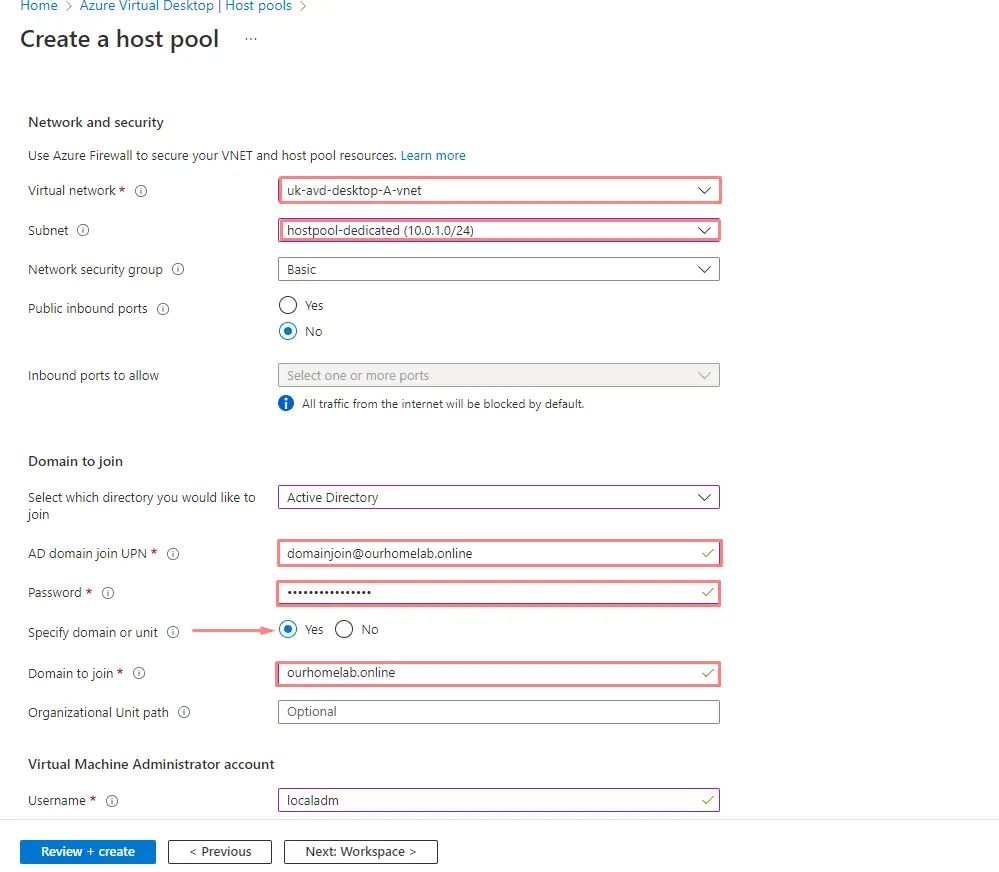
Step 6– Choose to join VM’s being provisioned to your Active Directory domain.
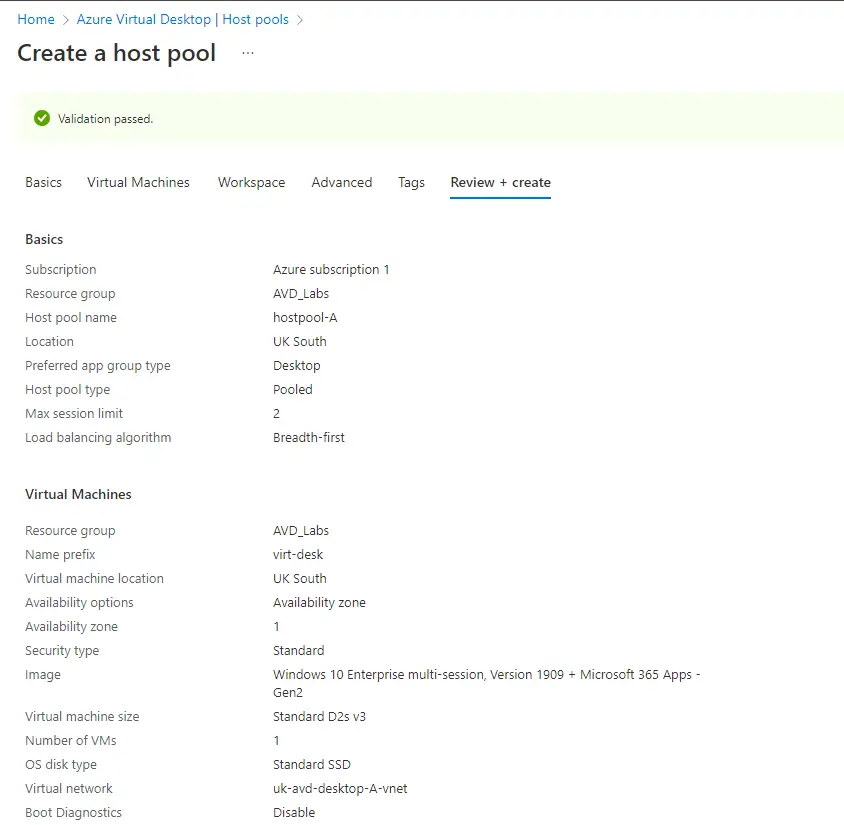
Step 7– Validate all settings
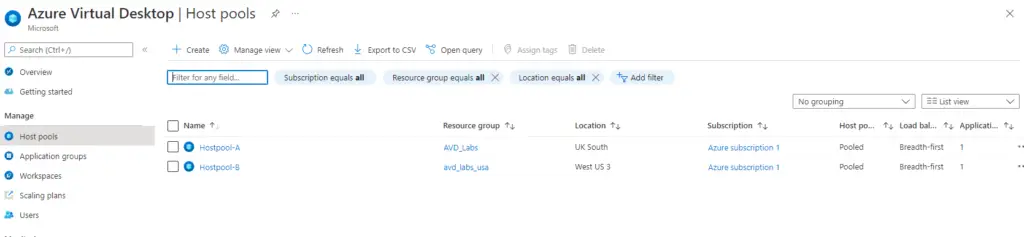
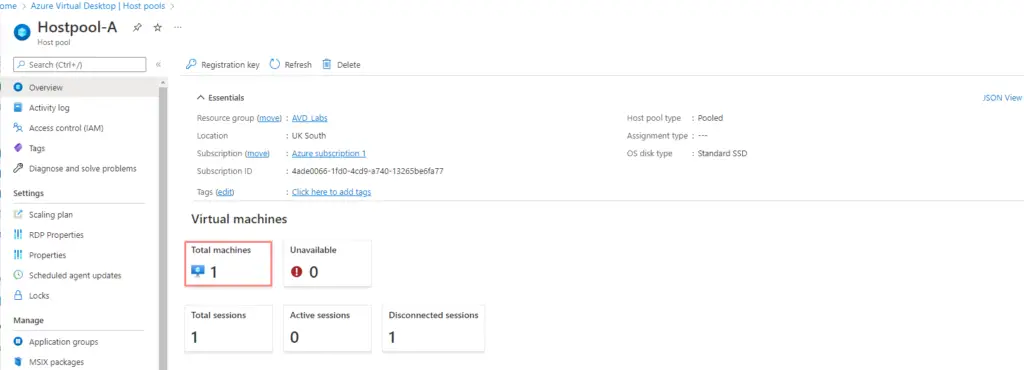
Step 8– Our host pool is now ready
Step 9– Our list of VM’s being mapped is here.
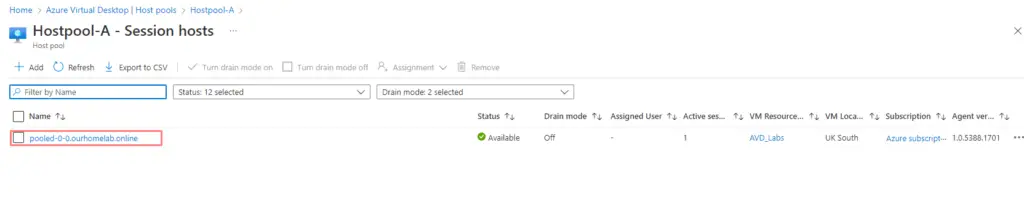
Step 10– Here is the VM that’s now ready
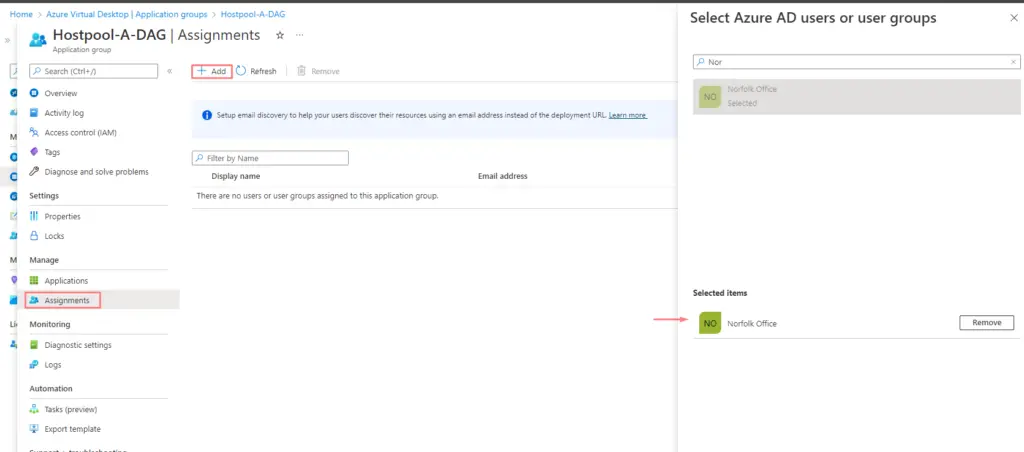
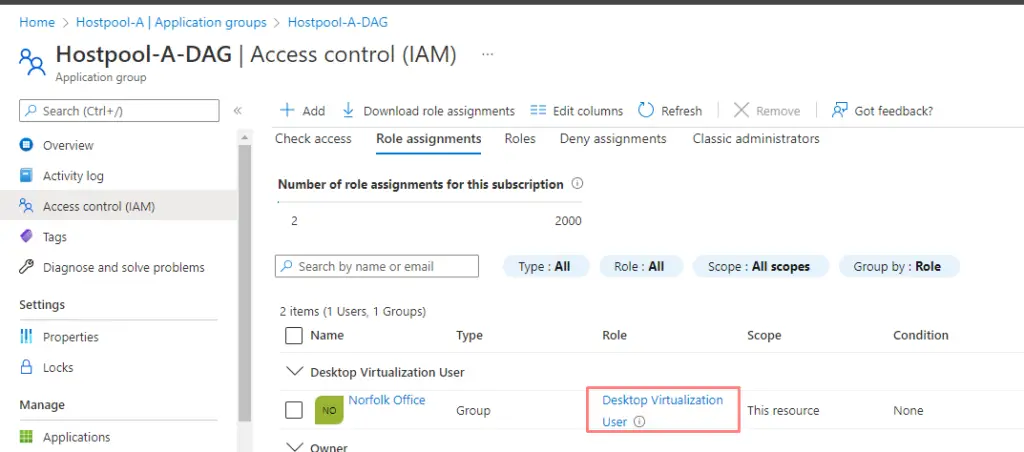
Step 10– Go to the Application Groups > HostPool-A-DAG – Assignments to allocate groups/user to the virtual desktop pool
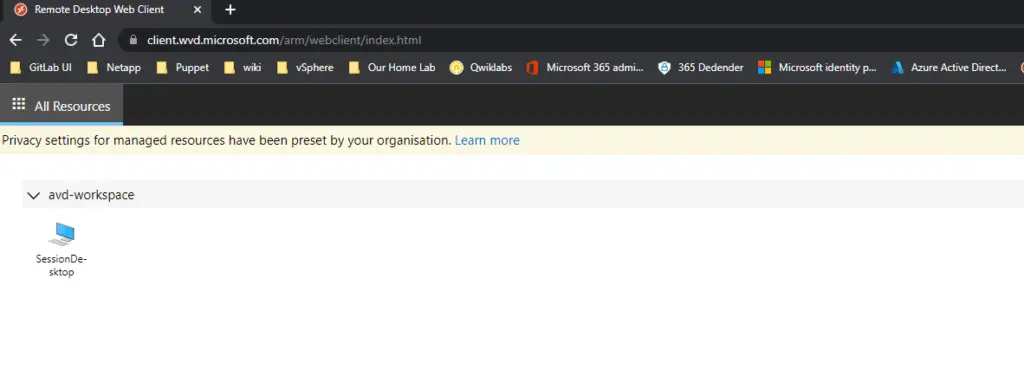
Step 11– Launch the web client to verify if we have connectivity to the session desktops
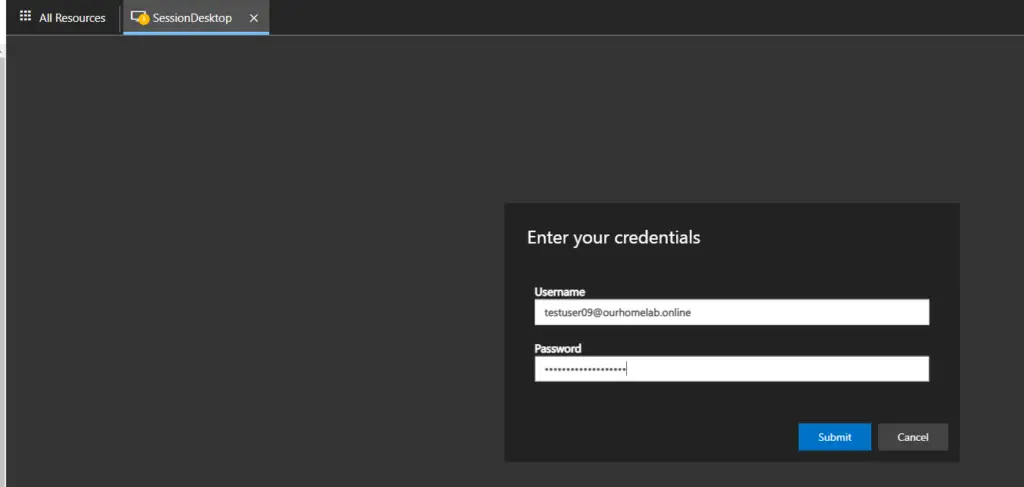
Step 12– Authenticate via our test user
Step 13– Our AVD is ready, and we have as well provisioned our Office 365