In this blog, we will deploy our Horizon View Connection Server on our production site.
Prerequisites
- Valid Horizon View License
- VM must be AD Joined
- Domain User with Administrator rights
It’s easy to start by installing the certificate on the horizon server before we install the view software so let’s begin with that.
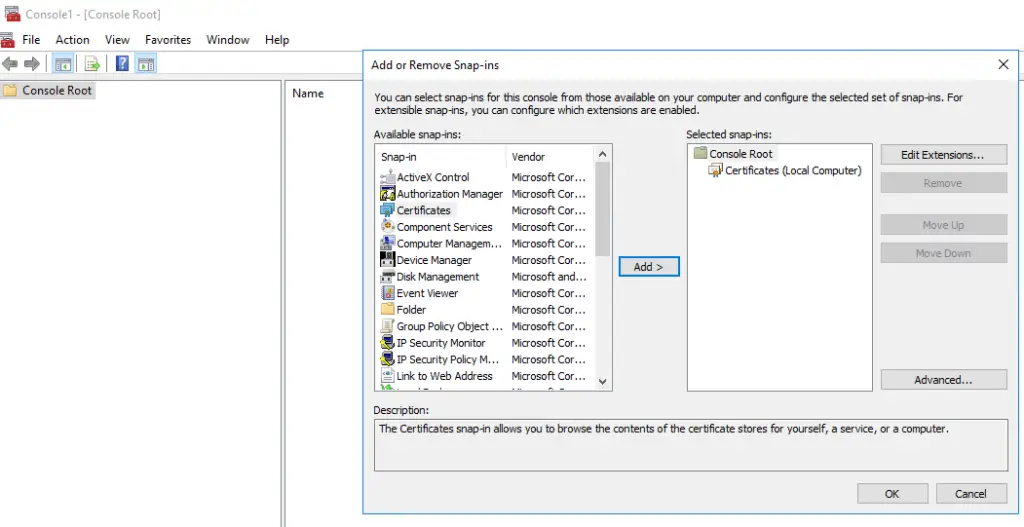
To Install a certificate on the view server, Open the Certificate MMC console and add certificate services snap in as shown.

One snap in is imported, Select personal and Choose Request new Certificate

Click Next to continue

Click the arrow as shown

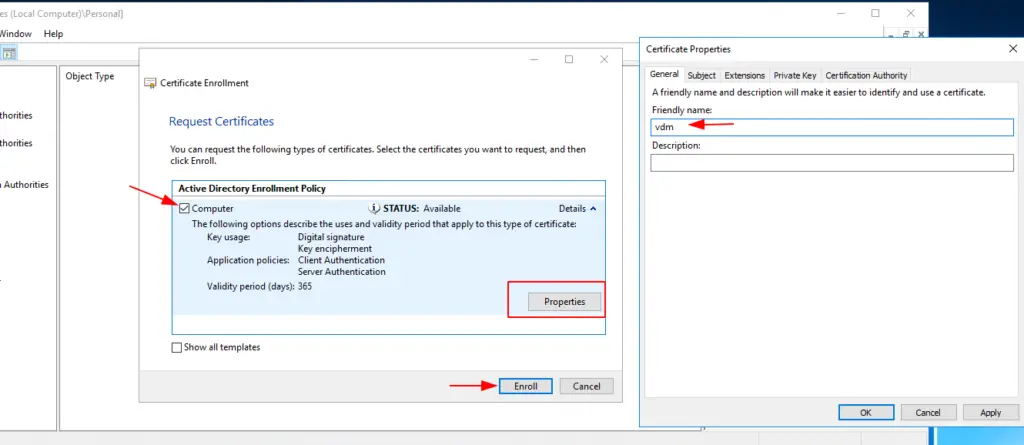
Click on Certificate Properties In here we need to ensure we are changing certificate friendly name to “vdm” from the certificate properties tab as this is a mandatory requirement

Ensure the private key is also exportable

Click Enroll to proceed

We will now see the certificate has been enrolled successfully.

Verify the certificate has been enrolled on our system.

.
Now with certificate installed, we can now open our connection server install software we downloaded earlier

Click Next to proceed

Accept EULA and click Next

Choose the location to install the software to

From the installation menu, as it’s our first server we select the Horizon Standard Server option and select Install HTML access. Ensure IPV4 is chosen and click Next to continue.

We will leave Horizon view to automatically configure all the firewall rules on our system

View Admin is a local admin and also a domain admin so I’ve chosen to deploy view with this account

Skip to join the VMware Customer Experience program

Click Next to continue

Horizon View can be deployed on-prem and on Cloud but in this exercise, we will choose to deploy View on our on-prem

Once the installation is completed, click Finish

Let’s now verify all the view services are installed and the services are all working as expected

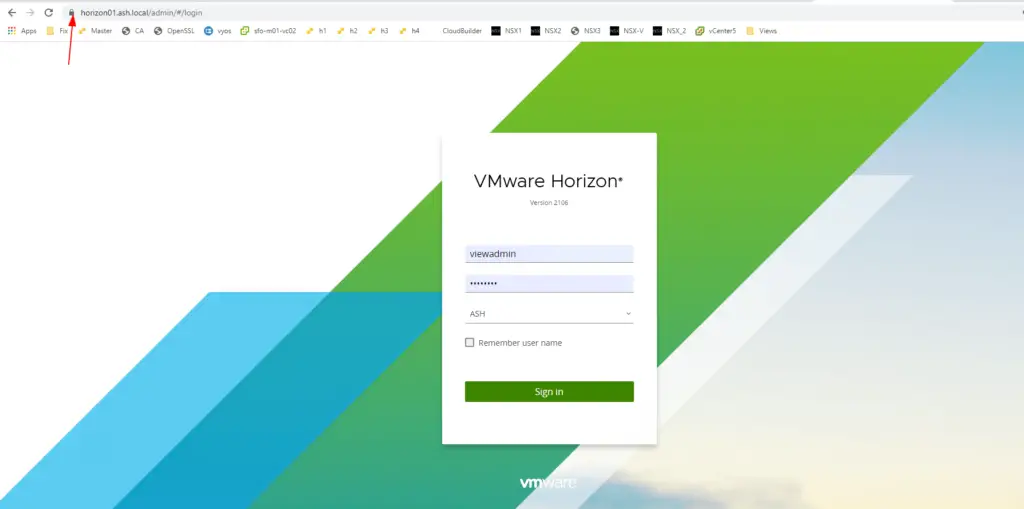
Reboot the system and when it’s done, launch view https://horizon01.ash.local/admin/.As expected our HTTPS is already in place.


