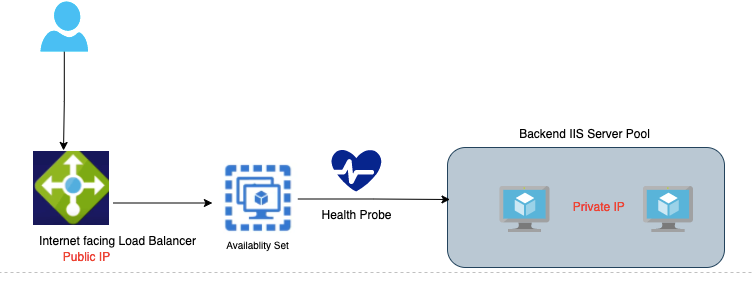
The write-up would cover the deployment of a Standard Azure load balancer. A load balancer ensures traffic is evenly distributed across all the workers in the group during demands. A load balancer is a public-facing one typically and it accepts traffic from outside and forwards to internal servers which are typical with just private IPs. The deployment of a standard log balancer is similar to that of a basic load balancer deployment.
Terminologies in Load Balancer

Comparison between load balancers
The basic load balancer is free to use but there is no SLA and no high availability whilst the standard load balancer is charged by hourly usage and has HA built into it via the use of AZ.
| Basic Load Balancer | Standard Load Balancer |
| It’s free | Charged per hour |
| No SLA | 99.99% SLA |
| Health probes – HTTP, TCP. A simple TCP handshake is done | HTTP Health probes – HTTP, TCP, HTTPS In this, a request is even made to check if a path is available default.html Session Persistence is a feature on Standard ELB |
| No perf metrics available | Perf metrics available |
| No support for AZ | Support for AZ |
| Machines in the backend pool need to be part of Avail set or scale set | Standalone VMs can be part of this load balancer as well, however, should be part of the same network |
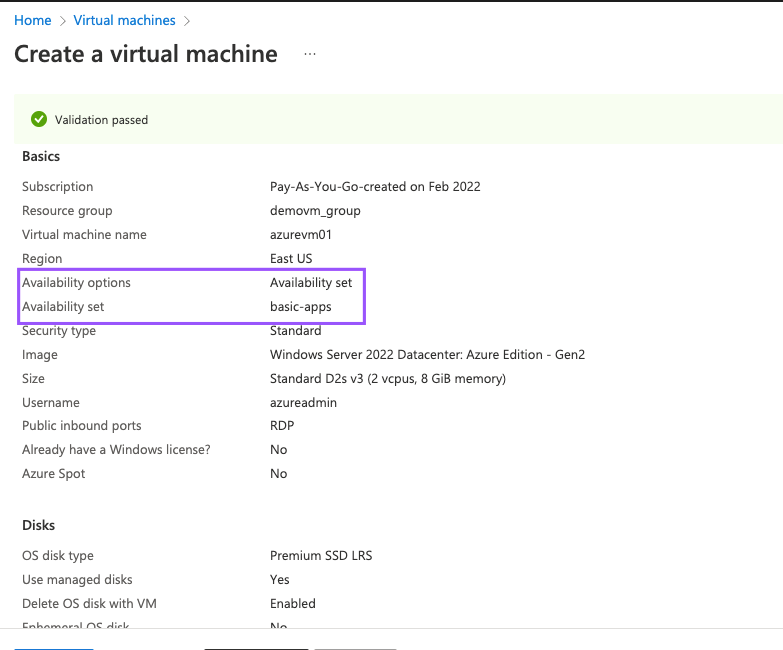
1- Create two Virtual machines
2- Install IIS on both servers
Add-WindowsFeature Web-Server
Set-Content -Path “C:\inetpub\wwwroot\Default.html” -Value “This is the server $($env:computername) !”
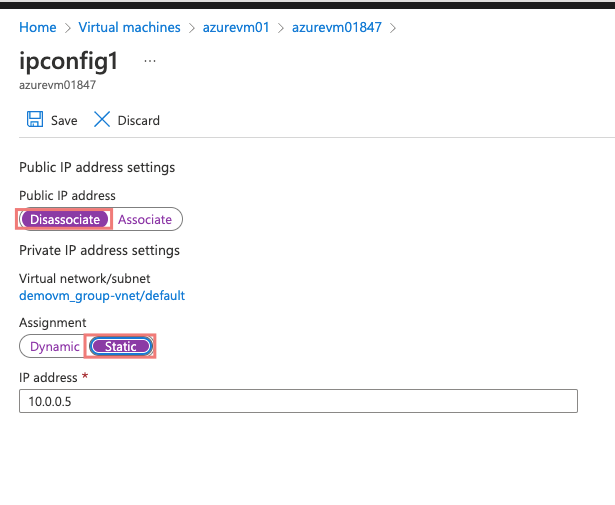
3- Disoassociate Public IPs from VMs. We don’t need public IPs on our VMs as this will come from our Public IP on the load balancer.
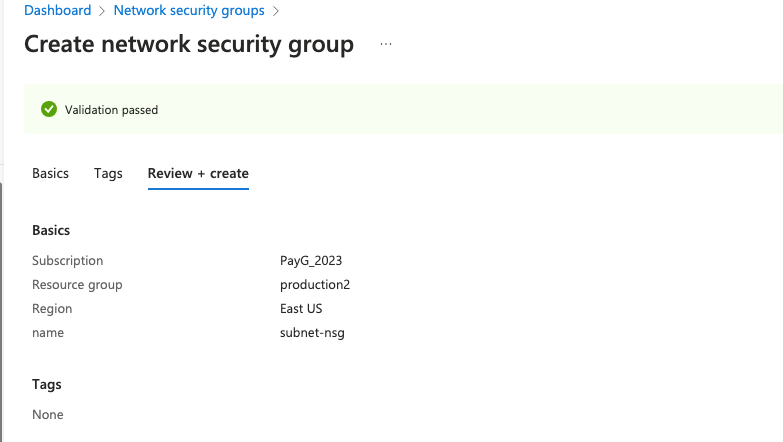
4- Create and attach a new NSG to the subnet
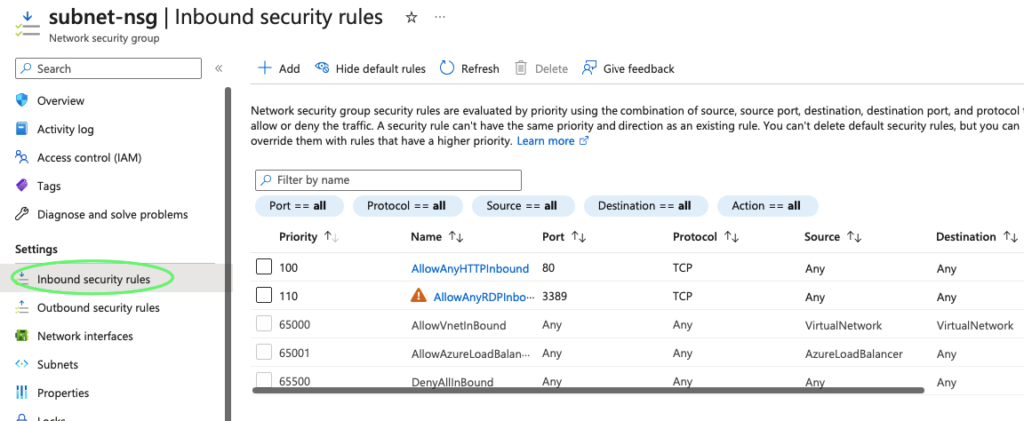
5- If we need the load balancer to talk to the outside world we need the NSG rules in place
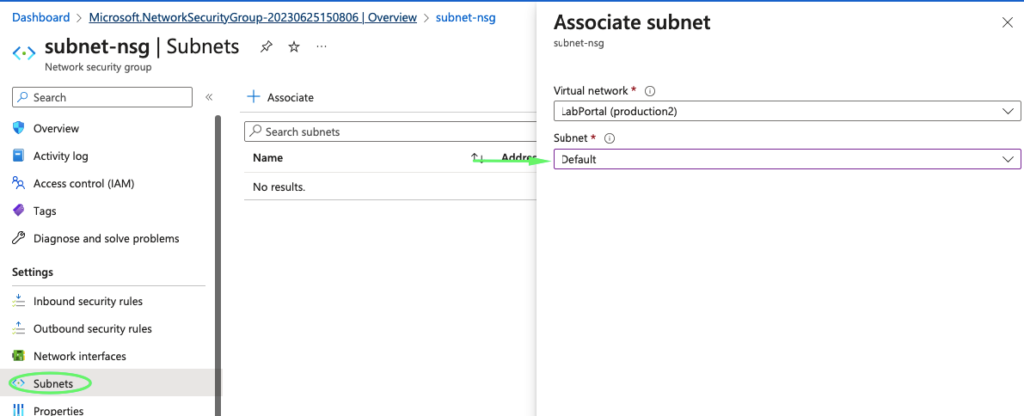
6- Associate NSG to subnet
7- Create a load balancer

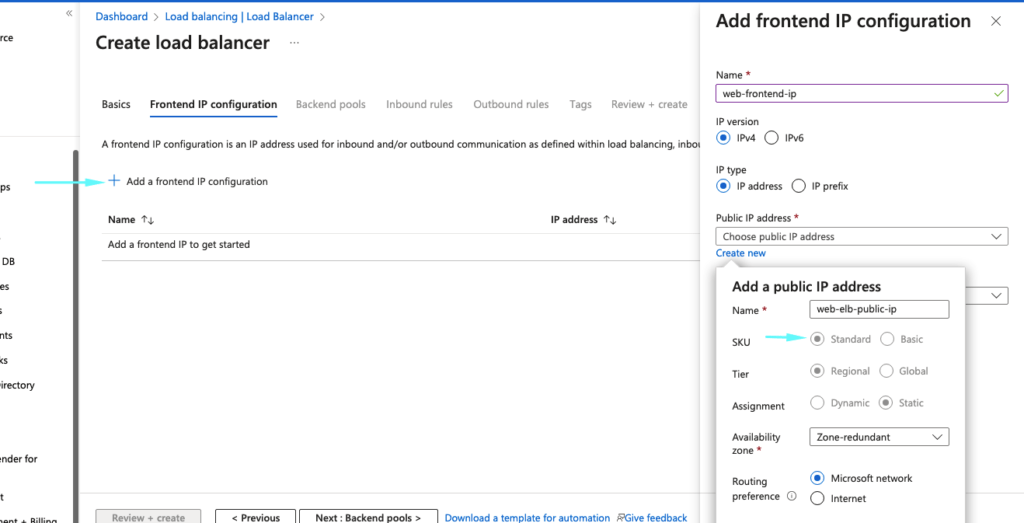
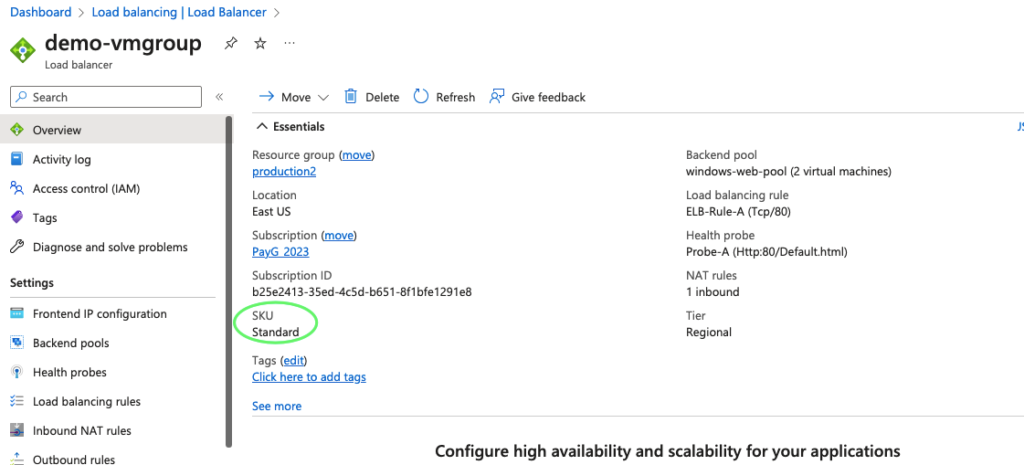
8- Give the load balancer a name and choose the Standard

9- Under the front-end, IP configuration give it a name, create a public IP for our load balancer and ensure the IP Assignment is set to Static
10 – Give the backend pool a name, and under associations choose virtual machine.
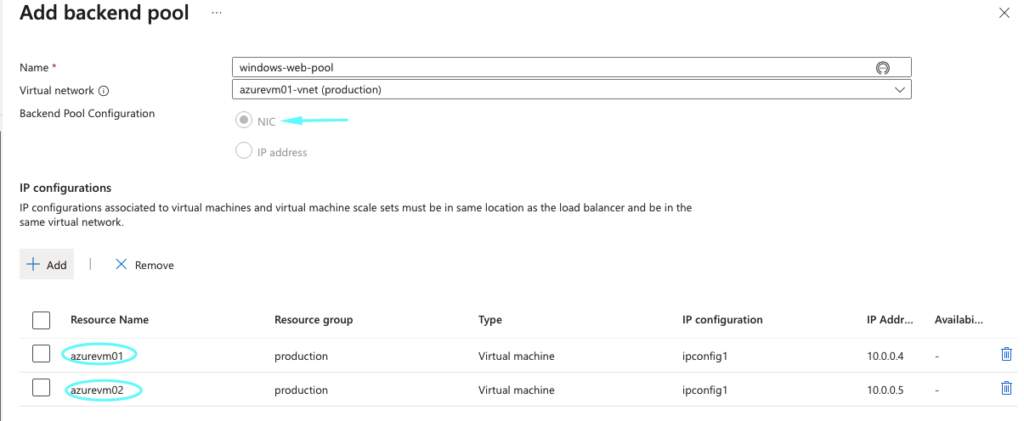
11- Both VM’s are added
12 – Skip all the inbound/outbound rules for now and click Create
14- Our load balancer is now ready

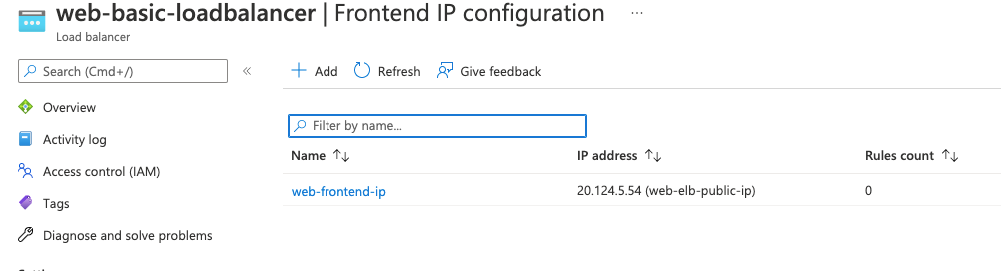
14- Our frontend IP configuration shows the public IP of our load balancer.
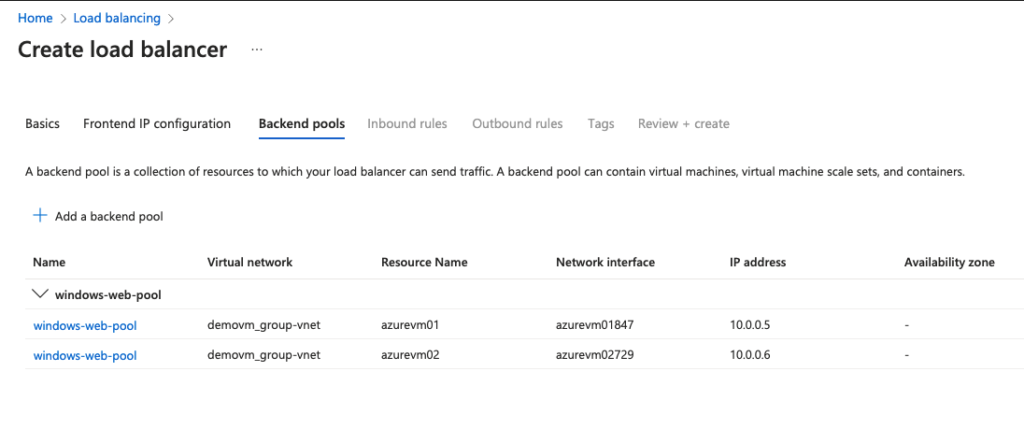
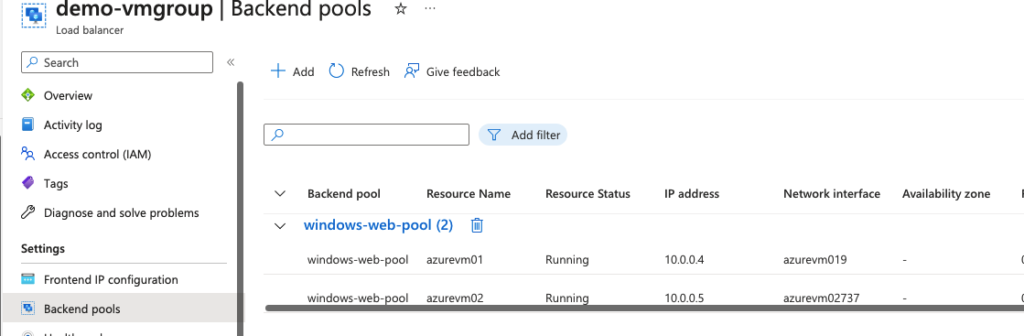
15- Our backend pool config shows both our registered VM’s in the load balancer.
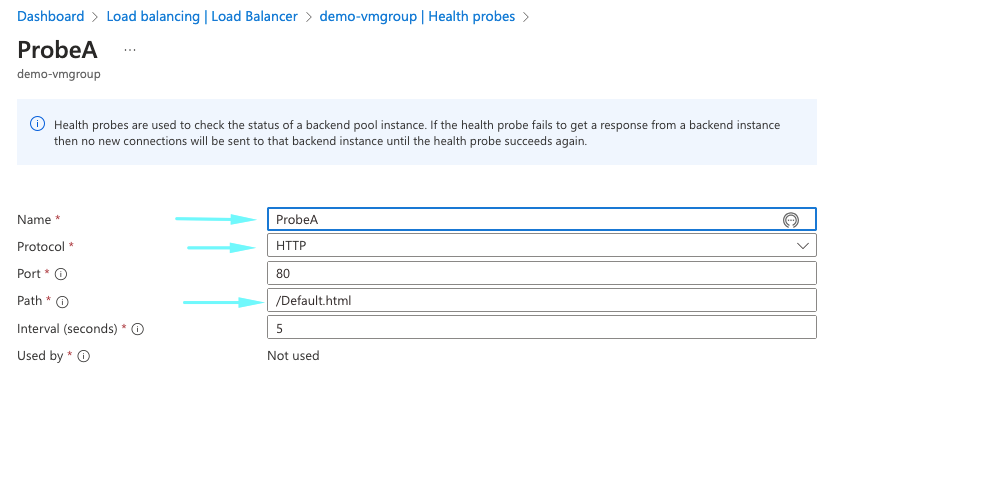
16- Under the health probe add the below paremeters. If the load balancer does not get successful health back, after 2 consecutive attempts it will mark the VM as failed and move to spin new instances.
- Name of the rule: – Probe-A
- Protocol: – HTTP
- Port: – 80
- Path:- Default.html
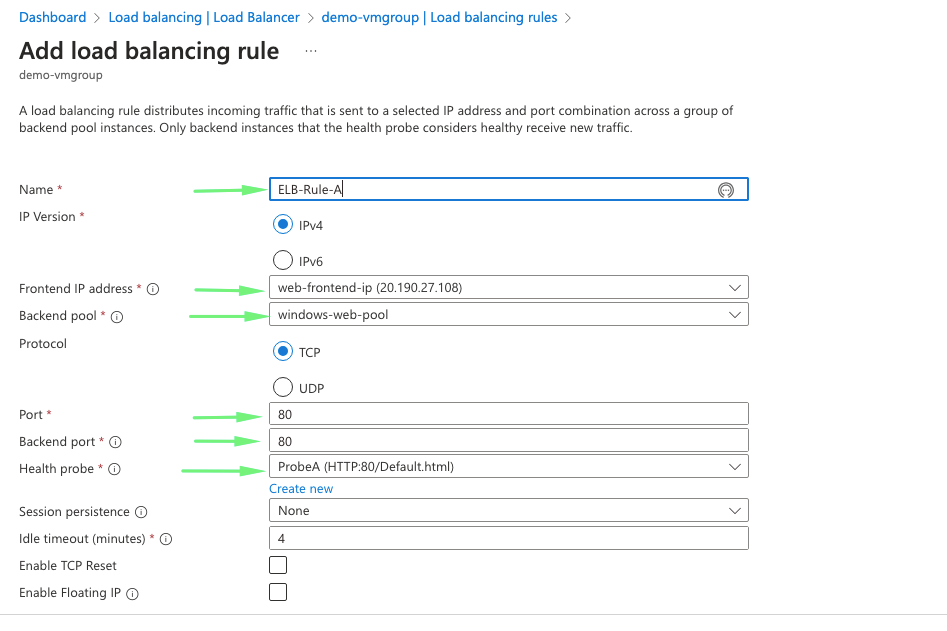
17- Under the load balancing rule, they define the following
- Name of the rule: – ELB-Rule-A
- Front-end IP: – Choose the front-end web tier ip
- Back-end Pool: – Choose the backend pool we created
- Port:- this is the front-end port ( ie: Port 80 on our ELB)
- Back-end port – this is the backend port ( ie: IIS server )
- Health Probe: – add the health check parameter defined
- Session Persistence – This is a cookie setting that allows users to stick to a session.
18- Our load balancing rule is defined

Standard Load Balancer NAT rules
NAT rules define how our load balancer communicates to the outside world. There are two NAT two rule to define
- Inbound NAT rule – Allows connections into the load balancer
- Outbound NAT rule- Allows connections out the load balancer eg: Internet
Defining Inbound NAT Rule
How do I connect to RDP now because we don’t have public IPs on our private servers?
We can do a bastion or there are some nat rules we can do on the load balancer so that we map the public IP of elb to the RDP port of the internal vm
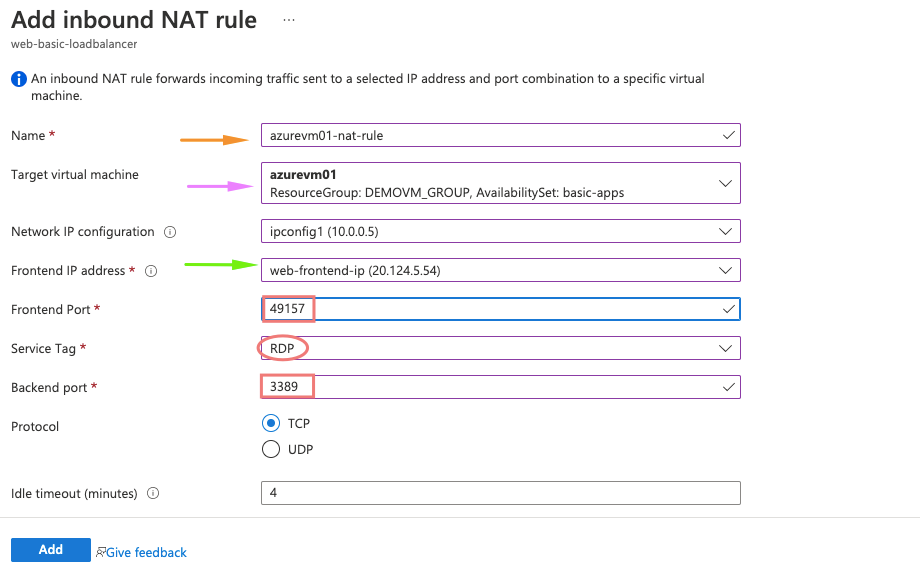
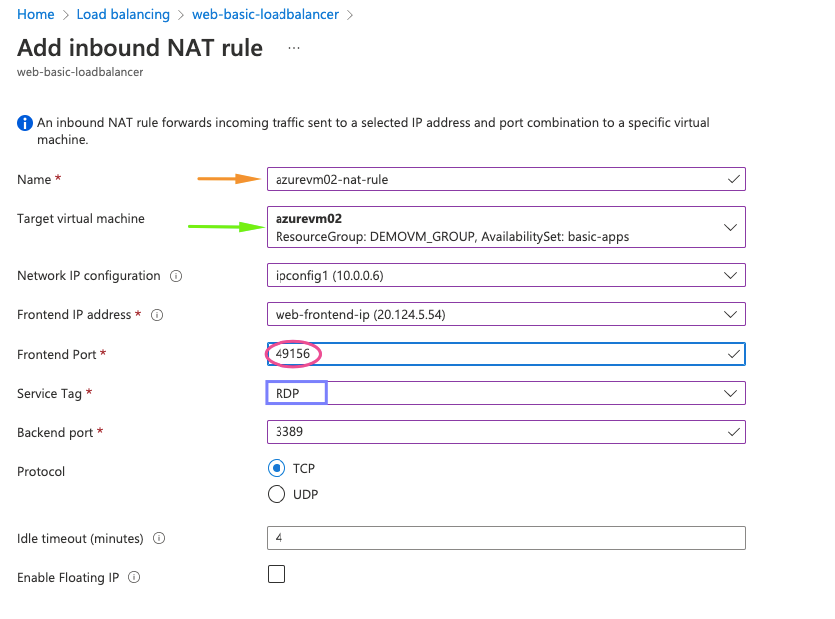
19- Under the NAT rule we need the following for our first VM
- Name of the name rule – ELB_WEB_NAT_RULE_A
- Target machine – Choose our first VM in backend pool
- Choose front end ip as our load balancer
- Front end Port – add a random number
- Service tag – choose RDP protocol
- Backend port – add 49156 which is the RDP port of our backend VM.
So here, whatever the request comes onto port 49157 of our load balancer, it’s forwarded to the RDP port 3389
20- Under the NAT rule we need the following for second VM
- Name of the name rule – ELB_WEB_NAT_RULE_B
- Target machine – Choose our second VM in the backend pool
- Choose front end ip as our load balancer
- Front end Port – add a random number
- Service tag – choose RDP protocol
- Backend port – add 49156 which is the RDP port of our backend VM.
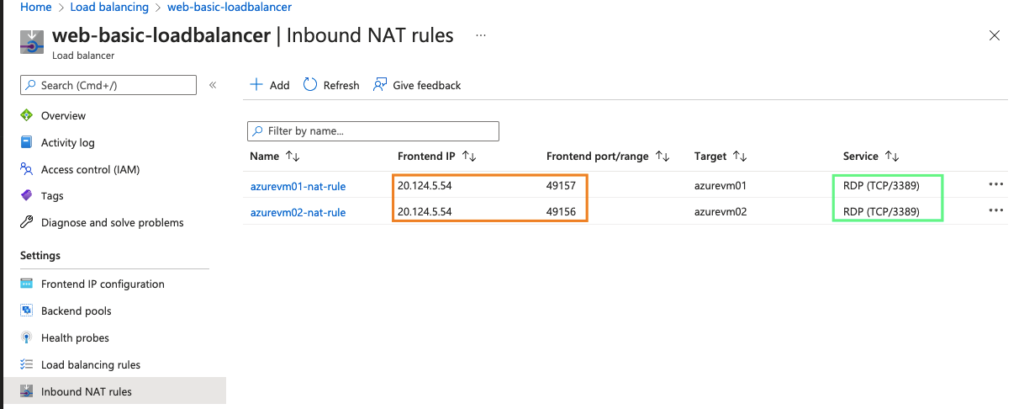
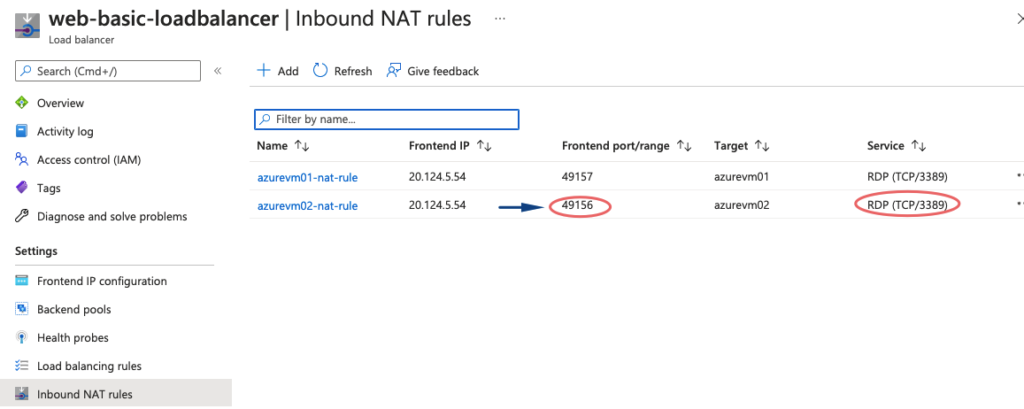
21- Both our Inbound NAT rules are defined.
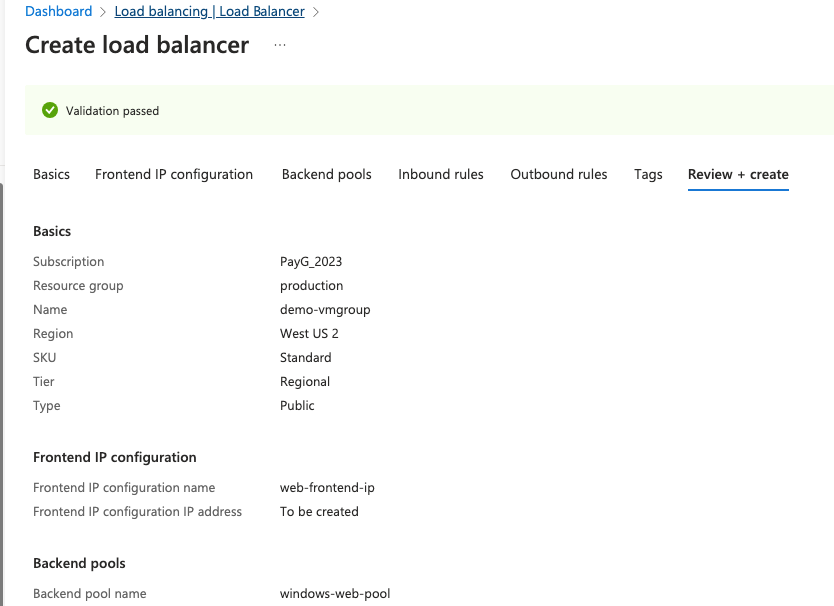
22- Finally, review our load balancer settings
23- Finally, review our load balancer output
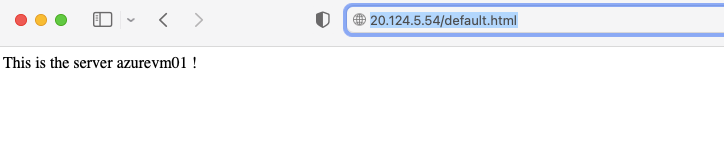

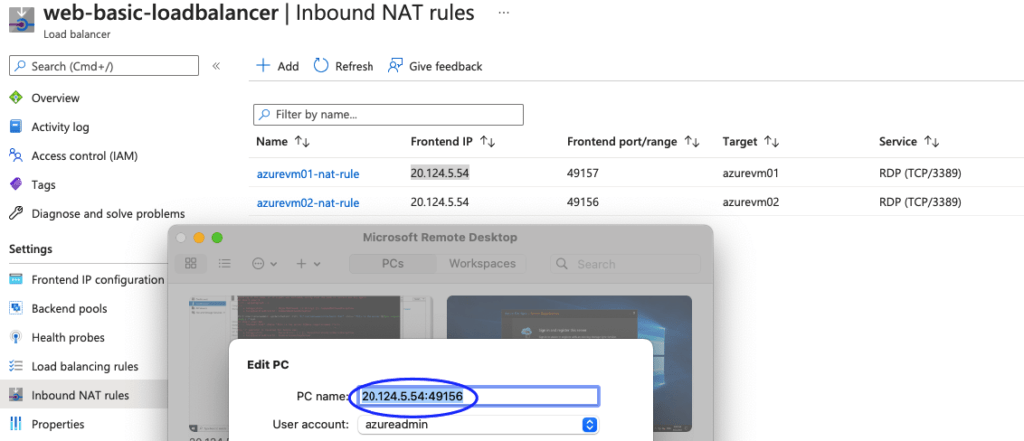
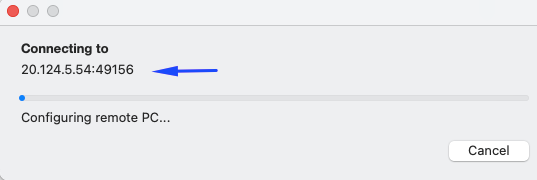
24- Testing our RDP Access
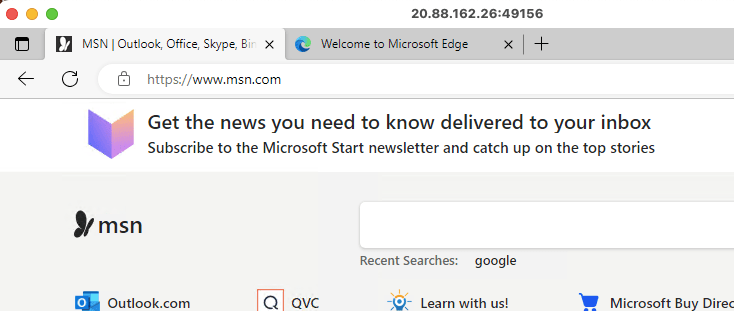
So this shows any traffic coming on our ELB on ports 49157 will be forwarded to 3389 in RDP
25- Connect to VM via RDP browser
Defining Outbound NAT Rule
26- Add all these paremeters required
- Name of the name rule – Outbound_RuleA
- Front-end IP address – select the web front-end IP
- Backend pool – choose web-pool
- Port Allocation- Use the default number of ports
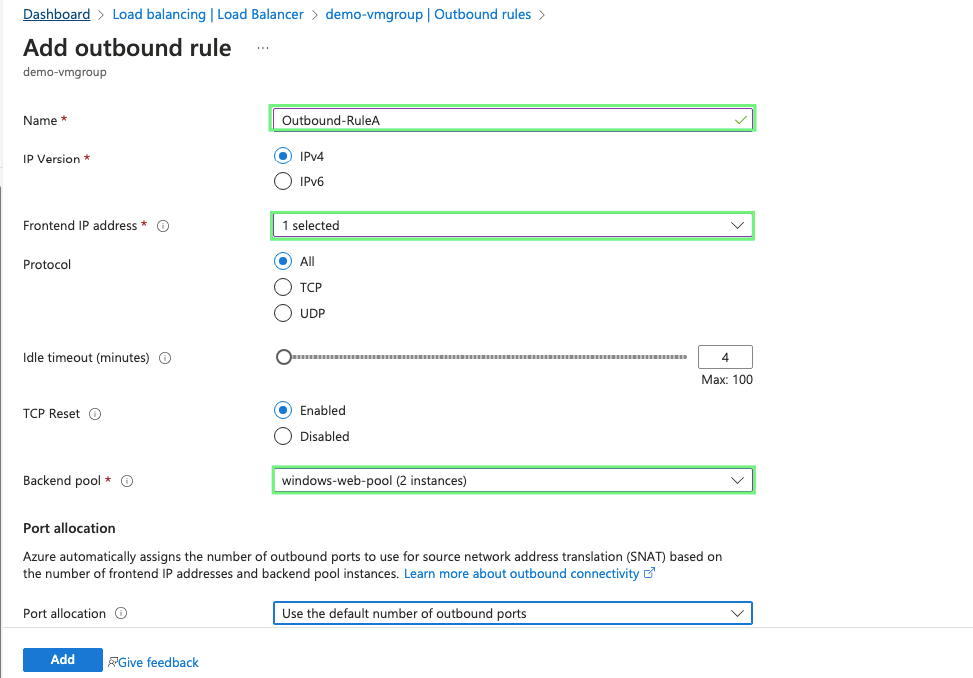
27- Our outbound rule is now ready

28- We now have internet connectivity on these VM’s via our load balancer.