If your vSAN cluster is running out of storage capacity or when you notice the reduced performance of the cluster, most likely you will need to expand the cluster capacity to boost performance. In this blog, we will add an additional node to our vSAN cluster thus scaling the capacity of the cluster.
Blog Series
- Configure vSAN in Single Site
- Create vSAN SSD Disks from HDD
- Remove an esx node from the vSAN cluster
- Scaling vSAN by adding a new esx node
- Two nodes vSAN7 Configuration
- Convert 2-Node vSAN to 3-node configuration
- VMware vSAN Stretched Cluster
We can expand an existing vSAN cluster by adding hosts or adding additional storage devices to existing hosts, without disrupting any ongoing operations.
VMware vSAN can be built on the following hardware:
- vSAN ReadyNode – ReadyNodes are preconfigured solutions using hardware tested and certified for vSAN by the server OEM and VMware which is by far the cheapest on-prem installation. eg : Lenovo VX Nodes, HP Simplivity etc
- Turn key deployments – fully packaged Hyper-Converged Infrastructure (HCI) solutions like Dell EMC VXrail
- Custom solution – hardware components compiled by the user, all hardware used with vSphere 7 and vSAN 7 must be listed in the VMware Compatibility Guide
Scale-Out vs Scale-up
Scale-out -This would simply mean we purchase new nodes and add them to the cluster to increase the vSAN capacity. This is the preferred route when there are no empty drive slots in our existing vSAN nodes to scale-up capacity.
Scale-up – If there are free or empty slots on our existing vSAN nodes, we can use this option to add additional hard disks to expand the capacity of our vSAN cluster by adding new disk groups. The caveat here is that if we wish to add more cache to the existing disk group ( ie: size the cache disk to at least 10 % of the total capacity for optimum performance ), we will need to evacuate the entire data, replace the cache device and build the disk group again.
Scale-Out Configuration
In our lab, we have thus a custom solution wherein we are using our nested esx hosts to scale out our environment. We have 3 ESXi hosts deployed in our environment and we will add a 4th node to the Cluster
Requirements for vSAN
1 )Create Vmkernel port and enable vsan traffic
2 ) Create  1 ssd + 1 sata disk ( ssd acts as flash and this capacity cant be used for provisioning VMs) . Ie ; disk groups in esx hosts
3 )Make sure there is 10G for VSAN traffic.
4 )VSAN should be licensed
Each new physical host in our environment has been built as below :
- 1 x 35GB SSD for cache
- 1 x 100G SSD for capacity
- 8GB RAM on esx host
Our current configuration shows three ESXi hosts and each with the above configuration.

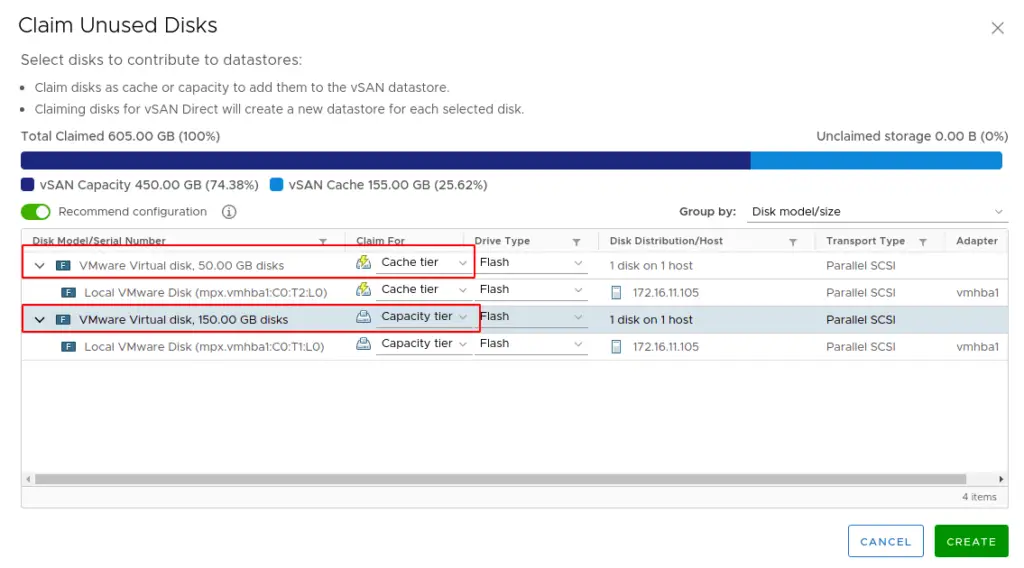
Next, we will add a new host ESX05 with a different disk configuration of 50 GB SSD and 150GB SSD disk which is a higher spec than what we have on our other hosts
1- Connect the new host to the distributed switch. Go to the distributed switch, choose to Add hosts

2- Choose the host to add to our distributed switch

3- It is recommended to migrate one NIC at a time but in this case I’ll just move with moving the whole lot in one go

4- We will also need to move our management vmkernel adapter to our distributed switch

5- Skip this section as we aren’t migrating VM’s at this time

6- Once the host is added to the distributed switch, let’s assign a vmkernel adapter for vSAN network as well to the new node. Click on the vmk-vSAN-DPortgroup adapter which we created earlier > Right Click and Choose Add VMkernel Adapters > Select Host
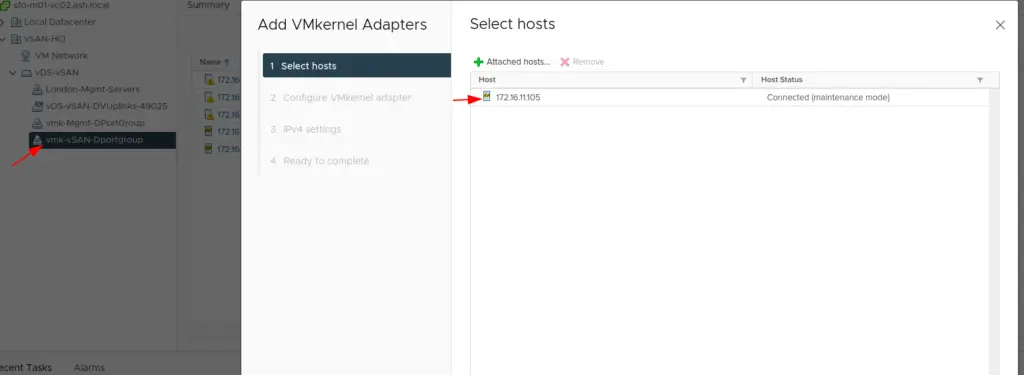
7- Under this section, choose vSAN service to be enabled
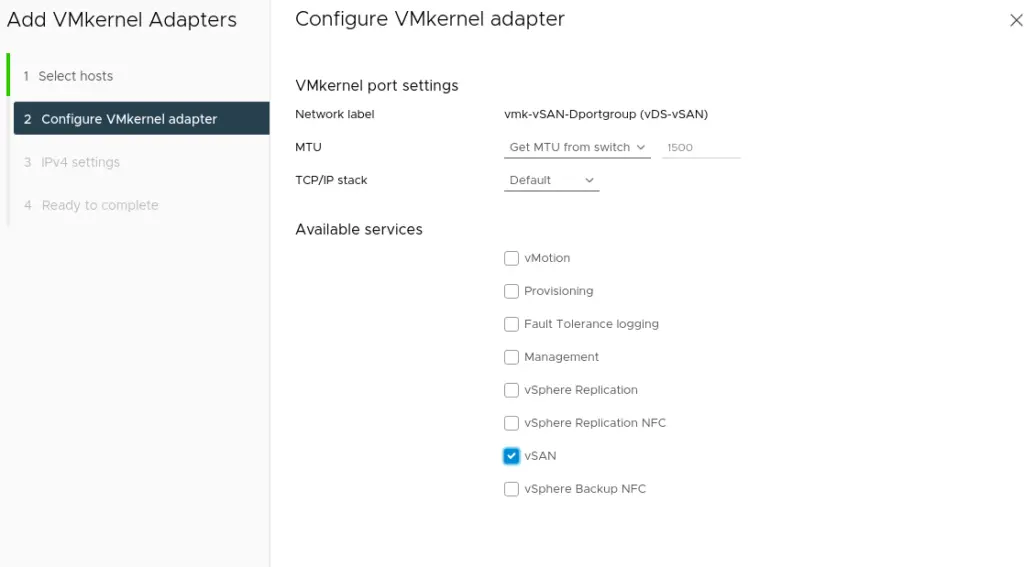
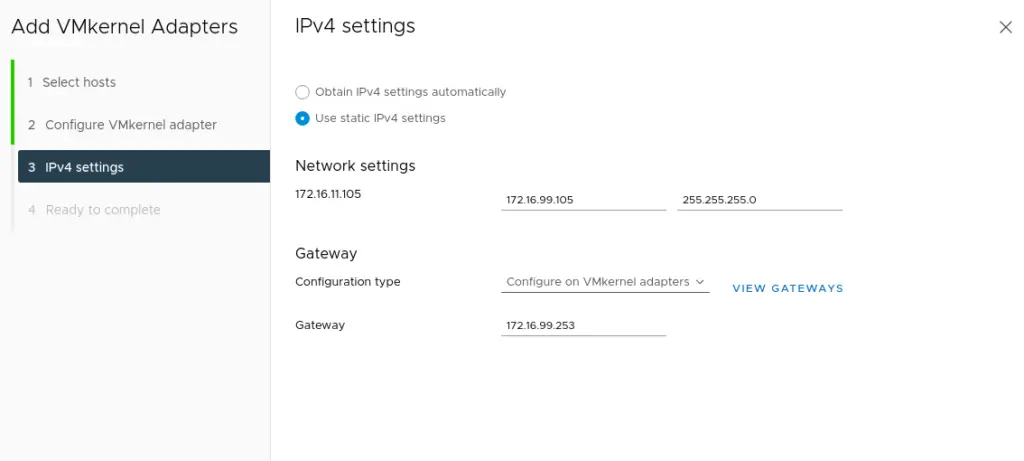
9- Review and Click Finish
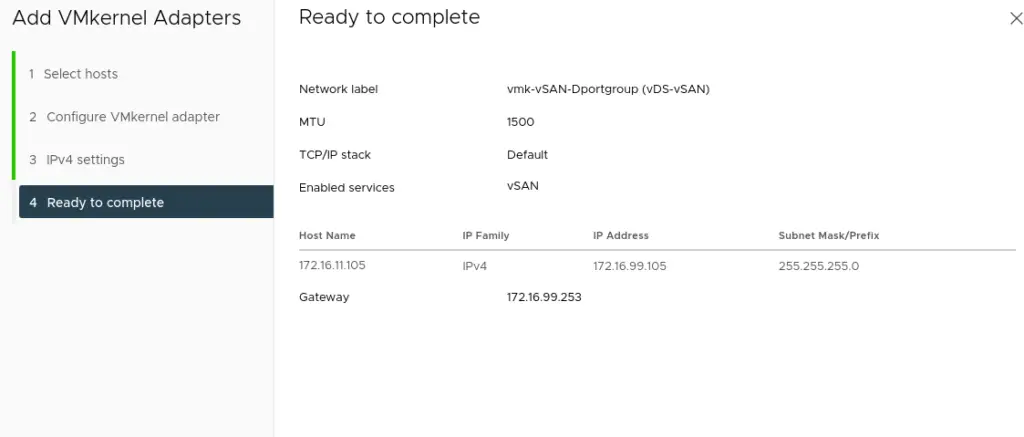
10- On the wizard completes, go to the host and verify if our vmkernel adapter for vSAN network is active.

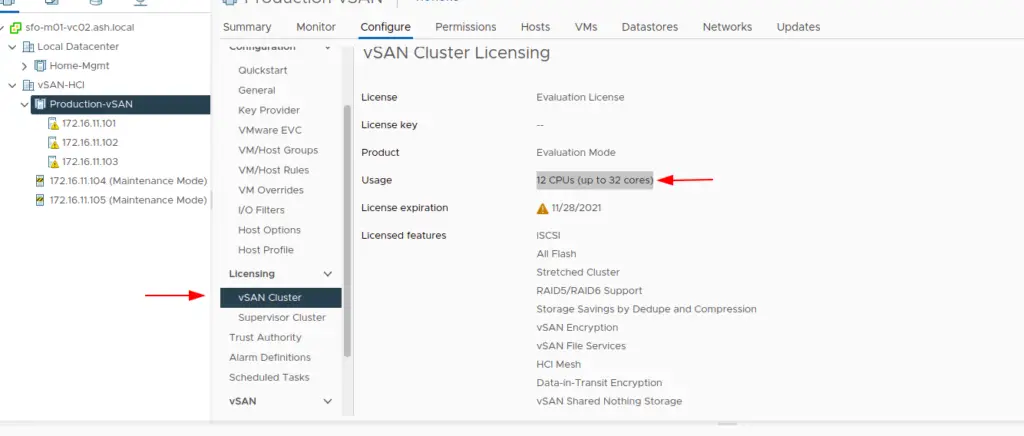
11- Validate if you have sufficient license to add a new host in
12- With all the above work completed, our next step is just to move the host into the cluster. Click on the Production vSAN Cluster – Choose the option to add the host into the vSAN Cluster
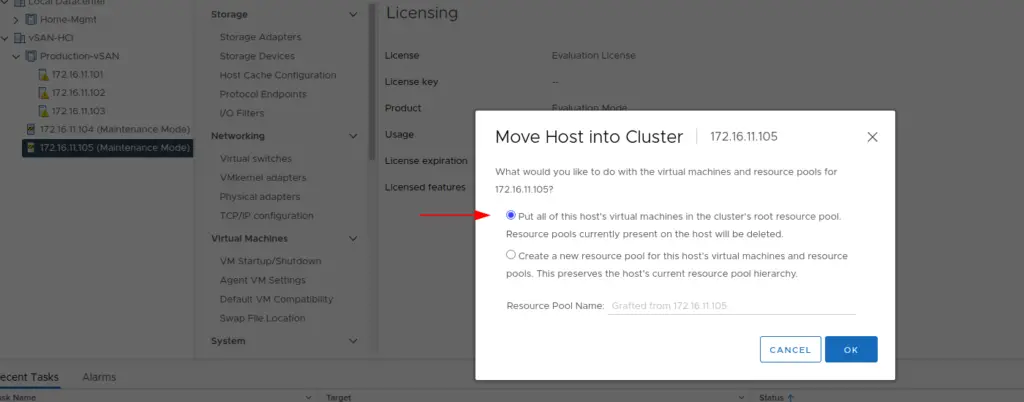
13- As seen our new host is now moved into the vSAN cluster

14- Right Click the host and choose to exit the host from maintenance mode. Validate if our new disks are present and are in a Not Consumed State. Since we added a new ESXi host, we can see the host will be showing on the vSAN cluster Disk management but there won’t be any disk listing.

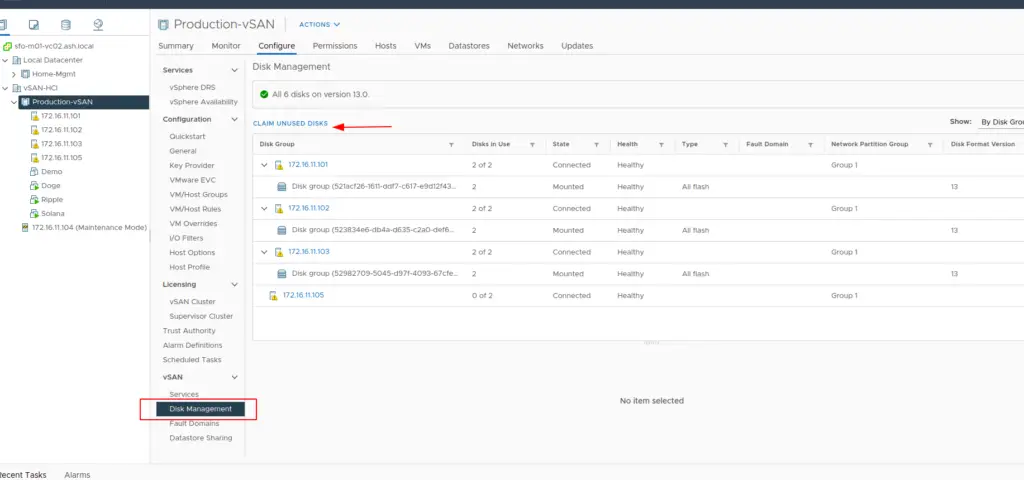
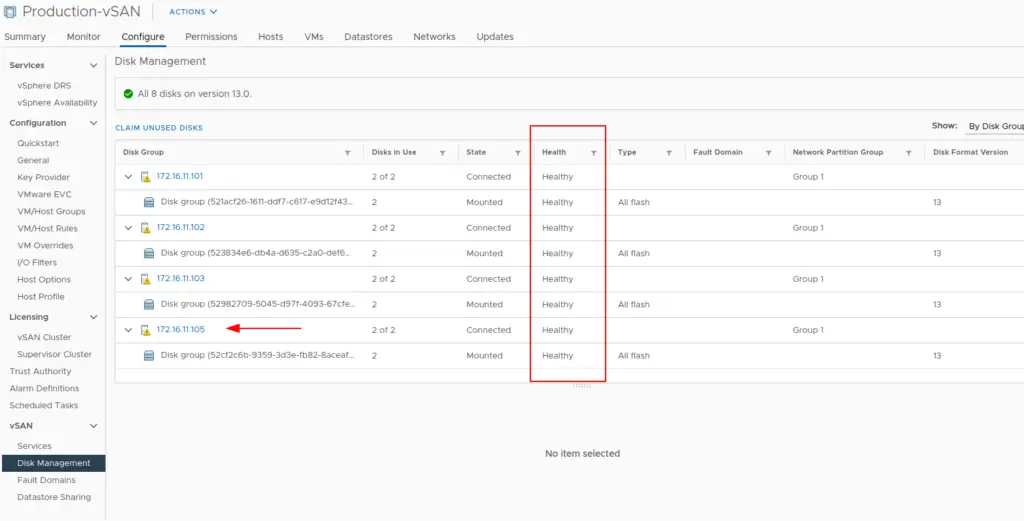
15- Go to vSAN Cluster – Configure – Services – vSAN – Disk Management and check if all our disks are healthy and make a note of the Network Partition Group ID and Disk Format version

16- Under Disk Management – Click on the Claim Unused Disks option
17- Validate the info and click on Create
18- Once you added the disks, Navigate to the Events tab and see the chain of events

19- Under the Disk Management tab, we can now see the new host is participating in the vSAN Cluster and providing datastore capacity
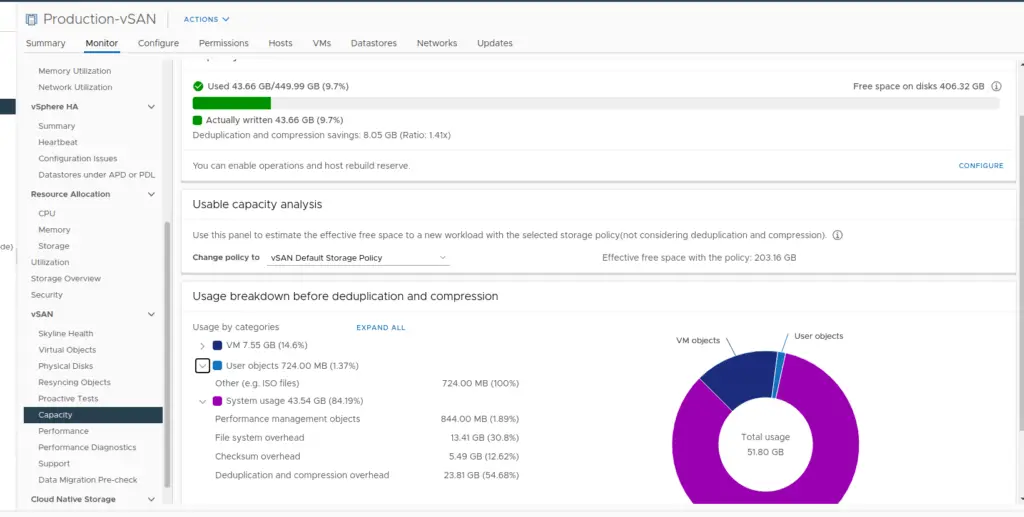
20-Navigate to Storage and Click on the vSAN storage and check the vSAN capacity.
Notes
If vSAN is not showing the correct capacity then verify if the vSAN On-Disk Format configuration is correct or not. Navigate to vSAN and select the General option so you can see there is a warning on the on-disk Format Version. Since we added a new host and the on-disk version may not be compatible with the version on others so in order to claim those SSD first do a Pre-upgrade check and once it is completed, click on upgrade. Upgrade Process will take a bit longer and after completion, it will show as all Disks Version will be updated.

