
In this blog, we will extend our existing NSX-T to include the AVI as well.
Licensing NSX ALB
NSX-ALB needs to be licensed before we start using the appliance. License is applied within the NSX ALB software UI.

Create Credentials for NSX-T and vCenter
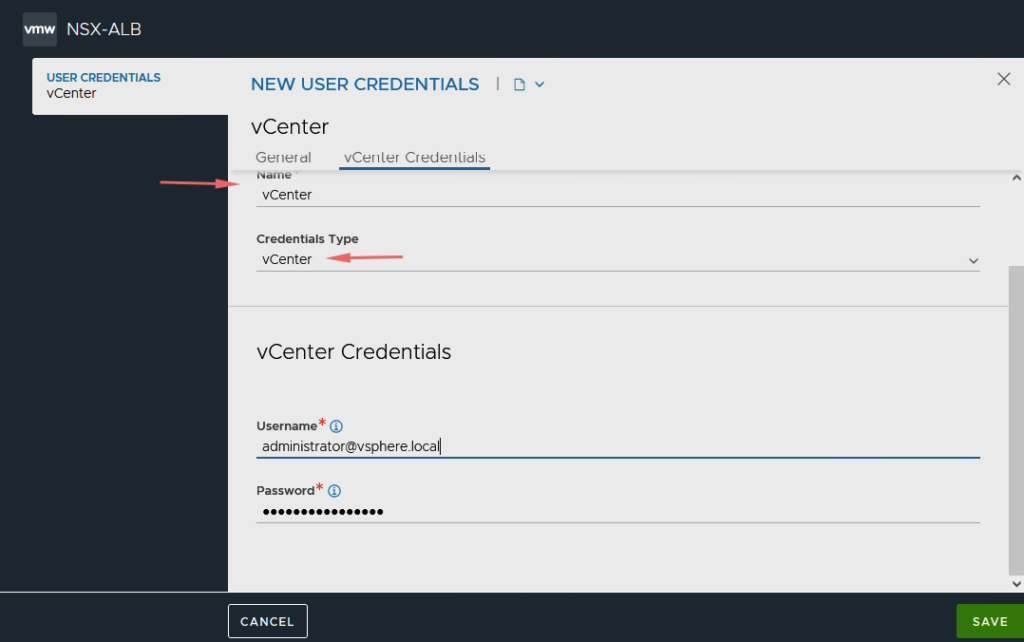
For NSX ALB to integrate with the vCenter and NSX-T, it needs a valid admin credential stored in the NSX-ALB database. Go to Administration > User Credentials > Create

Record a credential for our vCenter
Record a credential for our NSX-T

Our credentials for NSX-T and vCenter are now recorded so let’s begin the integration.

Define A Content Library
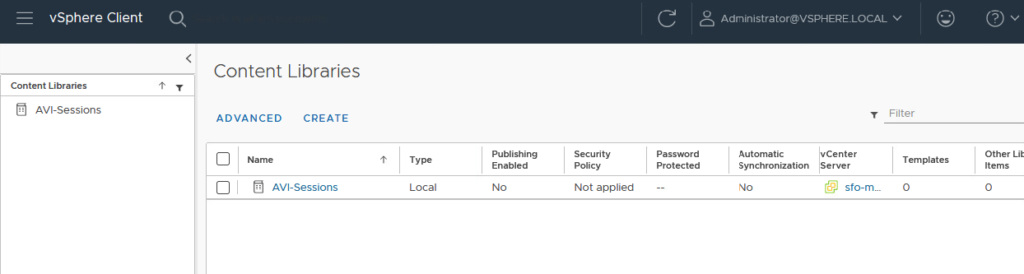
The AVI virtual service engine VM’s are deployed to the AVI cluster automatically as virtual engines are created and this is taken care of by the content library.

An empty content library is created.
Deploy Edge Transport Nodes & Create Edge Clusters
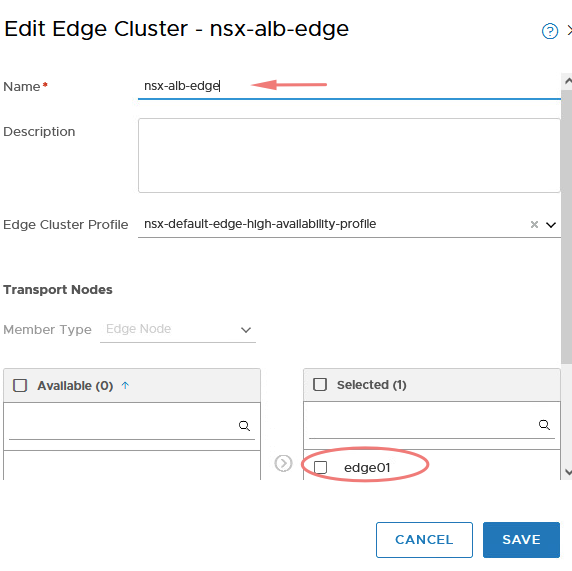
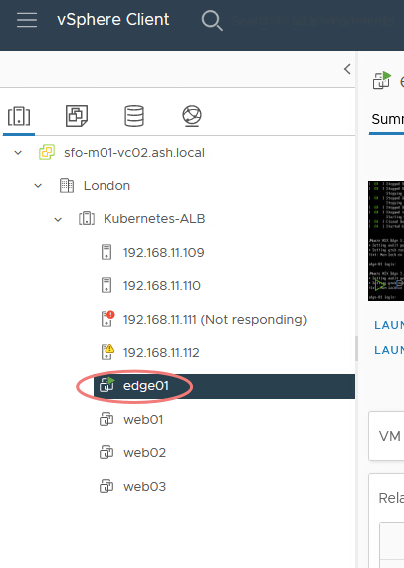
A new edge node is added to our new vCenter environment and this is joined to a brand new edge01 cluster as shown
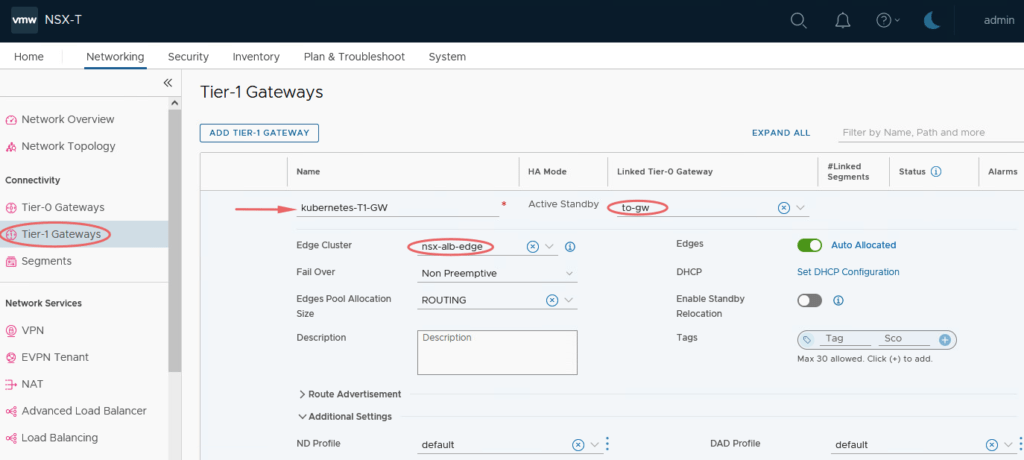
We will now extend my current NSX-T by adding a new Tier 1 gateway just for my AVI.
Our new edge node is deployed and ready.
Deploy New T1 Gateway for Avi Management
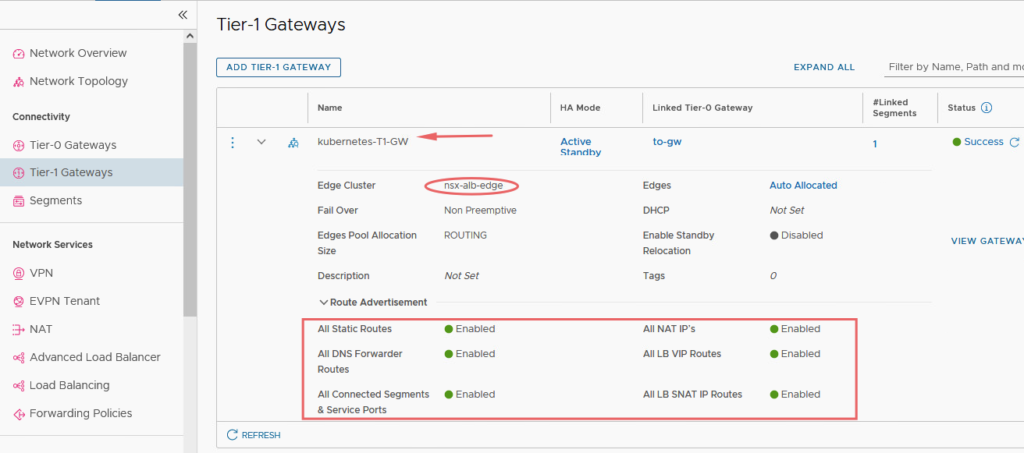
I’ve gone ahead and deployed a new T1 gateway just for AVI management and it’s connected to our T0 gateway and our newly formed edge cluster. Route advertisement is as well enabled across the new T1 and TO.
Create DHCP Logical Segments for Avi SE VMs & AVI Data VM
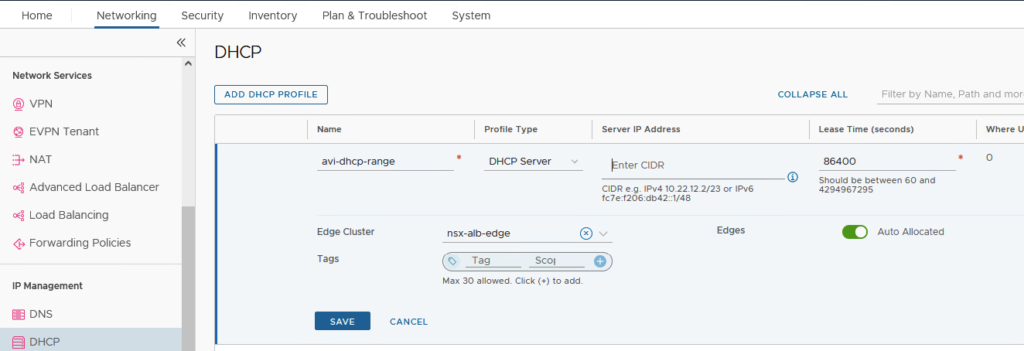
Go to Networking > IP Management > DHCP > Add DHCP Profile.
The AVI deployment wizard will ask us for two subnets/segments – a Management segment for our Service VMs and another a data segment. Provide the following info
- Name the DHCP profile as AVI-DHCP-Range
- Select the Profile Type as DHCP Server
- Choose the edge cluster as the new NSX cluster- nsx-alb-edge
- Leave Server IP Address blank as NSX-T will assign this IP automatically.
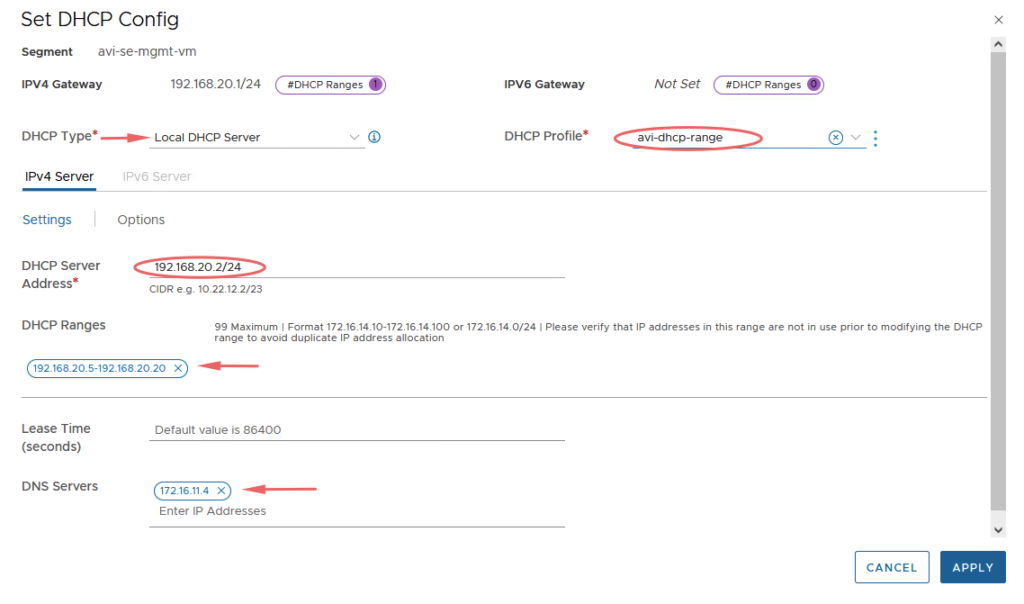
Create Logical Segments for Avi SE Mgmt VMs. Provide the following info
- Name the DHCP segment a name as AVI-SE-MGMT-VM
- Select the edge cluster as Kubernetes-T1-GW
- Choose the transport mode as the Prod-Overlay
- Choose the subnet CIDR range – 192.168.20.1/24

Under the DHCP Config, give the following
- Choose DHCP Type as Local DHCP Server
- Choose the DHCP profile as the one we created earlier.
- Choose a DHCP Server Address and the DHCP Range required.
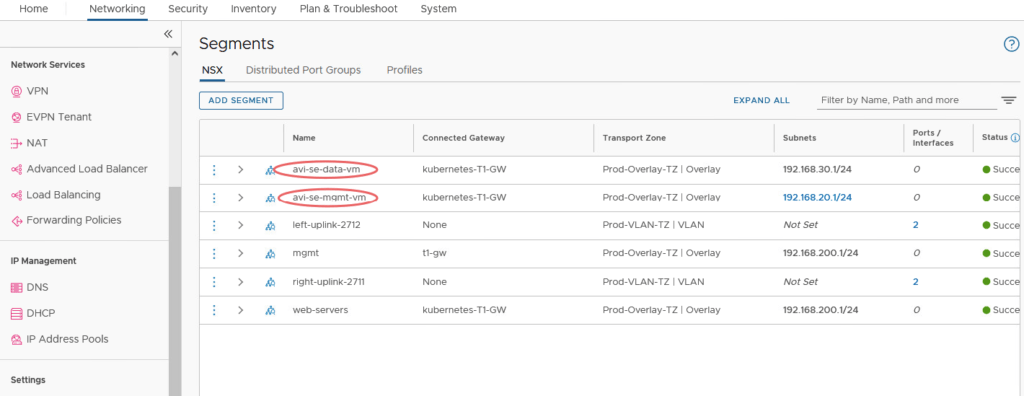
I’ve gone ahead and created our Data AVI Segment as well and this segment is also DHCP attached.
The next step is to integrate our vCenter and NSX-T into NSX ALB and we will cover this in our next blog.