The Virtual Private Cloud (VPC) capability in NSX isn’t brand new—it first appeared back in NSX 4.0. What makes VPCs powerful is their ability to deliver true multi-tenancy. Each tenant gets its own isolated slice of networking and security services, with no overlap or leakage between environments.
Access to networking constructs like T1 gateways and segments is governed by role-based access control (RBAC), while quotas ensure tenants don’t exceed defined limits when creating objects.
From NSX UI to vCenter Integration
In earlier versions of VMware Cloud Foundation (VCF < 9.0), VPC creation was handled entirely through the NSX UI. Enterprise admins had to set up NSX projects and configure RBAC policies before tenants could start building their own VPCs.
VPC management is now integrated directly into the vCenter Server UI, making the process smoother and more accessible.
Preparing for VPC Creation
Before spinning up a VPC, make sure:
- Edge clusters are deployed.
- A provider gateway is in place.
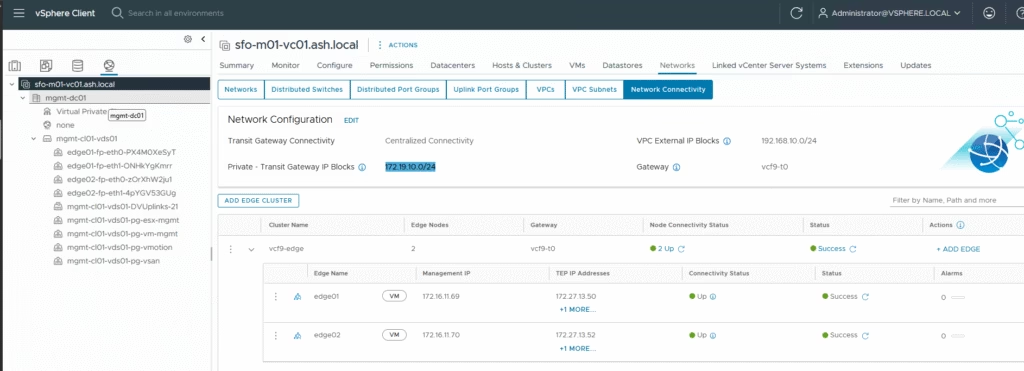
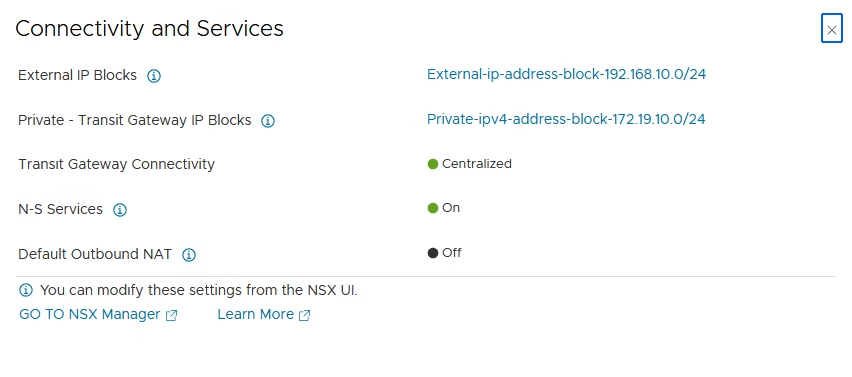
The VPC inherits its connectivity strategy (centralized or distributed) from the edge cluster, and external IP blocks are defined at that level.
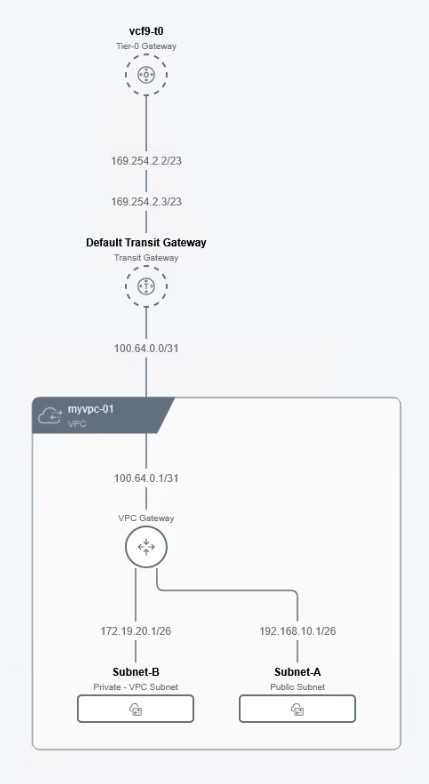
When you create a VPC, a VPC gateway is automatically provisioned. This gateway acts as a logical router:
- Handling north-south traffic between the VPC and the Transit Gateway.
- Managing east-west traffic between subnets inside the VPC
Creating a VPC in vCenter
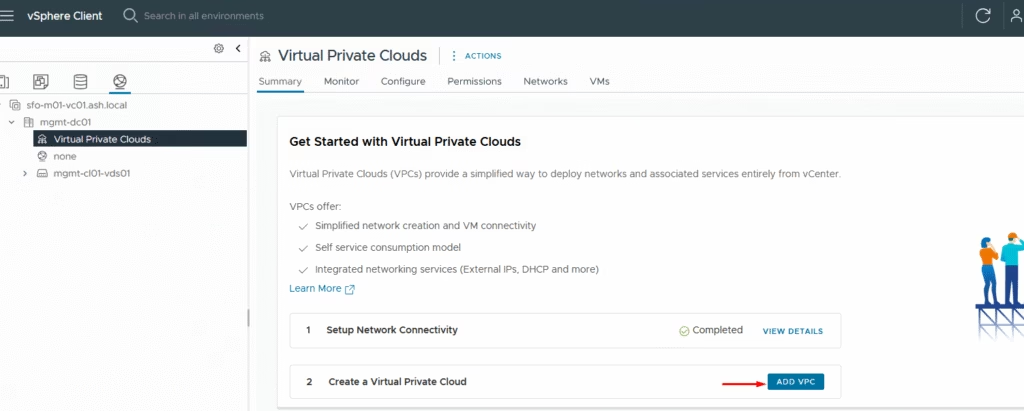
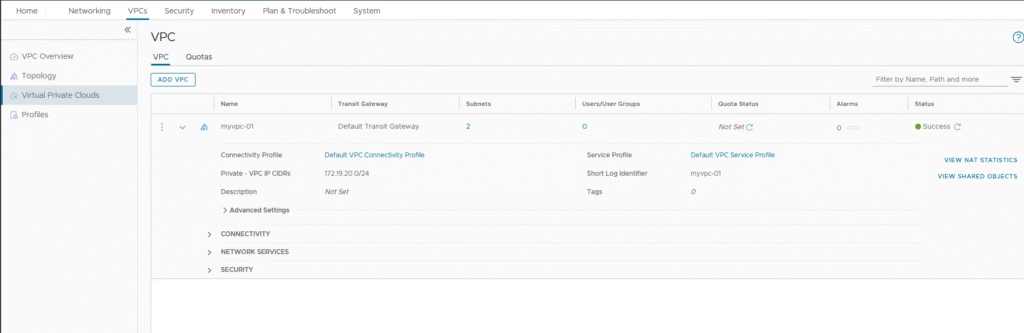
Go to the Networking tab in vCenter and go to Virtual Private Clouds
Virtual Private Clouds → Add VPC.
Enter the VPC name and private vpc cidr details.
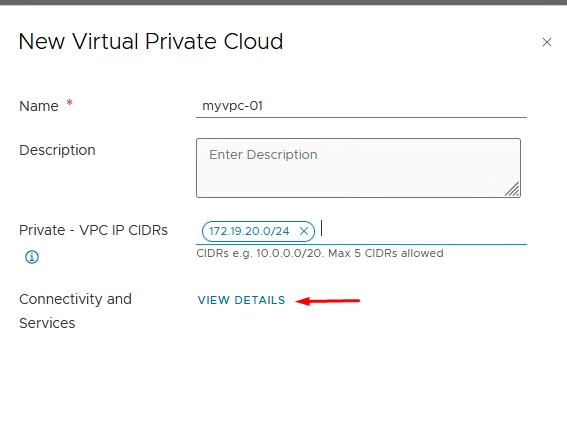
Use View Details to check the connectivity strategy and external IP block.
Click Save to exit from the wizard

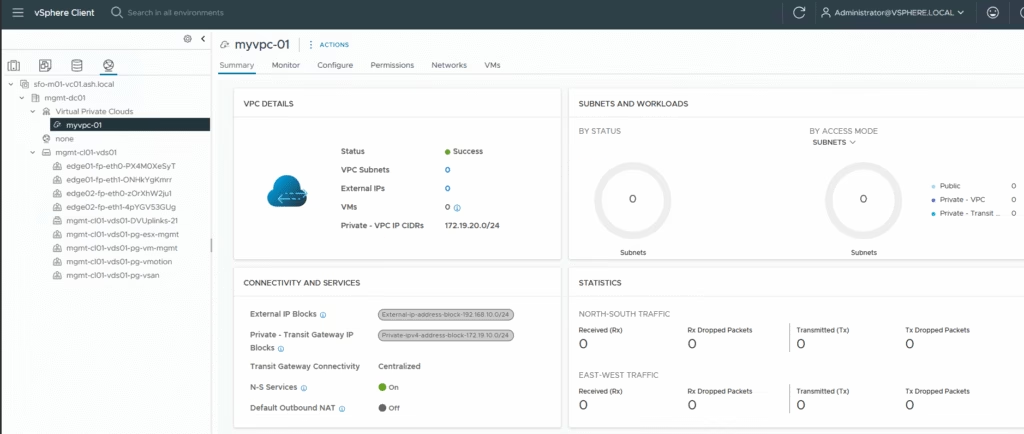
Our VPC is now ready and we can start creating subnets
Defining VPC Subnets in VPC
Subnets can be configured in three ways:
| Subnet Type | Description | Connectivity | NAT Required |
|---|---|---|---|
| Public | Advertised externally | Direct to physical network | No |
| Private VPC | Stays inside the VPC | Internal VPC-to-VPC only | Yes |
| Private Transit Gateway Subnet | Routed via Transit Gateway | Connects to other TGW-linked VPCs | Optional |
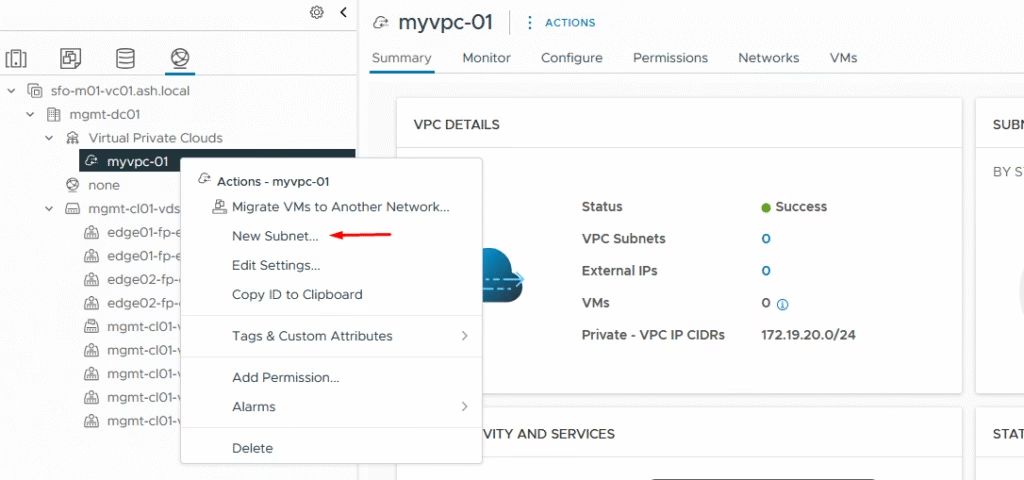
From the VPC view, click Actions → New Subnet.
Enter the Subnet name and select the access mode as Public
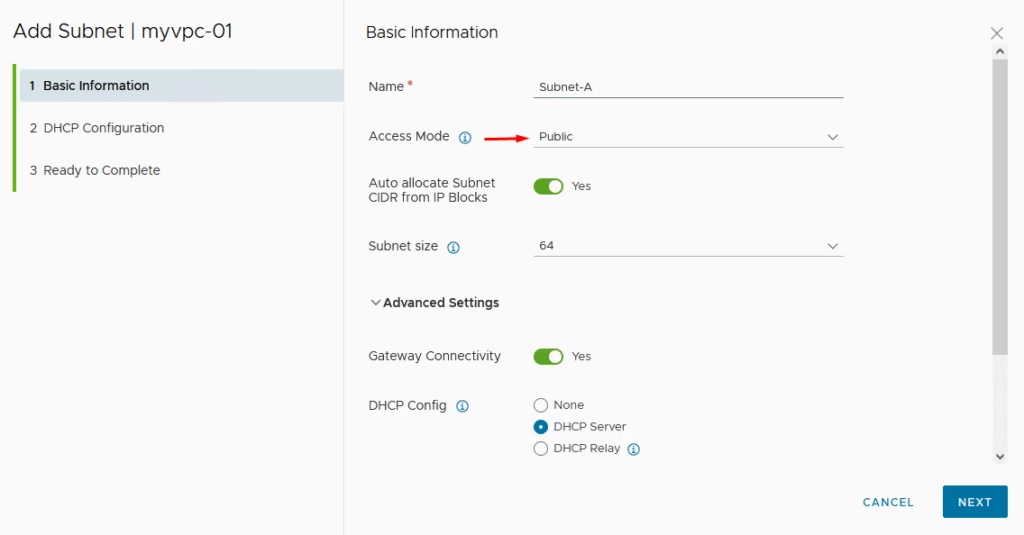
Optionally, we will enable DHCP for automatic IP allocation to workloads.
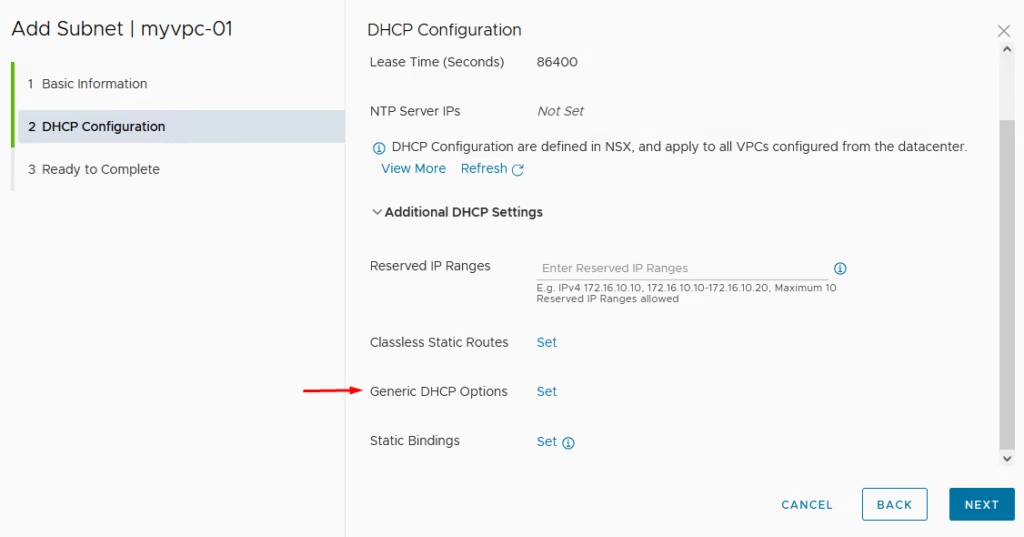
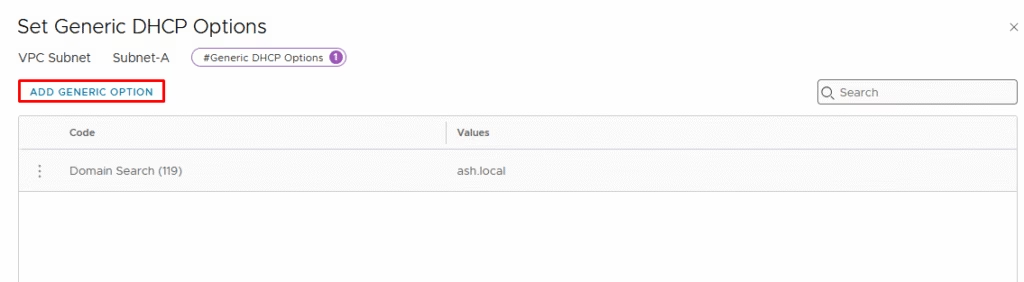
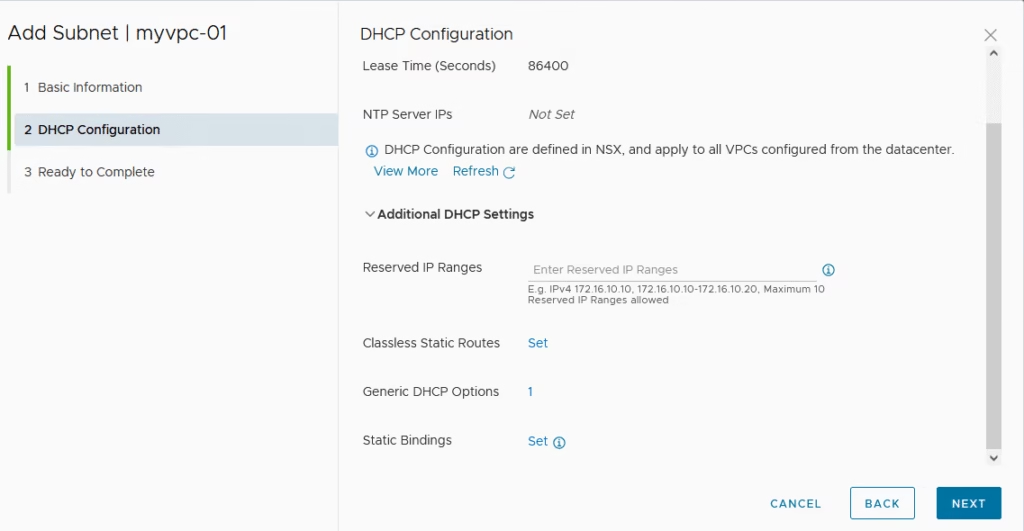
Under the options I’ve just added my domain name.
Click Next to continue.
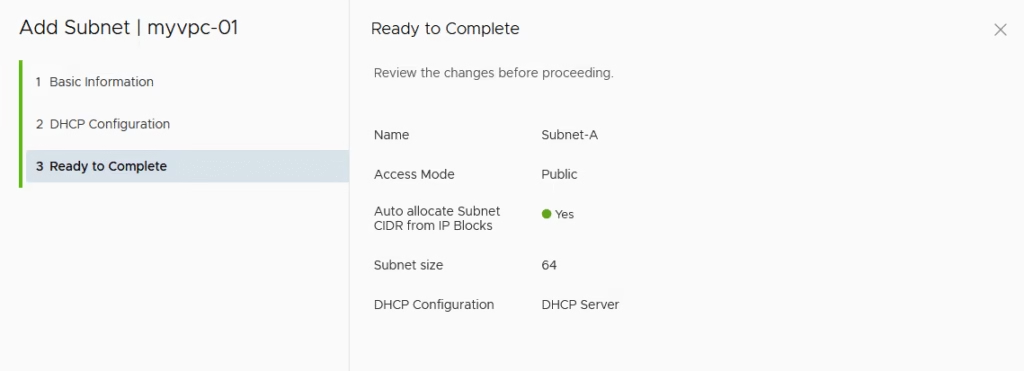
Click Finish to complete the config for our Public subnet
We do one more for our Private subnet
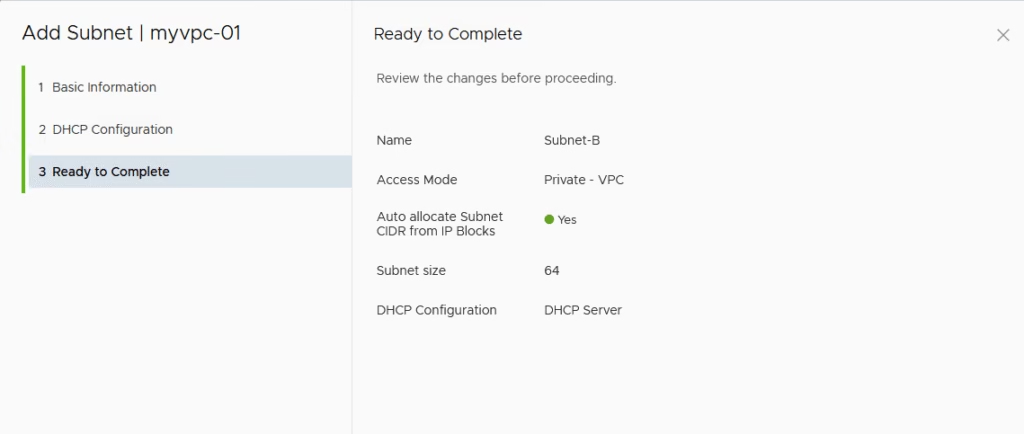
VPC Subnets are thus created
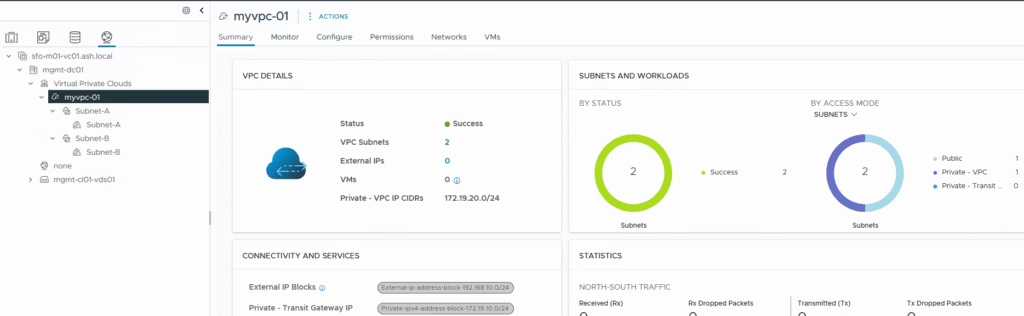
Under NSX UI, we can see both the subnets
The topology view would appear as shown.