In this blog, we will understand the process of creating an Office-based identity on the cloud.
Step 1: Go to https://www.microsoft.com/en-gb/microsoft-365/compare-microsoft-365-enterprise-plans. We can create an Office 365 tenant trial for 30 days before you start paying for the licenses.
The following are the details needed for the creation of a tenant
- Country where our business is located
- Global Admin Name, Email and Phone
- A Unique Tenant Name
- Payment Method
- A domain name
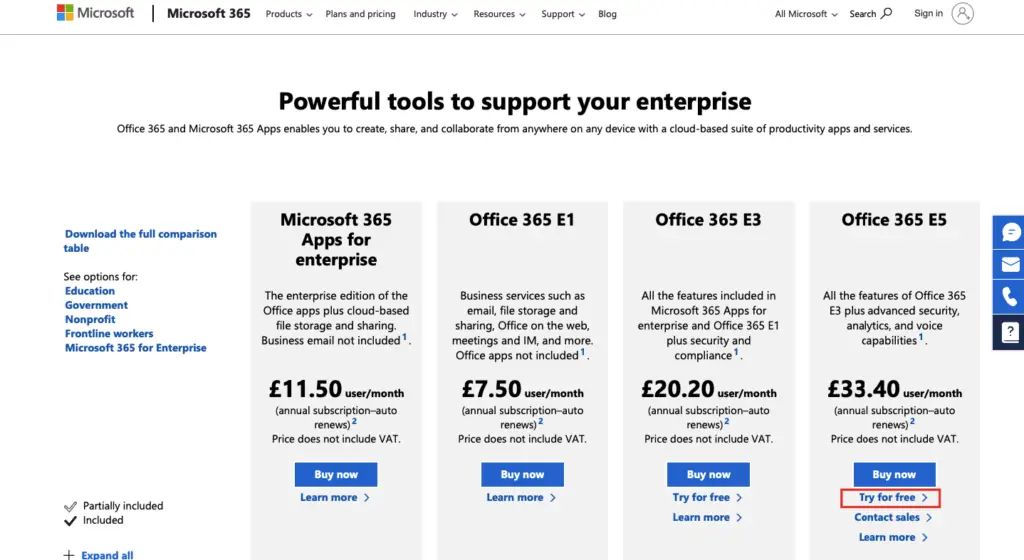
Step 2. Set up your account. Enter the email address that you want to configure with Office 365 and Click Next.

Step 3. Fill in the information. Click Next.

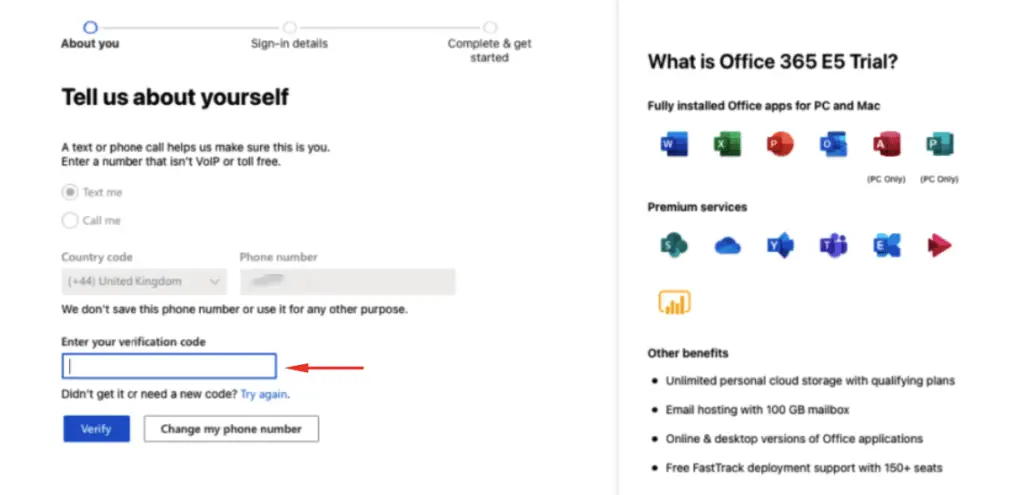
Step 4. Click Send verification code to verify your phone number. Enter the verification code. Click Verify.
Create your business identity
Step 5. Fill in the username and choose a domain name. Try to use the same domain name as your primary domain that you will configure later. Click Next. This domain is hoisted on the onmicrosoft.com domain but we will later change it.

Step 6. Microsoft is creating the Office 365 tenant account. Wait for it to finish and once done you have now signed up fully for an Office 365 tenant. Click on Get Started.

Step 6. Once you verify your account, choose to remain signed.

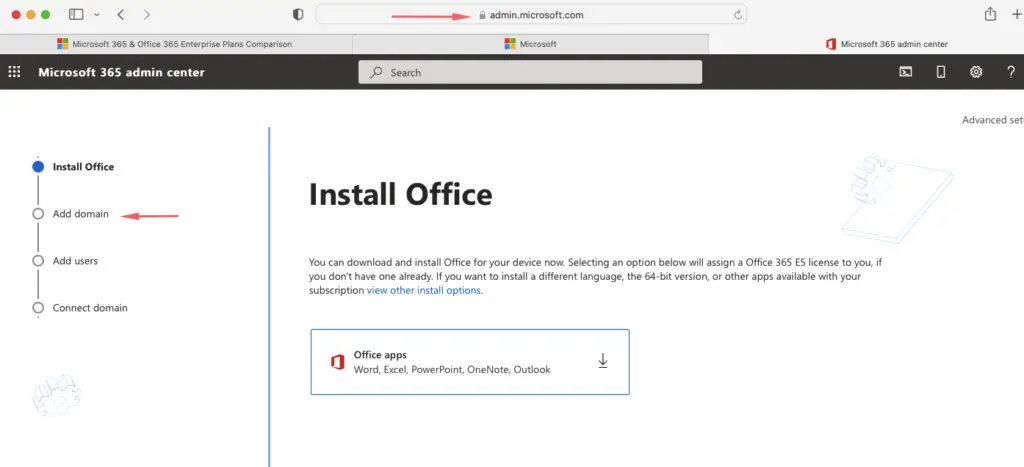
Step 7. You can always reach the Microsoft 365 admin centre page by going directly to https://portal.office.com.The Microsoft 365 admin center page shows up.
Change your business identity
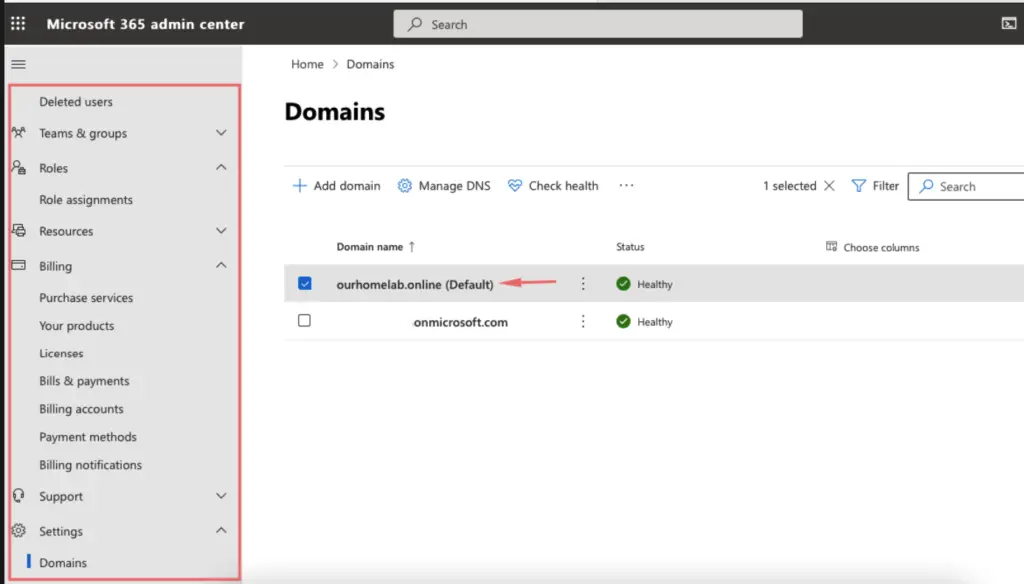
When we create a new tenant we specify a domain name or a tenant name which is tenantname.onmicrooft.com but since we want to login as onhomelbaonline.com which is a temp domain, let’s see how to change it

Step 8. Our next step is to change the business identity from onmicrosoft.com to our domain name to our own domain name using domain connect. I’ve just purchased a new domain for this demo so we will just add the domain name here.
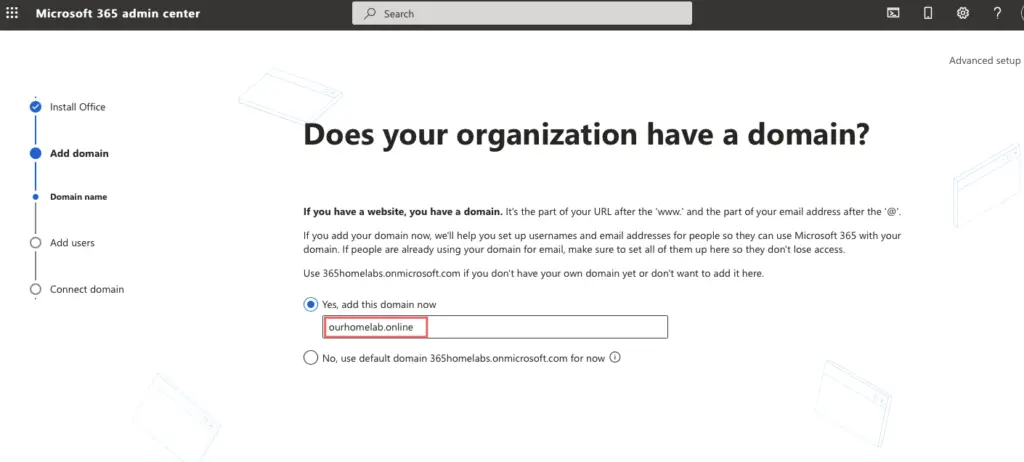
Step 9. In the next step, we will need to verify if this new domain belongs to us

Step 10. Copy the values below and add them to your registrar as shown.


Step 11. Skip adding users for now

Step 12. Click Continue
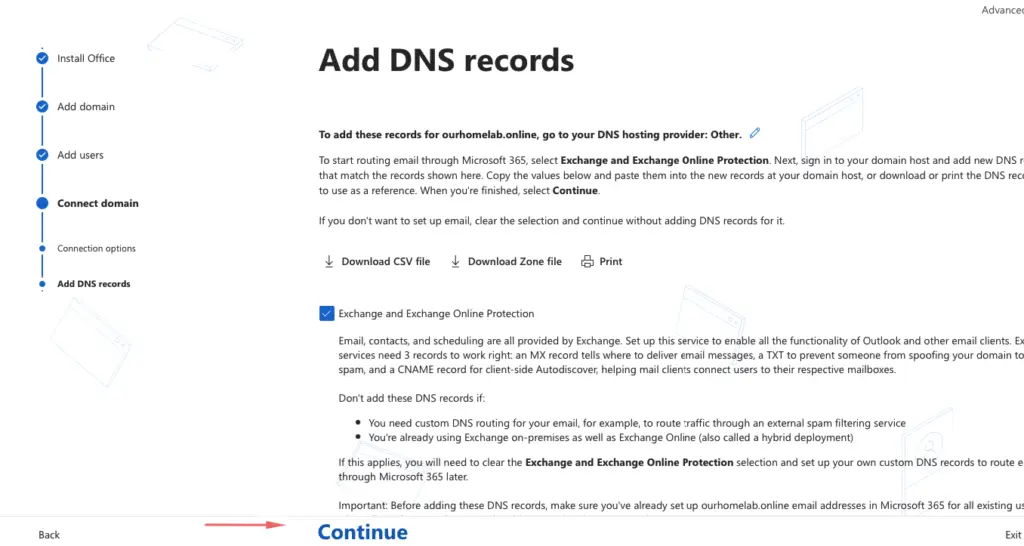
Step 13. I’ll choose the second option to set up my online services
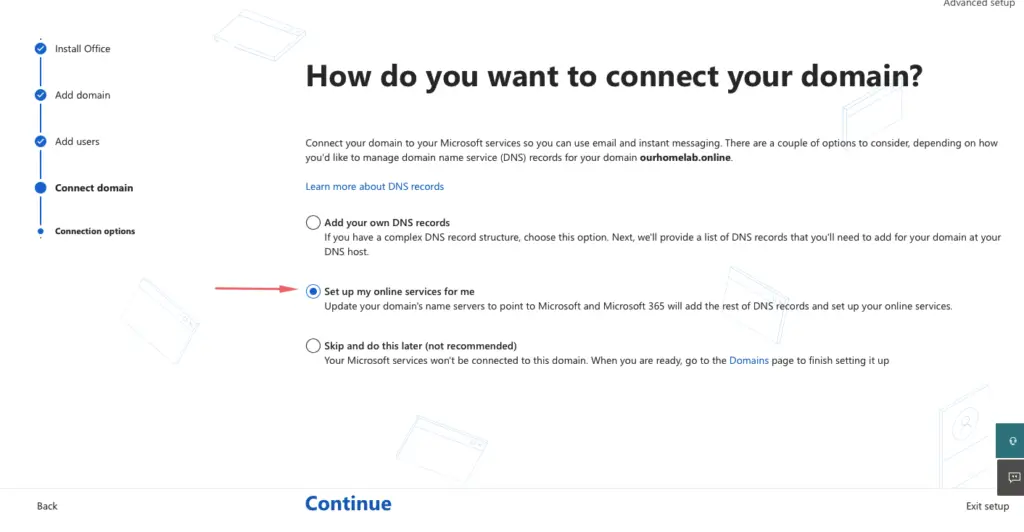
Step 14. Choose Next

Step 15. Our domain setup is now complete

Step 15. Login to the admin portal via https://portal.office.com/adminportal#/homepage to see the default domain
