In this blog, we will configure our BackupExec 21 with a storage unit. In order to use BackupExec, we will need somewhere to store our backups to and that happens by defining some storage configuration
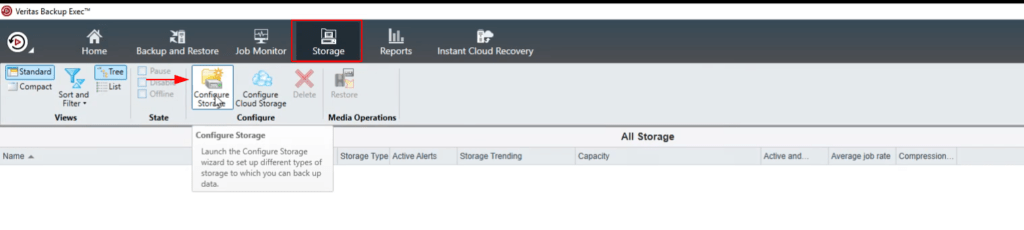
1- Hover over to the Storage tab > Click Configure Storage.
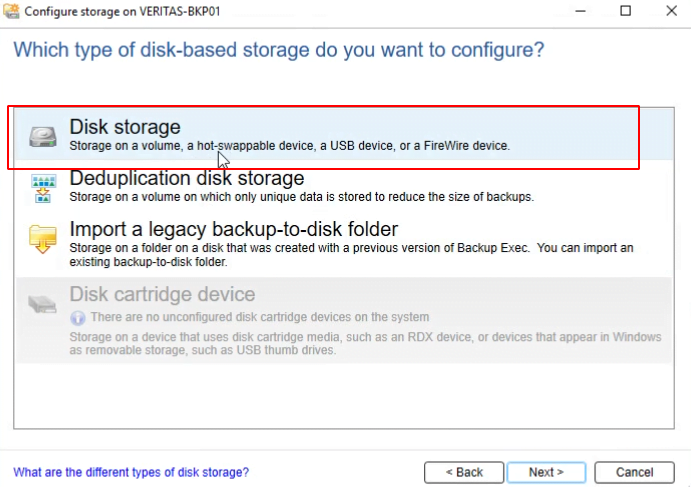
2- For this demo, we will use Disk-Based Storage ( B2D ) as our primary. You could as well use it to put the data to AWS S3 or tape storage.

3- Choose Disk Storage and click Next
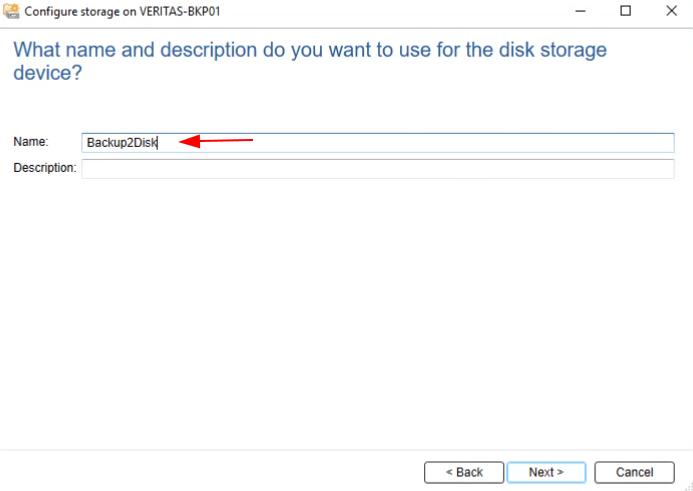
4- Give our B2D storage a name such as Backup2Disk1
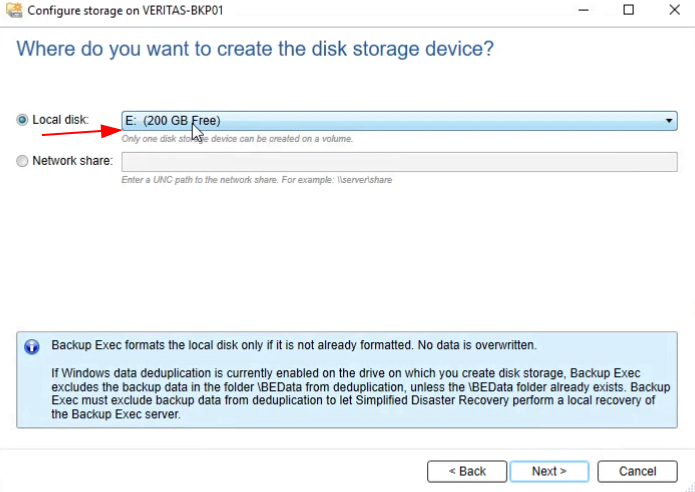
5- Select the location on our server.
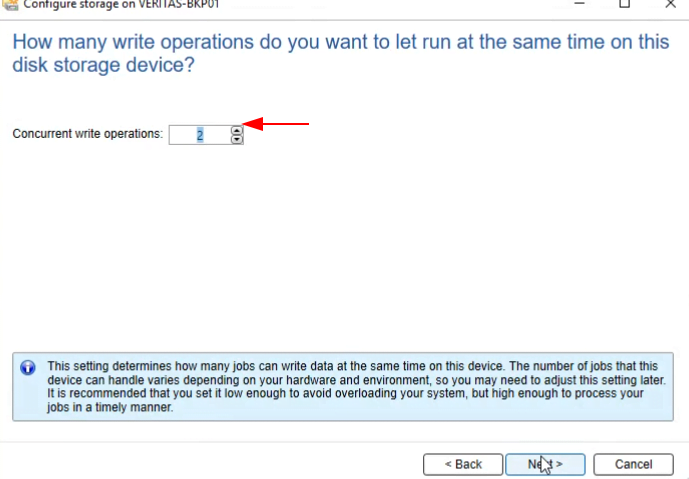
6- Determine how many parallel write operations should be allowed to the chosen storage. This setting in Netbackup is called Multi-streaming
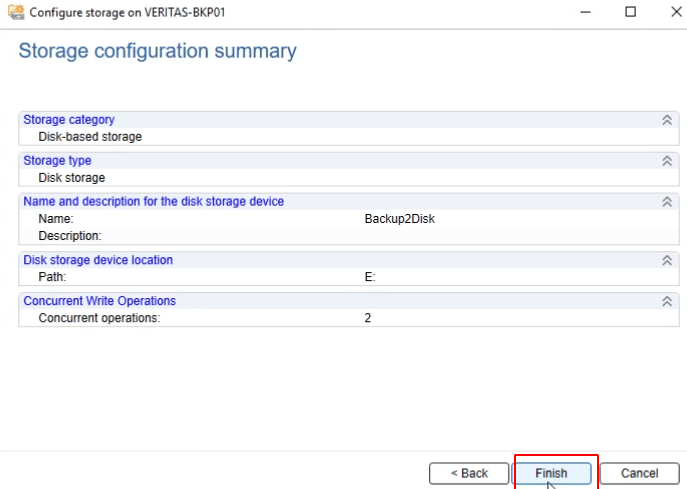
7- Review the details and click Finish.
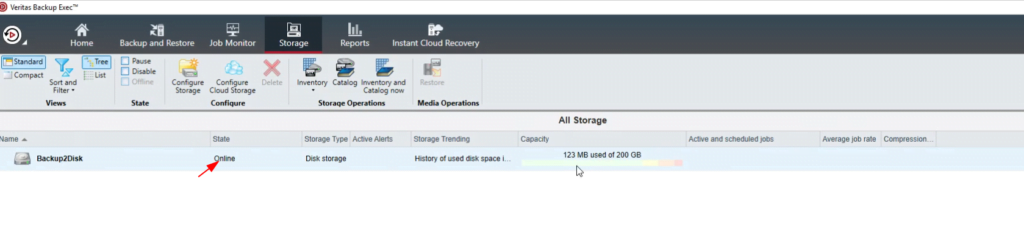
8- Our list of storage devices can be viewed under the Storage tab.
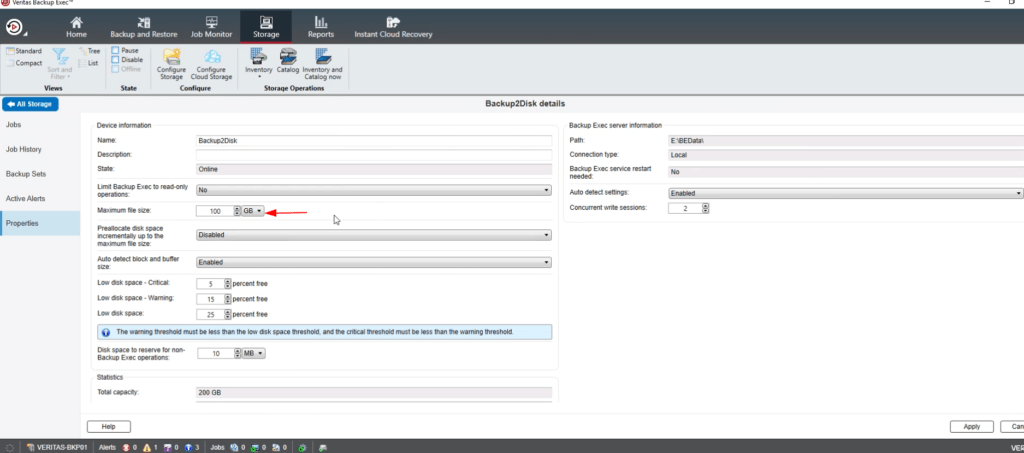
9- Here we will need to make a change to allow backup exec to store the amount of single vmdk file at a time. By default, this is set to 50GB and that’s not enough for a VM backup.
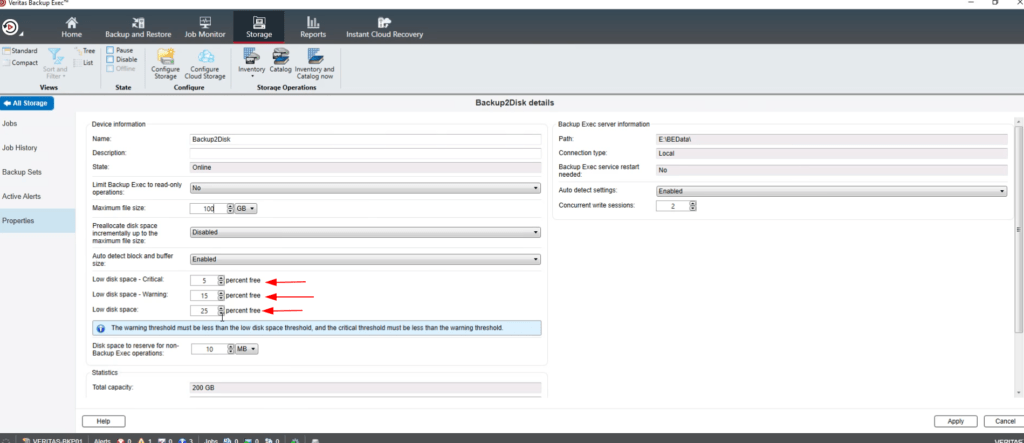
10- Adjust the high and low warning thresholds as these are helpful to monitor the disk utilization.
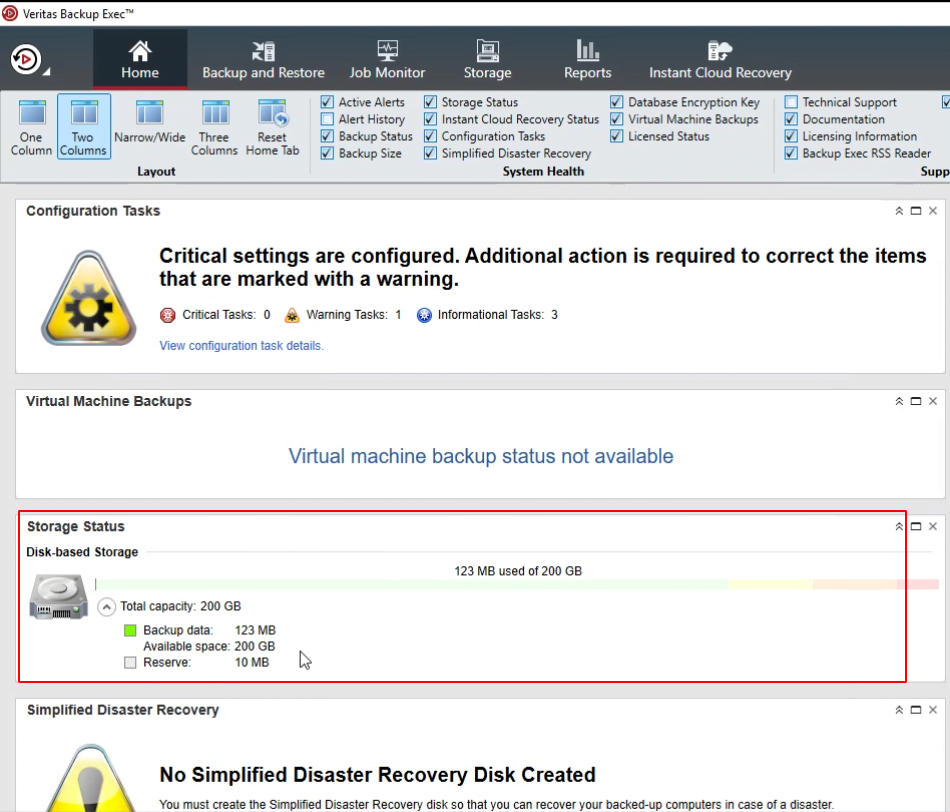
11- Under the Home > Storage Status, we can now see our Storage Unit has been configured