The core reason for using NSX Gateway-based DHCP is that it provides a centralized, scalable, and flexible DHCP service across multiple segments connected to a Tier-0 or Tier-1 gateway, without being tied to a single subnet like a local DHCP server or dependent on external infrastructure like a DHCP relay
In this post, we’ll look at how DHCP functions within NSX 9 and walk through a practical example of configuring a DHCP server for VM segments using GW DHCP unlike the local dhcp server or the dhcp delay. This is the most common deployment too.
NSX supports several DHCP deployment models:
1. Local DHCP Server
A DHCP server that is local to a segment.
- It serves only that specific segment.
- Simple and preferred for isolated management networks (e.g., Avi SE Mgmt, TKG Mgmt).
2. Gateway DHCP Server
A centralized DHCP service running on the Tier-0 or Tier-1 Gateway. This is the most common deployment.
- Serves all segments connected to that gateway.
- Useful when multiple segments must share a common DHCP pool.
3. DHCP Relay
For environments where DHCP is provided by an external physical DHCP server.
- Common in enterprise networks requiring central IPAM.
- NSX forwards requests to the external server.
Important Note for VLAN Segments
When configuring DHCP Server or DHCP Relay on VLAN-backed segments, NSX requires the following to be enabled:
- Forged Transmits
- MAC Learning
Scenario Overview
In this example, we will deploy a Gateway based DHCP Server within NSX to automatically assign IP addresses to VMs on Avi Service Engine (SE) Management segments.
NSX-T DHCP Server Profile Configuration
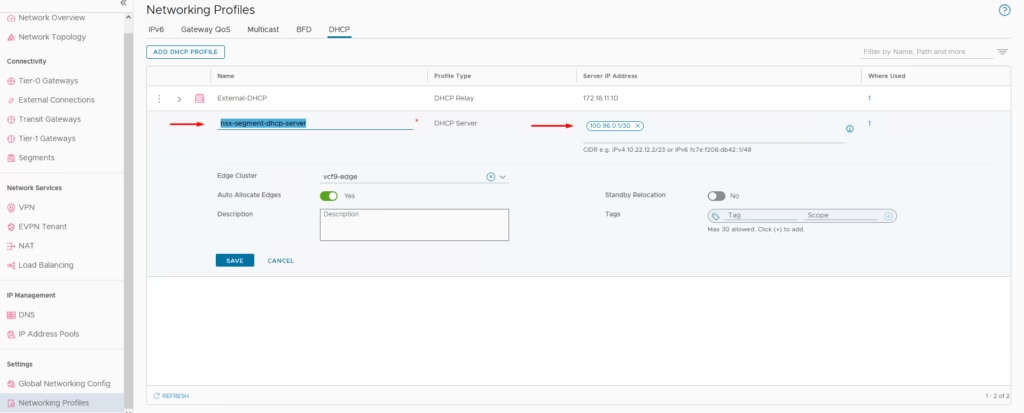
Go to Networking > IP Management > DHCP > Add DHCP Profile or in NSX 9, under Networking >Settings > Networking Profiles > Add DHCP Profile
- Name the DHCP profile as AVI-DHCP-Range
- Select the Profile Type as DHCP Server
- Skip the Server IP address in CIDR column as this will be provided by NSX-T
- Choose the edge cluster where the DHCP service will run vcf9-edge
- Leave Server IP Address blank as NSX-T will assign this IP automatically.
Here the dhcp services are served by the edge nodes
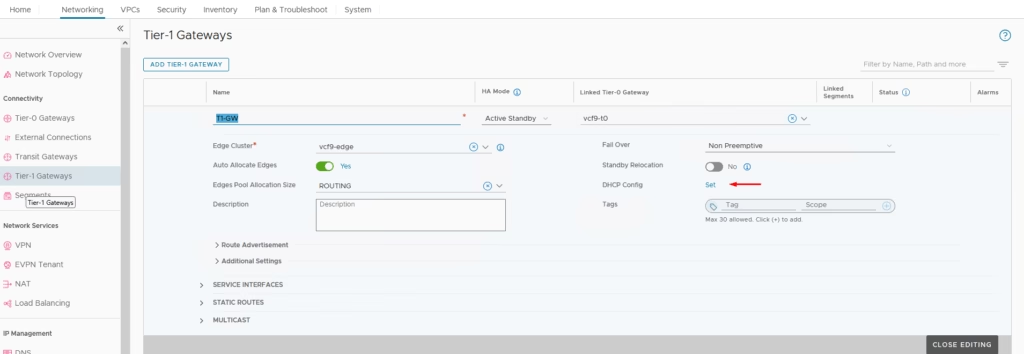
Go to the T1 Gateway and click on DHCP Config tab
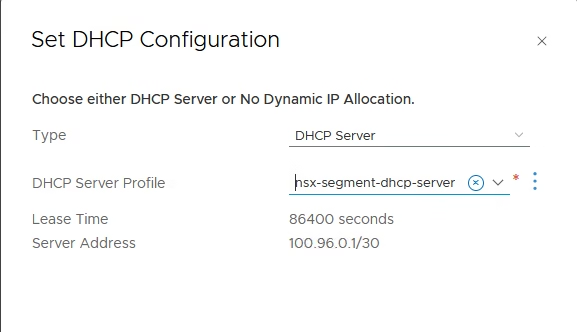
Choose the dhcp server profile here under the dhcp configuration
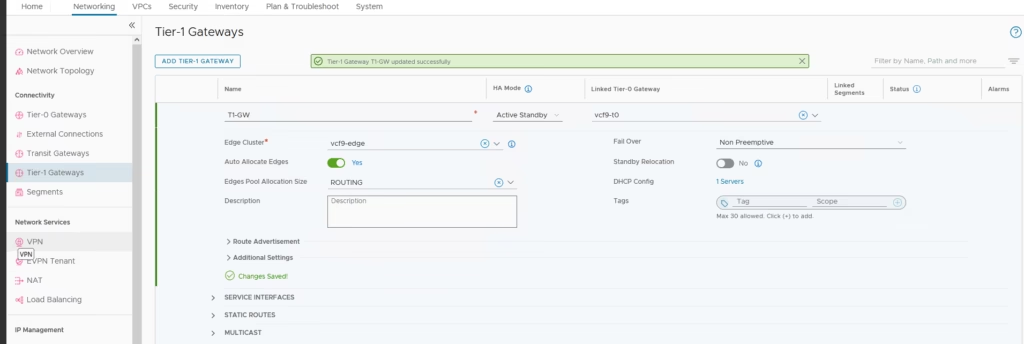
Click Save to commit the config
Create Logical Segments for Avi SE Mgmt VMs. Provide the following info
- Name the DHCP segment a name as AVI-SE-MGMT-VM
- Select the connected gateway as T1-GW
- Choose the transport mode as the Prod-Overlay-TZ
- Choose the subnet CIDR Gateway –10.60.0.1/24, a new range for example
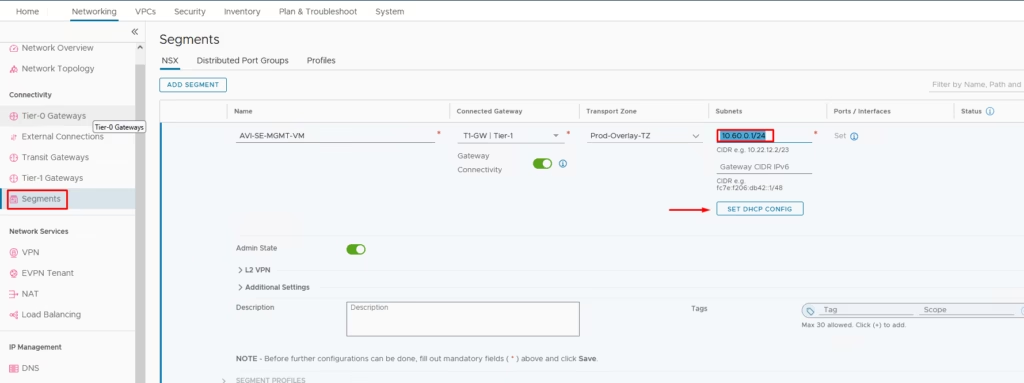
Under the DHCP Config, give the following
- Choose DHCP Type as Gateway DHCP Server
- Choose the DHCP profile as the one we created earlier.

Choose a DHCP Server Address and the DHCP Range required.
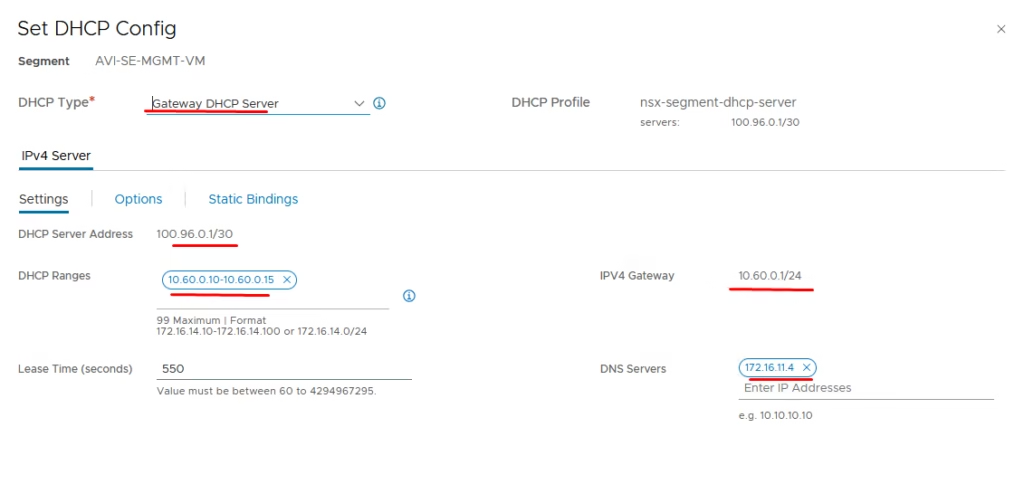
Create a few segments and attach a VM to the segment.

Our servers gets a DHCP IP assigned from NSX-T
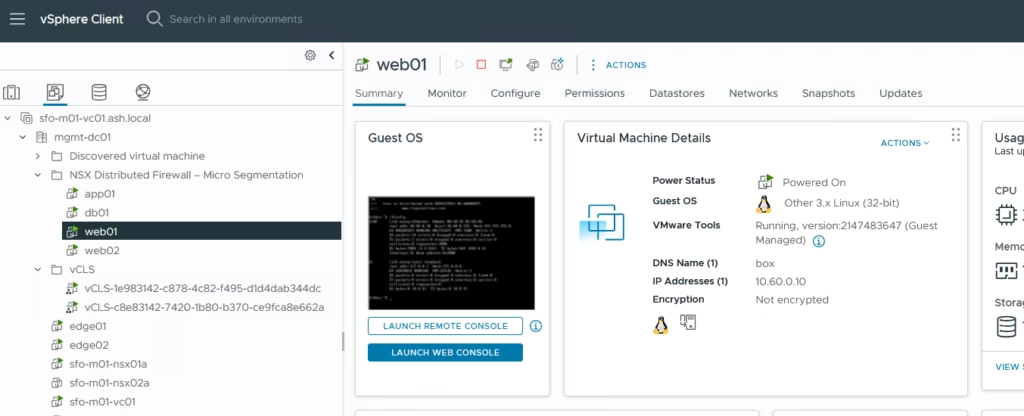
NSX provides DHCP services directly at the gateway level. By attaching a DHCP profile to a Tier‑0 or Tier‑1 gateway, NSX can centrally allocate IP addresses to all connected VM segments. This eliminates the need for external DHCP infrastructure or per‑segment servers, ensuring consistent IP assignments across multiple subnets with simplified management and scalability.
This version highlights the gateway DHCP model (centralized, internal to NSX) rather than the relay model (dependent on external servers).

