In this blog, we will deploy VDI Desktops using the Instant Clone feature we discussed earlier.
Instant Clone provisions in few minutes using the VMware fork technology. Comparing itself to the old Linked Clones in old Horizon versions, the typical issues with Boot Storms are eliminated as instant clones are always live and ready for use.
We did create a golden template in one of our previous blogs, so we will now create a desktop for a user from the VM template we created. Instant Clones can be deployed either as a floating desktop or as a dedicated desktop.
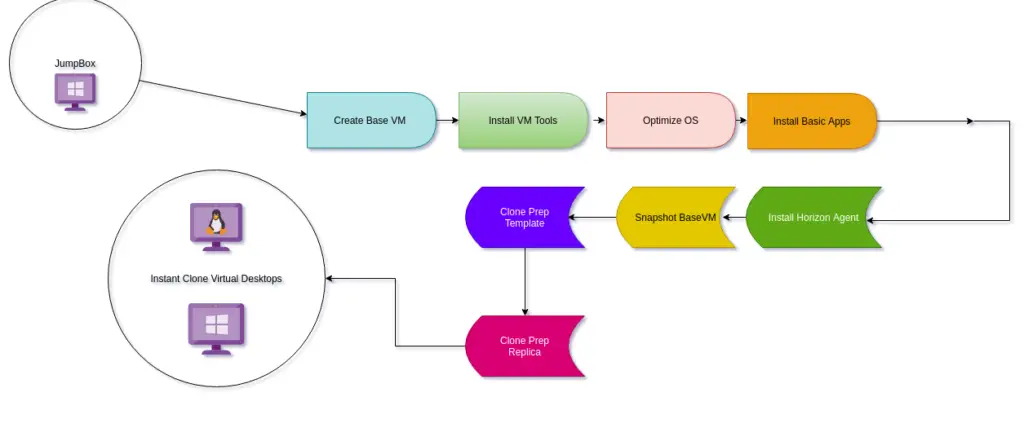
Prerequisites of Instant Clone
- An Instant Clone Domain Account
- VMotion, VMWare High Availability, and vSphere Distributed Resource Scheduler (DRS) are not supported
- Solid-State Disks (SSDs) or NVme to be used for Instant Clones
- If you have a cluster of two or more ESXi hosts with local datastores, select the local datastore from each of the hosts in the cluster. Instant clone creation fails otherwise.
Advantages of Instant Clone
- Instant Clone uses VMware fork technology which provisions VM in minutes.
- Load on vCenter is less
- No need to recomposing or refresh operations for Instant Clones
Creating an Instant Clone Domain Account
Login to view console and go to Inventory > Domains > Instant Clone Domain Accounts > Add
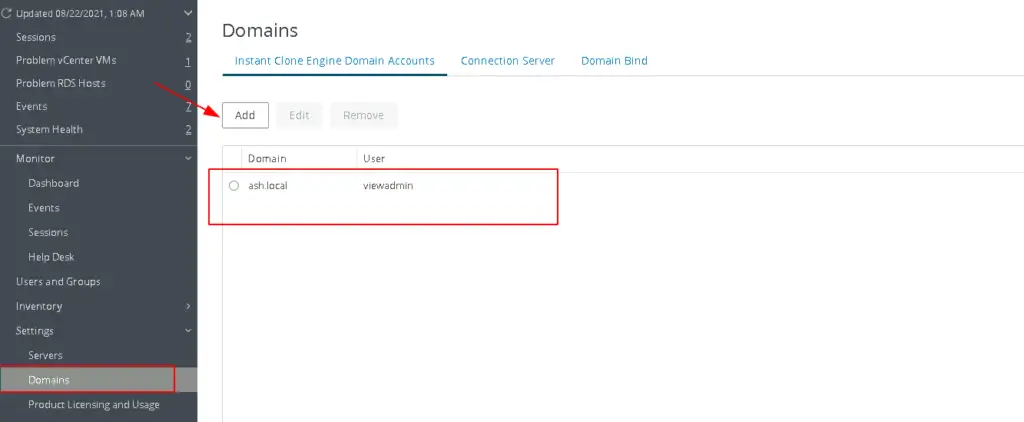
Creating an Instant Clone
Step 1. Let’s log in to our vCenter and verify the master VM template we created.

Step 2. Once Golden Image is ready, take a snapshot and name it as Win10_Golden_Snapshot
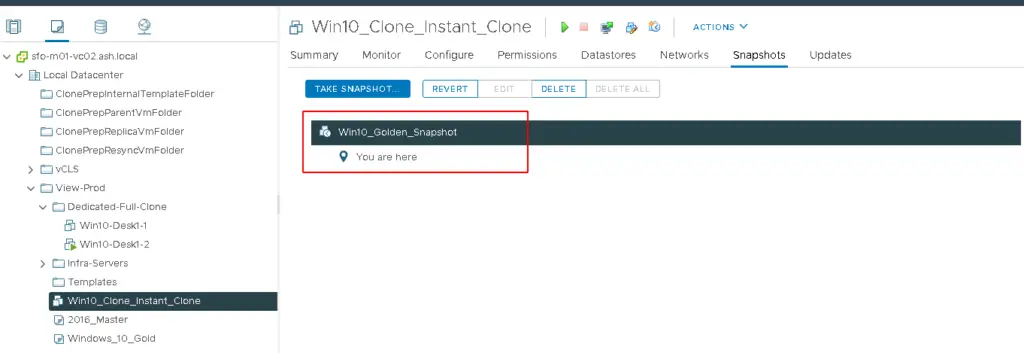
Step 3. Login to VMware Horizon Administrator console as our administrator user.

Step 4. Go to Catalog > select Desktop Pools > Click Add

Step 5. Choose Automated Desktop Pool and click Next to proceed
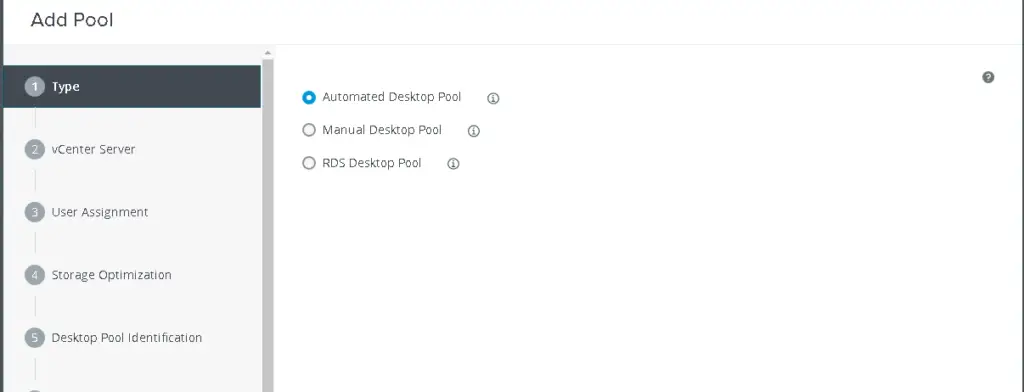
Step 6. Select instant Clone and select vCenter server from the list which we already added to our view environment.

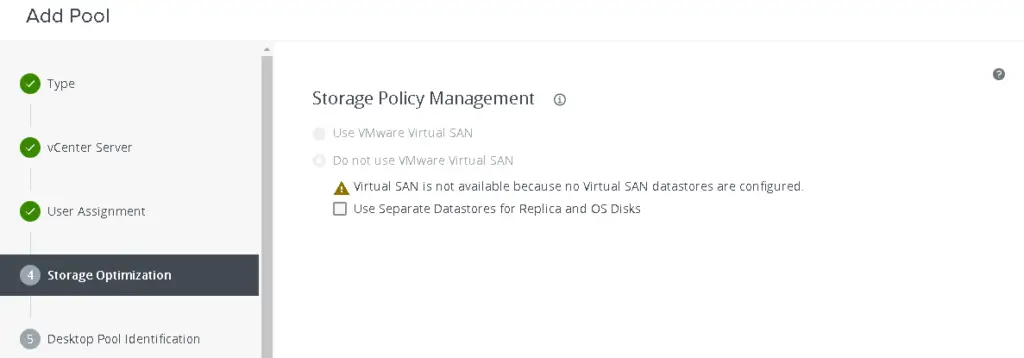
Step 7. We will now select floating assignment so users aren’t allocated dedicated desktops and will get a new desktop each time they log off.

Step 8. We will now select floating assignments so users aren’t allocated dedicated desktops and will get a new desktop each time they log off.
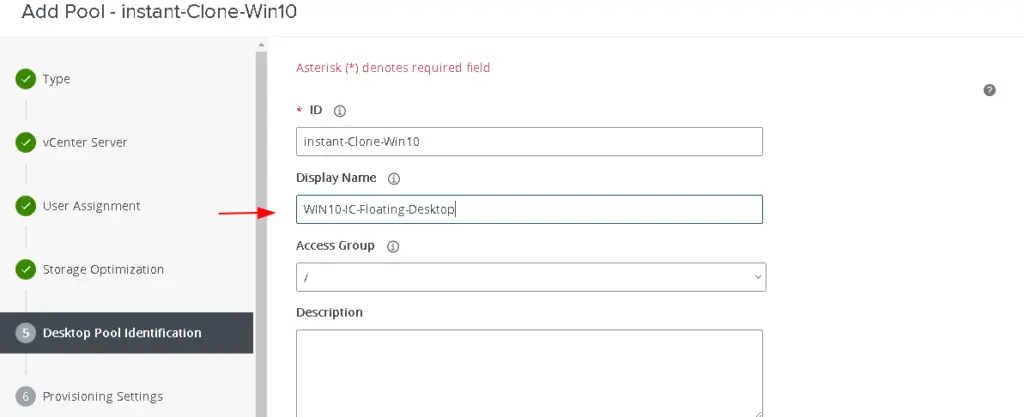
Step 9. Provide an ID, Display Name for the pool then click Next.
Display Name will be visible to our end users so pick something meaningful as MS Windows 10 IC-Desktop.
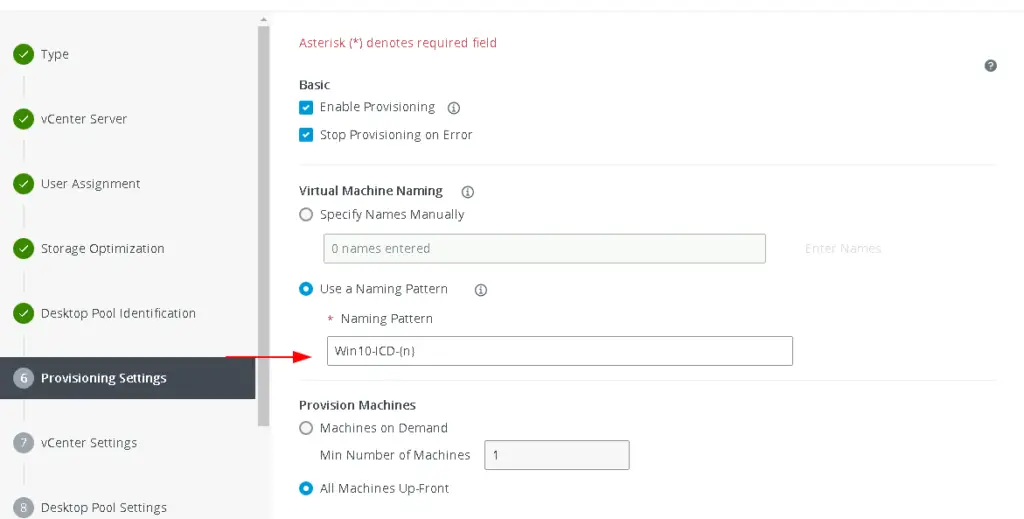
Step 10. Specify the naming pattern you’d prefer for your VM eg: Win10-IC-Desk-{n}
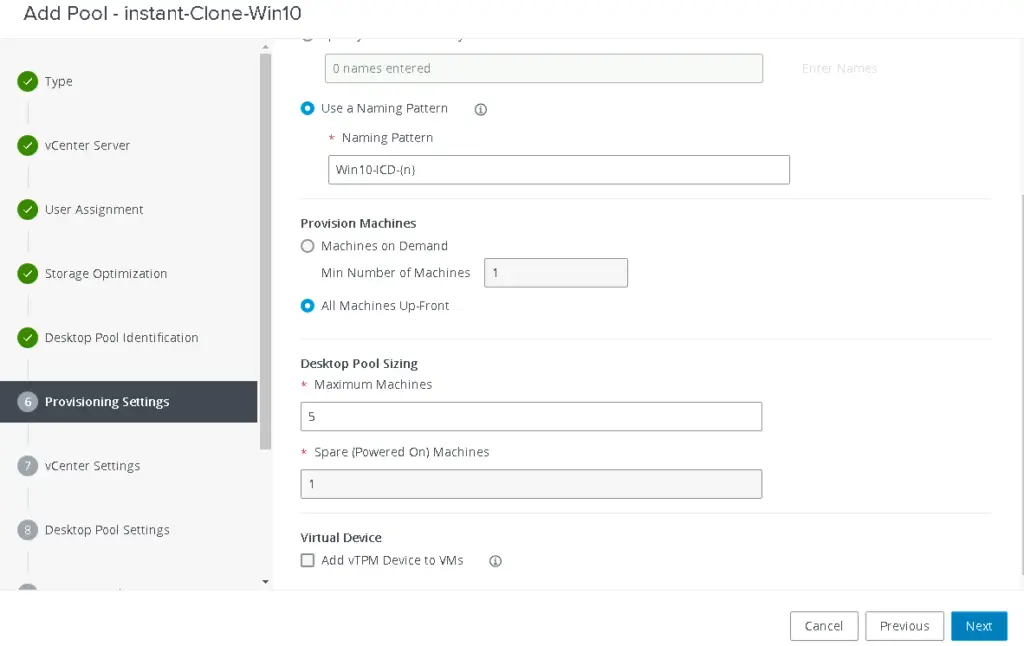
Step 11. Specify the number of machines we wish to provision. We can provision machines as per demand or provision all machines up-front. Provide all the required inputs and click Next.
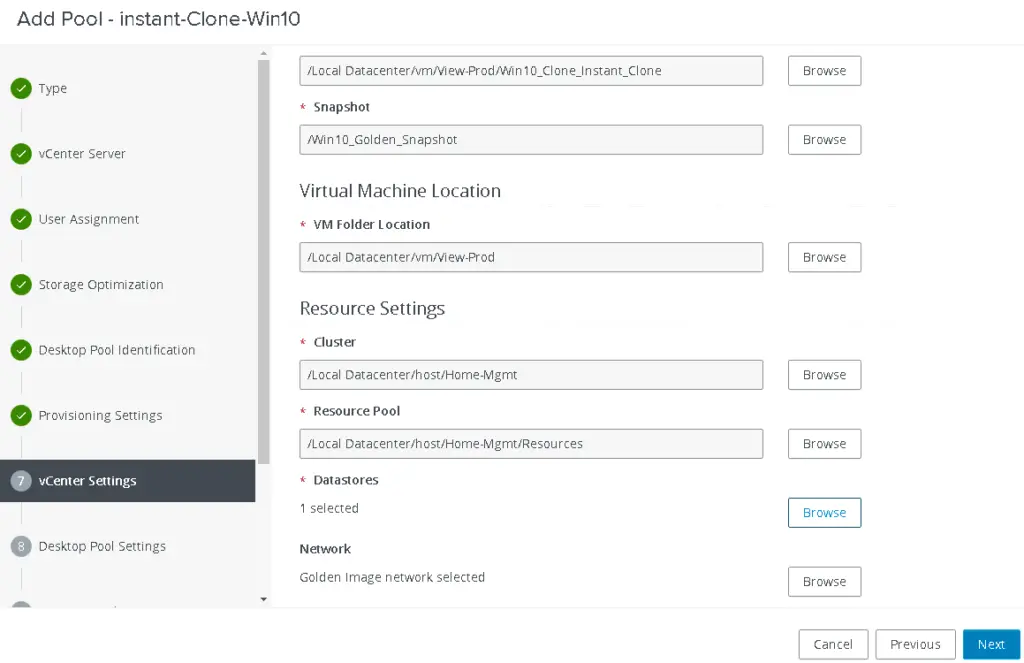
Step 12. We will now choose the template we created in our previous blog


Step 13. Specify the location on our vCenter where this VM needs to be deployed to

Step 14. Validate all our resource and cluster settings and click Next to continue

Step 15. Validate all our datastore to use.
Note– vMotion, VMWare High Availability, and vSphere Distributed Resource Scheduler (DRS) are not supported for Instant Clones

Step 16. Validate all settings and click Next
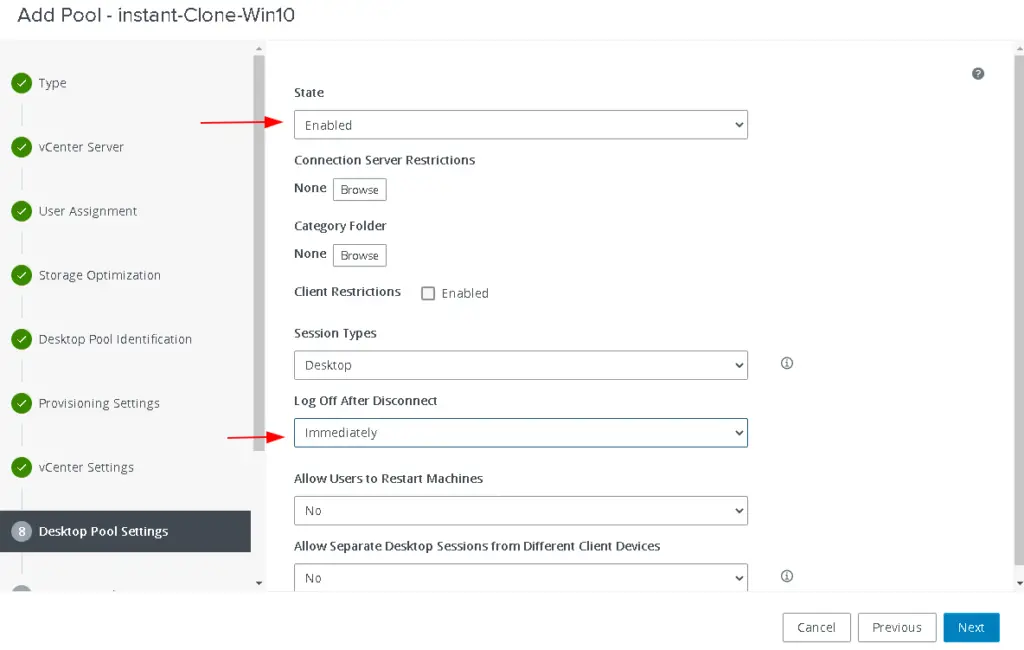
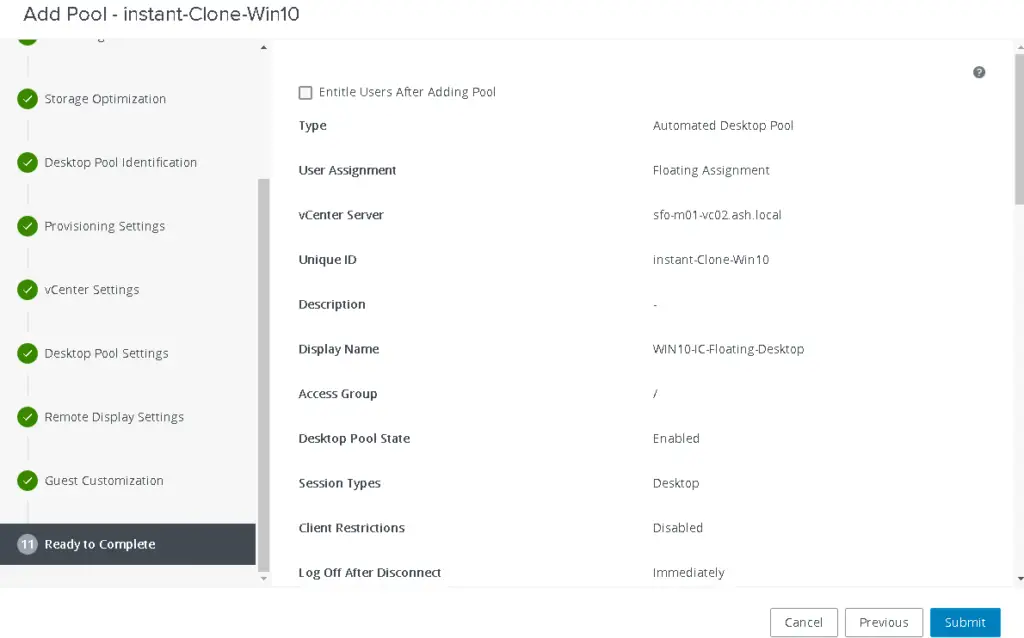
Step 17. Ensure the state of the pool is set to enabled and also ensure Log off after Disconnect is set to Immediately.
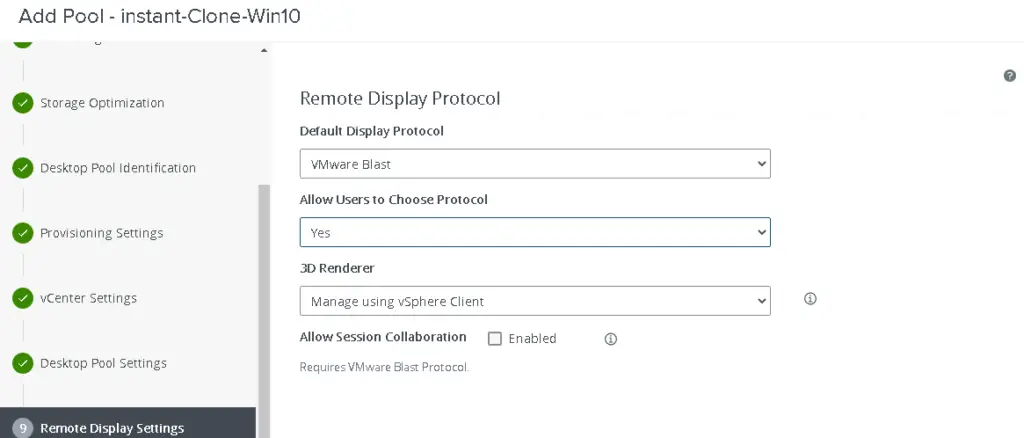
Step 18. Ensure all these settings are applied correctly. We will be using Blast protocol to connect to our View desktops. VMware Blast is available only for Windows 10 Enterprise edition. Enable also the HTML Access option (requires the Blast protocol) to allow access via browser. Click Next.
- Default Display Protocol: VMware Blast (Options are available “Microsoft RDP, PCoIP and VMware Blast“)
- Allow users to choose protocol: Yes (Available options are “Yes or No“)
- 3D Renderer: Disabled (Option used for 3D graphics usage, Available options are “Disabled, Manage using vSphere Client, Automatic, Software, Hardware, NVIDIA GRID VGPU”)
- Max number of monitors: 2 (for changing number of monitors, desktop VM needs to go through one reboot. Avalable options are “1,2,3 and 4“)
- Allow Session Collaboration: Enabled (Required VMware Blast Protocol)
Step 19. I’ve chosen to deploy all these desktops under my Horizon View Dekstop OU
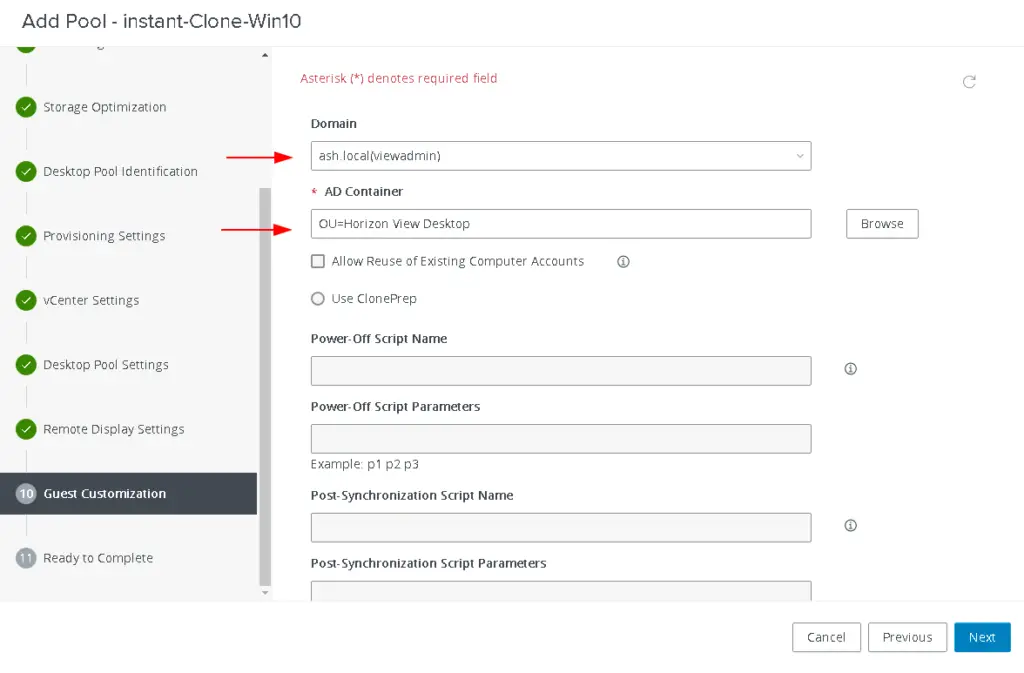
Step 20. Guest Customizations are used to connect the new VM to the domain etc.
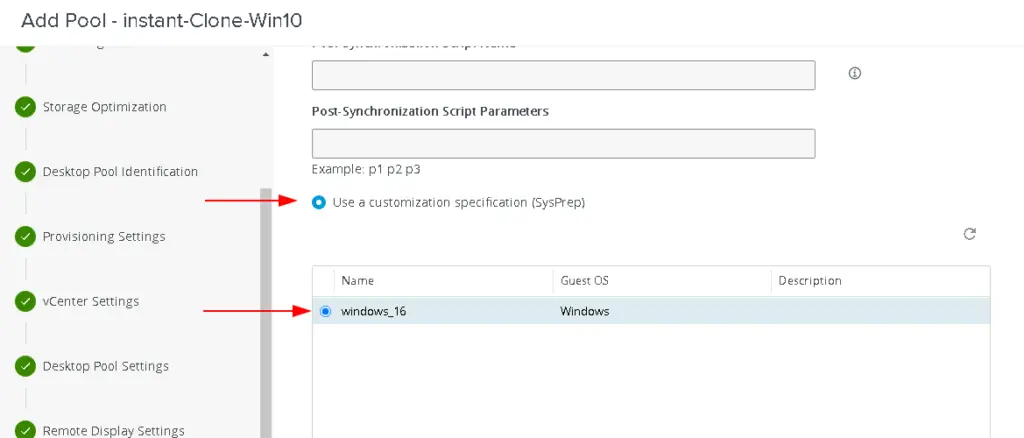
Step 21. Ensure all these settings are applied correctly. We will be using Blast protocol to connect to our View desktops
Step 22. The created Instant Clone pool is shown

Step 23. We can now see the VM’s have started provisioning

Step 24. Login to vCenter and we can now see two folders being created by the view – ClonePrepInternalTemplateFolder & ClonePrepReplicaVmFolder
ClonePrepInternalTemplateFolder
- cp-template-xxxx: This is the template VM that is used to create your Instant Clones which is created from our master image.
ClonePrepParentVmFolder
- cp-parent-xxxx: The number of these VMs should match the number of hosts in your cluster.Each ESXi server will have 1 of these powered on and in memory to create the Instant Clone VMs.
ClonePrepReplicaVmFolder
- cp-replica-xxxx: This VM is used to create the cp-parent VMs. It is used to provision additional co-parent VMs.
ClonePrepResyncVmFolder
- If you want to update/modify the Clones with a new image it will create a VM in here for staging.


Step 25. All our Instant Clones are created from the above replica disk which was created from the VM in ClonePrepReplicaVmFolder

Step 21. Under the view Inventory tab, we can see the status of VM’s
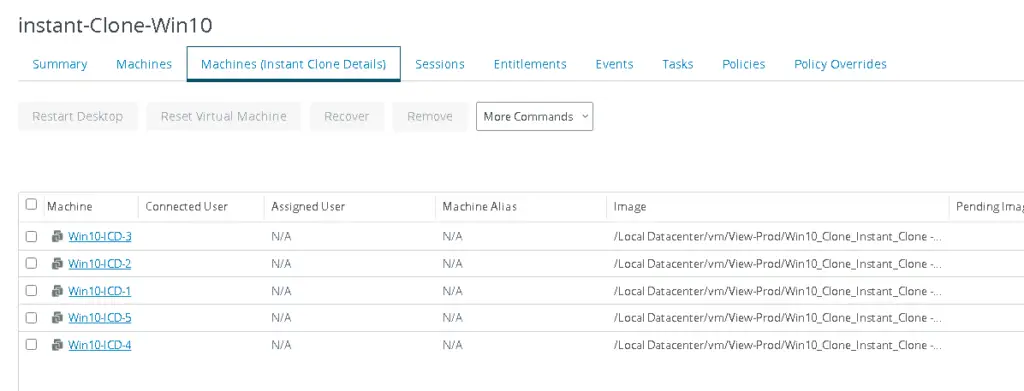
Step 22. The events tab will provide you with recent activities on the VM’s being provisioned

Step 23. Under our Active Directory OU we can now all the computers being AD joined and ready for use

Assigning Users a VDI Desktop
Our desktops are ready but for users to connect to the desktop, we will need to grant them permissions.
Step 1. Hover over to Desktop Pool Section and Click on Entitlements
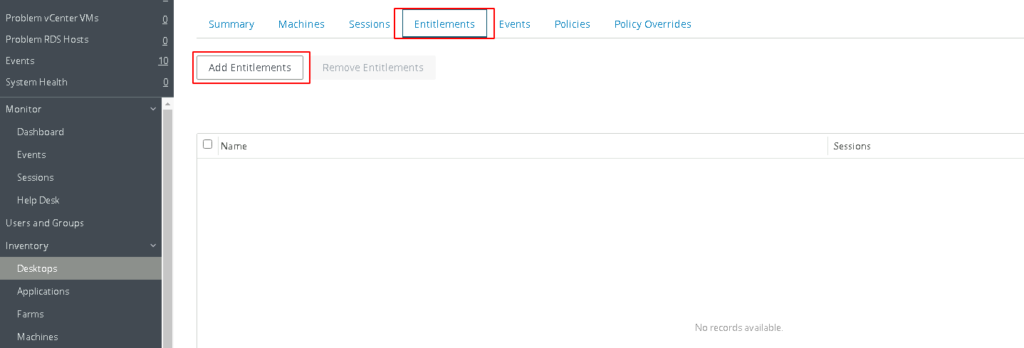
Step 2. Click on Add Entitlements and search for our user we added earlier

Step 3 Preview the screen to verify if our user has been added

Accessing VDI Desktops Users
In order to access the VDI Desktop, users can log in to a browser window or via a client on their laptop and type in the name of our connection server.
VMware Horizon HTML Access
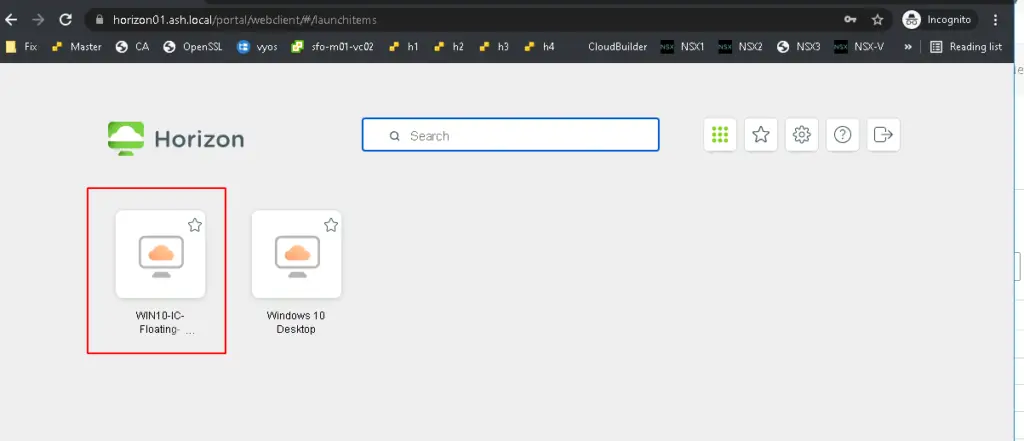
HTML access is via VMware’s Blast protocol. In order for us to connect all we need to do is to launch a browser a punch in our Horizon View UAG / View Security Server / Connection server as below


Double click on the desktop machine icon.

VMware Horizon Client
You could also install a client version on your laptop and connect to the VDI farms.
The easiest way to install the correct agent for the horizon environment is by accessing the web UI of our Horizon View UAG / View Security Server / Connection server https://horizon01.ash.local and download the Horizon client and install it.

By default, this will take you to vmware.com to download the latest horizon client but our administrators can force you to download from a fileserver URL as soon as you click the above option. We will cover it in our next blog.

