
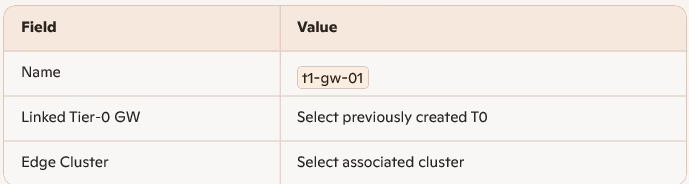
In this post, we’ll configure a Tier‑1 (T1) Gateway and link it to the Tier‑0 (T0) Gateway we created earlier. The T1 gateway acts as a bridge between logical segments and the overlay network, enabling east‑west traffic and north‑south routing via the T0
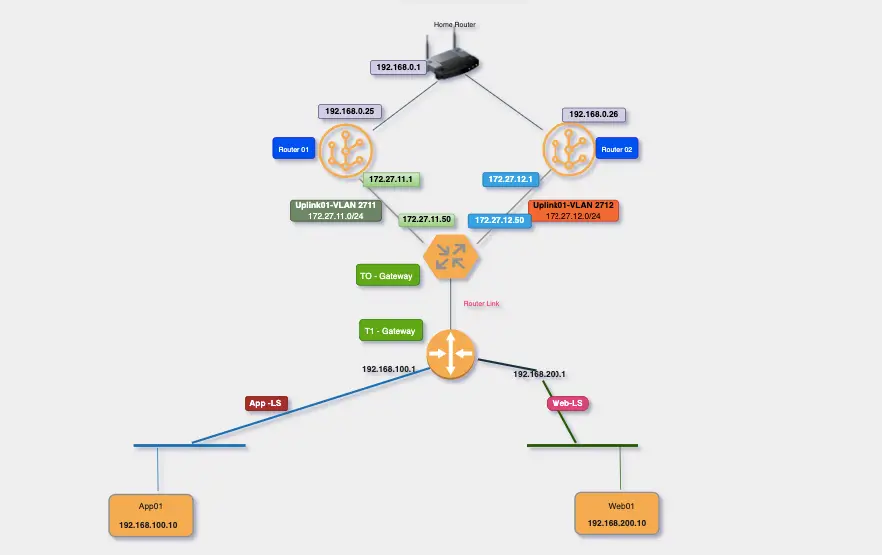
Network Design Overview
The T1 Gateway is responsible for:
- Connecting logical segments (e.g., App, Web, DB) to the overlay.
- Forwarding traffic upstream to the T0 Gateway, which handles external routing.
- Supporting route advertisement for dynamic routing protocols like BGP.
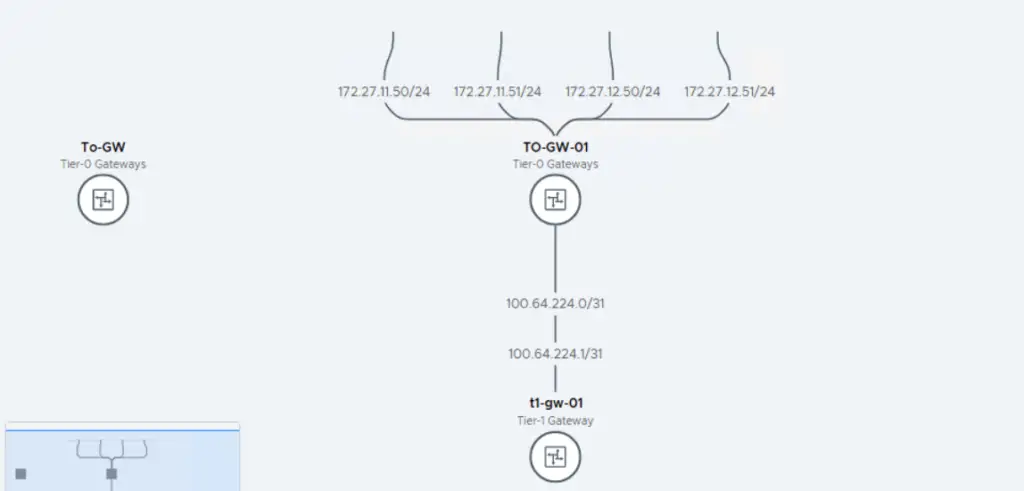
Our Network Design
Steps to Deploy T1 Gateway
Navigate to Networking > Tier‑1 Gateways.

Click Add Gateway.
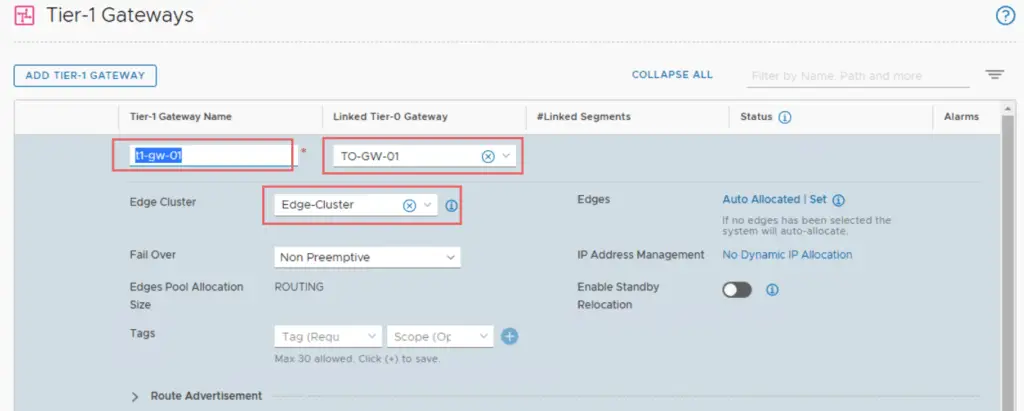
Scroll down and enable all Route Advertisement options:
- Connected Segments
- Static Routes
- NAT
- Tier‑1 Connected Routes

Click Save to deploy the T1 Gateway.
Once we are done with configuring T1 we can view the topology by navigating to Networking > Network Topology.
The T1 Gateway setup is straightforward but essential. It enables your NSX‑T overlay to support multi‑tiered routing, segment isolation, and dynamic route advertisement. With this in place, your nested lab is now ready to simulate real‑world enterprise traffic flows