In this post, we’ll attach our Overlay segments — App, Web, and DB — to simulate a Layer 2 domain within NSX‑T. These segments form the foundation of east‑west traffic in your virtualized environment.

Logic Behind Segments
Each NSX‑T segment behaves like an access port on a physical switch. Instead of configuring interfaces on a physical router, we define default gateways inside NSX‑T.
For example:
- All VMs in the App segment will use the gateway defined in the App segment itself.
- This abstracts physical routing and enables overlay-based mobility
Segment Types in NSX‑T

Create Overlay Backed Segments
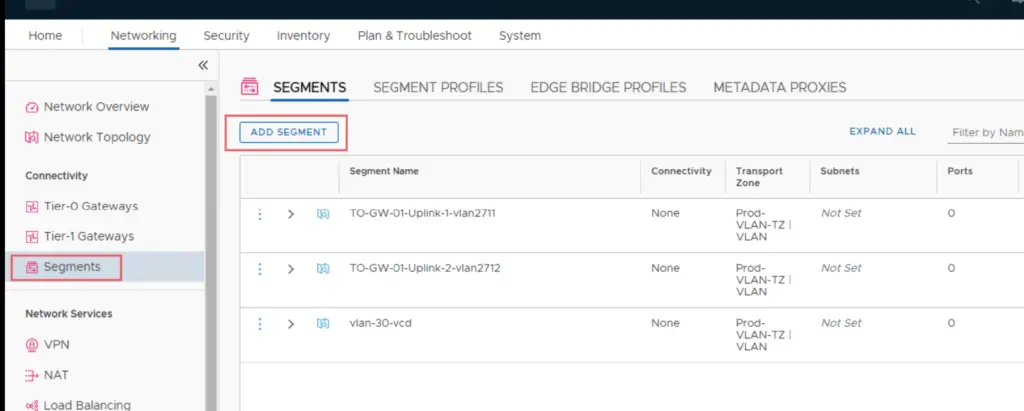
Log into NSX-T Manager VIP and navigate to Networking >Segments >Segments > Add Segment

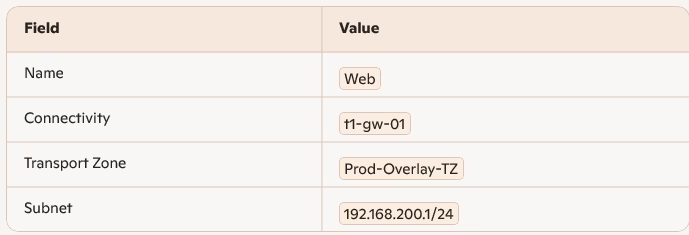
Example: Overlay Web Segment connected to T1-GW


Click Save.

The IP here will be used as a gateway for our Web Servers

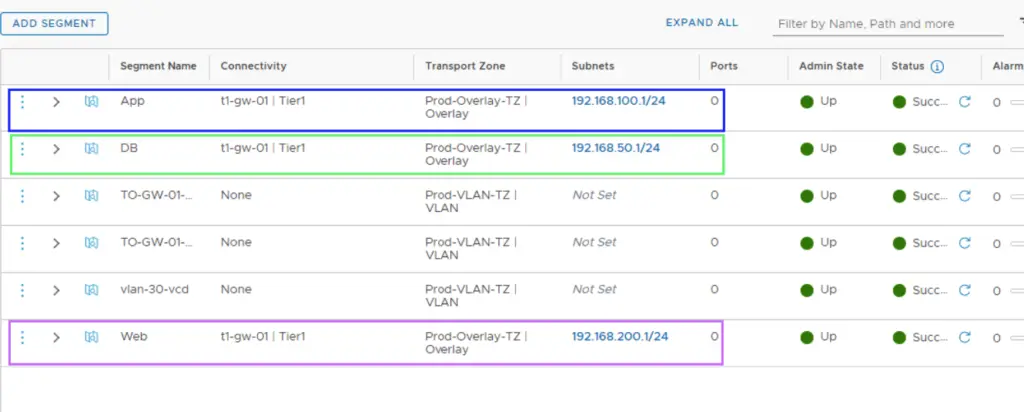
Repeat for App and DB Segments

Each segment connects to t1-gw-01 and uses Prod-Overlay-TZ.

Create VLAN Backed Segments
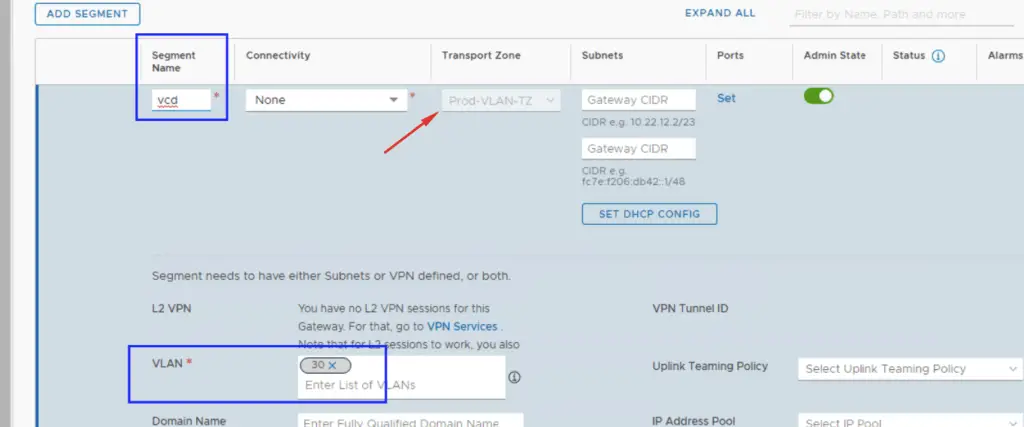
If you need to connect to physical VLANs:

Click Save. Ensure VLAN 30 exists on your physical switch infrastructure.

Verifying the Topology
Navigate to: Networking > Network Topology
You’ll now see:
- T1 Gateway (
t1-gw-01) - Connected segments: App, Web, DB
- Route flow from segments → T1 → T0 → VyOS → External worl

With Overlay and VLAN segments configured, your NSX‑T lab now supports:
- Layer 2 isolation
- East‑west traffic
- Gateway abstraction
- Tunnel‑based mobility
This setup mirrors real‑world enterprise segmentation and prepares your lab for advanced services like DFW, LB, and micro‑segmentation.

