In this series, we are going to cover the deployment process of HCX and how to configure live migration of our virtual machines from our on-prem to the cloud with zero downtime using HCX.
HCX allows us to extend our on-prem vSphere environment to the Cloud offering a bidirectional workload migration between the on-prem to the cloud and vice versa. HCX thus can be used for Disaster Recovery & Data Center Migration & can do bulk migration at scale.
HCX Network extension feature gives the flexibility to move virtual machine workloads and retain the IPs thus saving loads of time and thus preventing modifications to the VM networks. The network extension feature is the HCX feature that offers simple disaster recovery plans across the sites.
Components of HCX
- HCX Interconnect Service – Helps in the pairing of the site and general HCX management.
- HCX Wan Optimization Component ( HCX-WAN-Opt): – This component offers WAN optimization techniques like compression and de-duplication similar to our Veeam Wan accelerator used in Veeam Backups.
- HCX Network Extension (HCX-NET-EXT): – provides Layer 2 extension capability across our network.
Summary of HCX Deployment
The following are the high-level steps required for our HCX deployment.
- Verify compatibility matrix
- Build ESXi hosts
- Deploy two vCenters and connect the ESX host to them.
- Connect ESX hosts to the distributed switch.
- Deploy HCX Enterprise via OVA.
- Register HCX Manager with the vCenter and NSX-T.
- Connect HCX Sites
- Create HCX Network Profiles for Mgmt, Uplink(WAN) and vMotion
- Create Compute Profiles for HCX-A and HCX-B
- Create HCX Service Mesh between both sites and link the Compute at both sites.
- Migrate VM
Network Topology of Lab
Our network topology is setup as below


Management VM Sizing Requirements
Since we have deployed it in our lab, we have deployed it with bare minimum settings.
| VM | Version | vCPU | Memory GB | Storage | Quantity |
| vCenter1 | 7.0 U1 | 2 | 10 | 100 | 1 |
| ESX-HCX-01 | 7.0 | 10 | 40 | 25GB | 1 |
| ESX-HCX-01 | 7.0 | 10 | 40 | 25GB | 1 |
| HCX-A | 4.5 | 4 | 12 | 65GB | 1 |
| CoreA | Ubuntu | 1 | 1 | 10GB | 1 |
| CoreB | Ubuntu | 1 | 1 | 10GB | 1 |
Since we have deployed it in our lab, we have deployed it with bare minimum settings.
| VM | Version | vCPU | Memory GB | Storage | Quantity |
| vCenter1 | 7.0 U1 | 2 | 10 | 100 | 1 |
| ESX-HCX-03 | 7.0 | 10 | 40 | 25GB | 1 |
| ESX-HCX-04 | 7.0 | 10 | 40 | 25GB | 3 |
| HCX-B | 4.5 | 4 | 12 | 65GB | 1 |
| CoreC | Ubuntu | 1 | 1 | 10GB | 1 |
| CoreD | Ubuntu | 1 | 1 | 10GB | 1 |
Deploying the VMware HCX Appliance
HCX comes packaged as an ova file, login to the vCenter and browse to the OVA file downloaded from VMware.com.
Launch the ova deployment wizard from within vCenter
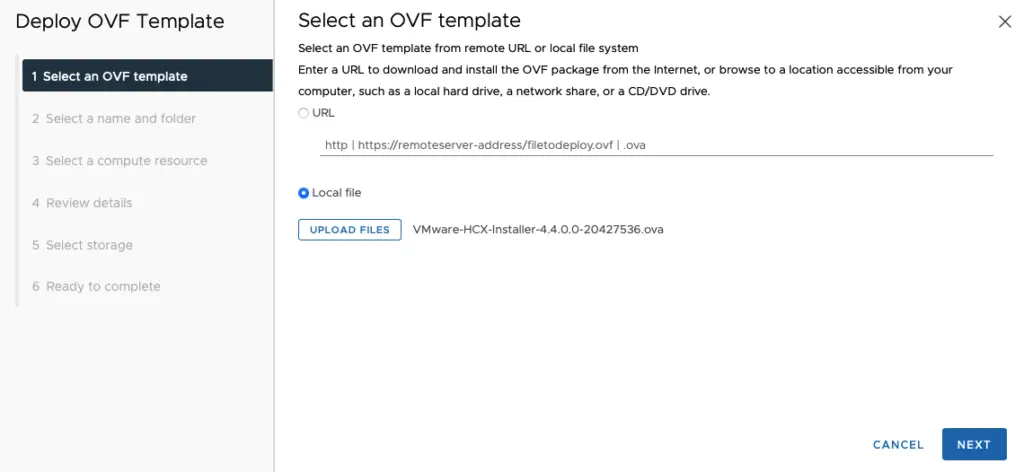
In the Next screen, provide the VM a name as HCX-01

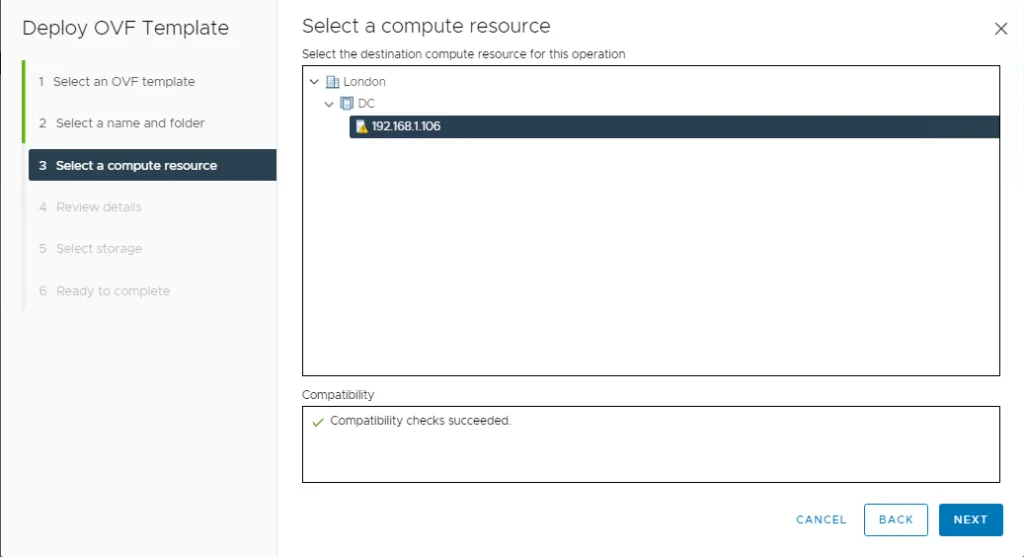
Choose the cluster to deploy the VM to
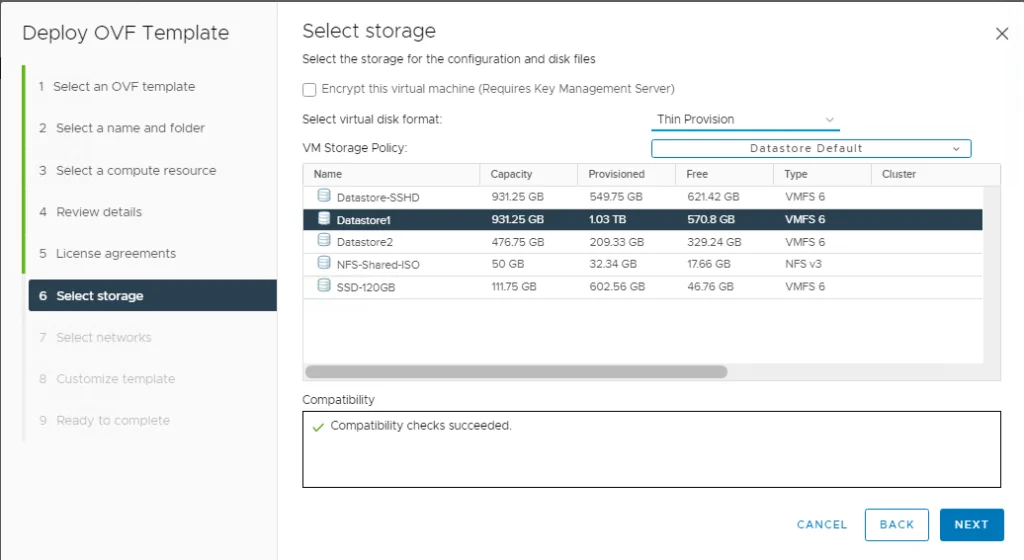
Select the virtual disk format as thin disk and choose datastore location and click Next.
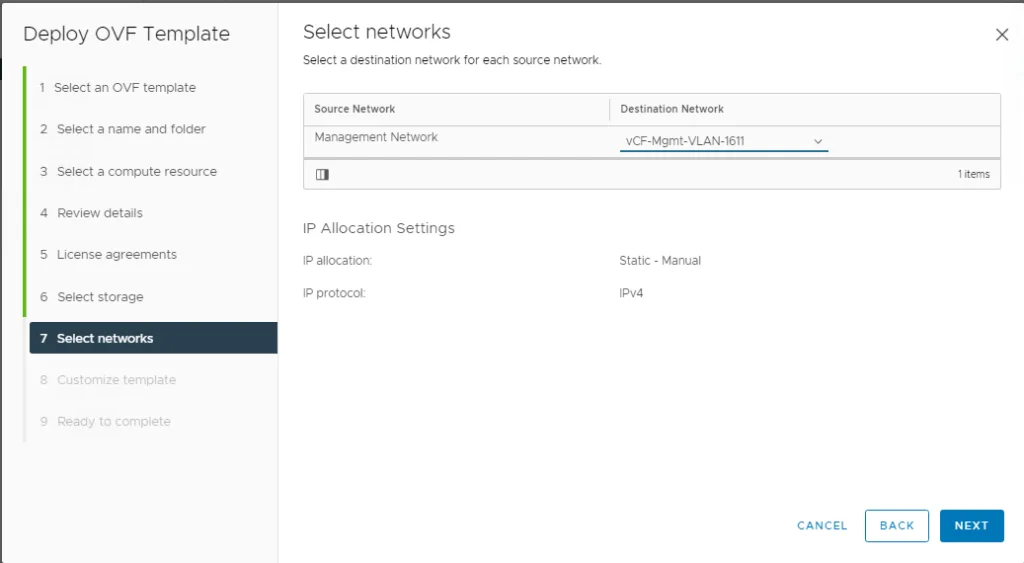
Select the management port group from the destination network dropdown and click Next
Review the settings and click finish to start the deployment.
- Hostname
- Network 1 IPv4 Address
- Default IPv4 Gateway
- Network 1 Netmask
- NTP server list
- DNS Servers
- Domain Search Lists
Enter passwords for both the CLI user and CLI privilege mode.
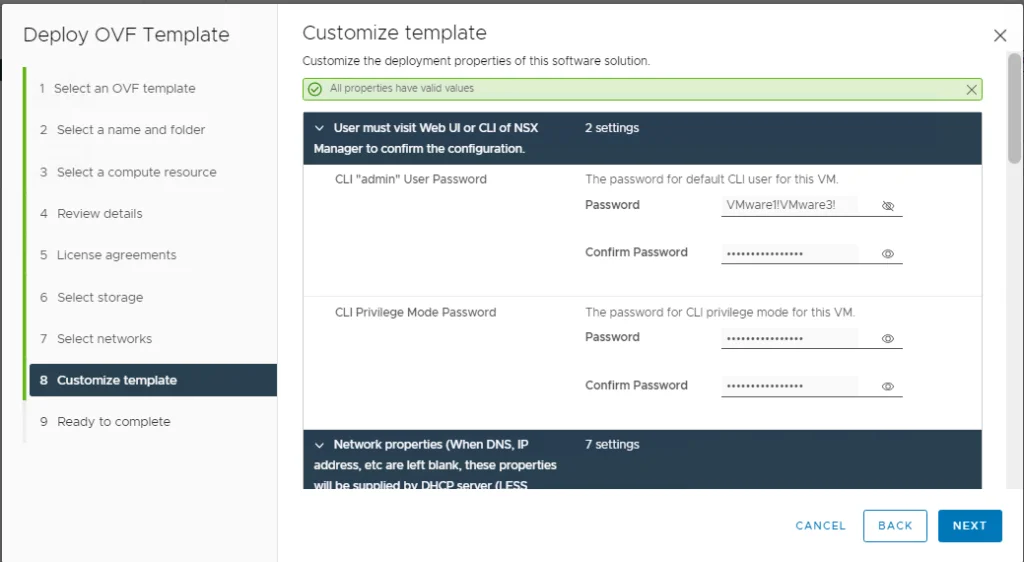
Check the Enable SSH check box as shown and click next to proceed and Click Finish to complete the installation
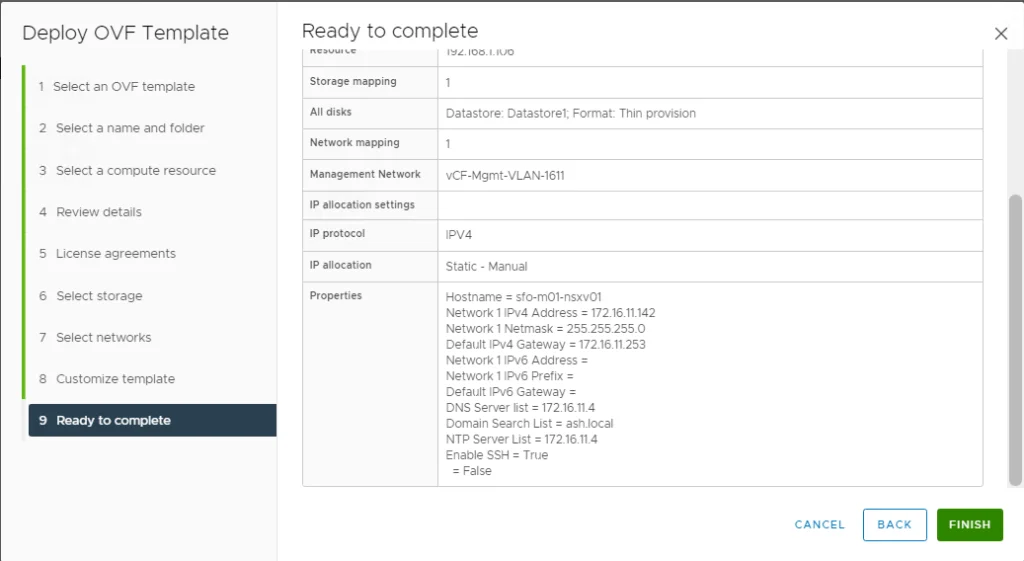
The ova should start to deploy and once done, power on the VM.

Launch a web browser and connect to the NSX management address via https://HCX_mgrIP
The user name is admin and the password is the one we set at deployment.

Licensing & Deployment
HCX needs to be licensed before we can use it. Click continue to proceed to configure HCX

This License Key needs to be a VMware NSX Data Center Enterprise Plus per Processor License

The evaluation license is chosen here

The appliance will connect and download the latest version of HCX

Wait for the initial registration & deployment to complete.

Give your location.

Confirm your system name.

Select the deployment type as vSphere.

Specify the vCenter Server and NSX-T Manager details.

Configure SSO details.

In case our HCX is externally facing, we can give the URL here.

Click Restart to finish the deployment.

Log back in after the reboot.

The appliance summary will show all services are started

Log off and log back in to vCenter and we can see now the HCX Manager is registered with vCenter


