In today’s ever-evolving business landscape, efficient data migration solutions are essential. Whether transitioning to cloud-based platforms, navigating mergers or acquisitions, or simply restructuring, the challenge of securely and seamlessly moving data persists. Quest On Demand Migration emerges as a robust ally in this endeavor, offering a comprehensive suite of tools to simplify the migration process and ensure uninterrupted business continuity. In this blog, we’ll explore the intricacies of Quest On Demand Migration and how it can streamline your data migration endeavors.
Blog Series
- Part 1 – Getting Started with Quest On Demand Migration (ODM)
- Part 2 – How to Migrate Accounts/Mailboxes in a Collection on Quest On Demand Migration (ODM)
- Part 3 – How to Migrate SharePoint sites with the Quest On Demand Migration (ODM) tool
Understanding Quest On Demand Migration
Quest On Demand Migration is a cloud-based platform empowering organizations to seamlessly migrate data across various environments, including Office 365, Azure Active Directory, Exchange Online, OneDrive for Business, SharePoint Online, and Teams. Through its centralized dashboard, administrators can oversee every aspect of the migration process, from pre-migration assessment to post-migration monitoring.
Getting started with Quest ODM
Sign Up and Access Quest On Demand.

Visit the Quest On Demand Migration portal. Create an organization within the portal. Subscribe to the On Demand Migrations module.
On the left navigation panel, Select Tenants to add Source tenant and Target tenant (You can add Azure tenants and on-premises domains (using agents) to On Demand). Ensure you have the necessary permissions in both the source and target tenants.
Note: Each tenant admin must have Global Administrator and ApplicationImpersonation roles assigned to them in their respective tenants. Steps to enable the Application Impersonation role can be found here.

Navigate to the Migration section. Click Projects to view existing projects or create a new one by selecting Create Project.

Enter Title, Source tenant, and Target tenant.

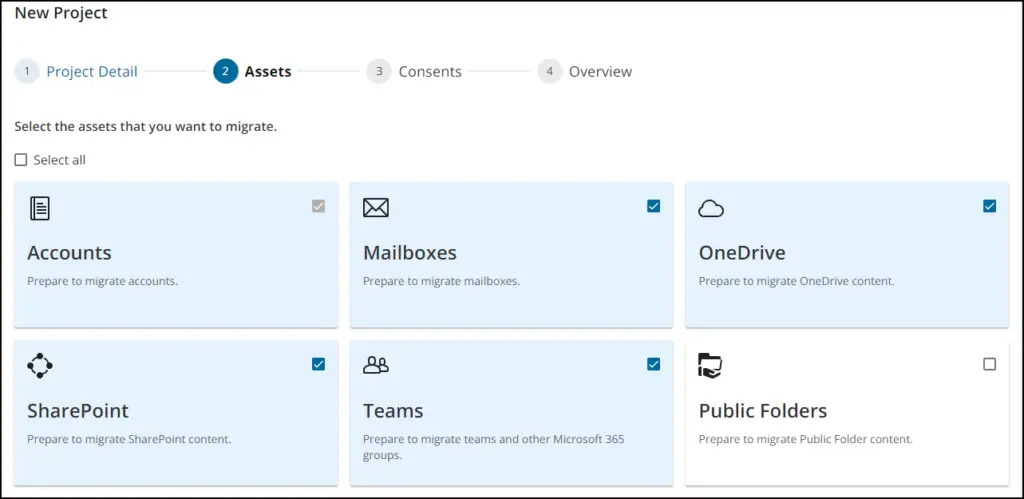
From the Assets section, select all or just the assets that you want to migrate. Click Save & Continue.

Obtain consent for all the selected Assets by selecting Grant Consent from both the source and target tenants to access user data. This will provide Migration admin permissions.

Follow the consent prompts during the setup process and Accept. Click Save & Continue.


Review the details and Click Finish.
Configure Discovery Task
Click Discover.

Go to the Project Dashboard and click on Discover to create a Discovery task.

Create a new task by selecting Discover all / Discovery from File.

You can choose to add Recipients to get a notification when the task is completed. Click Next.

Schedule the task by Running now or later as needed. Click Next. Review the details and click Finish.

Go to the Task section to check the status of the task.

Once the task is completed, We can start migrating.

