In this blog, we will be covering the following articles just to cover all the AWS basics on a single page.
- AWS Regions
- AWS VPC and Subnets
- How to Deploy AWS Instances
- AWS Security Groups
- Autoscaling
- AWS Load Balancer ( ELB )
- AWS Flow Logs
What is an AWS Region?
Regions would mean where AWS has its data center available.

Virtual Private Cloud (VPC)
It’s an isolated network in the Amazon world, just for use on the big Amazon infrastructure. VPC is just a master subnet and is defined per region, so this extends across the AZ’s. We can think the VPC Is kind of a software router
Availability zones
AZ’s (Availability zones) are data centres in a region, typically separated within 60 miles and interconnected via high bandwidth lines. Each region has different availability zones as shown.

Within each AZ we divide networks into subnets. Each subnet communicates with AZ using routing.
https://aws.amazon.com/about-aws/global-infrastructure/regions_az/

Edge zones
Cache the content to the local area of the user. If the content is not in the edge, the request is sought to the main AZ to load data into the edge, so this avoids latency as content is served from a local edge location. This works with Cloudfront.
AWS Outposts
This is another service which brings all services to on-prem so assume that there was a hospital, and they need a high bandwidth connection, so with Outposts all AWS services are on-prem, and it doesn’t depend on the cloud.
Creating a VPC
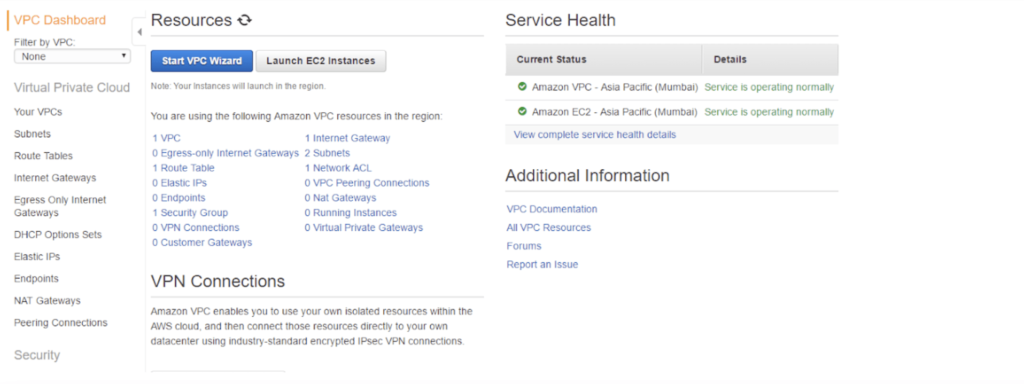
VPC can be thought of as a software router which has its own subnets and associations. Once the region is chosen, we will first start by searching for VPC in our search tab.

Choose Start VPC Wizard
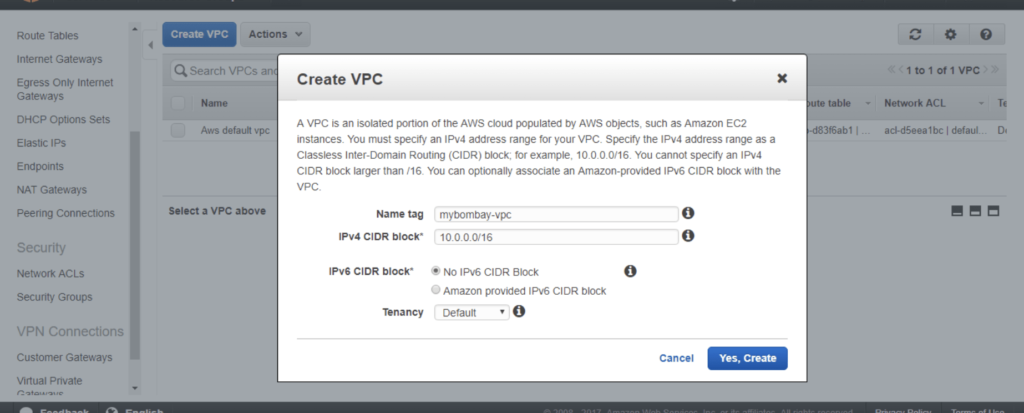
Provide the VPC with a name and choose a CIDR range and Click Create
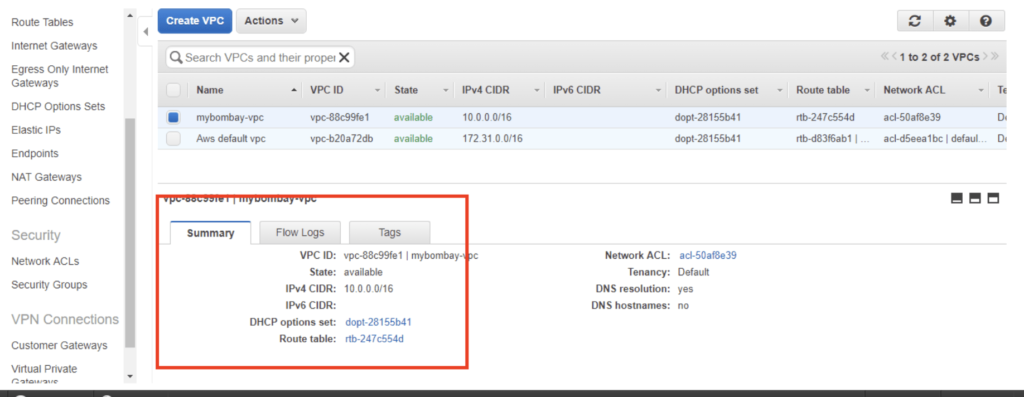
Once VPC is created, we will have our new VPC along with the default VPC AWS created for us which can be deleted later if we wanted.
My AWS region in AP-South has two data centres – 1A and 1B. We will now create subnets inside this region.
Creating IGW for Public Subnets in VPC
A public subnet in AWS will need to be connected to an Internet gateway for instances to access the outside world. A private subnet will be connected to a NAT Gateway or NAT Instance.
Create a public subnet in 1A AZ
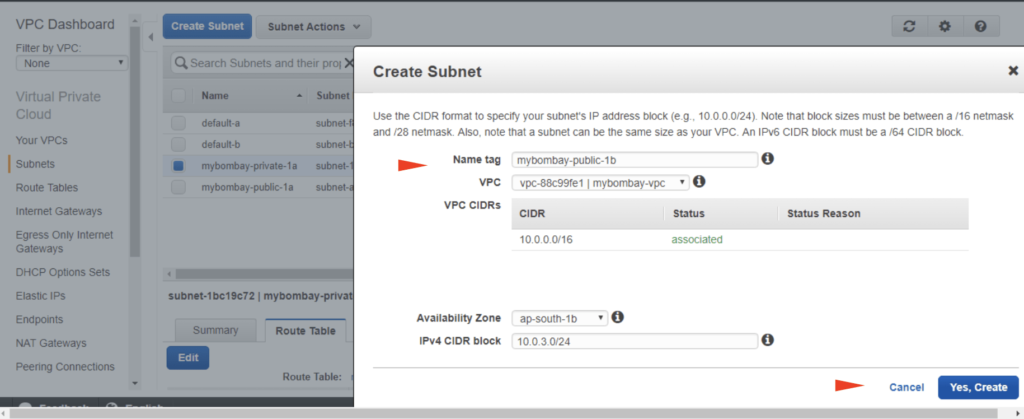
Let’s create 4 subnets in total across the AZ’s
- 1 private and 1 public subnet in 1A AZ
- 1 private and 1 public subnet in 1B AZ

In order for the subnet to talk to the outside world, the main route table will need a gateway attached to it. Hover over to the Internet Gateway section to Create an Internet Gateway
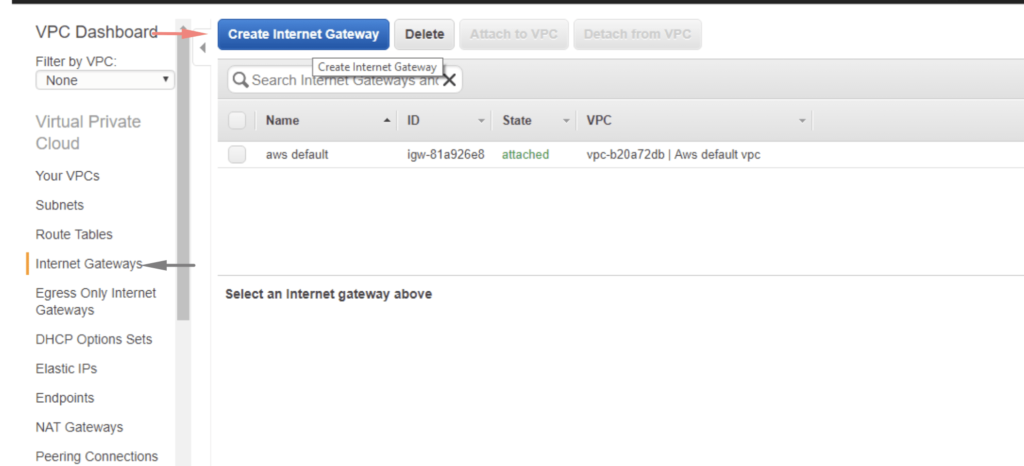
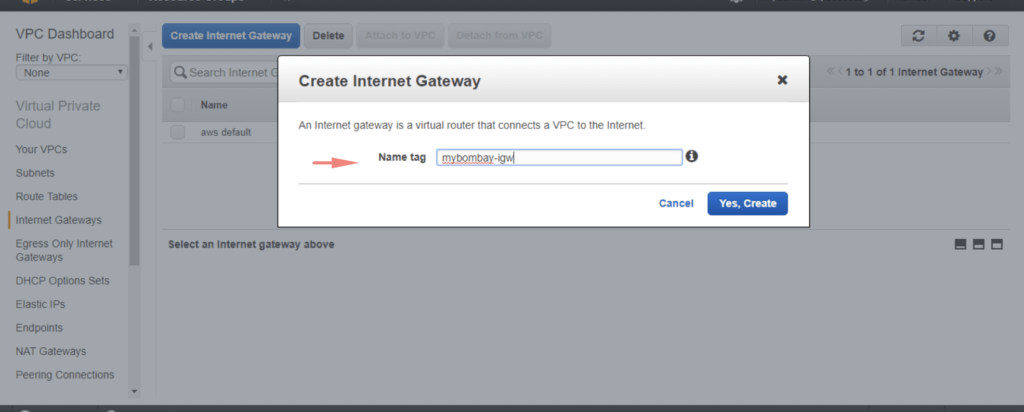
Give the gateway a name
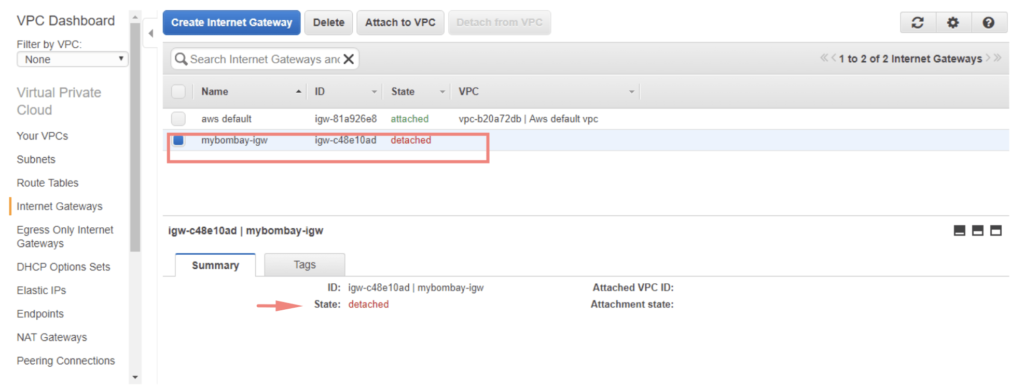
Once the gateway is created we will see it’s not attached to anything
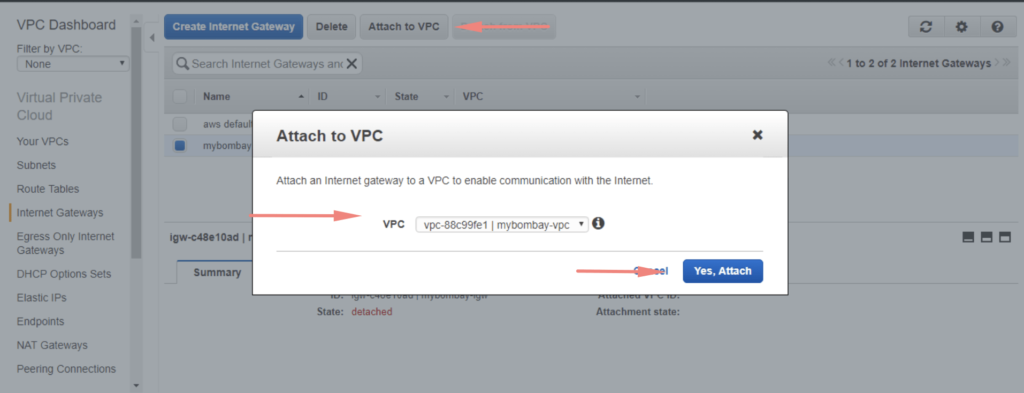
Choose the option to Attach to VPC and in this case, we select mybombay-vpc
We will now need to update our route table and add a new route. Attach the gateway interface we created to the main route table.
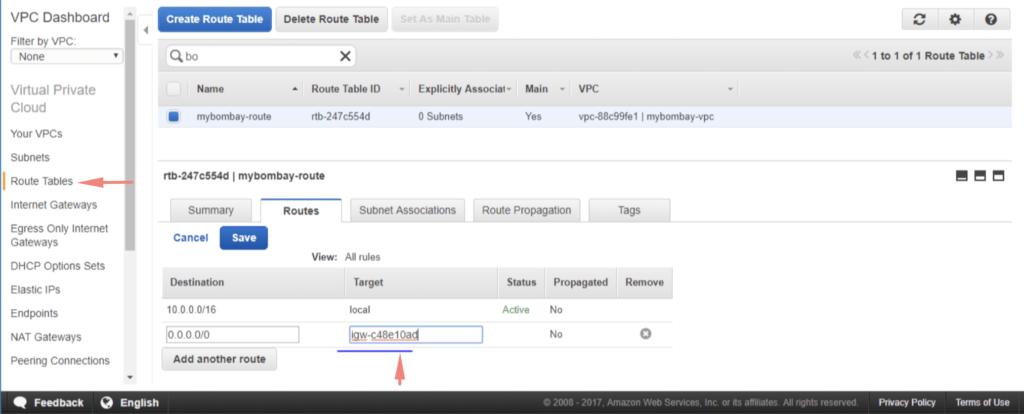
Once the gateway is attached to the main route table, all we now need to do is to connect a subnet to the route table so instances can communicate with the outside world.
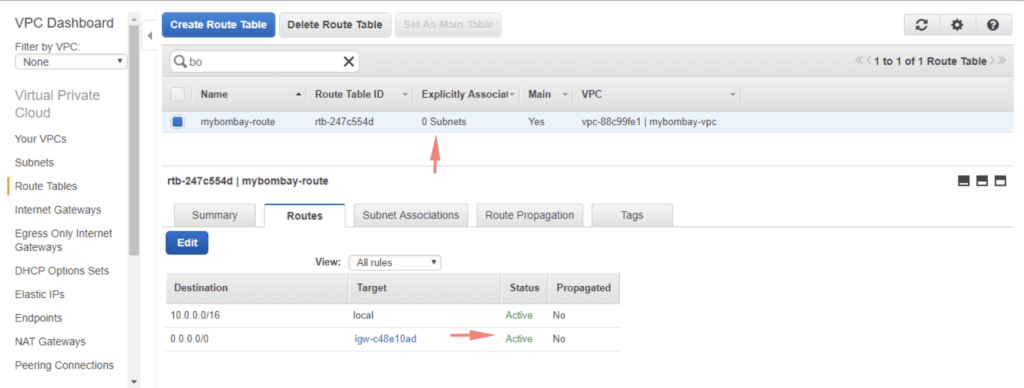
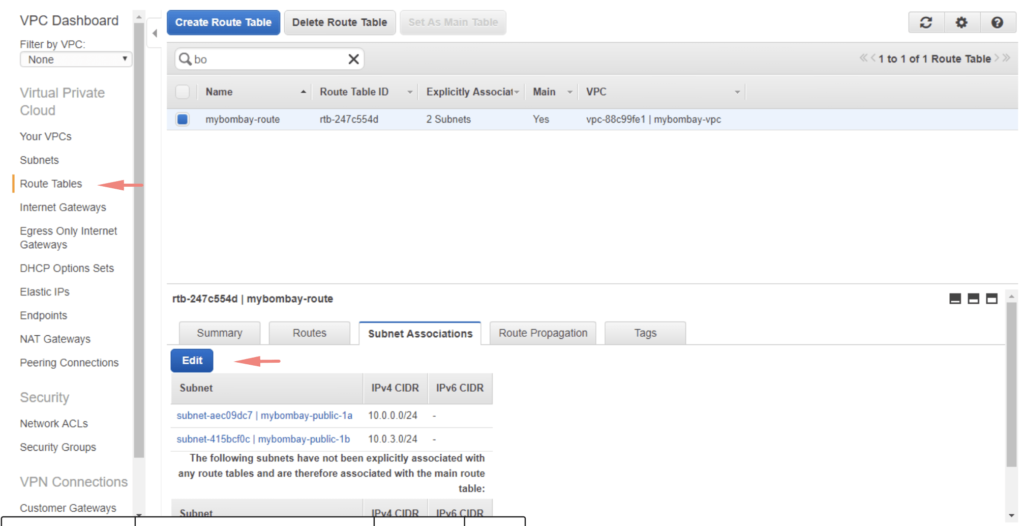
No subnets are associated with the route table so we need to attach the subnet. In this example, I’m to attach both public subnets we created earlier
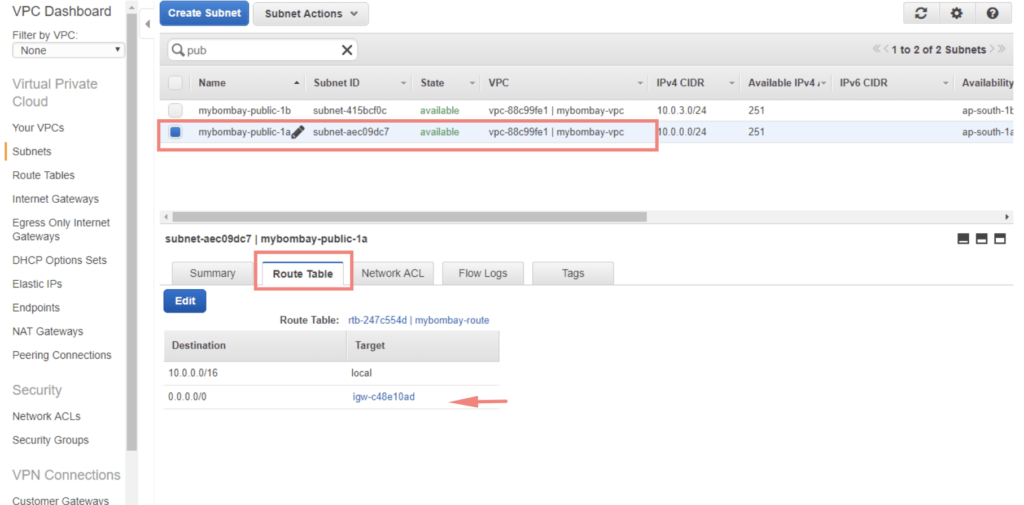
Go to Subnet Section – Choose the Public Subnets we created – Under the route table – Click Edit and attach the gateway we created.
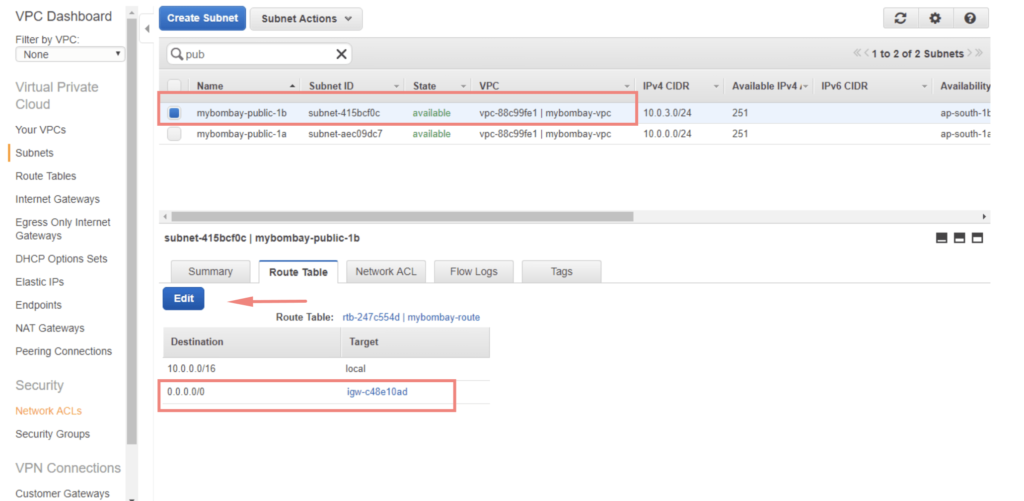
Repeat the same for our public subnet in 1B AZ as well.
Choose Auto Assign Public IP’s on the subnet, we can do so by choosing the public subnet we created and Under Subnet Actions. All instances being created from now on attached to this subnet by default will get a public IP.
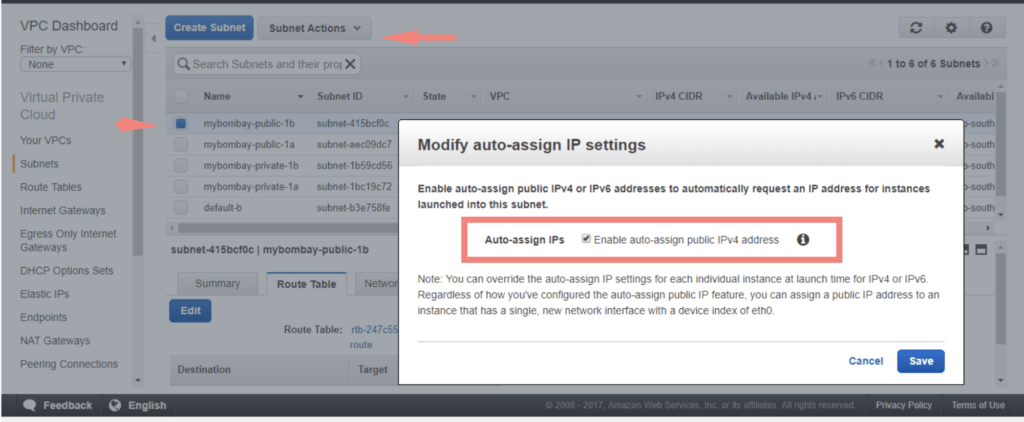
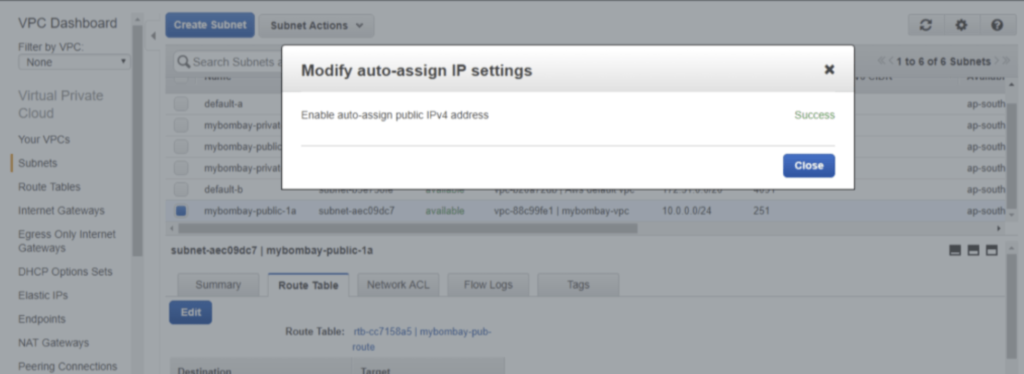
Click on Save to enable the action
Creating Nat Gateway for Private Subnets in VPC
Private subnets on the other hand should be going via the nat gateway, so I’m to create a new nat instance and attach it to vpc and then map all the private subnets to use nat
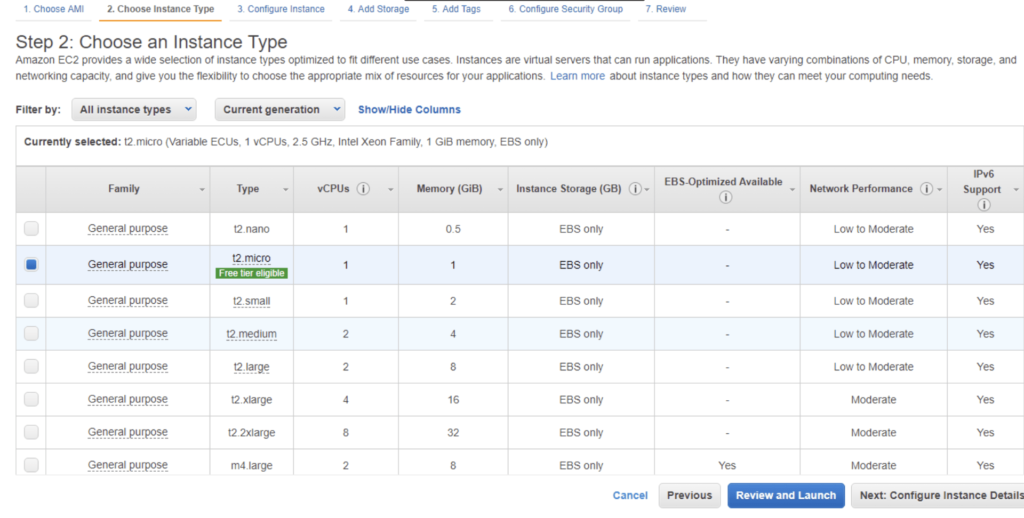
We will just pick an Amazon AMI Image from the marketplace and use it to configure NAT Instance
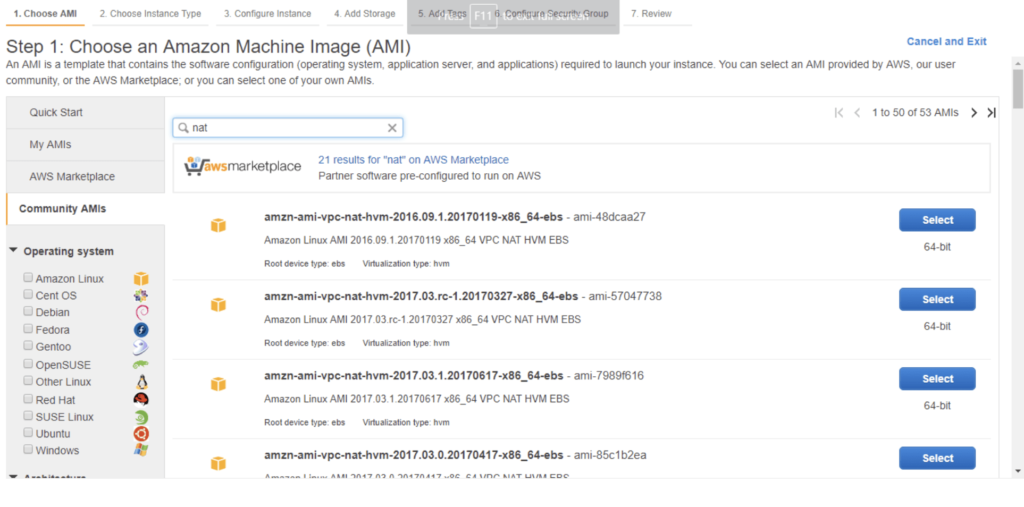
Leave everything as default
Choose the subnet as our public subnet
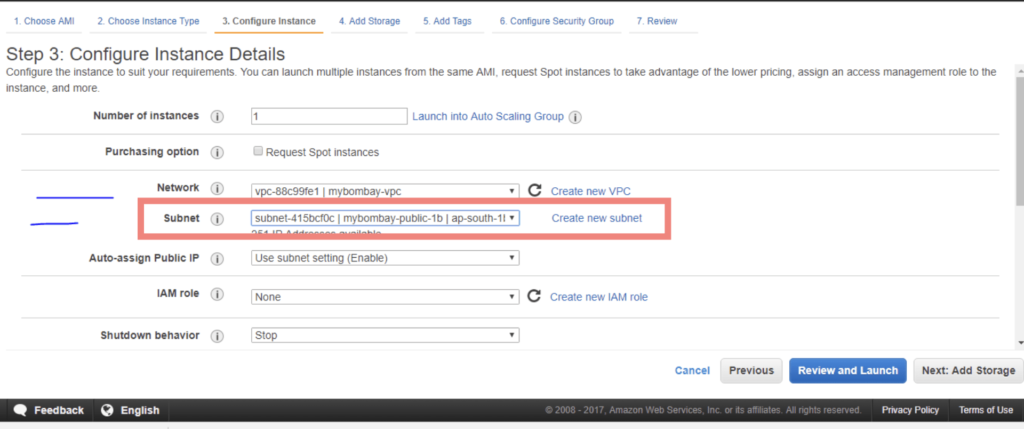
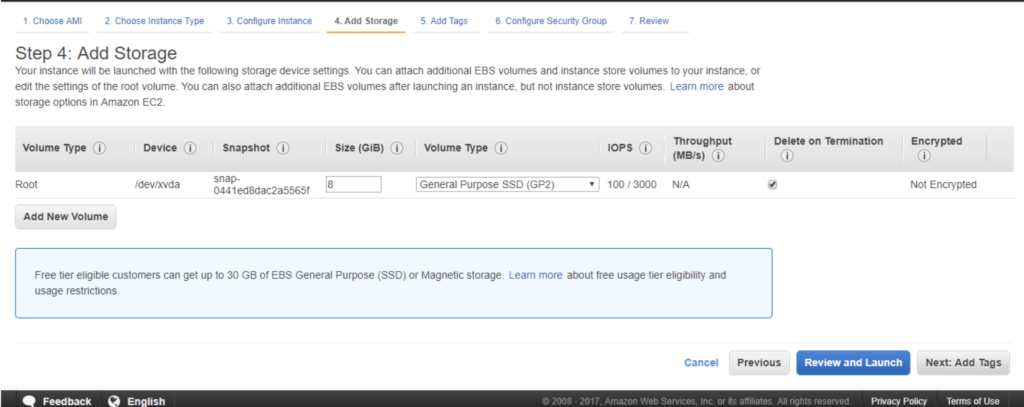
Leave everything as default
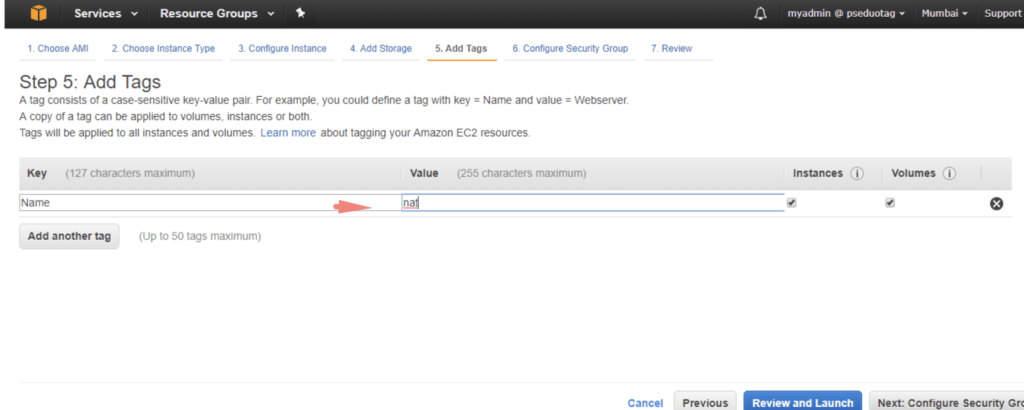
I’ll define a tag as NAT.
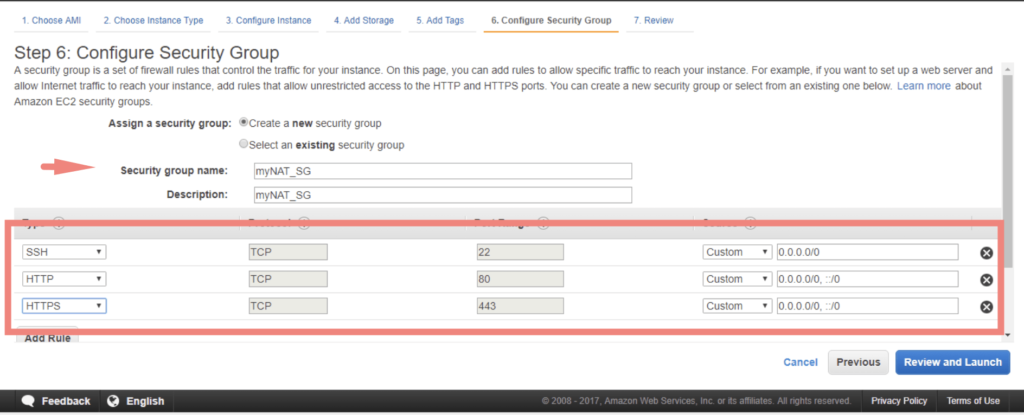
Security Groups are ways by which access to the instances is controlled. We will need SSH/HTTPS access so we enable ports 22 and 80
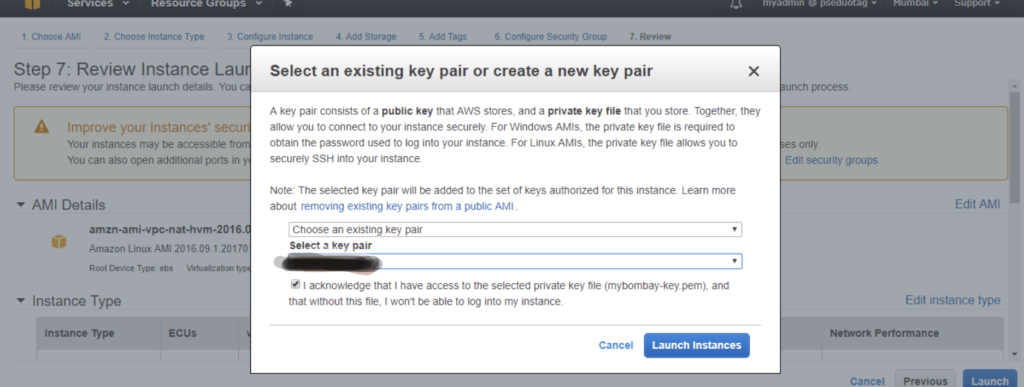
Choose a key pair for the instance and click Launch Instances
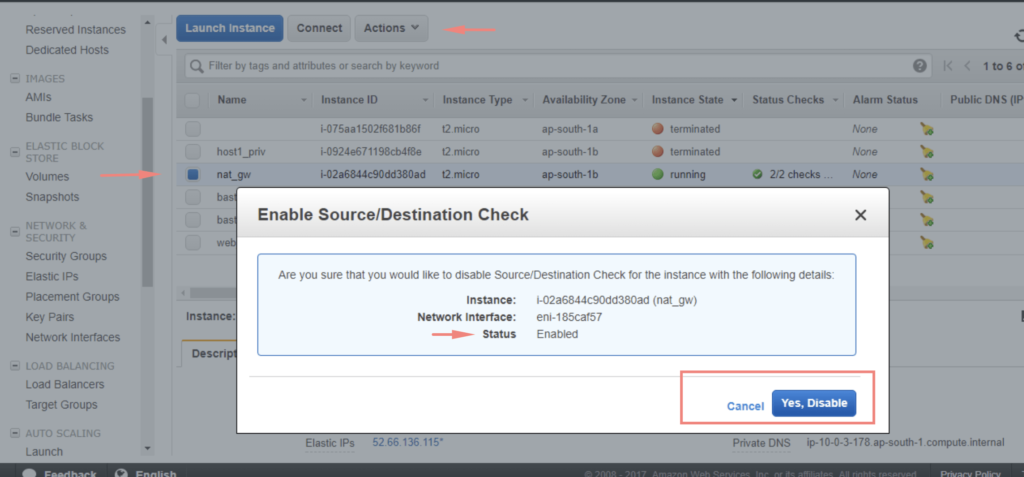
Once the nat instance is created, select the Instance – Under Actions- Choose to make Source/Destination checks disabled.
Creating a HA Bastian server in Autoscaling Group
Bastion server is a jump box used to connect to our AWS environment.
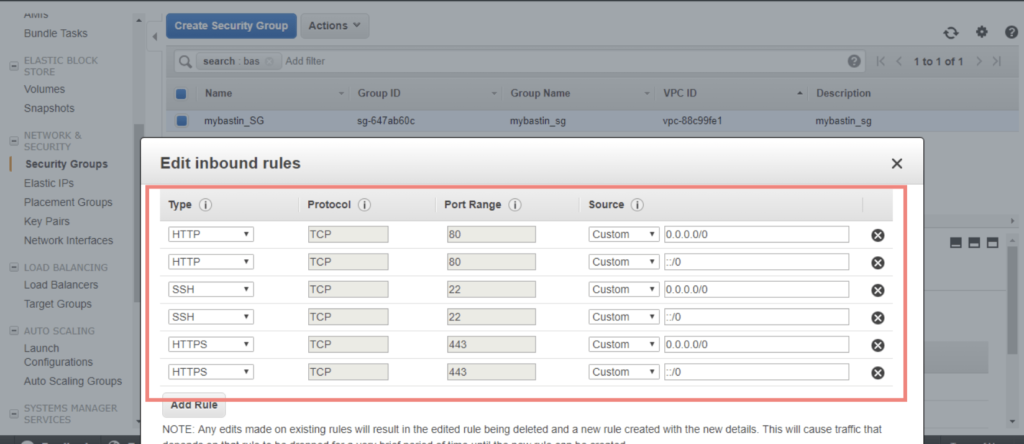
I’ve created security for my bastion host as shown
Now I’m to create a standard instance from an amazon ami and that will act as a jumpstation. I’ve chosen to deploy a bastion host on both my AZ’s for HA purposes.
Under AutoScaling tab – Create AutoScaling Group
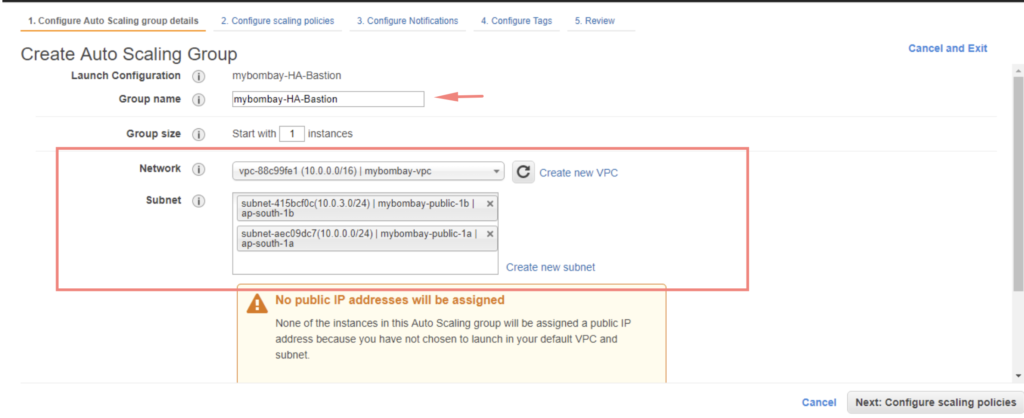
- Give the Group a Name
- Group Size – 1
- Select the VPC
- Finally choose both the public subnets
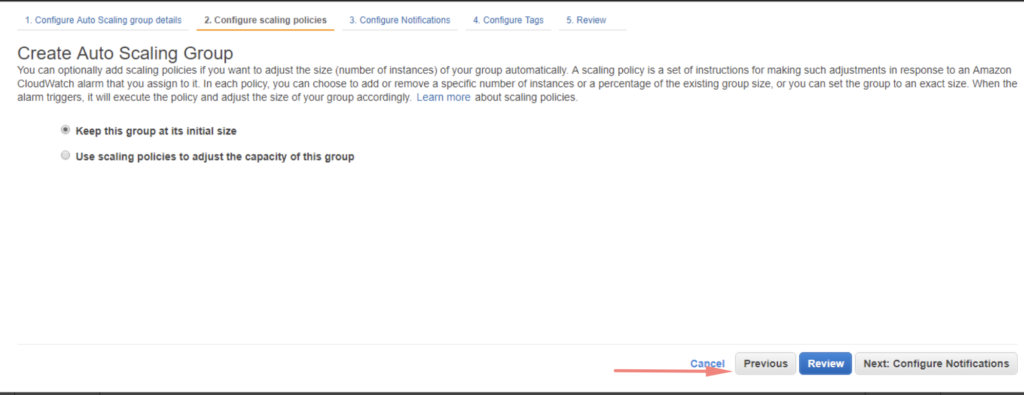
Click Review
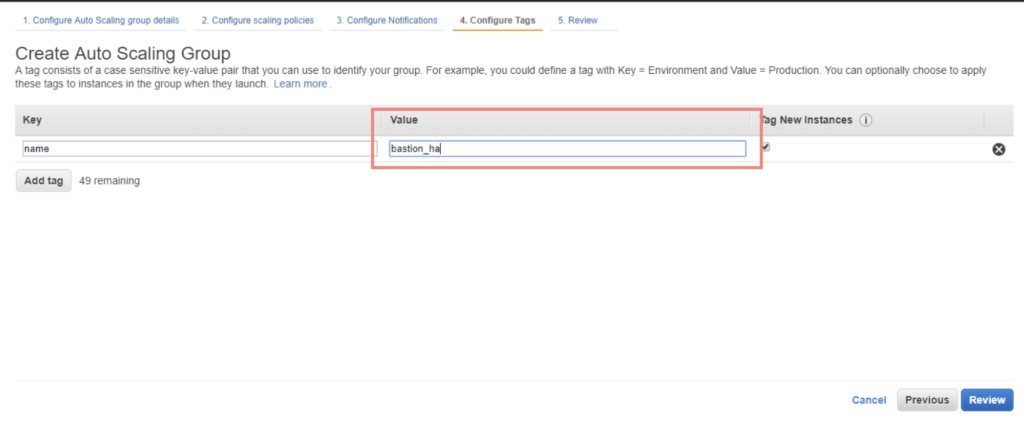
Give the tag bastion_ha and click next to proceed
Once deployed, we can see our Autoscaling Group
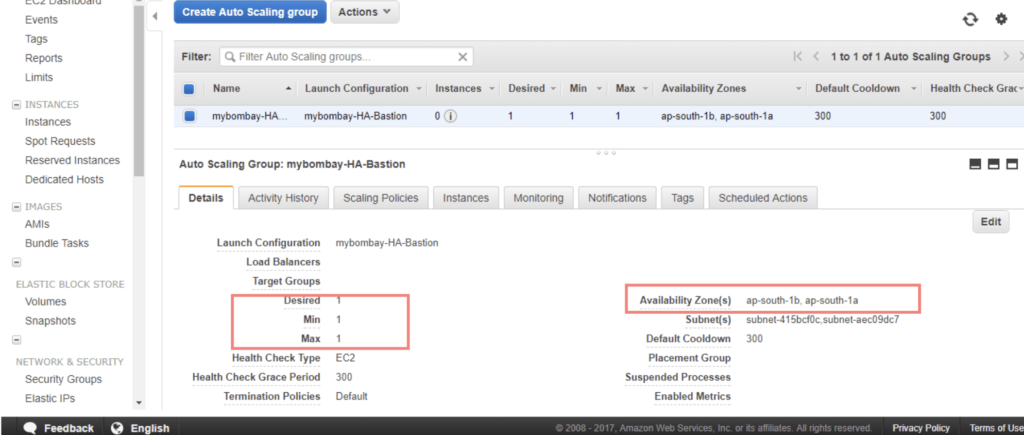
Now I add the desired capacity=2, min=1 and max 2 so I have a HA pair always
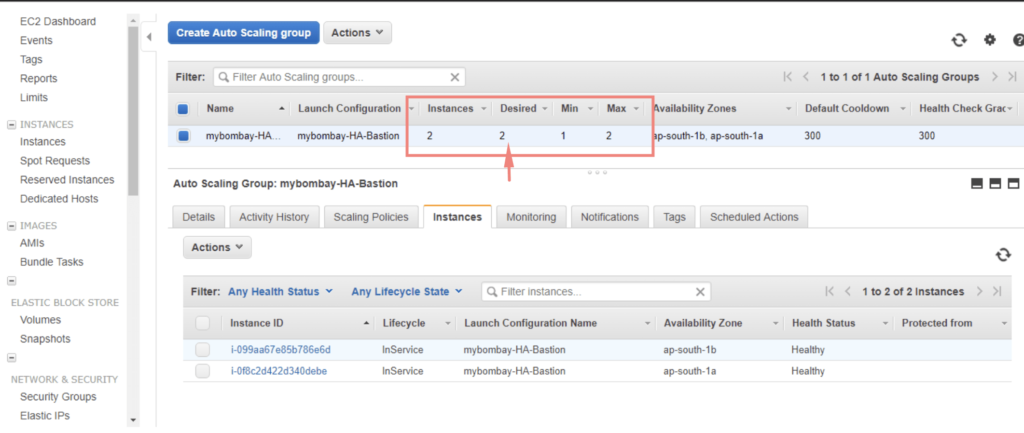
Under the Instances tab, we can now see two instances being created. One instance will be in our 1A AZ and the other one will be in 1B AZ

Let’s now attach the nat instance to private subnets. I’ve created a private routing table and attached the nat instance AMI ID to it as shown
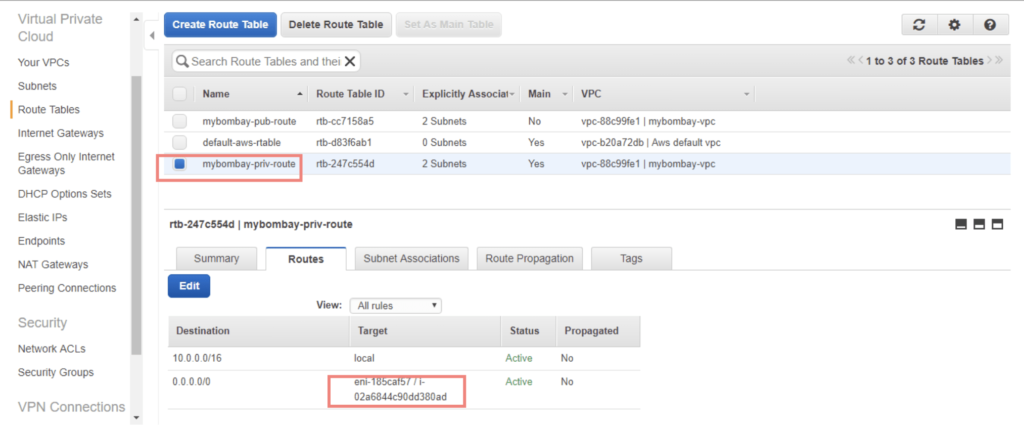
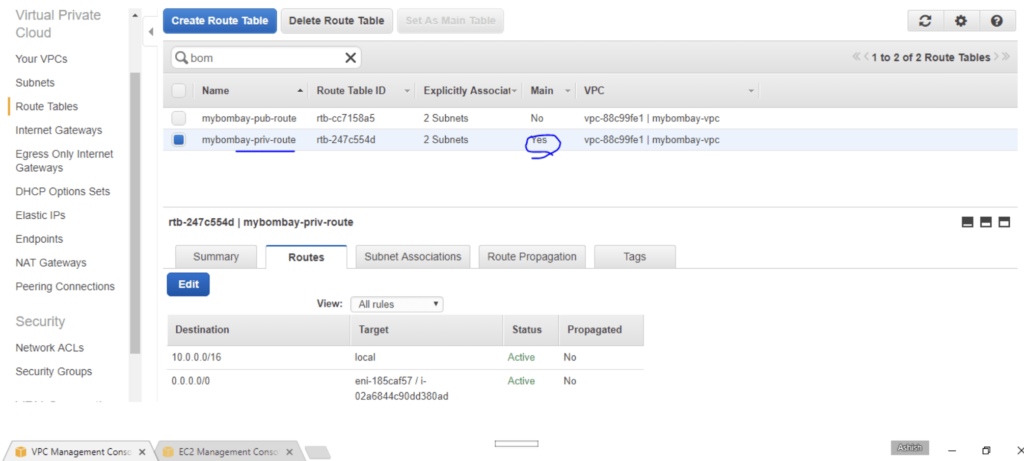
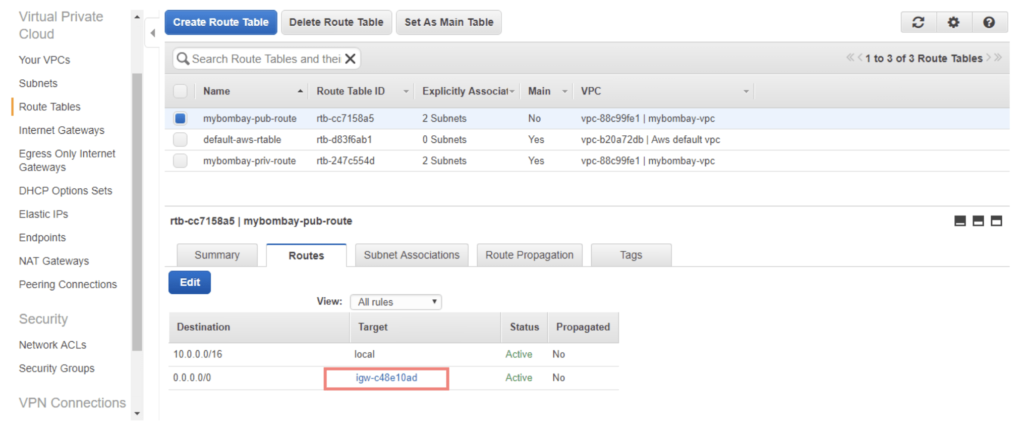
The public subnet is only to have the internet gateway on it.
There is still no public IP on the nat gateway so I need to attach an Elastic IP to it.
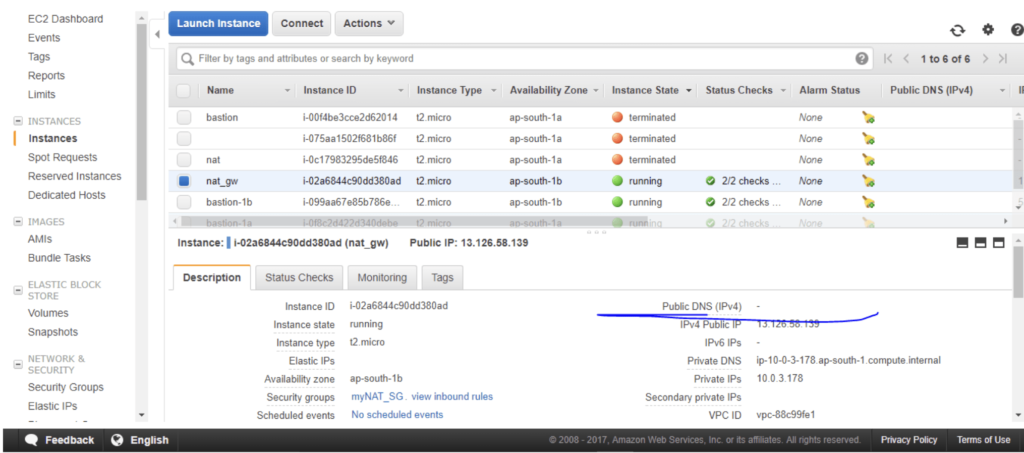
Go to the Elastic IP section and allocate a new public IP.

Under actions tab – connect the public IP to the NAT Instance

We have now established a connection to the outside world for our private subnets as well via the NAT gateway.
What are Flow logs
Flow logs are just to capture all network traffic on a vpc
Select the VPC and Create Flow Log

Prior to creating a flow log, we will need a dedicated role group. Define a role group under IAM – Roles Section

We also need to set up a log collection group in cloudwatch alarms

Once the role group and Log collection group is setup, go back to the VPC and create flow log

Once defined, all packets from this VPC will be logged under our Cloudwatch Alarms

Creating a load balancer (ELB)
Let’s now create a Load balancer.

Give the load balancer a name and choose to deploy the load balancer in our Bombay vPC

We select our public subnets from the group to be added into our load balancing group

We will just define a security group to allow ssh and https traffic in

Finally we hit the create to finish off the configuration of load balancer.

Now we can attach servers to our Autoscaling group
Creating an Autoscaling Instance
Let’s first install an Apache webserver
Just pick an amazon ami
In the user-data field or the bootstrap file add these
#!/bin/bash
yum update –y
yum install –y httpd24
service httpd start
chkconfig httpd on
host_name=`curl -s http://169.254.169.254/latest/meta-data/local-hostname`
echo “hi there from $host_name” > /var/www/html/test.txt
Add the instance to the Auto-scaling group (ASG)
Under the Instances tab, let’s create few virtual machines

We will now paste in the above user data info above into the User data section as shown so the instance will deploy everything in one go

I’ve chosen to deploy the ASG into my two public subnets and gave it a name as web-servers

Once done, click Create AutoScaling Group
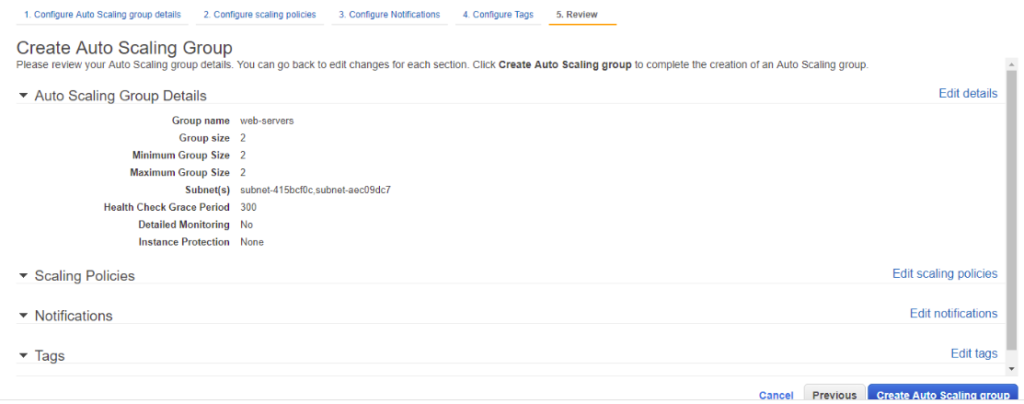
Our AutoScaling Group is created and will now launch two webservers in it.
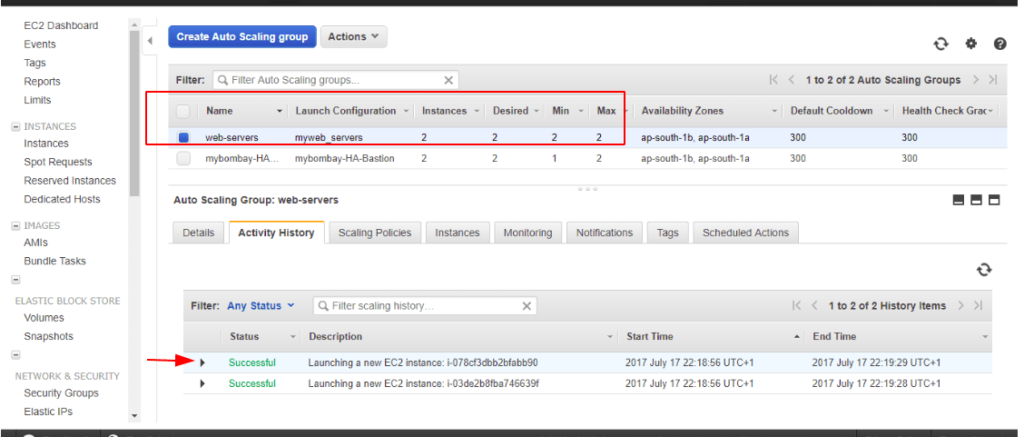
As expected, we will now see the Lifecycle Status as InService and the Instance is spread across two AZ’s
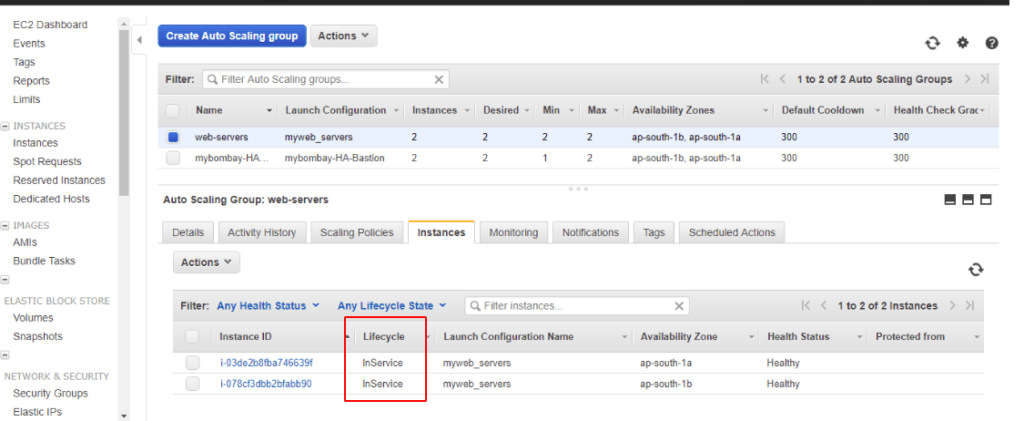
Under our Instance view, we can now see both our web servers are present
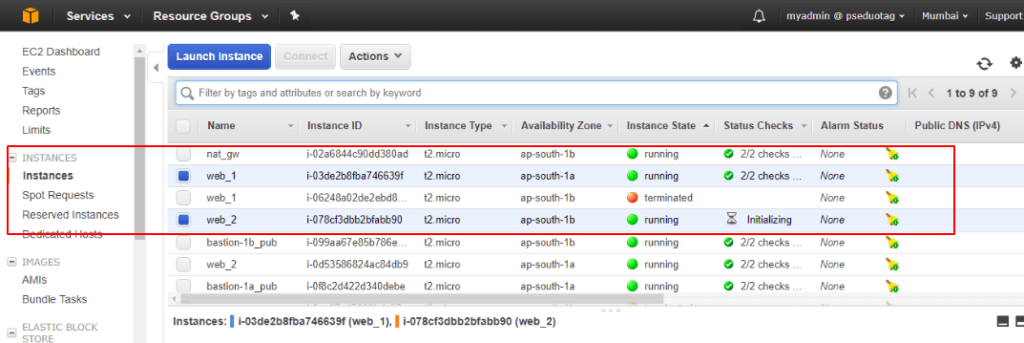
Integrating ASG members to ELB
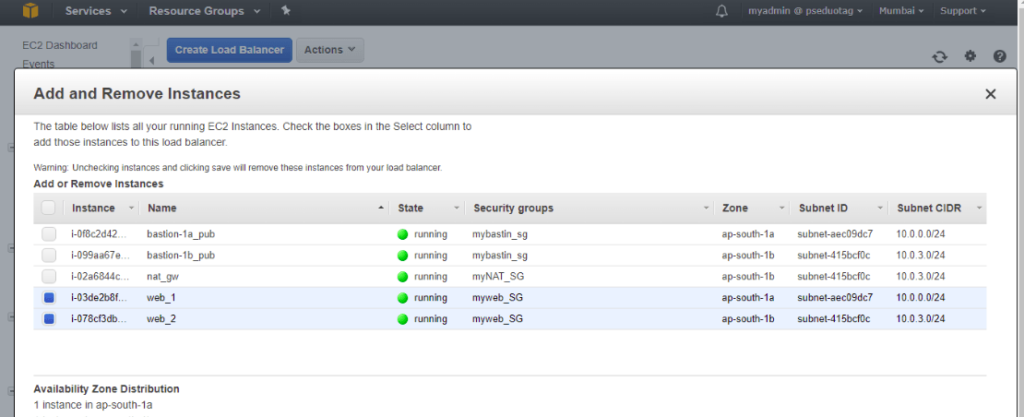
In order to integrate our ASG members to ELB, we go to ELB and choose to add the two web servers we created.
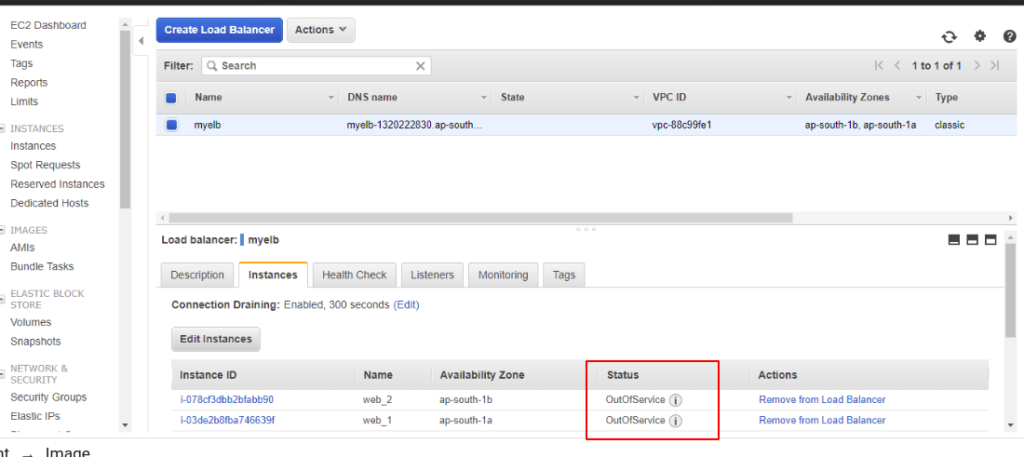
ELB will now show our instances in the ASG are “OutofService”
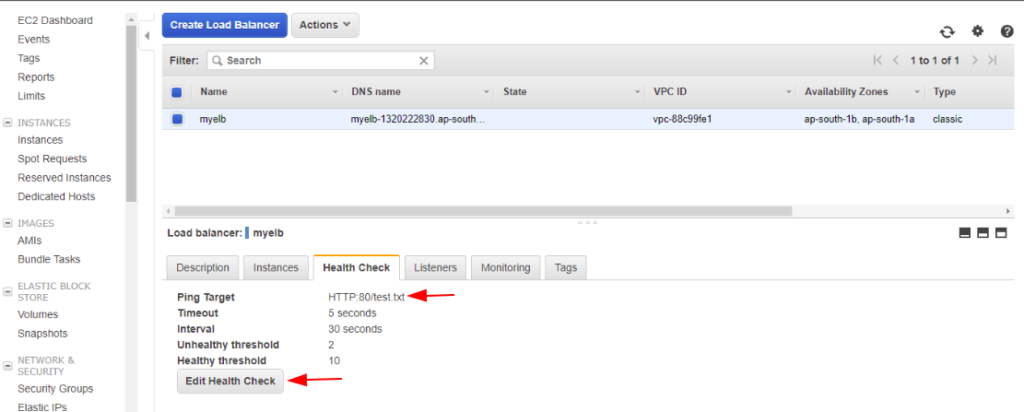
I’ve changed the health check to /var/www/html/test.txt. All the ELB now does is it checks if the file exists.
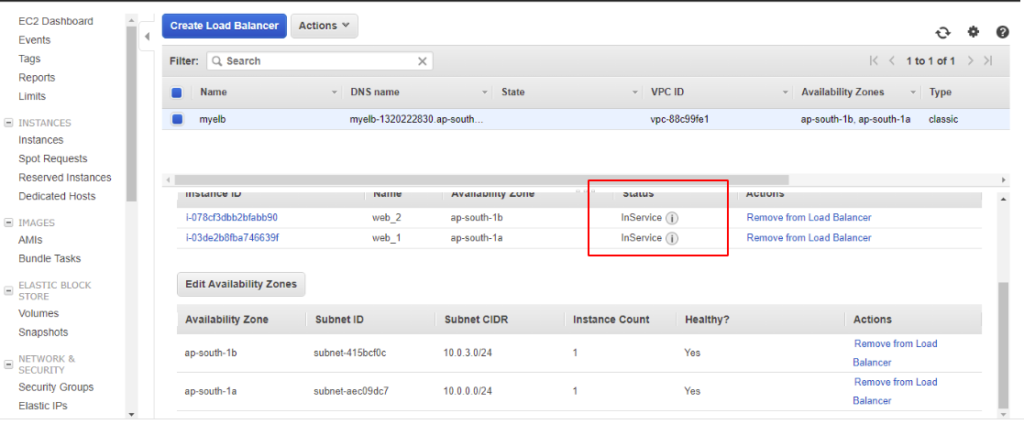
As expected we now see the status of our ELB as “InService”
Simulating a failure of an instance

One of my Instance is now out of Service
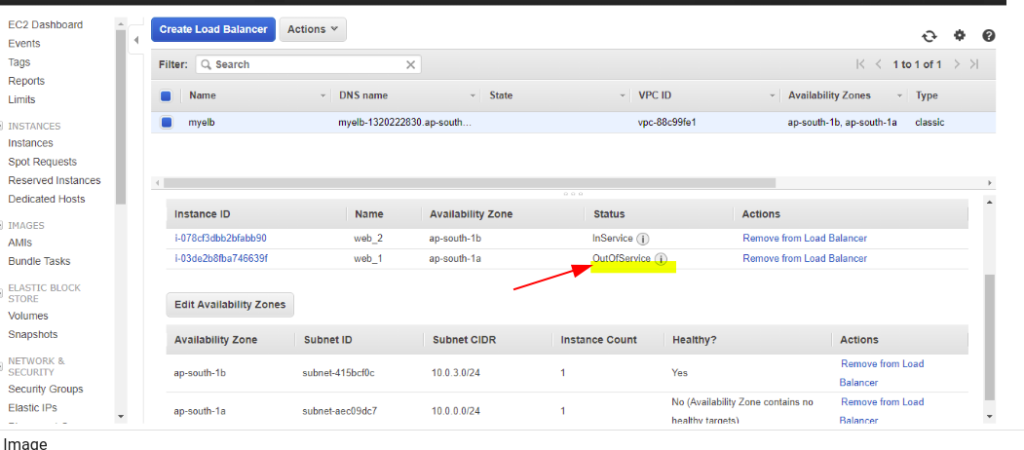
Now the autoscaling should spin this up but autoscaling is not detecting the failure
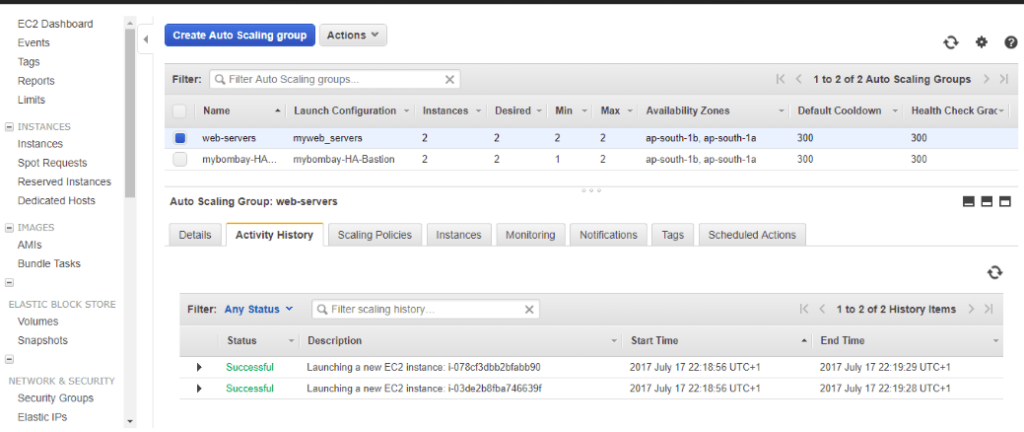
This is due to the fact that our Instances are still live and health check is still not happening at the load balancer level.
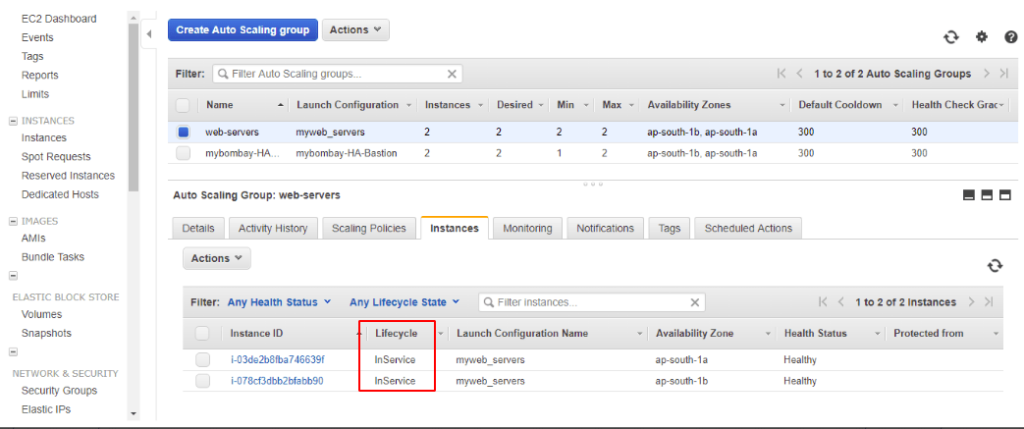
So let’s change the health check from EC2 to ELB
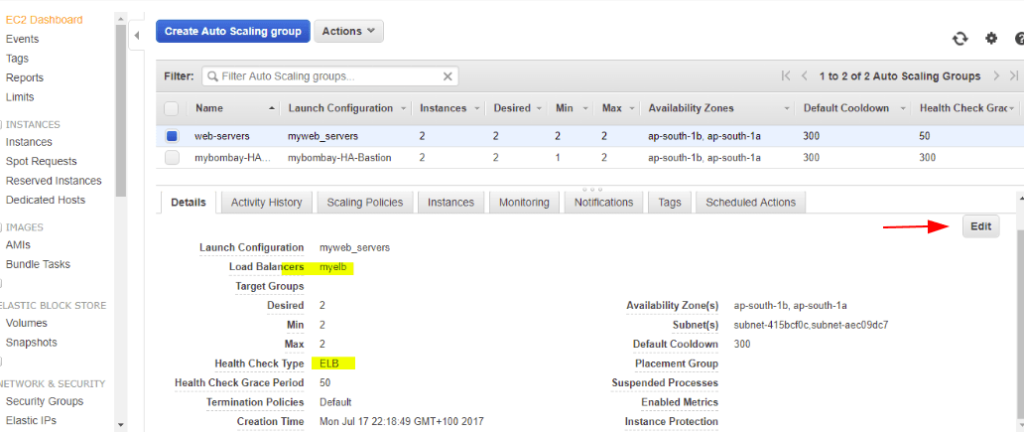
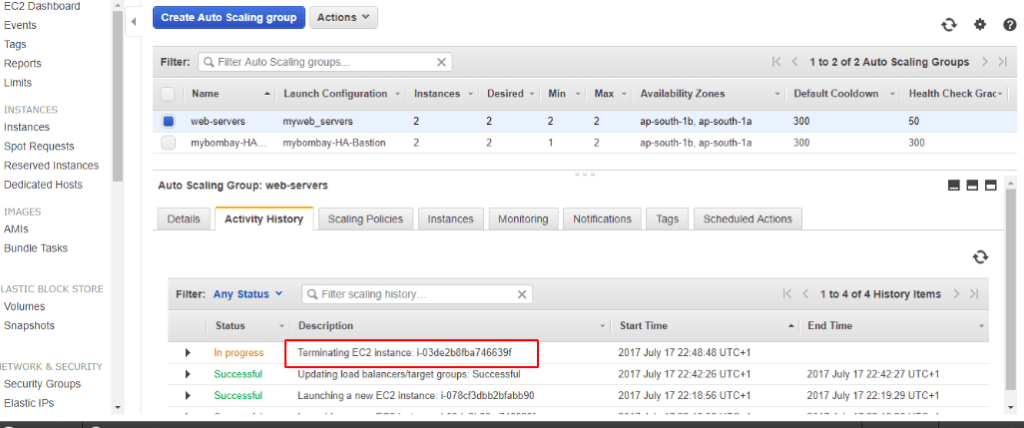
As soon as the health check is changed from EC2 to ELB we can now see stats working correctly and we see instances with health checks not passing terminating instances and ASG launches us a new instance to keep the state healthy.
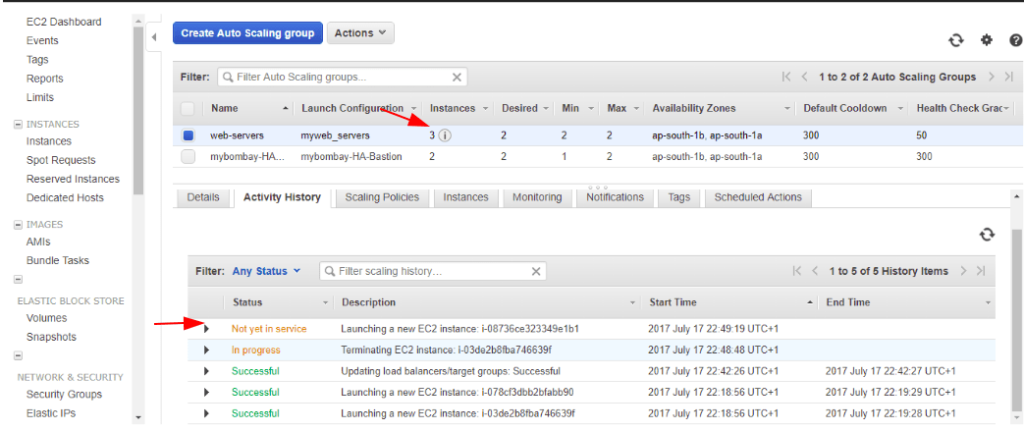
Let’s now drop the number of instances on autoscaling config. Now it drops one instance from the load balancer.

Security Groups
SG are instance-level firmware and they are stateful services which means if inbound access is allowed, outbound is also allowed. SG are used to control access to and from a VM.
For a web security group, we need port 80 and 443 port to be accessible and we do that by defining a security group as below

For my ELB, we need Port 443 and Port 80 in our case to pass through as we have apache web server on it.
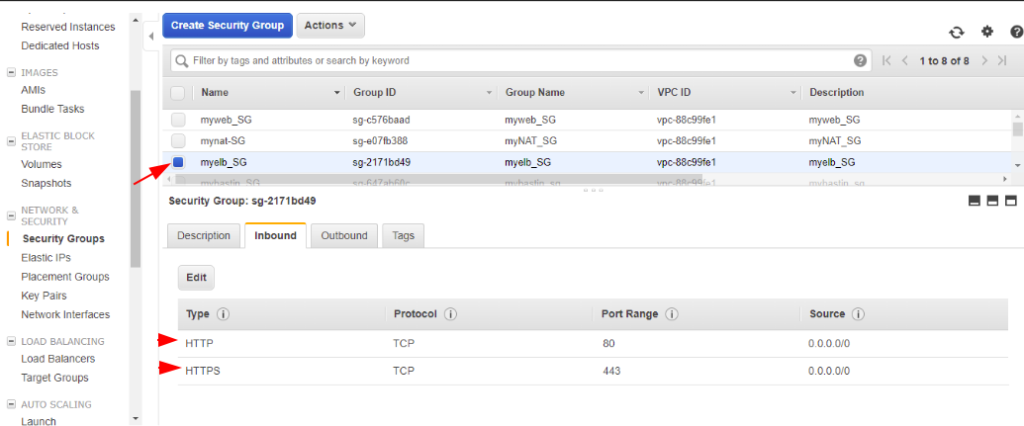
For my Bastion Host, we need Port 22 and Port 80 in our case to pass through as we need to access it from our lab PC

For my database instances, we need Port 3306 to pass through so we define a rule as below

Similarly, we can tighten access between App – DB – Web – Bastion by defining a micro-segmentation rule as to how we deploy our NSX-V/T rules.
The outbound rule determines what sort of traffic is allowed from the VM to the outside world

