Azure Active Directory is a cloud-based identity service used on Azure Cloud. AD Connect is a tool that allows us to integrate on-prem AD Forest to Azure which helps in user authentication.
The major differences between an On-prem AD and the Azure Cloud AD is shown here

Microsoft Azure Hybrid Identity
The below write-up will add a new Azure Active Directory than creating it under the default directory.
Hybrid Identity Authentication Types
There are two authentication types
| Managed | Azure AD handles authentication using PTA (pass-through authentication) or PHS ( password hash authentication) |
| Federated | Large Enterprises with complex authentication requirements( eg: Okta ec) |
Hybrid Identity Authentication Options
There are three sign methods or authentication types to work with Azure AD
| Password Hash Synchronization (PHS) | In this sign-in method, a hash of the users password is synced from on-prem to Azure AD |
| Password through Authorization (PTA) | The same password is used in Azure Cloud & on-prem. No password component is synced into the cloud and the authentication is still handled by the on-prem AD |
| Federated Authentication | Authentication is handled by 3rd party federal software eg: ADFS, Okta, MFA, etc |
To begin creating an Azure Active Directory we will need to create a new resource under our resource group

Choose Azure Active Directory

Choose to create the Azure Active Directory resource

What’s an Active Directory Tenant?
A dedicated and trusted instance of Azure AD. Each Azure tenant has a dedicated and trusted AD directory and this includes tenant users and groups, and applications and is used to perform identity and access management onto resources.

Default Directory – This is by default created when Azure AD is created.
So let’s say you have an organization and an organization has many other companies under that organization so they could go ahead and create directories for each of the companies in that organization, to keep users and groups aligned under each company.
Subscription – All of our resources are billed against a subscription. So it’s like you would have a subscription for production, you would create one against them. Likewise, for dev workloads, you will create one for it.
Each subscription can only be linked to one directory
Trust between Azure Subscription
Under tenant type, choose Azure Active Directory

Give the organization a name, this is internal referencing and so you can just put whatever you need.
The initial domain name has to be unique on the internet so in this case its ourhomelabonline.onmicrosoft.com

Validate everything and click on create

We will now be accessing Azure as user@ourhomelabonline.onmicrosoft.com but if we wish to have a custom URL defined, we will need to purchase a domain.
I am now to add a custom domain name, ourhomelab.online was purchased from a registrar so here is the process
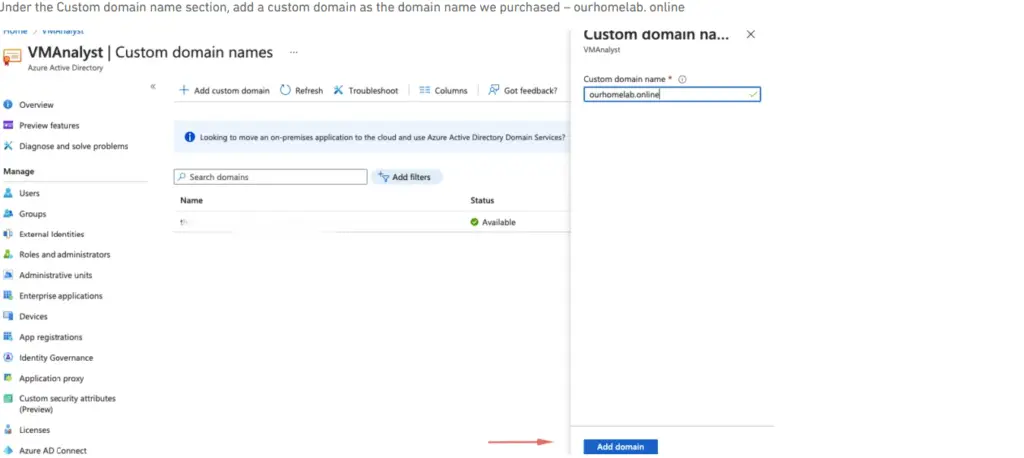
Under the Custom domain name section, add a custom domain as the domain name we purchased – ourhomelab. online

We need to now verify the above domain belongs to us. To use ourhomelab.online with your Azure AD, create a new TXT record with your domain name registrar using the info below.

Back into our domain registrar and add this record to our DNS.

Click on Verify and this should now show on Azure as the verification has completed.

Go to our on-prem AD serve, open Active Directory Domain and Trusts to add a UPN Suffix as ourhomelab.online

I will now create a user as Azureadmin and as expected we can see our @ourhomelab.online so let’s create an account for him under the domain. This is the account that’s used for periodic synchronization with Azure AD.

We will add Azureadmin to the Enterprise Admins Group

Deploying Azure AD Connect
Back on Azure, let’s create a new user as AzHomeLabAdm under the custom ourhomelab.online domain we created

We will add AzHomeLabAdm to the Global Admins role

We will enable this account for this period

Open a new connection via Ingonito to portal.azure.com with AzHomeLabAdm@ourhomelab.online

Use the password we set initially to login

Under Azure Active Directory > Go to Azure AD Connect and Download Azure AD Connect

Download the software

Back on the on-prem Active Directory Server, we will run the AD Connect Setup software

Click Continue

Click Next to continue

We will select Enable Single-sign-on & Pass-through authentication

Provide the name of the global admin we created in Azurewhich was AzHomelabadm@ourhomelab.online

It will now ask us to connect our on-prem AD to create a link between them. Choose Add Directory

Provide the azureadmin@ourhomelab.online account we created in our on-prem here. This is the account that’s used for periodic synchronization with Azure AD.

As seen our single forest ash. local is now validated

We will leave this section at its default settings and ensure User Principal Name is selected

We can be specific as to which OU’s need to be synced across but I will just sync everything here as my AD is small in footprint.

Click Next to continue

Choose Sync

Select the options Password has sync & Password write back

Enter credentials to enable SSO

Since we choose Single-sign on we will now need to provide our domain administrator credentials to validate

Our SSO is now validated against our On-prem Active directory

Choose the option to Start synchronization

We will now wait for this to complete

Once done, we see our configuration is fully complete

Back on Azure AD, we can now have our on-prem users showing up on Azure.

The progress of Azure Synchronisation can be viewed by the Service Manager. This software is installed on the local on-prem during the time we installed the Azure AD connect. As seen this does a full import of our on-prem data to Azure

After a few moments, we can see the sync is all done

Connectivity between our on-prem and cloud can be determined here

I’ve some sync issues here, so as to resolve them I’ll do a Data synchronisation

Once the Azure AD is connected, we can see the details of its sync.

Overall health status can be obtained here

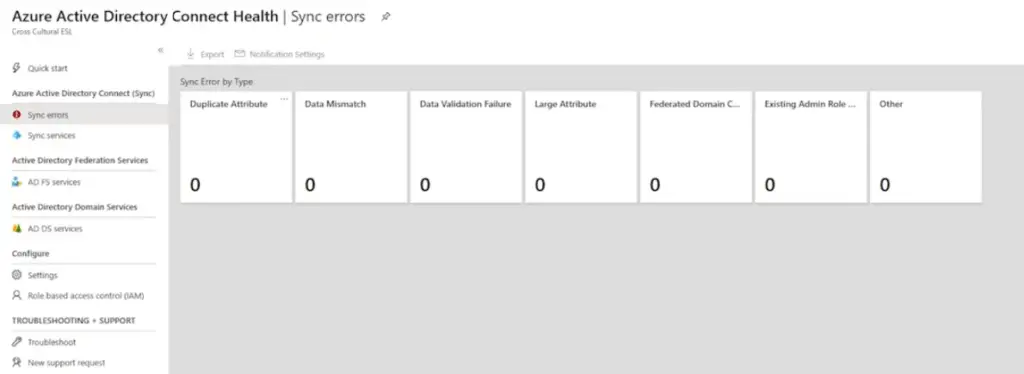
The sync errors can be obtained from the health and security tab

Joining a VM to Azure AD
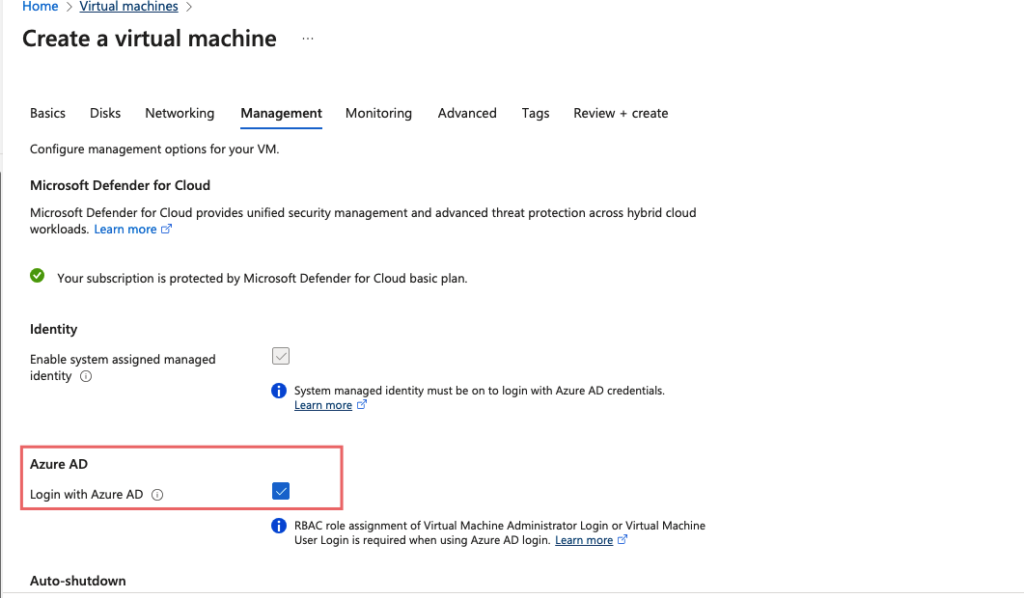
When we create a virtual machine, we can just simply tick the button Login with Azure AD so our devices will be joined to our Azure AD.

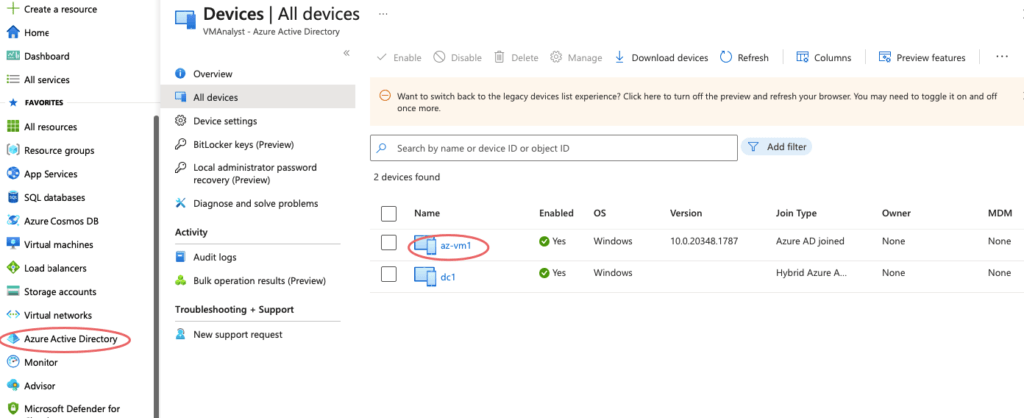
Under the Azure AD Devices tab, we can see the VM being added.

In the next blog, we will focus on setting up users and applications for Hybrid Identity

