With the first NSX‑T Manager deployed, the next step is to build out the cluster by adding the remaining managers and setting up the Virtual IP (VIP) for high availability.
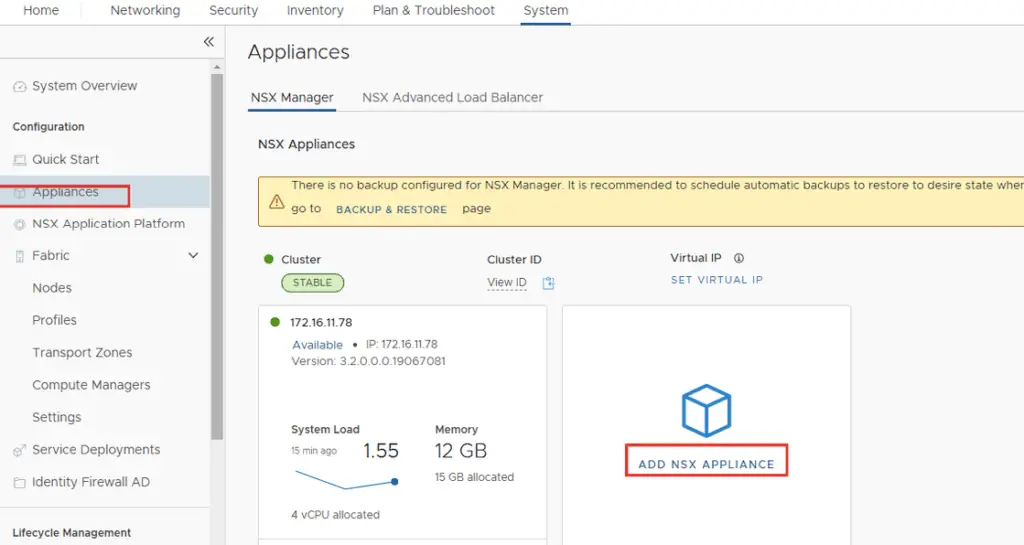
Log in to NSX-T manager and navigate to System >Appliances and click on Add Appliance.
Enter the IP address (remember, it must be in CIDR format).
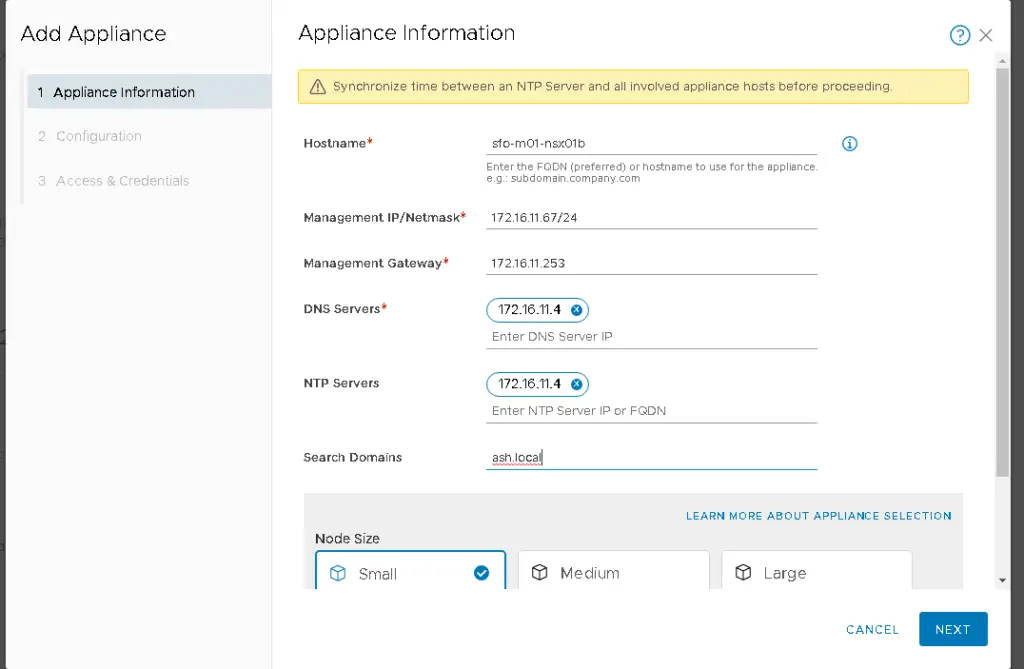
Choose the deployment size that matches your environment.

Select all these details
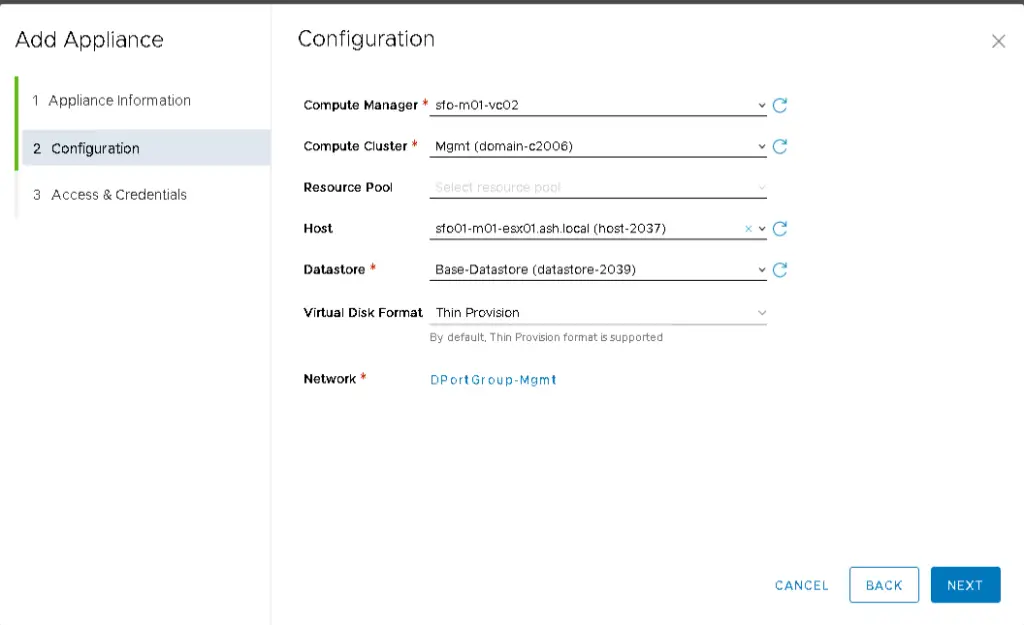
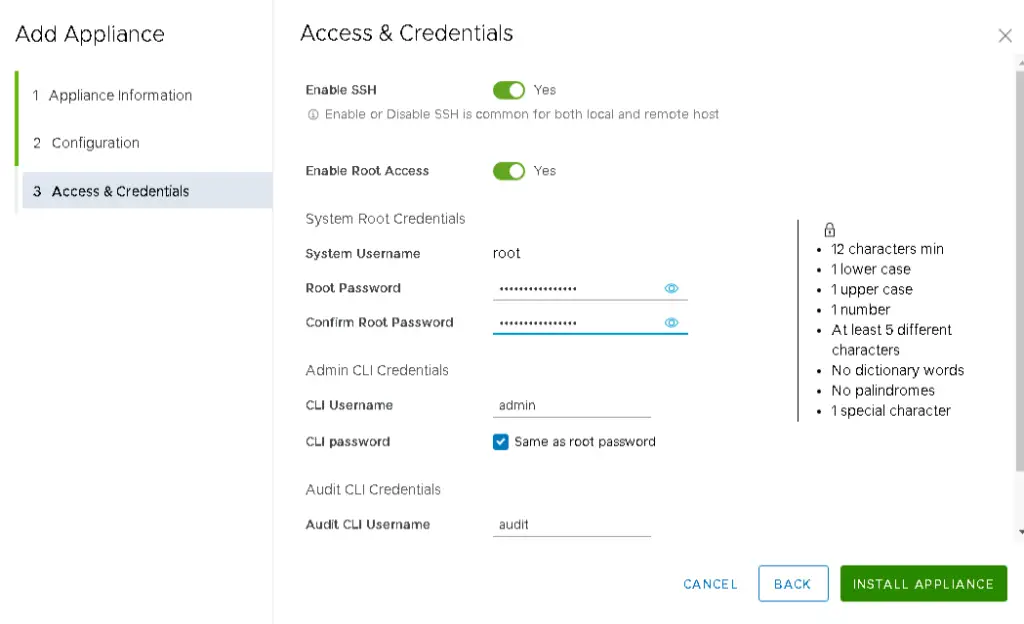
After few moments our appliance will be installed. Follow the same procedure for 3rd (nsx-01c.ash.local) appliance.

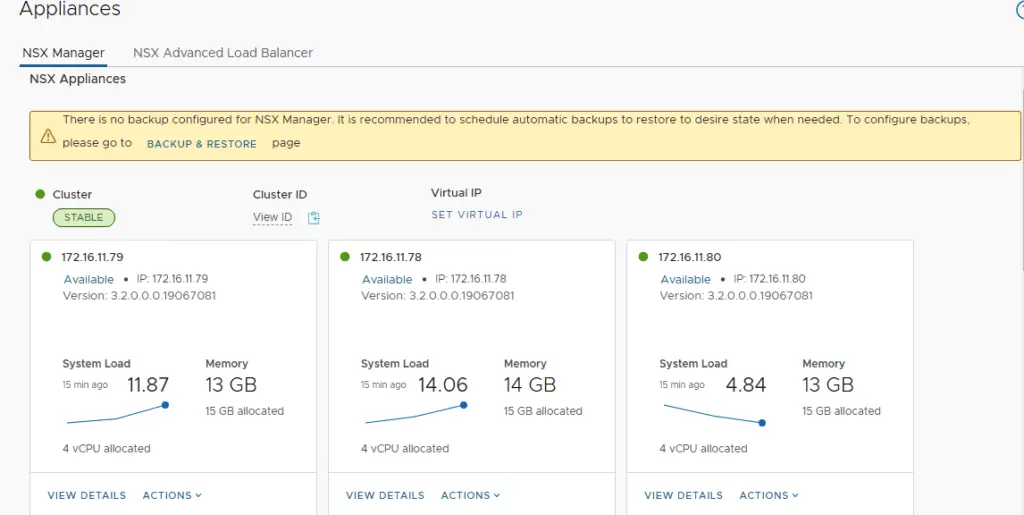
Configuring the VIP
Next, Set the VIP (Virtual IP) for the cluster. NSX-T Managers Cluster offer a built-in VIP for high availability. The VIP will be connected automatically to the active NSX Manager and rest two will be on stand by.
Enter the IP add >Save.

Once the VIP is added, wait for the cluster to report a healthy status with all three appliances up and running.
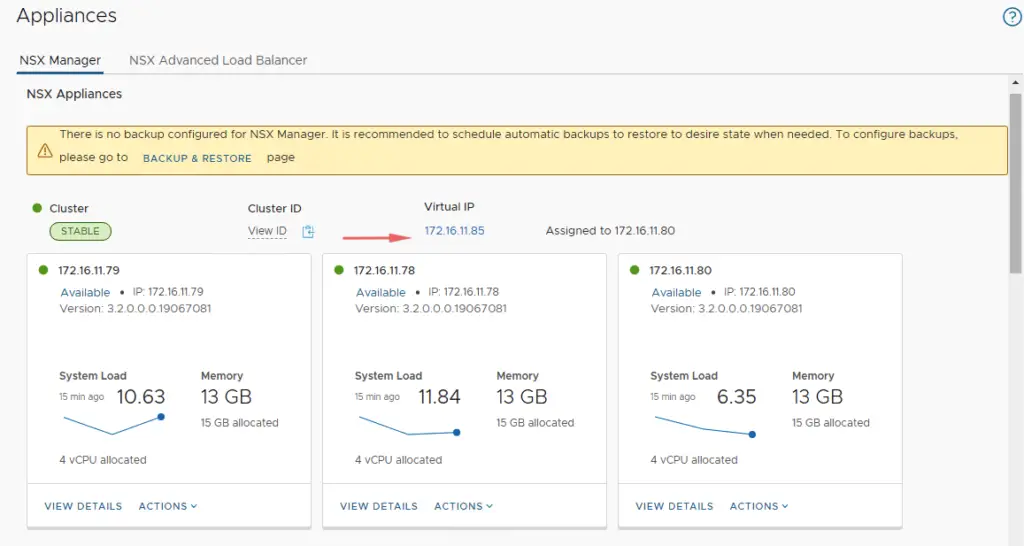
Verifying Cluster Health
Check the cluster status. It should show stable with all 3 appliances up and running.
Enable SSH in NSX-T Manager
Log in to vCenter Server and open the VM console of the NSX-T Managers one by one
To start the ssh Service in NSX-T Manager, run the below command
set service ssh start-on-boot

We are done with enabling SSH in the NSX-T Manager
Verification by NSX CLI
Use the NSX CLI to confirm the cluster is stable. SSH into the VIP or any manager node and run:
get managers→ lists all managers in the clusterget cluster config→ shows each node as JOINEDget cluster status→ overall status should be Stable, with all members UPget cluster status verbose→ detailed per‑node informationget services→ lists all running services
SSH to VIP or any NSX-T manager VIP IP and run the command ‘get managers’


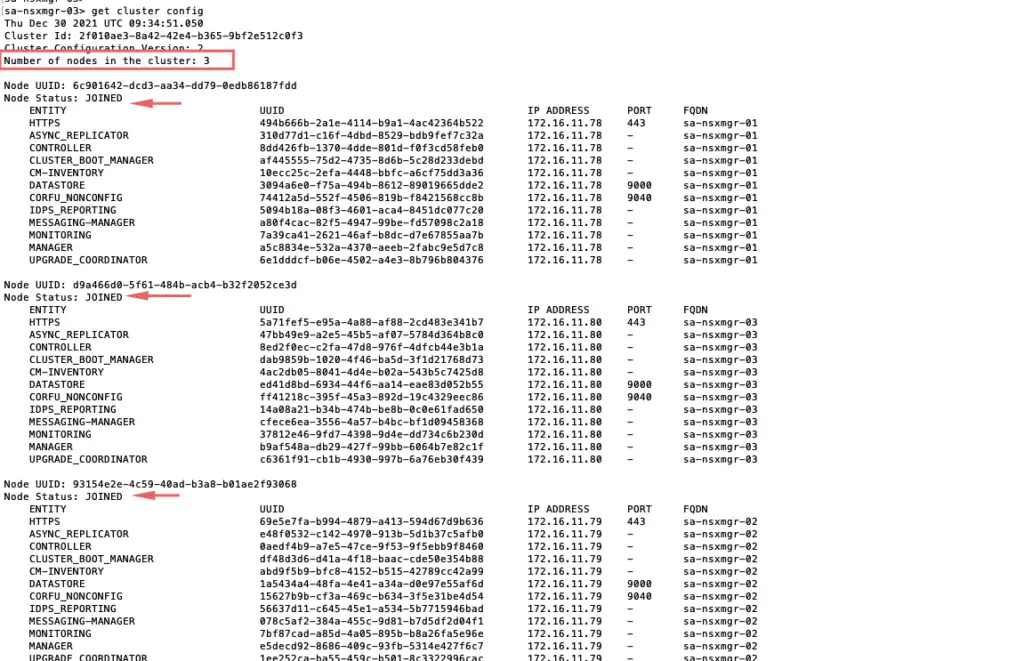
‘get cluster config’
All 3 nodes should show up here with the node status as ‘JOINED’
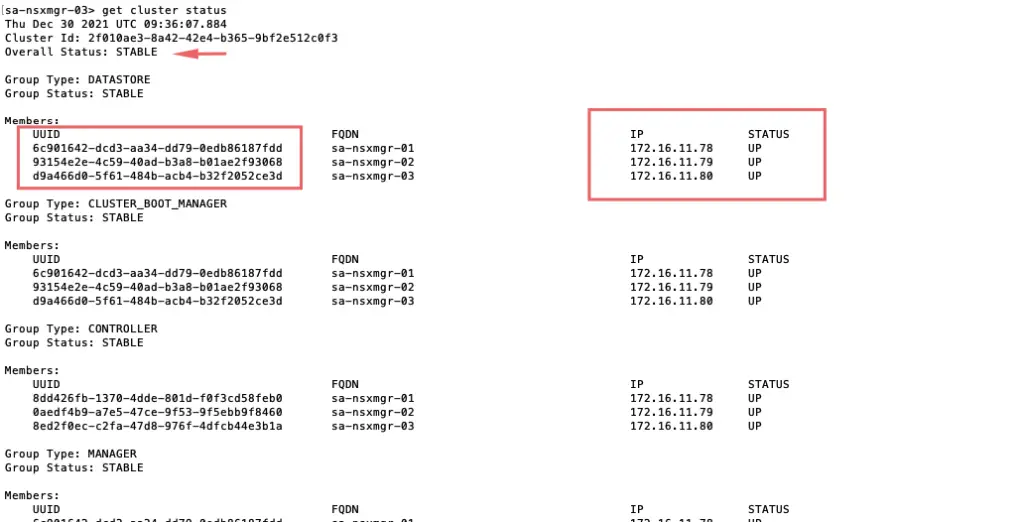
Run get cluster status to query the NSX management cluster status
‘get cluster status’
Overall status: Stable
All 3 members status: UP
‘get cluster status verbose’ to give detailed information on each node.
Run get services to get a report of all services running

To start a service
start service snmpVerify NSX VIB installed
SSH into the ESXi host and run: esxcli software vib list | grep nsx

