The write-up would cover the deployment of a basic Network load balancer. A load balancer ensures traffic is evenly distributed across all the workers in the group during demands. A load balancer can be a public-facing one typically and it accepts traffic from outside and forwards to internal servers which are typical with just private IPs.
I’ve created two Windows 2022 VM’s here – NLB-01 and NLB-02
| Name | Description | IP Address |
| NLB-VIP | NLB-Cluster-VIP | 172.16.11.175 |
| NLB-01 | NLB-Member Server | 172.16.11.177 |
| NLB-02 | NLB-Member Server | 172.16.11.176 |
Install Network Load Balancing –PowerShell
Type the below command, and then hit enter.
Install-WindowsFeature NLB,RSAT-NLB
Install-WindowsFeature -name Web-Server –IncludeManagementTools
Set-Content -Path “C:\inetpub\wwwroot\Default.html” -Value “This is the server $($env:computername) !”
Enable Network Load Balancing GUI
Step 1: Under the Role and Features, choose WebServer(IIS)

Step 2: After installing Web Server (IIS) role, choose Network Load Balancing

Step 3: Click Add features

Step 4: Click Next
Click next

Step 5: Click Next

Step 6: Click install to begin

Step 7:Click close

Create a NLB Cluster
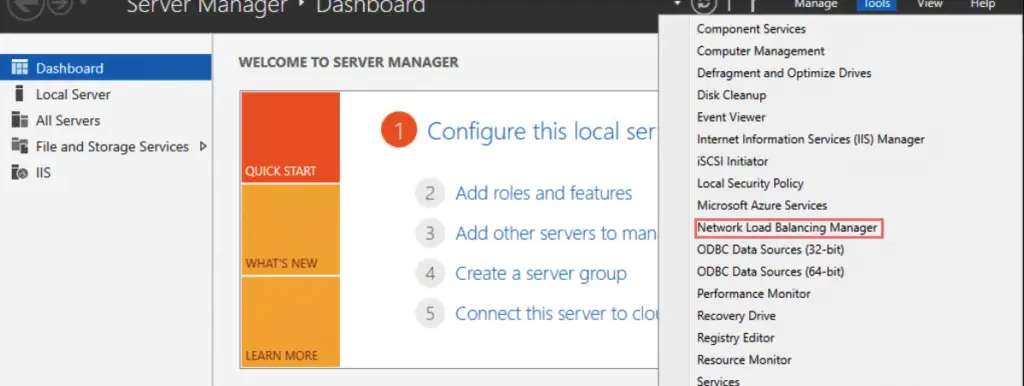
Step 8: On the Server Manager > choose Network Load Balancing Manager.

Step 9: Under Network Load Balancer > Right Click on Network Load Balancing Clusters and select New Cluster

Step 10: We will choose our first VM NLB01 and click Connect.

Step 11: Since it’s our first VM NLB01, we will set the Priority (unique host identifier) to 1 for the node to respond to the client’s queries – Set the “Priority” (unique host identifier) value 1. This node will reply to the client’s queries. Ensure that the default status has been set as “Started”.

Step 12: Click Add to give the cluster a Virtual IP address.

Step 13: Let’s add a cluster VIP address as 172.16.11.175

Step 14: Click Next

Step 15: Select a cluster operation mode as Unicast

Step 16:Click Finish

Step 17: Our first node is now added to the cluster and is healthy so we will now proceed to add the next node in.

Add Second Host to Cluster
Step 18: Choose the Cluster name and then click on Add Host to Cluster.

Step 19: We will now add here our second VM NLB02 here and click the Connect button

Step 20: Under the host parameters, we will now pick the Priority value as 2

Step 21: Click Finish

Step 22: Our second node has been added as well

Verify NLB Configuration
Our web servers are defined under the load balancer IP and we can get to it via https://VIP IP and we can see web-traffic from NLB01

Select the control host, and then click on the stop option to stop NLB01 node

We have validated that our web server is still working and now our traffic is being served via NLB02 via the cluster VIP address


