Log Insight can be used for centralized log collection and monitoring of our hybrid cloud environment – It provides built-in dashboards to capture log activity across all the VMWare products which are integrated into vLog so it acts a Syslog server.
vRops comes packaged as an ova file, this can deploy similarly to how we do a standard OVA installation however we are going to use vRLCM to do this deployment.
Prerequisites
Here are the relevant web links
- vRealize LogInsight Documentation
- vLog and vCenter Server Compatibility Matrix
- vRealize Operations Sizing Guidelines
- vRealize Sizing Tool
- vRli Sizer Sizing Tool
The following are the high-level steps required for our vLog deployment.
- Forward and Reverse Lookup zone needs to be set up for our new vLog appliance
- NTP Server is required.
- Verify compatibility matrix
- Verify vRealize Sizing Tool and Sizing Guidelines for the vLog version
- Supported Lifecycle Manager Installation
Management VM Sizing Requirements
Since we have deployed it in our lab, we have deployed it with bare minimum settings.
| VM | Version | vCPU | Memory GB | Storage | Purpose |
| vCenter | 8.0 | 2 | 10 | 100GB | vCenter |
| vrLI | 8.6 | Cluster IP | |||
| vrLI-1 | 8.6 | 2 | 10 | 50GB | Master Node |
| vrLI-2 | 8.6 | 2 | 10 | 50GB | Worker Node 1 |
| vrLI-3 | 8.6 | 2 | 10 | 50GB | Worker Node 2 |
vLog Licensing and Editions
vRops needs to be licensed before we can use it.
- Standard: Allows management of vSphere only.
- Advanced: Adds VMware Cloud (AWS / Azure/GCP) functionality, 3rd party operating system monitoring, and health dashboards.
- Enterprise:
Pick the vLog version from the Sizing tool – Choose the approximate amount of data to be polled by vLogs, and the sizer will recommend the size of our deployment.

Deploying the VMware vLog Appliance
Download the vLog Appliance and copy it to the vRealize lifecycle manager appliance.

Attach the .ova file to the product binary & Click Add
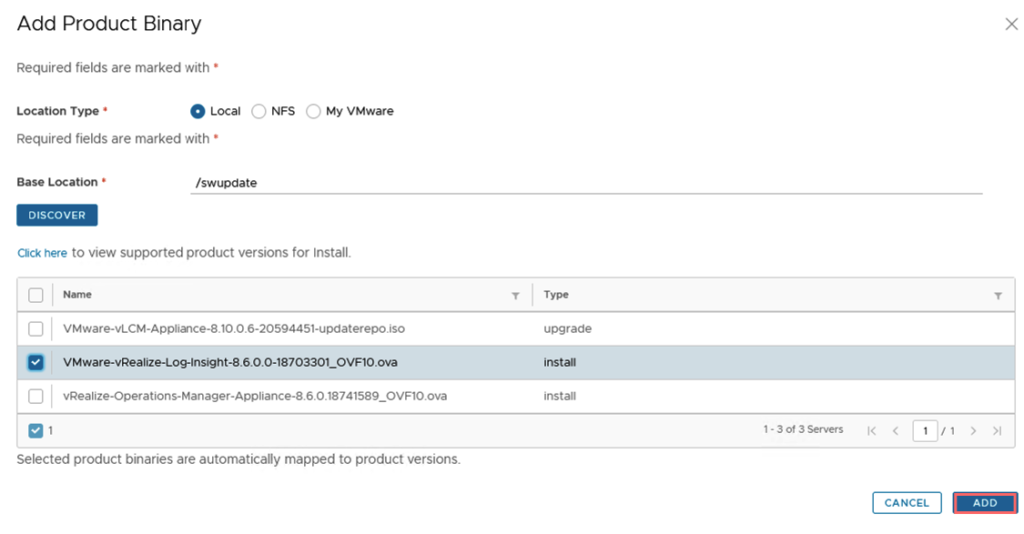
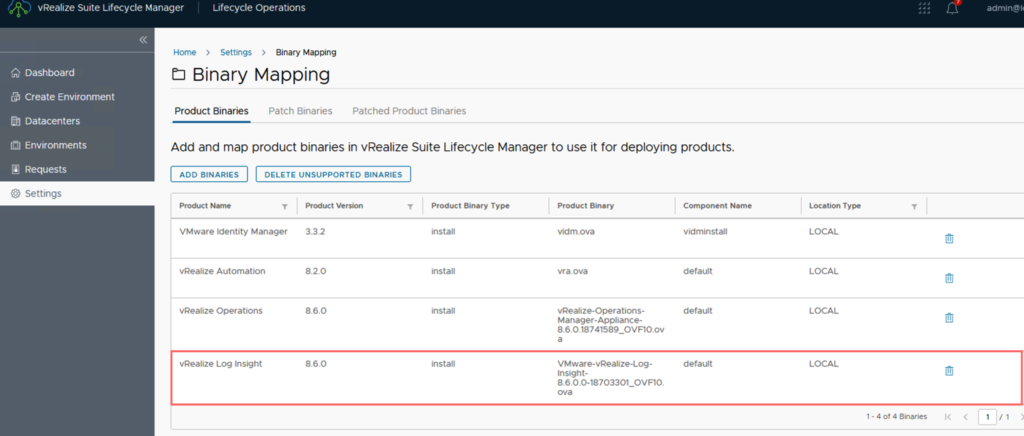
Once the file has been attached, we can see the file
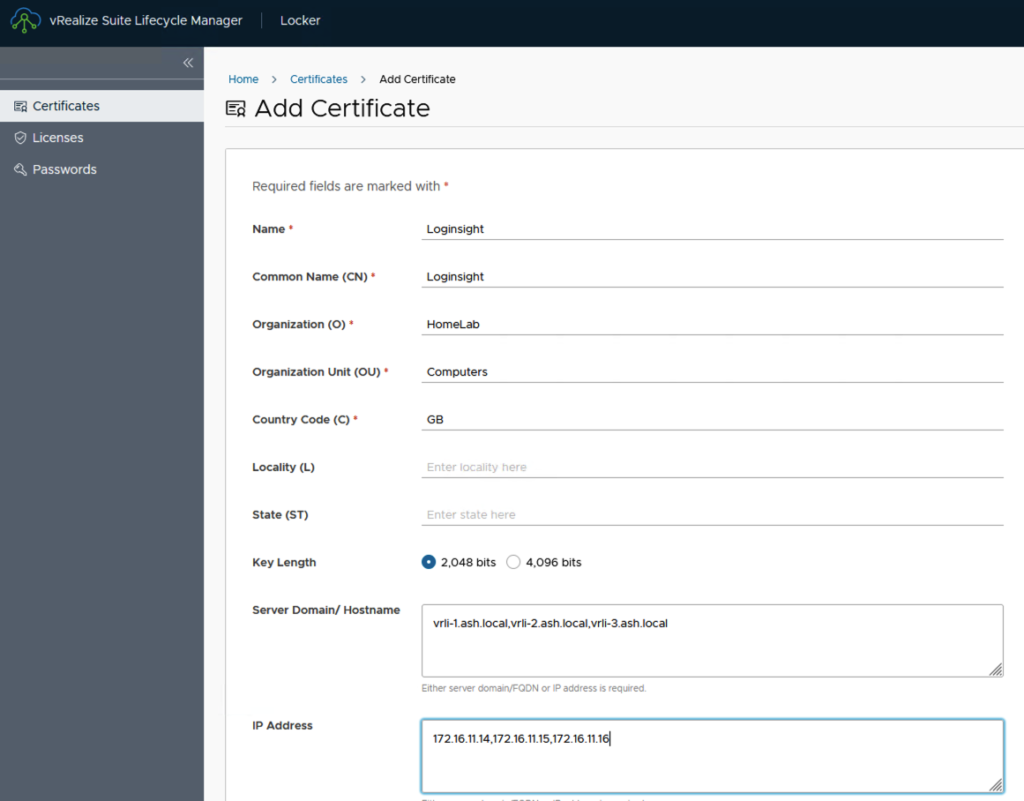
We will first need to create a certificate on the vRLCM appliance with all the node FQDNs
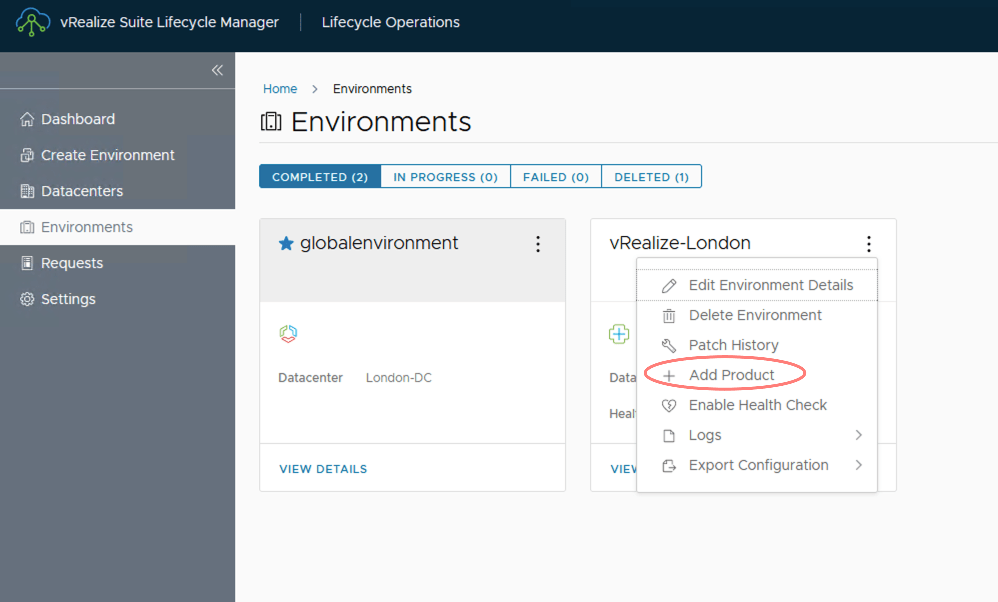
Go to Environments, add Product
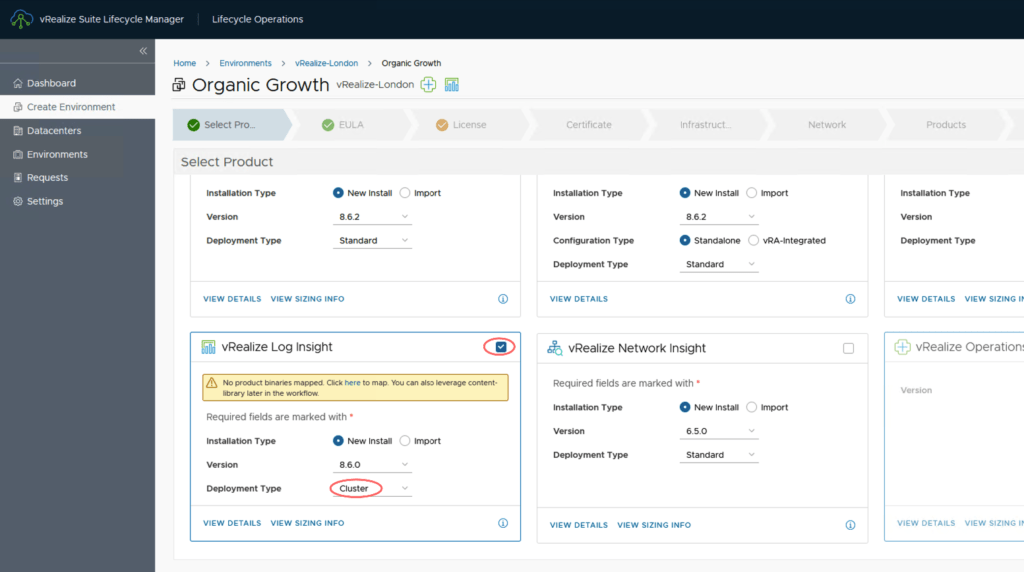
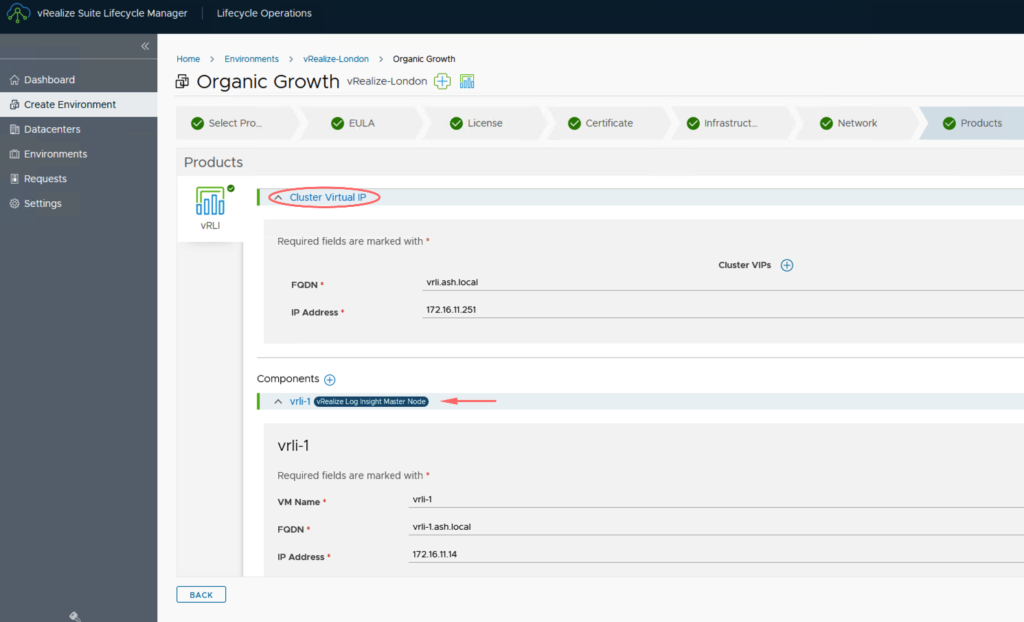
In a Clustered implementation, a Master and two worker nodes are provisioned by default whilst in Standalone – The master node is provisioned by default
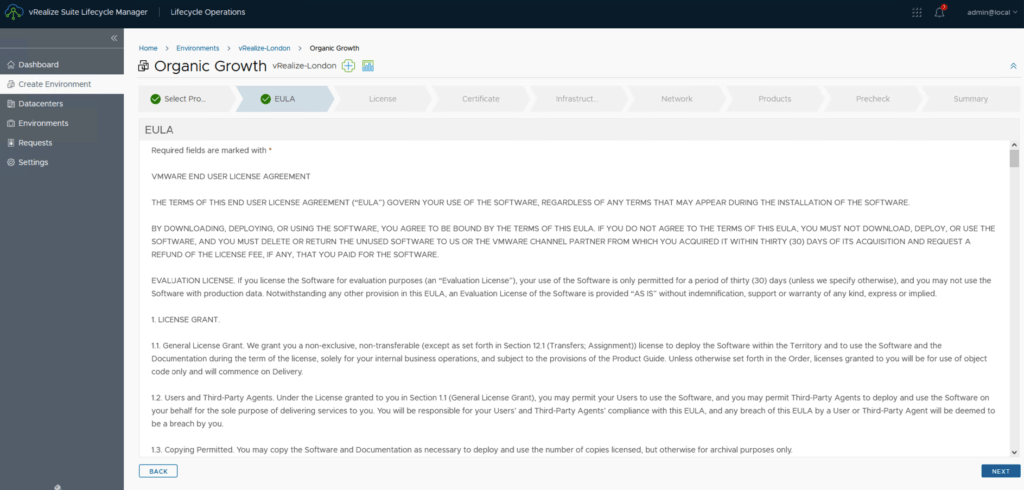
Accept the license agreement
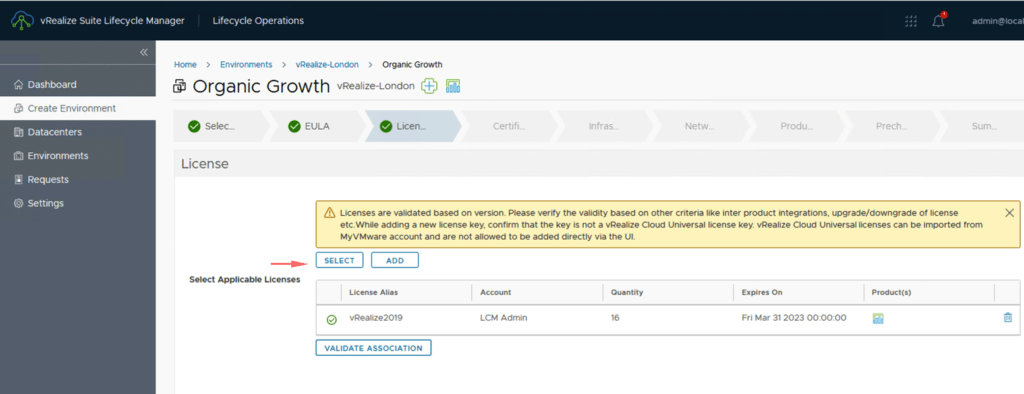
Attach the license key
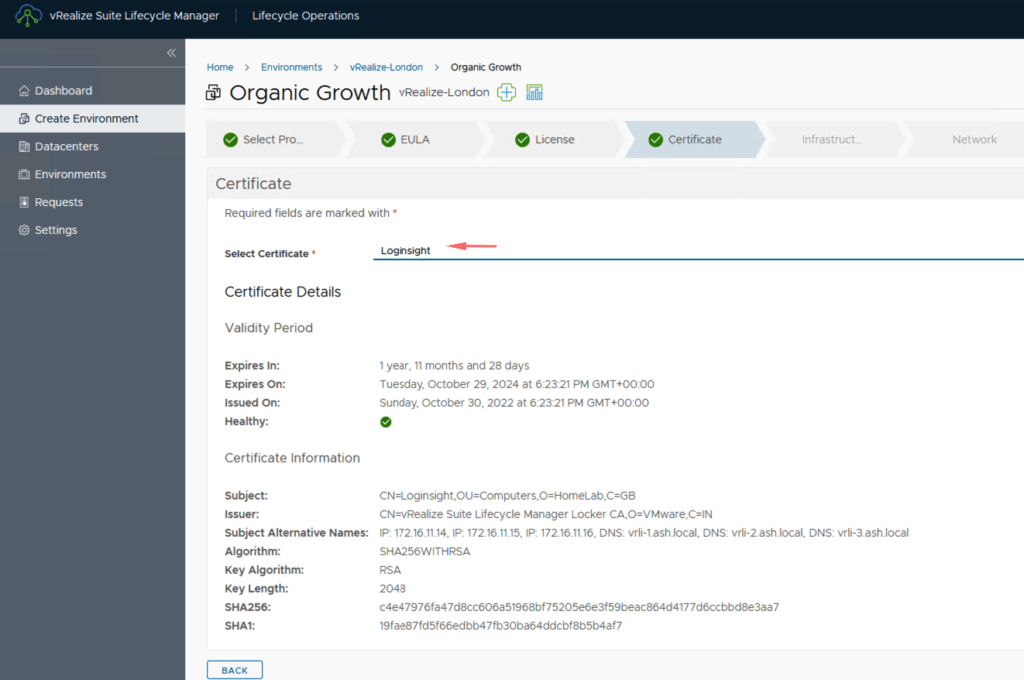
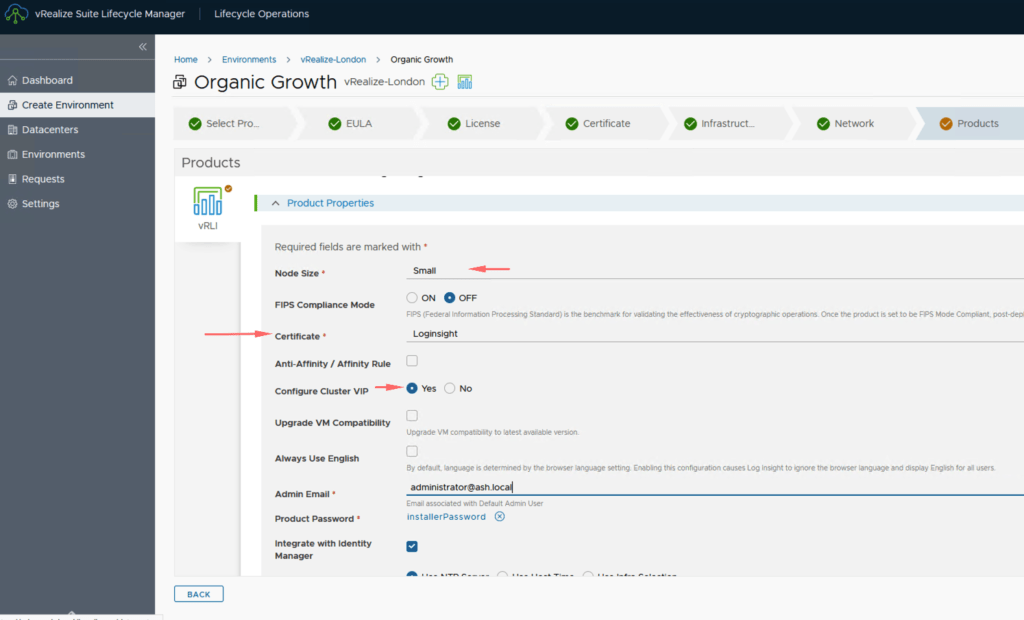
Pick the certificate that was generated
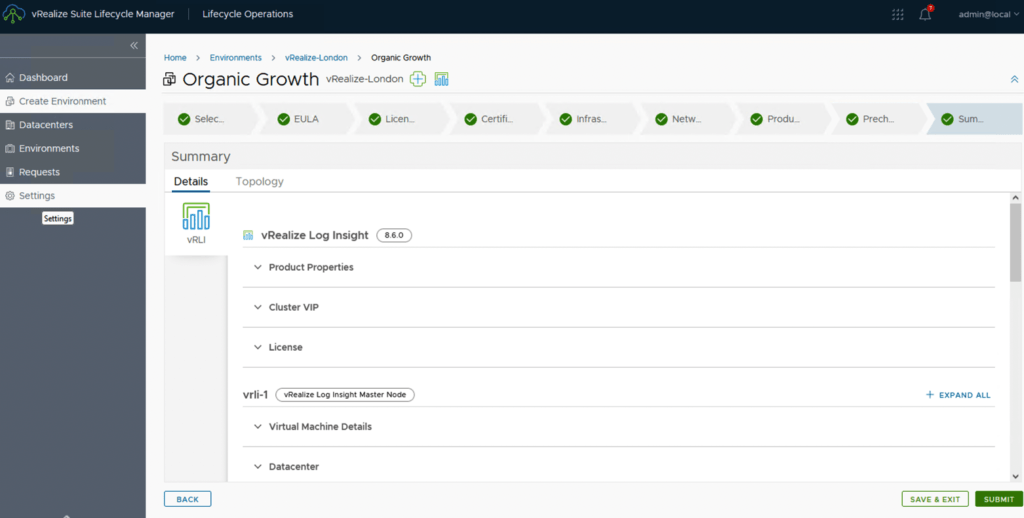
Review the settings and click finish to start the deployment.
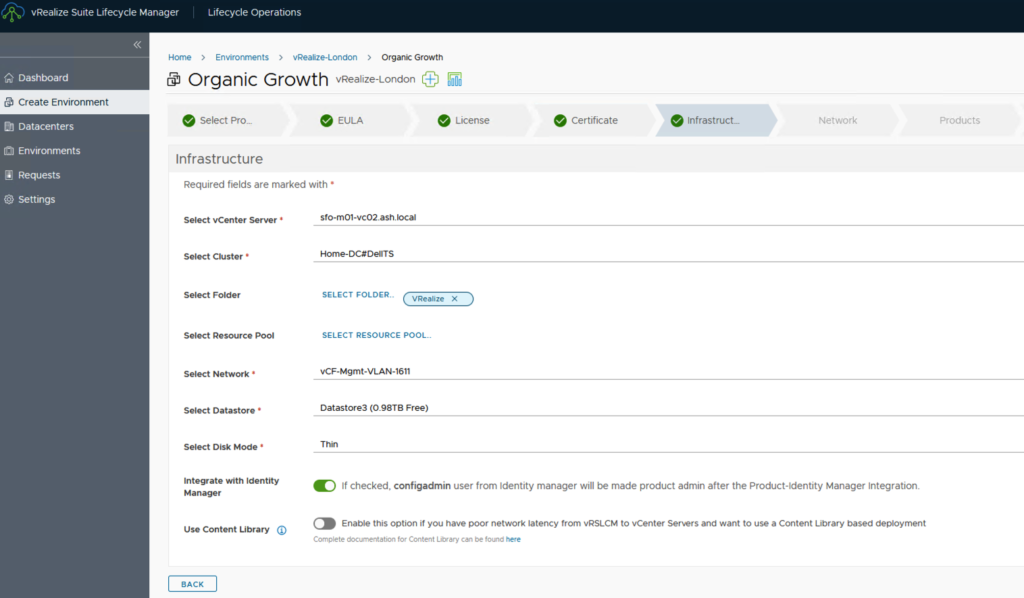
- vCenter Name –
- Cluster Name
- Folder to deploy the VM to
- Select the port group
- Choose a datastore to deploy the VM to
- Domain Name – Give the VM name
- Domain Search Path – Give the DNS Name
- DNS Servers
- Domain Search Lists
- Network 1 Netmask
- NTP server list
Under the Components section – Define all our nodes
Run a precheck
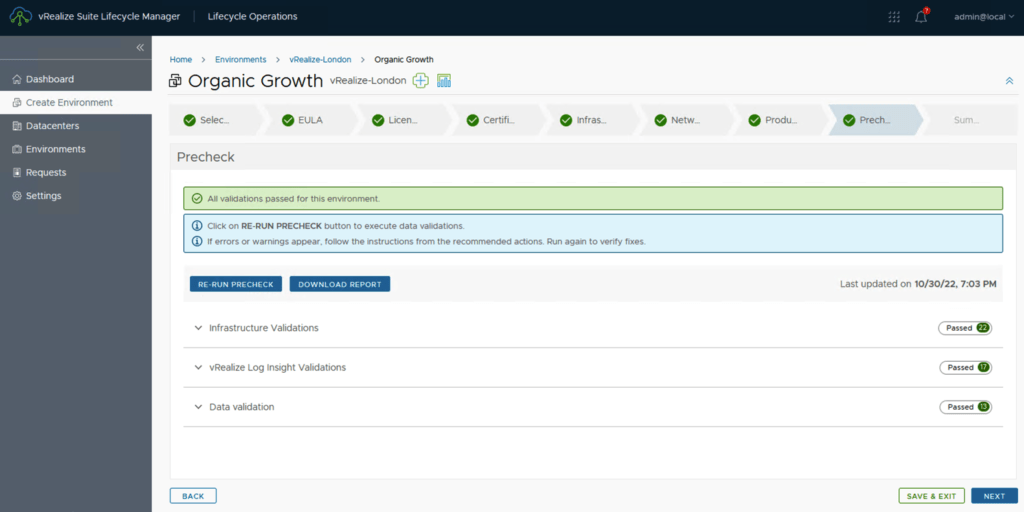
Click Submit to start the deployment
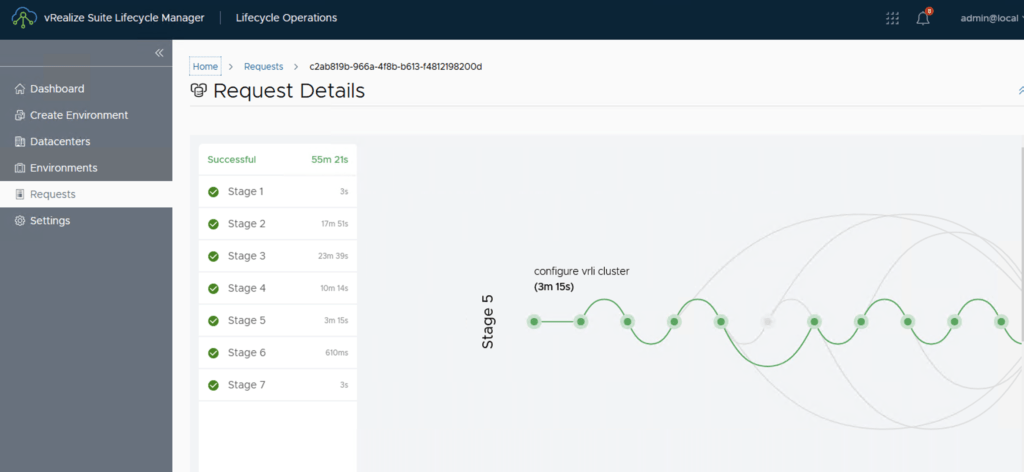
The workflow shows us the progress of these deployments
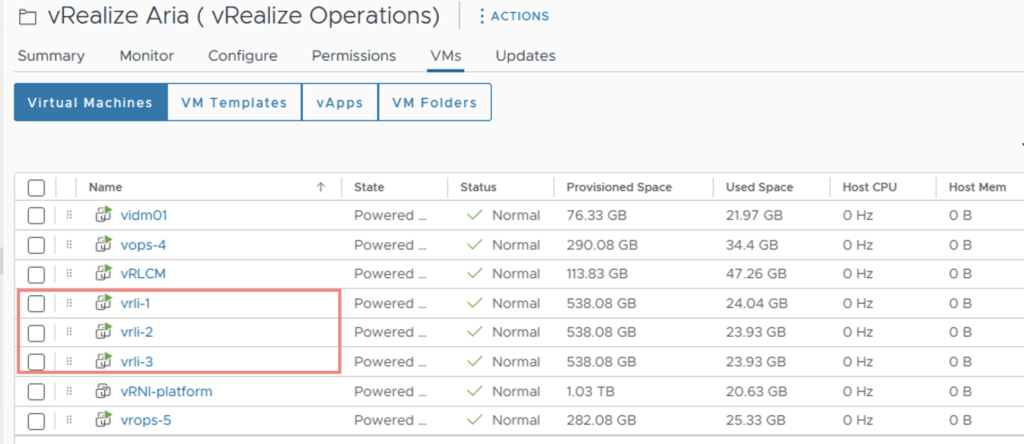
All our servers are now deployed
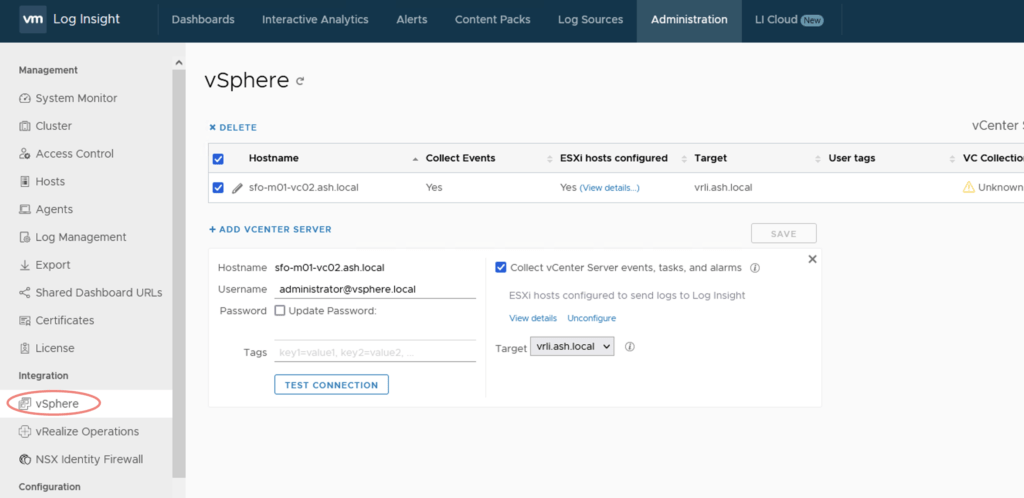
Once the deployment is complete, launch a web browser and connect to the Cluster management address via https://vrli.ash.local/admin/vsphere
Enter the authentication details for vCenter and click Test Connection to verify if entered credentials are correct. Click the Advanced option to specify ESXi hosts to monitor.
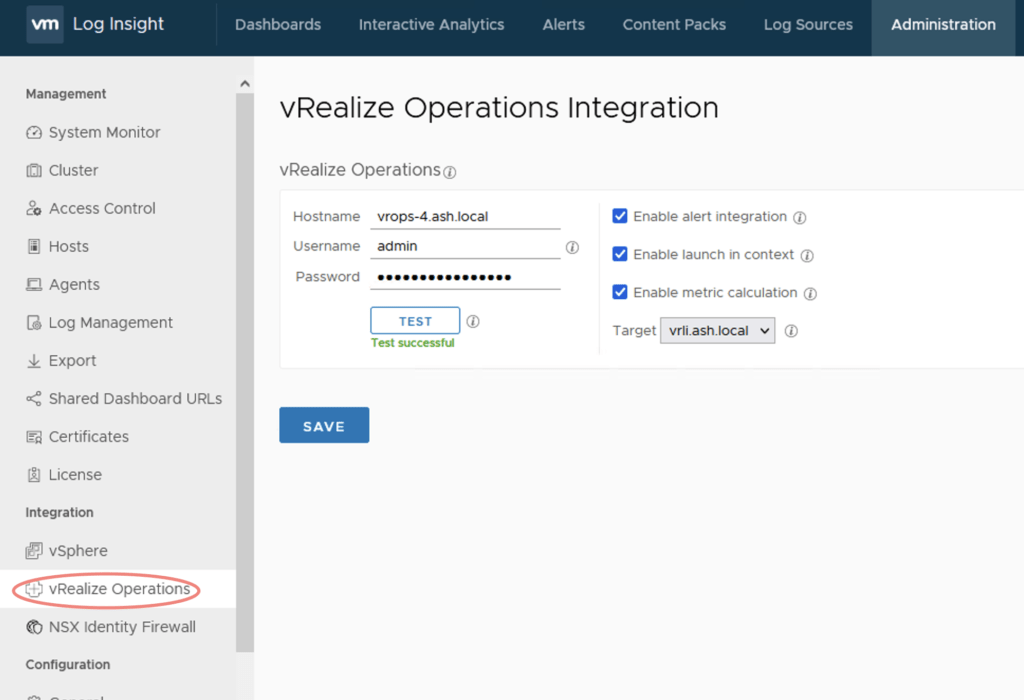
Enter the authentication details for vRops and click Test Connection to verify if entered credentials are correct.