It’s been a while since I last set up an iSCSI san so here is the write-up to cover that.
An ISCSI SAN is a good way to learn VMware concepts and adding multipathing to the storage creates a HA solution that will enable you to test most features on the vCenter.
By default, Microsoft will allow only one path per initiator so we need to tweak a few settings to enable a multipath mechanism for iSCSI Networks both at the VMKernel level and also at the Microsoft OS level.
You could go with a single vSwitch configuration and attach two VMKernel Adapters to it and attach a failover order policy to the VMNIC’s or you could create two vSwitches and two port groups with a vmnic each on them.
On my ISCSI Windows SAN 2 NICs are connected as shown.

Create a single vSwitch with two Port Groups
1 – Enable the software ISCSI adapter.

2 – Create a new vSwitch

3 – We are going to need some spare NICs on our host to create additional vSwitches. Create two VMkernel adapters as shown and attach them to our new vSwitch

4 – On my vSwitch 1, we can now see both our VMK adapters linked. A point to remember here is that iSCSI only allows one path per initiator and if you try to add another VMK port to the storage when you already have one, it doesn’t show you the VMK port under the port binding of the software initiator tab.

5 – On the Edit settings on the first PortGroup ISCSI-B, select the “Override switch failover order:” check box and move one of our VMNICs to an unused state.

6 – Likewise, on the Edit settings on the first PortGroup ISCSI-A, select the “Override switch failover order:” check box and move one of our VMNICs to an unused state.

7 – Check the “Path Status” and we can now see the VMK1 is linked to just the first NIC

8 – Check the “Path Status” and we can now see the VMK2 is linked to just the second NIC

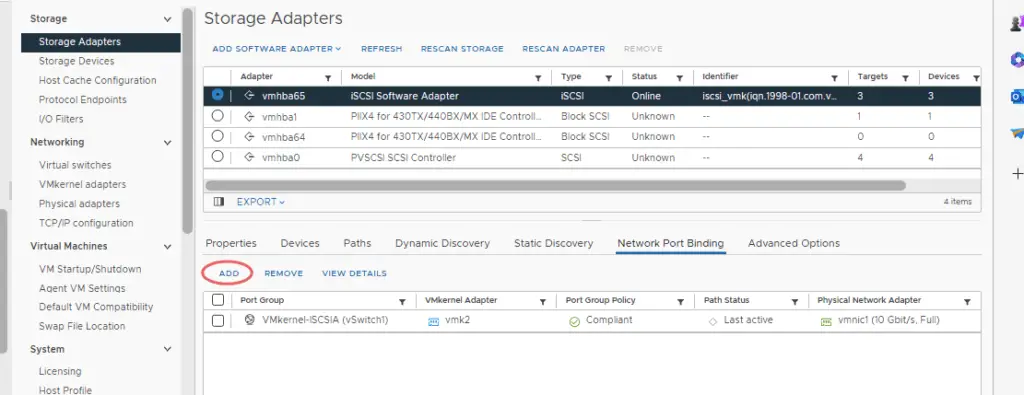
9 – Go to iSCSI initiator Properties & then to the “Network Port Binding” tab and click on “Add”

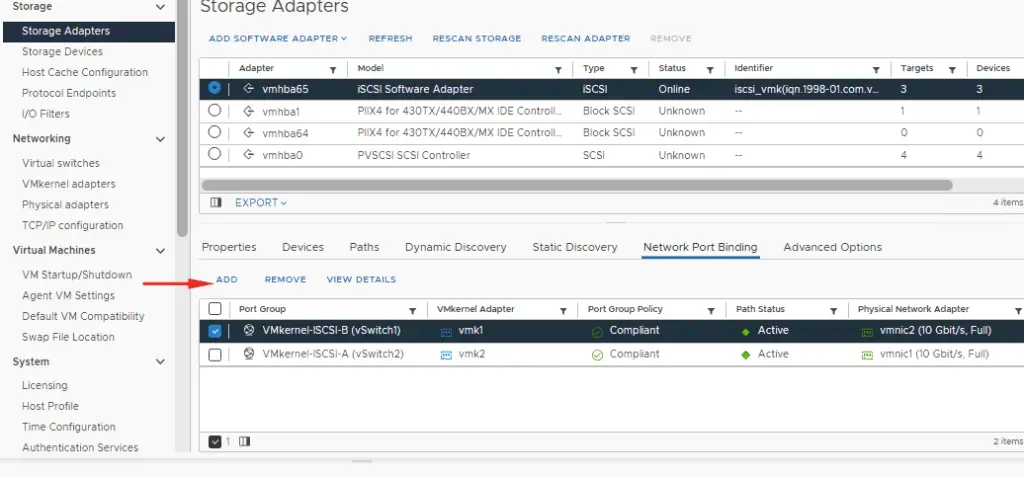
10 – It shows the available “VMK” ports here so go ahead and attach the VMK ports

11 – Our VMK adapters are linked

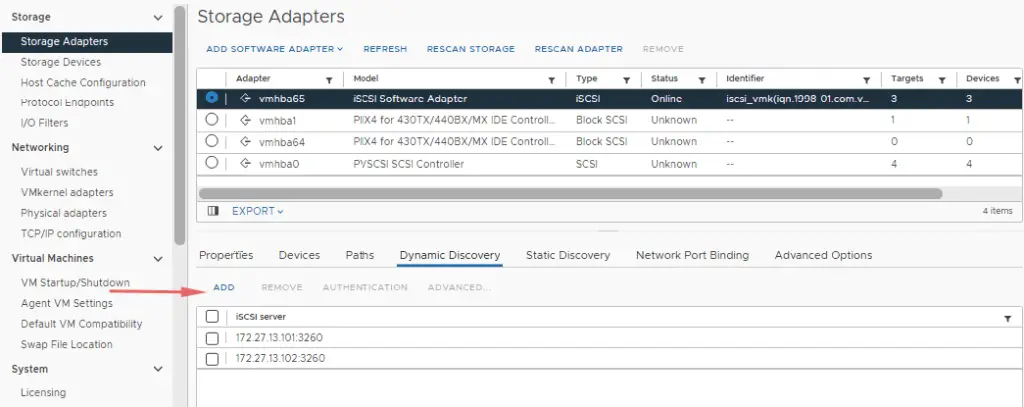
12 – The next step is to add a connection to the target SAN Array and this is also known as “target discovery”

13 – Add the IP Address of the SPA ISCSI Port and repeat the same for SPB ISCSI Port as well. Thus we will have two connections to our storage array

14 – Add the IP Address of the SPA ISCSI Port and repeat the same for the SPB ISCSI Port as well. Thus we will have two connections to the array.

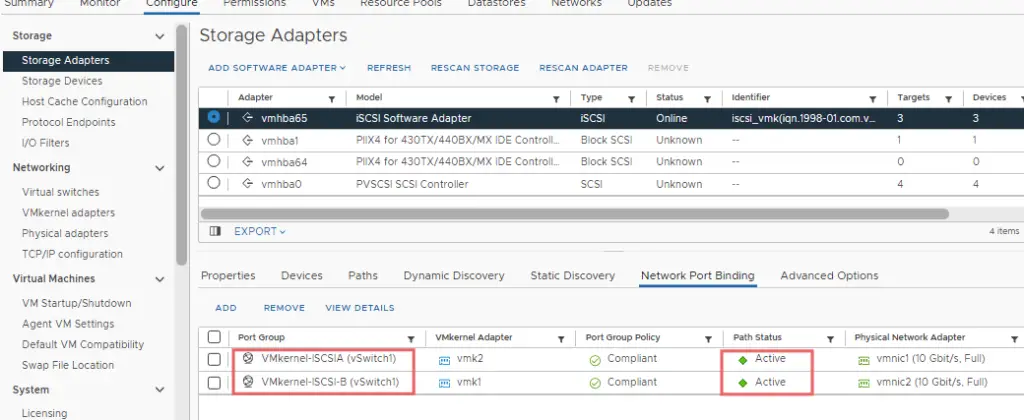
15 – Check the path status again and you will be able to identify the “Active” status of one of the luns.

That’s it and we successfully configured multipathing and high availability in our iSCSI Storage Network.

