This is a product that helps us to service our endpoints such as mobiles (Apple IOS / Android) and Windows Desktop VMs ( Windows 10 & 11 ) and the collective solution is now known as Endpoint Manager. The following products form part of the MEM suite.
Intune – It is a 100 % cloud-based unified solution that can manage and control mobile devices – Apple / Android, push apps, set rules and compliance policies etc so it’s an MDM (Mobile Device Manager) which does device management and also a MAM (Mobile App management) which does the application management on the devices. This solution cannot manage servers such as Windows 2022,2019 etc. using Intune. The whole suite will need to be Windows 10/11.
ConfigMgr / SCCM – This is an On-prem management of desktops/laptops etc. which helps in patching OS, app updates etc
Co-Mgmt – a mix of both above ( hybrid config )- Some of the devices can be managed by the cloud and others from SCCM
Desktop Analytics – A cloud-based solution provides insights into what configured on the OS such
Auto-pilot – Preconfigure devices getting them ready to use and it helps in the life cycle mgmt of devices. When you ship hardware from Dell etc you can ask them to hook up to MS Store.
All these tools are managed by the Admin Centre.

In our lab setup, we have an Eye Hospital that will need an intune setup and the following are the users and groups.

Once the Azure tenant is hooked up to the SCCM it becomes a beast

Licensing Microsoft Intune
To use Intune, we will need a Microsoft 365 subscription per user. Intune is compatible with the following licensing bundles:
- Microsoft 365 E5 / Microsoft 365 E3
- Enterprise Mobility + Security E5 / Enterprise Mobility + Security E3
- Microsoft 365 Business Premium
- Microsoft 365 F1 / Microsoft 365 F3
- Microsoft 365 Government G5Microsoft 365 Government G3
- Microsoft 365 A3 / Microsoft 365 A5
Add custom domain in Microsoft Intune
When we sign up for Microsoft Intune, we get a unique domain name hosted in Azure Active Directory. which will be in the format: your-domain.onmicrosoft.com. Your domain is the company name you chose when you signed up, and onmicrosoft.com is the standard suffix assigned to your account. Instead of using this domain name provided by Azure Active Directory to access Intune, we can configure a custom domain for our organization.
As part of this assignment, I’ve gone ahead and purchased a new domain name grandvm.com, and changed my default type of tenant to the domain via the Azure portal. An Azure AD tenant is a reserved Azure AD service an organization receives and owns once it signs up for a Microsoft cloud service.
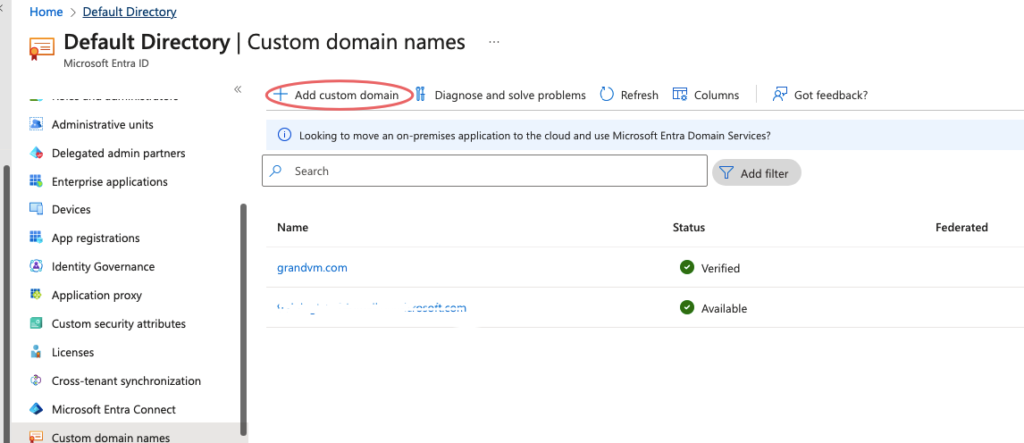
On the navigation panel, choose Setup > Domains. Choose Add domain, type your custom domain name, and click Next if you are doing it via Intune.

Configure Intune
Create the tenant via Azure Portal or Intune portal
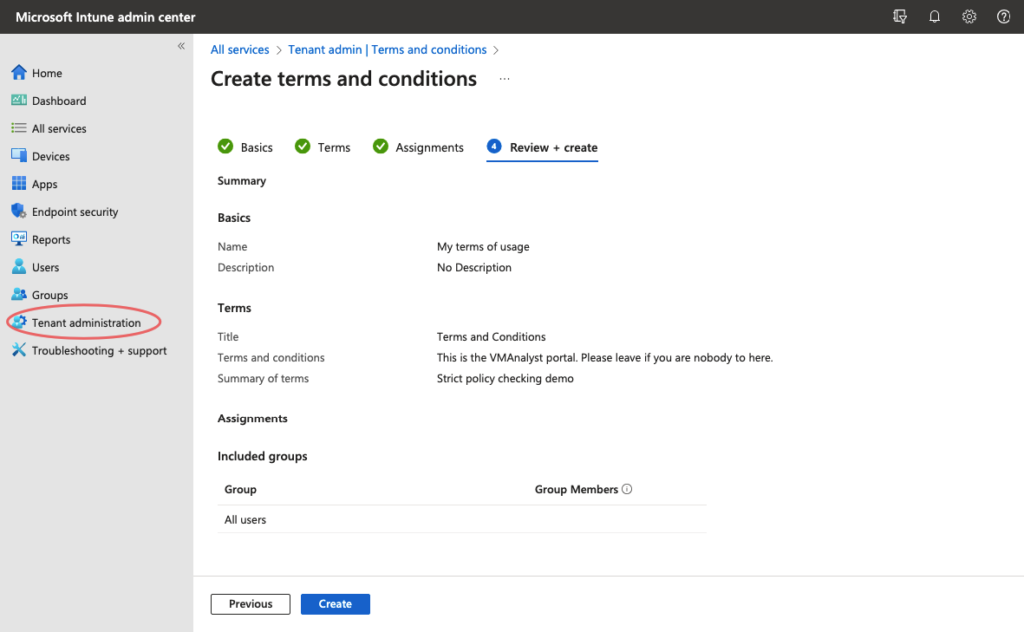
Create Company Branding
Once the tenant is configured, the next step will be to add some branding and customizations to our Intune portal so users get a specific login page. For Autopilot to work, we will need to configure branding and customizations. You can configure these settings from Azure portal > Azure AD > Company branding.
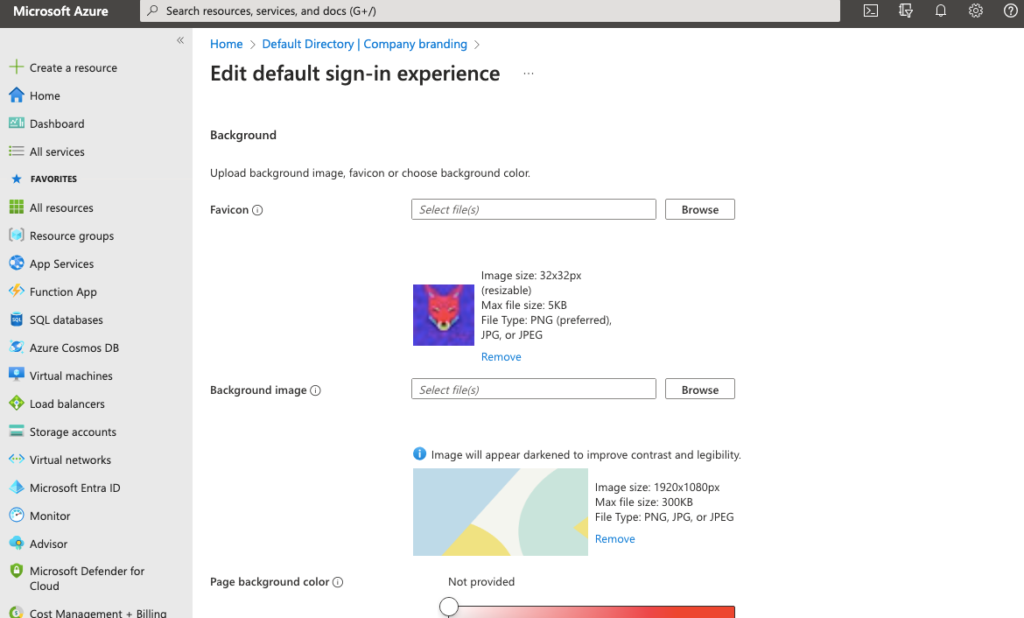
Add Organizations – Company Terms and Conditions
Under Tenant Administration > Terms and Conditions > Create
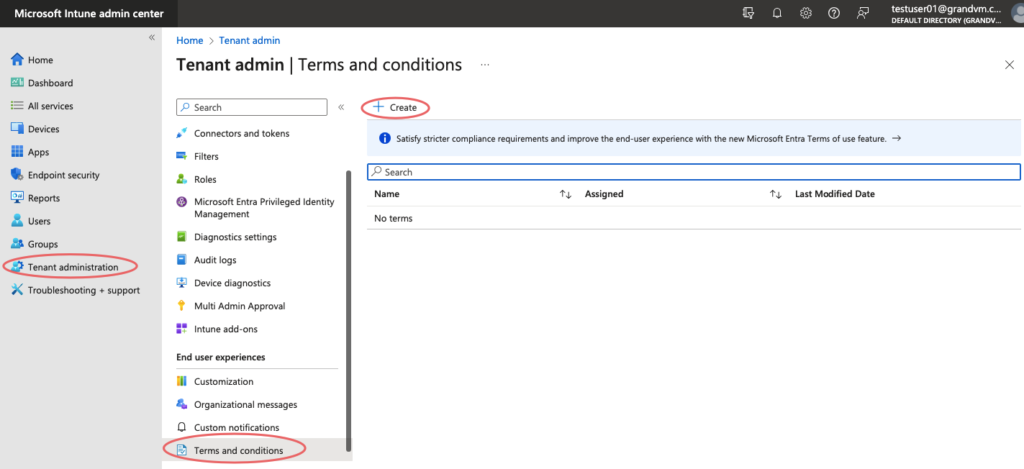
Give a name and a valid description of our company terms

Give a name, terms of acceptance and a summary of the terms

Apply our company policy to all Users
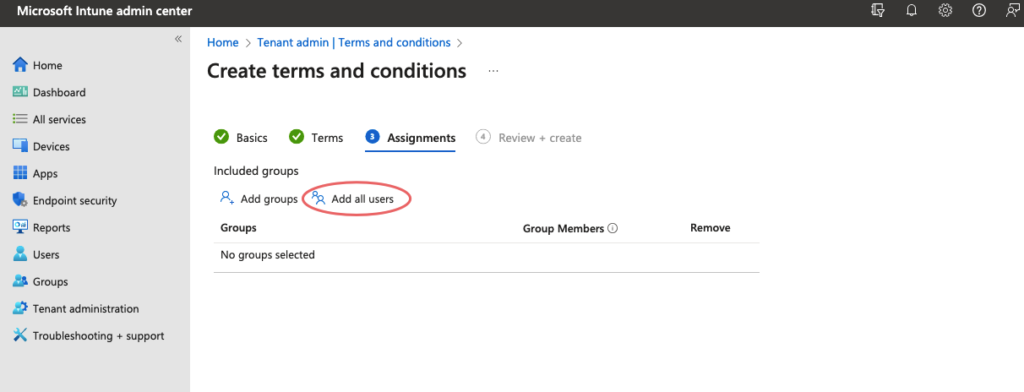
Click Review and Create

Our company policies are now created

Create Company Customization for End Users
Under Tenant Administration > End user experiences > Customization lets us create customization policies for our end users so this is what the users see when they log in via their devices.
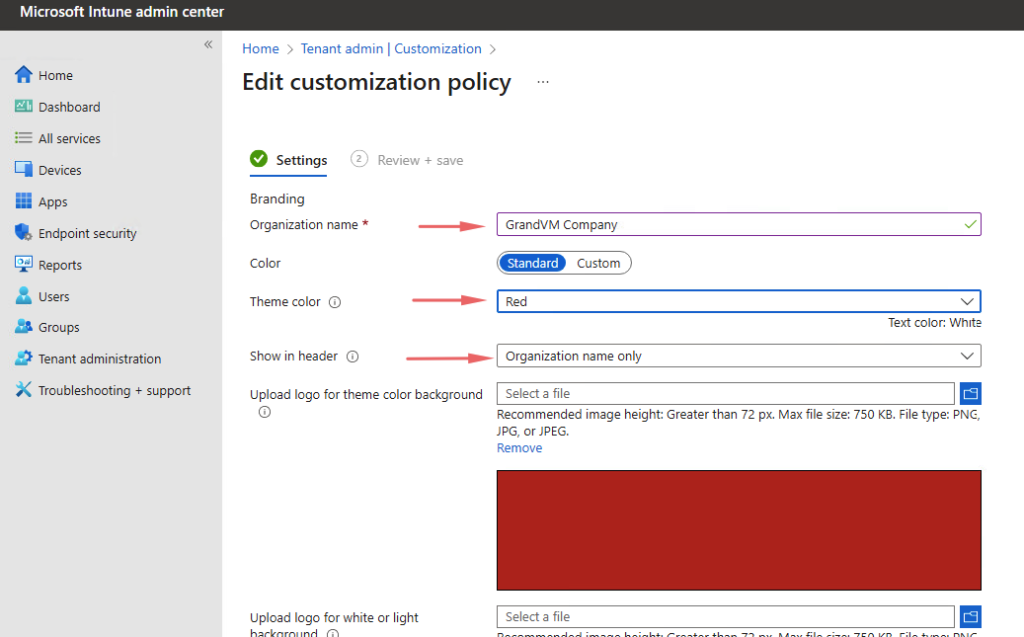
Give the support information as required.

This section would allow us to choose what to display when the user logs in so we’ve allowed the Office Online Apps and Entra enterprise Apps to be visible. Also, we’ve chosen to hide the reset button on corporate devices as well.

Click Review and Save. Choose to preview the customization we just set.

Our default login page shows the apps

Implementing an Intune tab
A quick way to spin up a lab is via the Windows 11 and Office 365 Deployment Lab Kit which will spin up these VMs in a HyperV environment.

Create Users
The following users are created by default in the deployment kit so we will just make a few changes to it to get our environment ready.
Choose Users -> All users -> New user -> Create user.
Provide the following details
- Username
- Given Name
- Job Title
- Company Name
- Location
The following users are created in AAD and we will aim to associate them with dynamic security groups

Setup Device Categories and Dynamic Device Groups
Dynamic groups help in organising the devices based on some parameters such as device location, the targetted OU groups etc. In this demo, we have an eye hospital so we will create the following dynamic groups to demonstrate the power of intune.

Create Dynamic AD Groups
Our Eye Hospitals are located in many sites across the UK, so let’s begin by creating a group in Azure for our Norfolk Office based on a condition or property eg: City. To create a group in the Microsoft Intune Admin, go to Groups and select New Group.
There are two types of groups in Microsoft Intune:
- Security group defines who can access the resources in Azure or Intune.
- Microsoft 365 group provides collaboration opportunities by giving members access to a shared mailbox, calendar, SharePoint sites, etc thus being mainly used for collaboration.

Add the group users, choose the device category and assign the value needed.
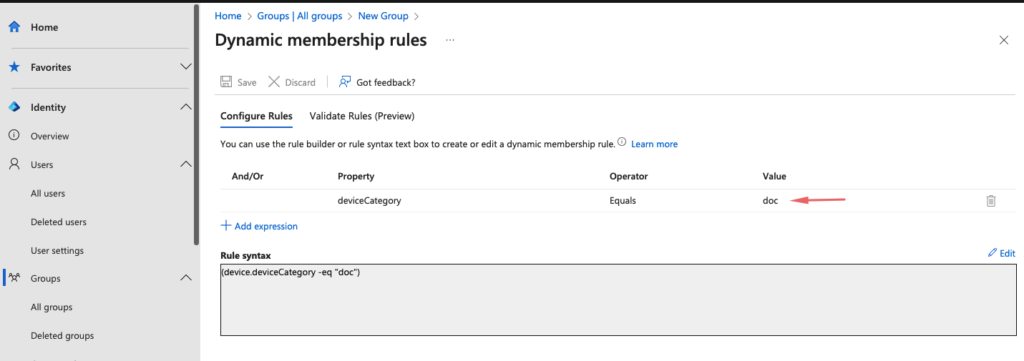
Likewise, I’ve created a dynamic group based on the device category for our Kiosk and Ophthalmologists as well.
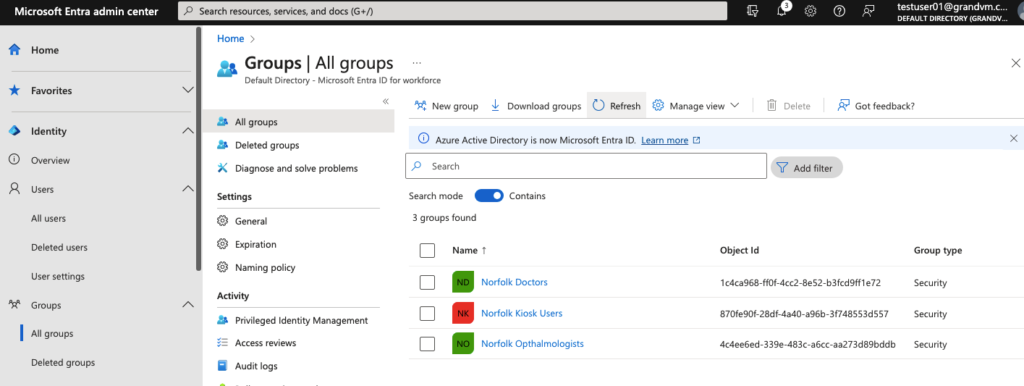
Enrolling Devices to Intune
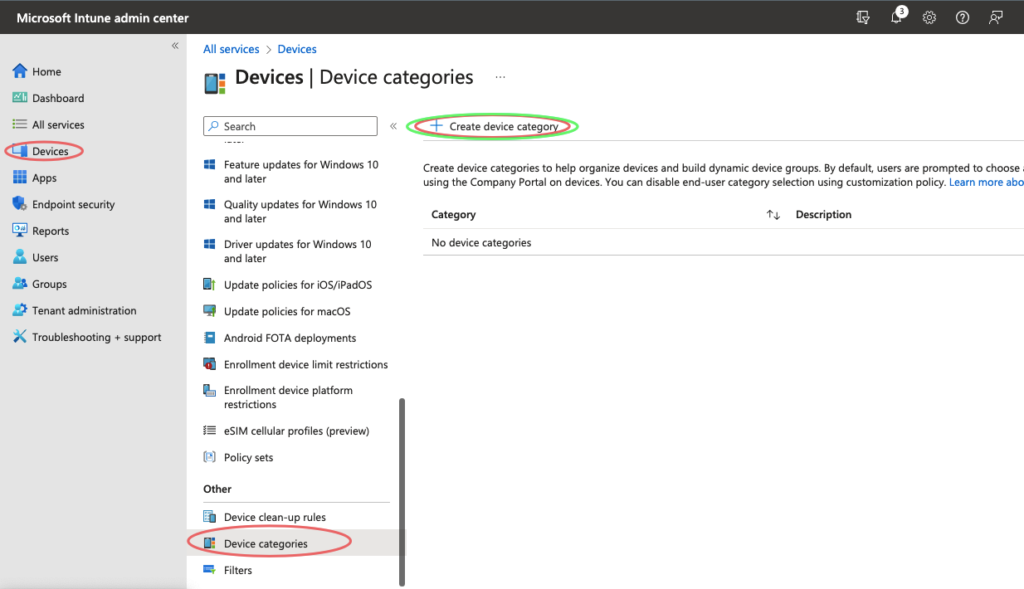
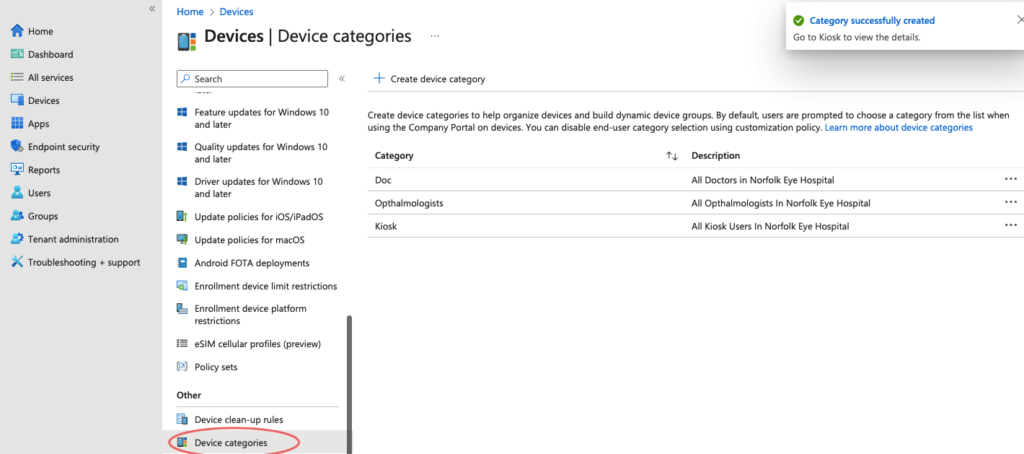
We have defined three categories in our previous step as shown so we will now create these device categories in our Intune and link it which would enable us to enrol devices to Intune.

In the Intune portal, click on devices > Create device category
Every group should have a group owner so we’ve added one here.
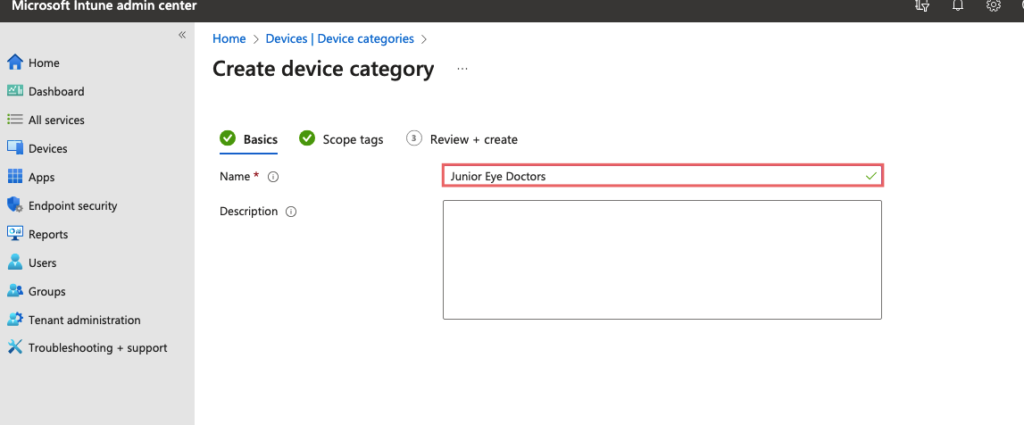

Likewise, i’ve gone ahead and created multiple device categories
Assigning Owners to Dynamic Groups.
As per our setup, the following owners will be allocated to groups as shown.


Assigning Licenses to Groups
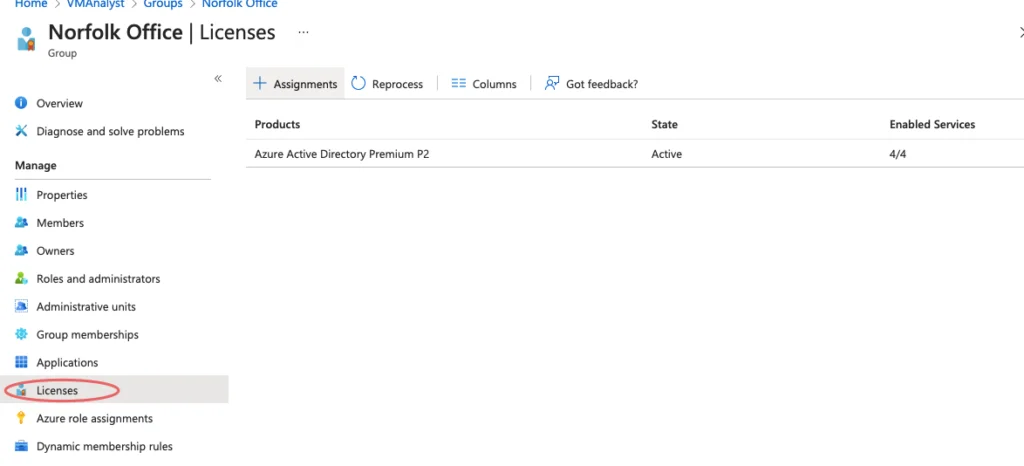
Before enrolling devices in Intune, we need to assign each user or group an Intune license. Rather than assigning licenses at an individual user level, it’s much faster to do the assignment at the group level and this happens under the licenses tab at the Group level.
Select Groups > Norfolk Office > Licenses > Assignments to add a license to our group.
Now we can enrol devices into our Intune.
Creating Enrollment Restrictions
These are corporate standards that you set in your organizations and these include
- Deny mobile phones with Android OS versions less than version 10.0 to join an enterprise network
- Allow only IOS users to sign in from a location
- Restrict users from adding more than 3 device
Click Devices > Enroll Devices
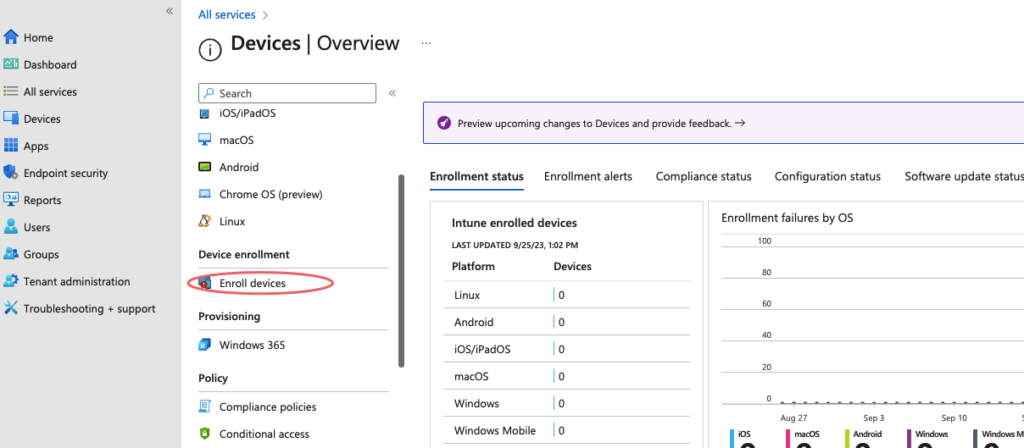
Click Enroll device limit restrictions to see the restrictions in place.
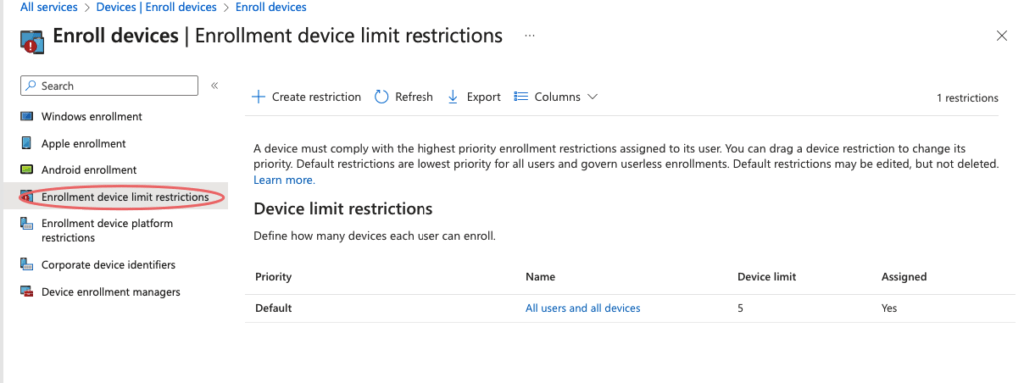
We will add a new restriction to prevent kiosk staff from using their own devices less than Android 11

Block all Android Users below 11.0
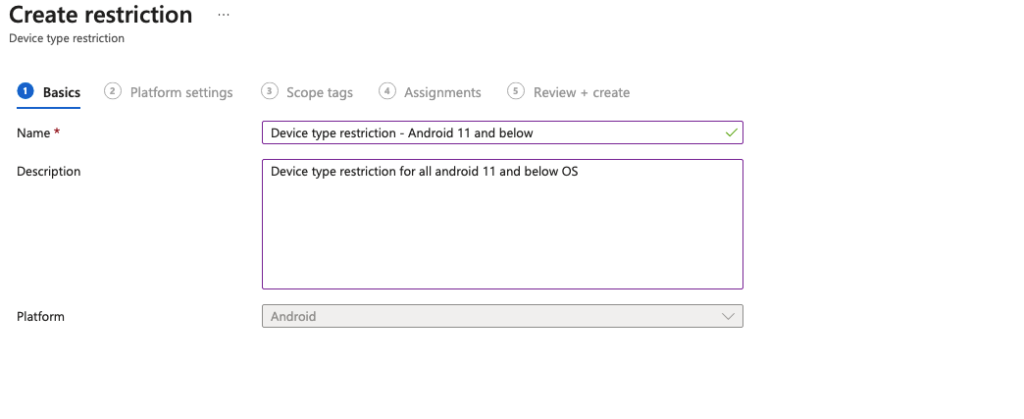
Block all devices less than Android 11

Assign the restriction to the group

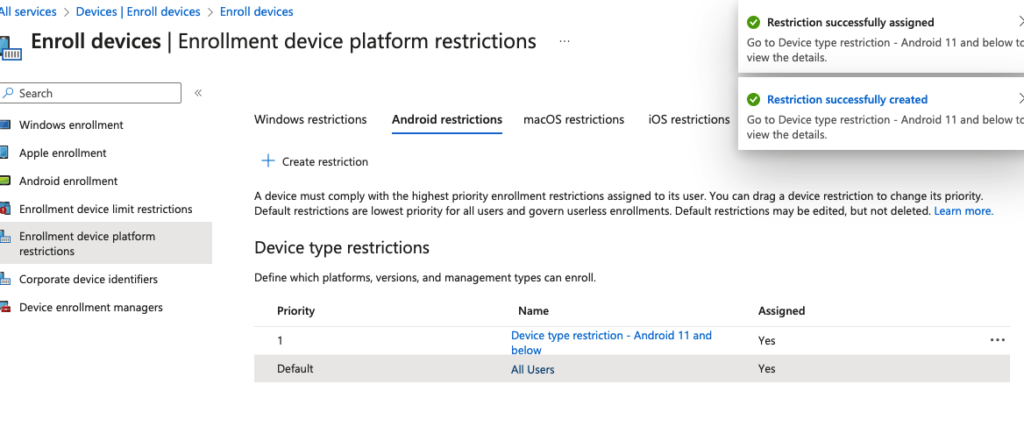
Click Create to add the restriction

Our device restriction is now created.
In the next blog, we will enrol our Windows devices to Intune.

