

In this blog, we will take a look at how to install IIS on our Windows Server 2019.
Enable IIS Web Server With PowerShell
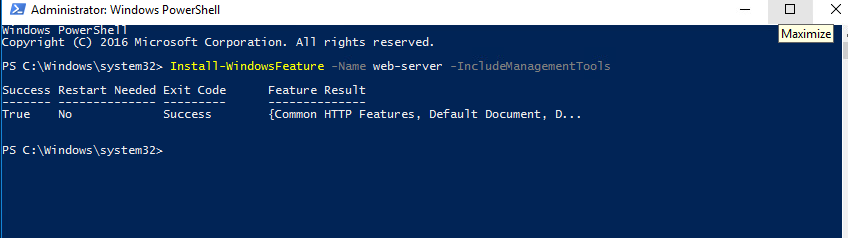
1- Open PowerShell with admin rights and just run this command to install IIS along with its management tools so we can manage the webserver.
Install-WindowsFeature –name Web-Server -IncludeManagementTools

2- Wait for the installation to complete

3- As seen, the server has been installed with a web server role.
IIS can be installed via the web-UI as well so let’s take a look into that approach.
Install Web Server IIS
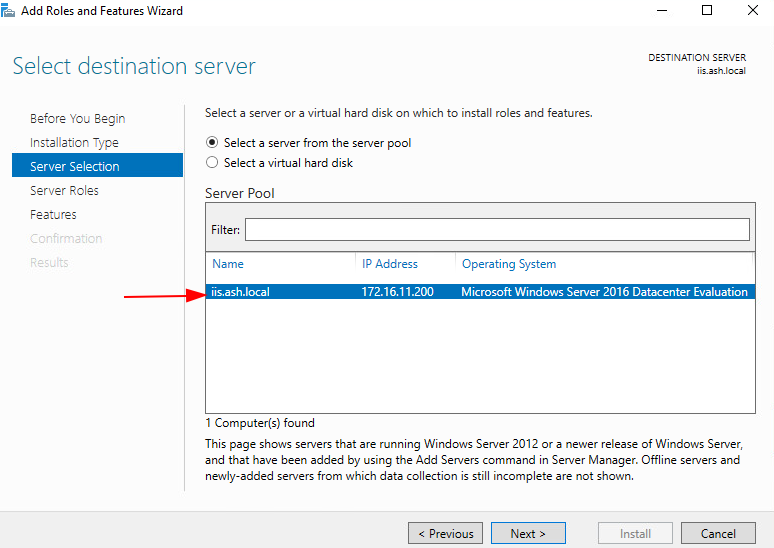
1- Open Server Manager, Go to Add roles and features

3- Click Next to continue

4- Choose Role-based or feature-based installation here.

5- Choose a server from the server pool and then click Next.
6- Select the checkbox next to Web Server (IIS) and click Next.

7- Ensure Include Management tools are ticked and click the Add Features button to proceed

8- We will skip this bit as we are not installing additional features.

10- Click Next to continue

11- Ensure all these role services are ticked

12- Review and finish off the installation.

13- Reboot the server to validate if all services have come back online.

A quick powershell script is below
Add-WindowsFeature Web-Server
#remove-item C:\inetpub\wwwroot\iisstart.htm
#Add-Content -Path "C:\inetpub\wwwroot\iisstart.htm" -Value $("RebelAdmin LoadBalance Test " + $env:computername)
Set-Content -Path "C:\inetpub\wwwroot\videos\Default.html" -Value "This is the server $($env:computername) !"
New-NetFirewallRule  -Enabled:True  -LocalPort 80  -Protocol TCP  -Direction Inbound  -Profile Domain  -Action Allow  -DisplayName "HTTP on TCP/80"