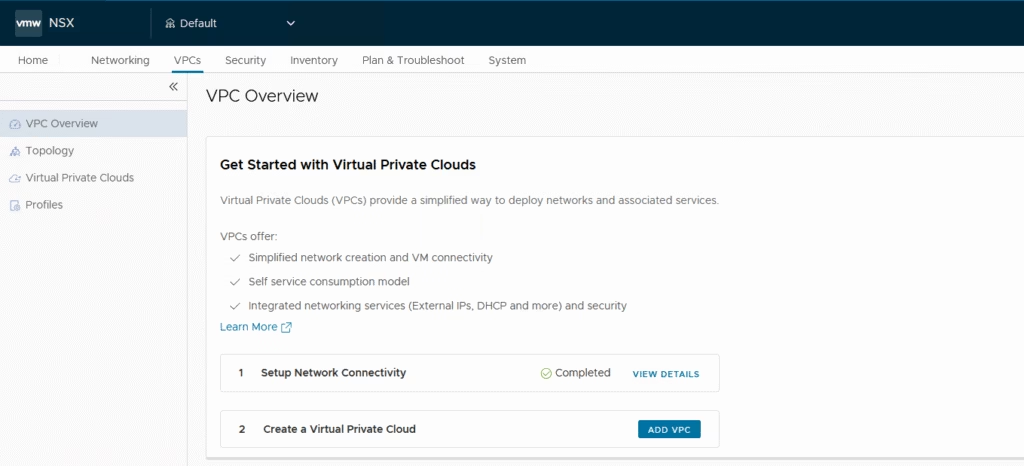
With VCF 9, VMware has made it easier to deploy NSX Edge VMs by introducing a new workflow directly within the vCenter UI. This is especially useful when setting up centralized external connectivity for VPCs. While you can still use the NSX Manager for installation and configuration, the vCenter-based method streamlines the process significantly.
What’s New: Transit Gateways Replace Tier-1
One of the first things you’ll notice is that deploying Edges via vCenter no longer spins up a Tier-1 Gateway. Instead, it creates a Transit Gateway , a new construct in VCF 9 designed to connect multiple VPCs within a project. This shift simplifies routing and aligns with the new VPC architecture.
Choosing Your Connectivity Mode
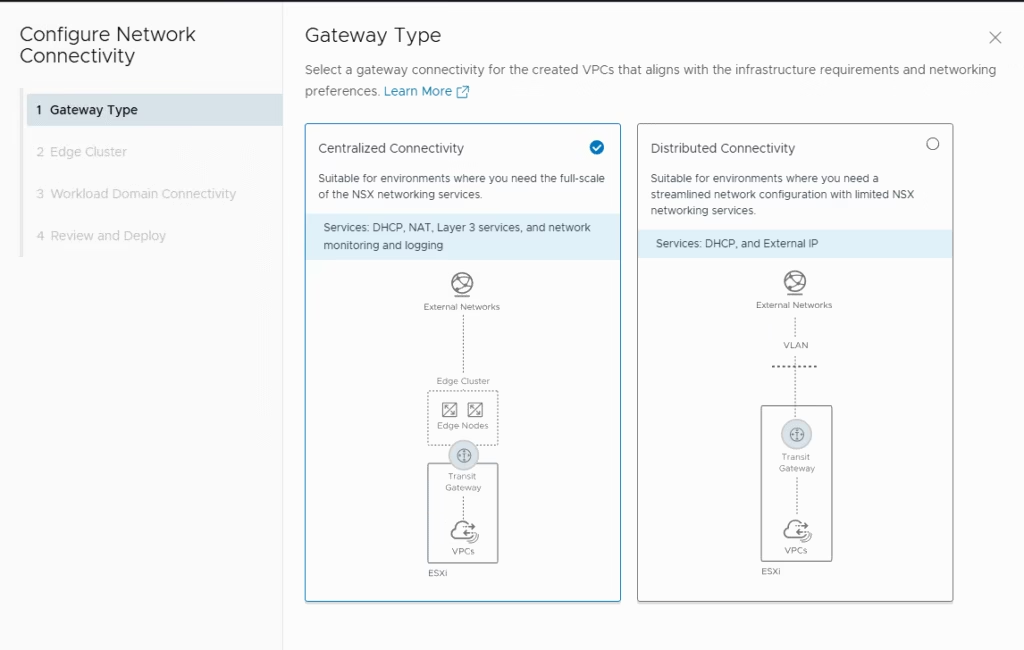
When deploying through vCenter, you’ll be prompted to choose the gateway type. There are two options:
- Centralized Connectivity: Traffic is routed through a Tier-0 Gateway, and NSX Edge VMs host the virtual router.
- Distributed Connectivity: The Transit Gateway connects directly to an external VLAN—no Edge VMs needed.
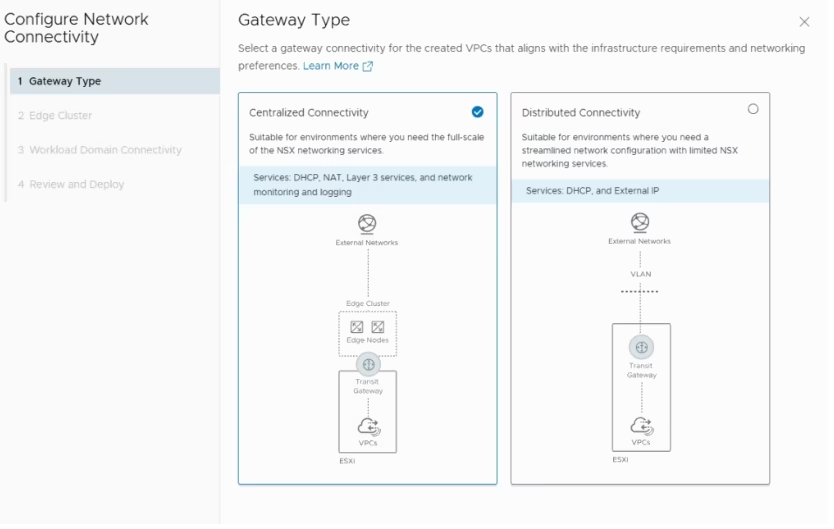
For this walkthrough, we’re focusing on the centralized model, which is ideal when you need external network access for your VPCs.
How Transit Gateways Work with Tier-0
In centralized mode, the Transit Gateway’s Service Router (SR) is deployed on the same NSX Edge VMs as the Tier-0 SR. Each Transit Gateway SR is tightly coupled with its Tier-0 counterpart. This setup supports both active/active and active/standby modes, depending on your HA requirements.
Deploying NSX Edges via vCenter
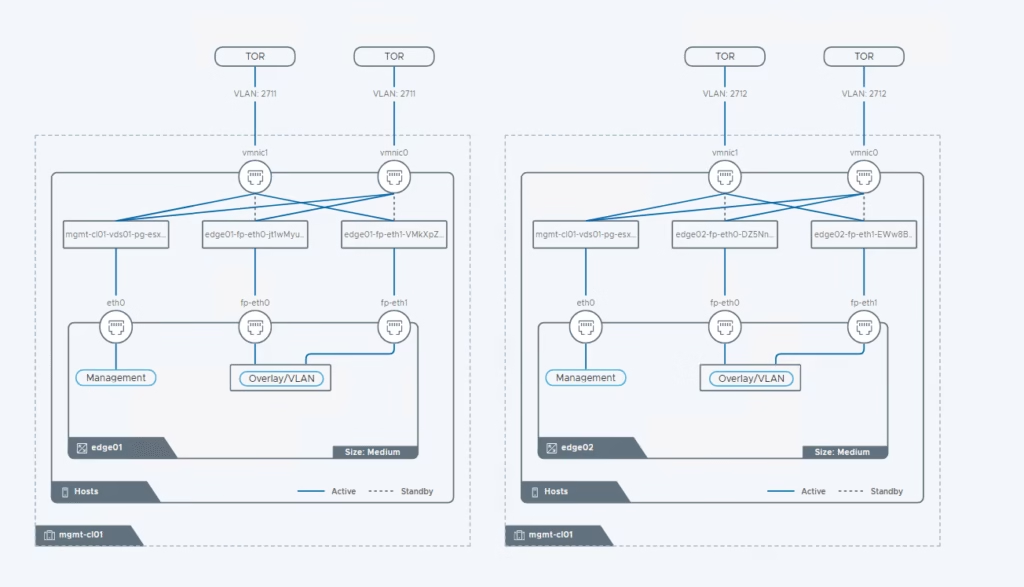
I have two physical NICs, make sure the Edge TEP and host TEP are on different VLANs and can route to each other via an external router. This is critical for overlay traffic to function properly.
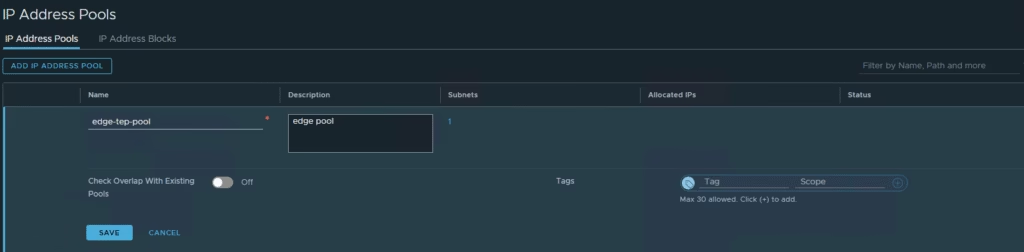
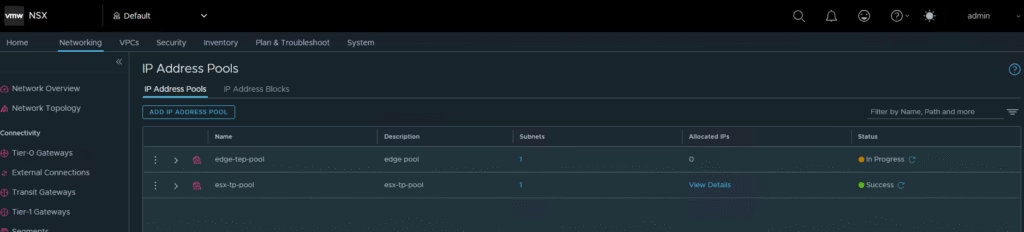
Now the first step is to create a tep pool for the overlay, this can be done via the vCenter itself but i’d prefer to do this via the NSX mgr UI.
Under the IP Address Pools, just add the edge-tep-pool
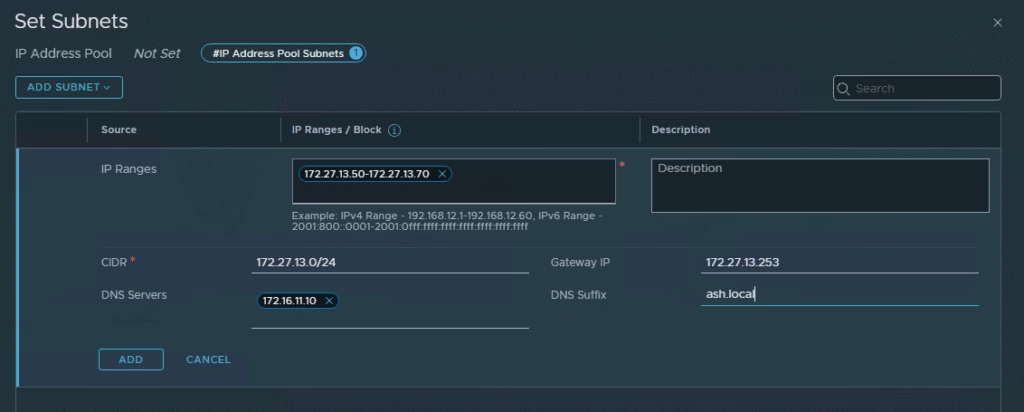
Choose the IP ranges as required in the subnet along with the gateway and cidr
The edge-tep-pool is now ready and we can begin the configuration via vCenter UI
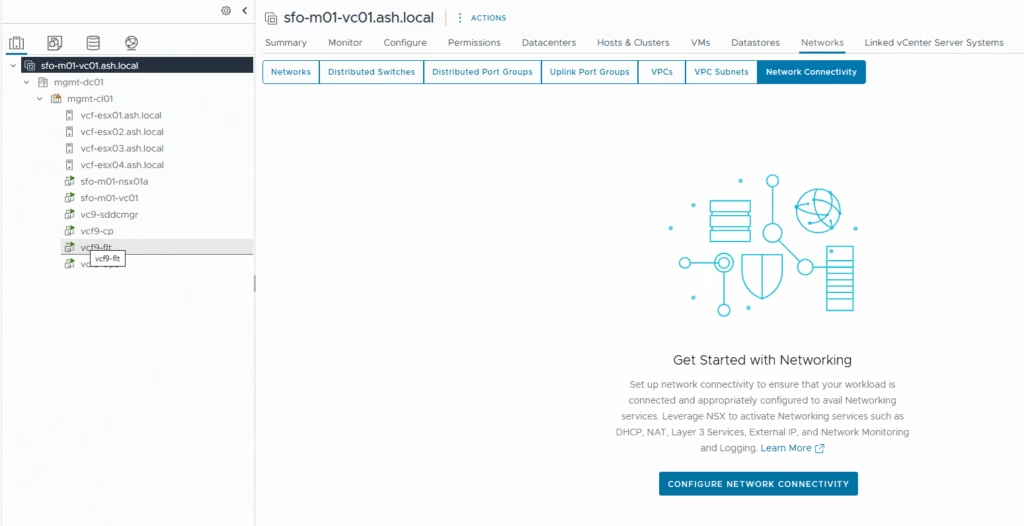
In vCenter, go to Networks > Network Connectivity, then click Configure Network Connectivity.
Select Gateway Type as Centralized Connectivity for this setup.
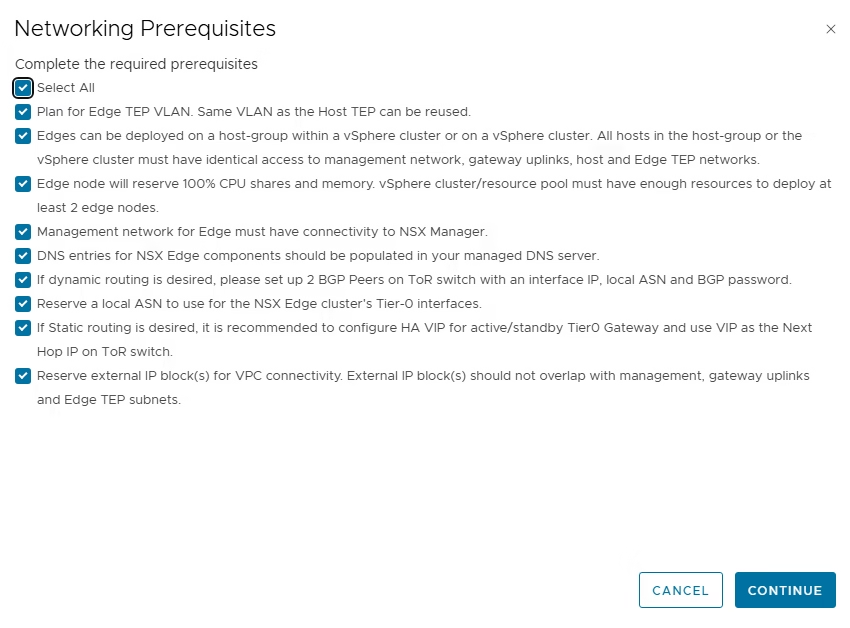
Review all the prerequisites
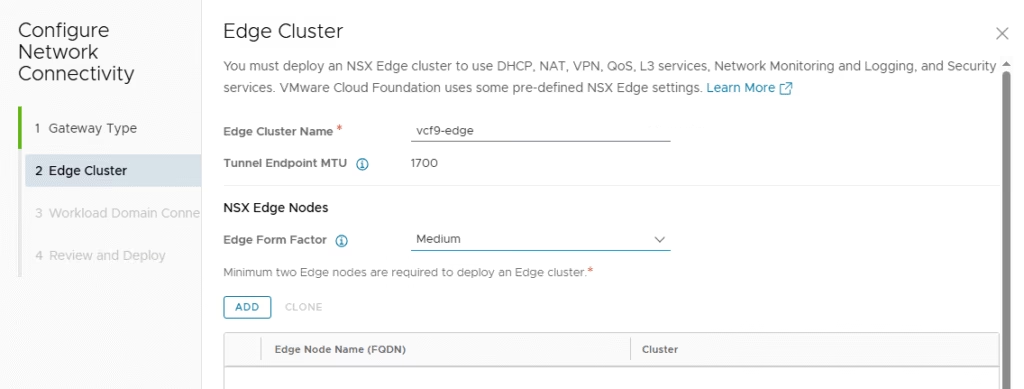
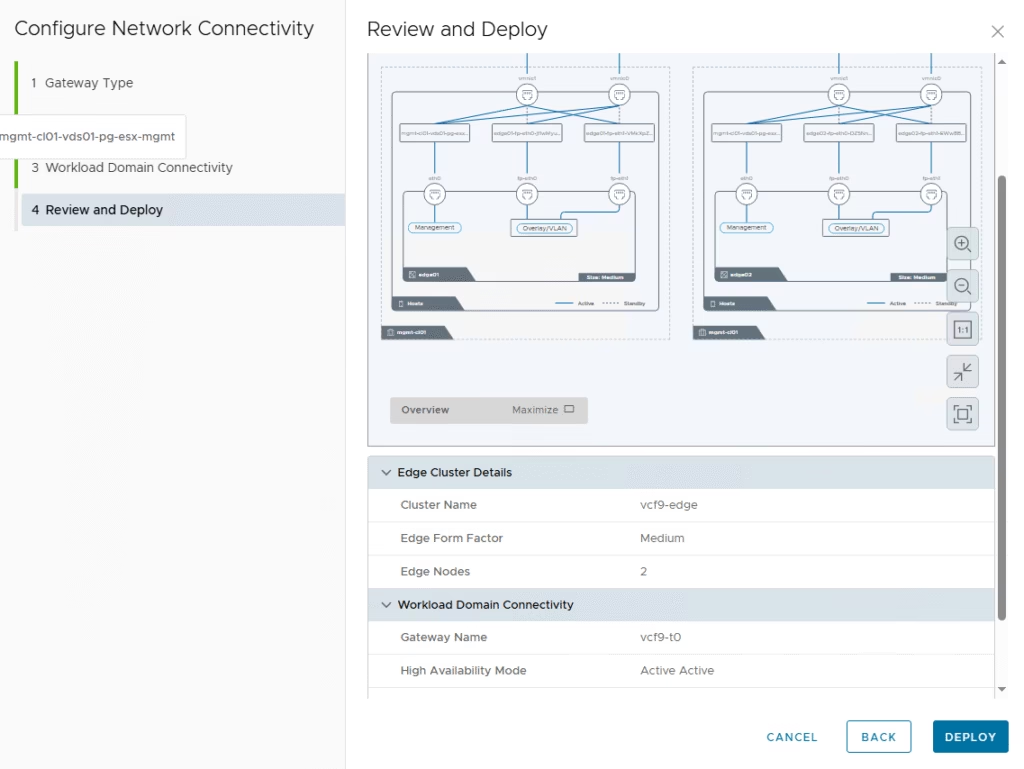
Give the edge cluster a name and choose its form factor
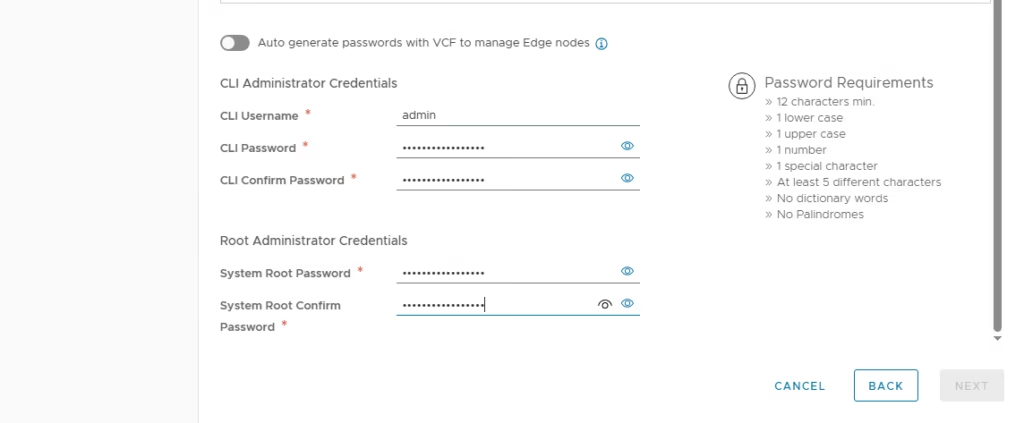
Provide the credentials for root and admin
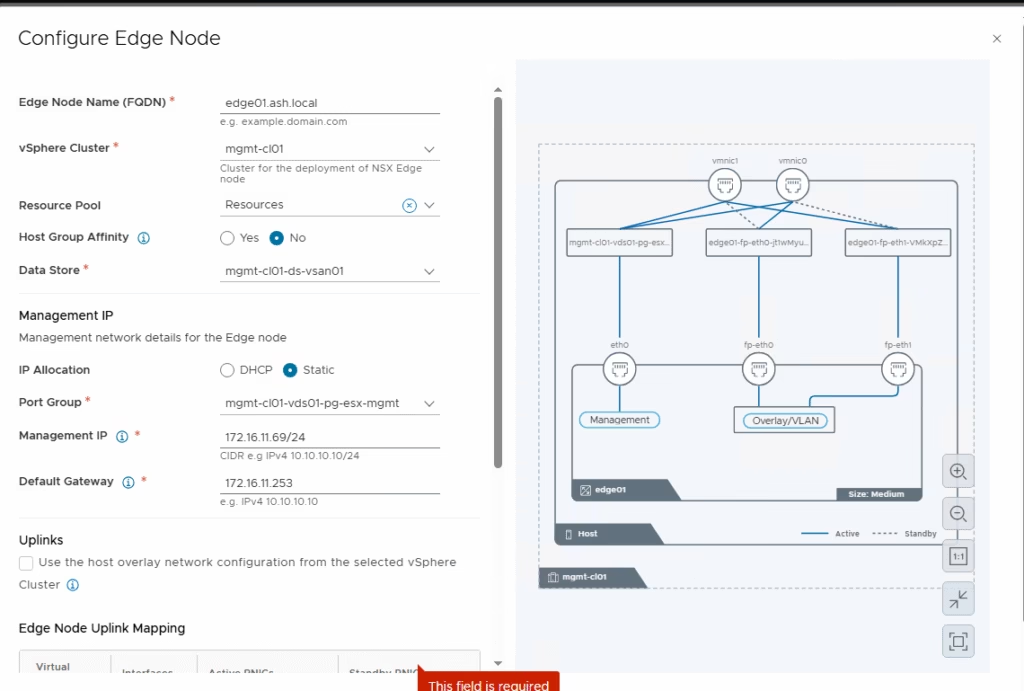
For each Edge node:
- Set the name (must match DNS FQDN)
- Select vSphere cluster and datastore
- Assign management as static
- Choose the management IP for edge node and the management port group
- Set default gateway
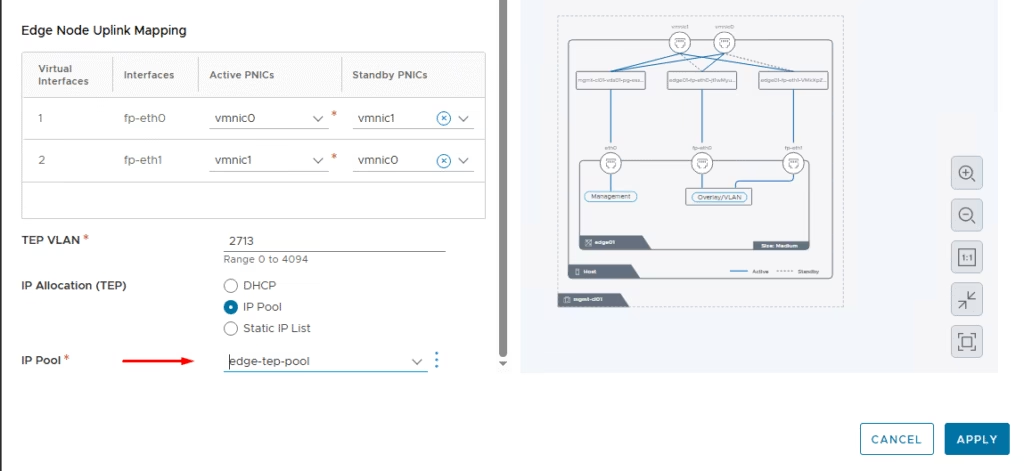
Define uplink teaming policy here, so we leave everything as default and set the Edge TEP VLAN as 2713. The wizard will auto-create trunk port groups for fp-eth0 and fp-eth1.
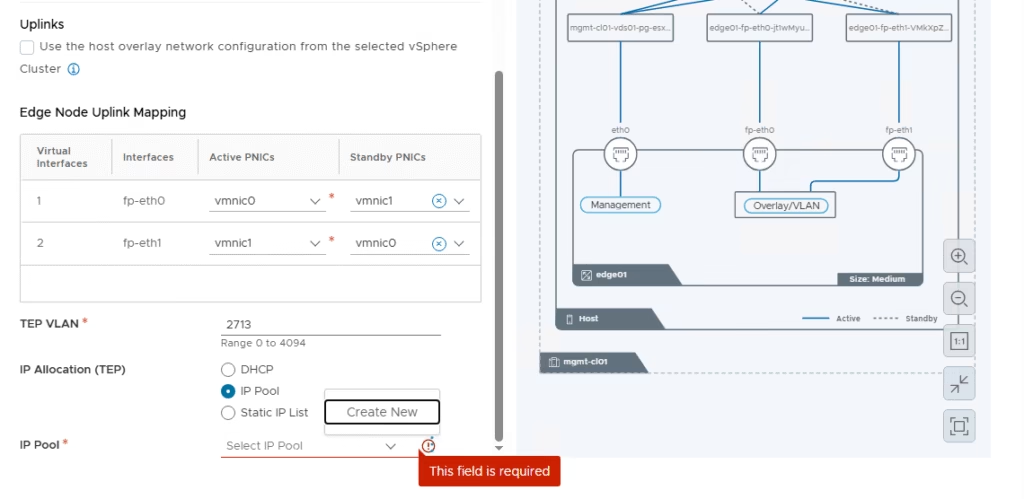
So the IP pool we created earlier on NSX UI now appears here on in this wizard you can create one on the fly
Add Second Edge VM as per the above process

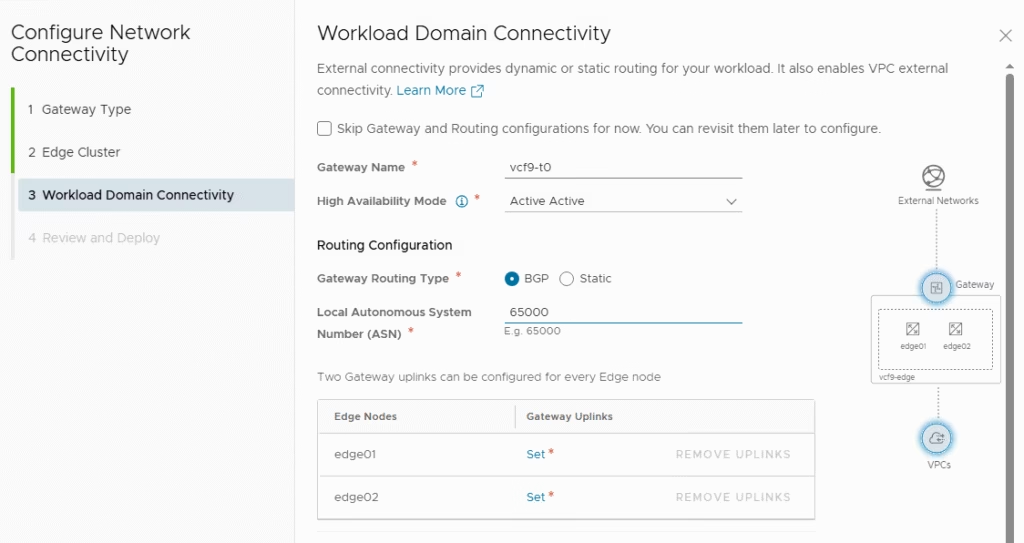
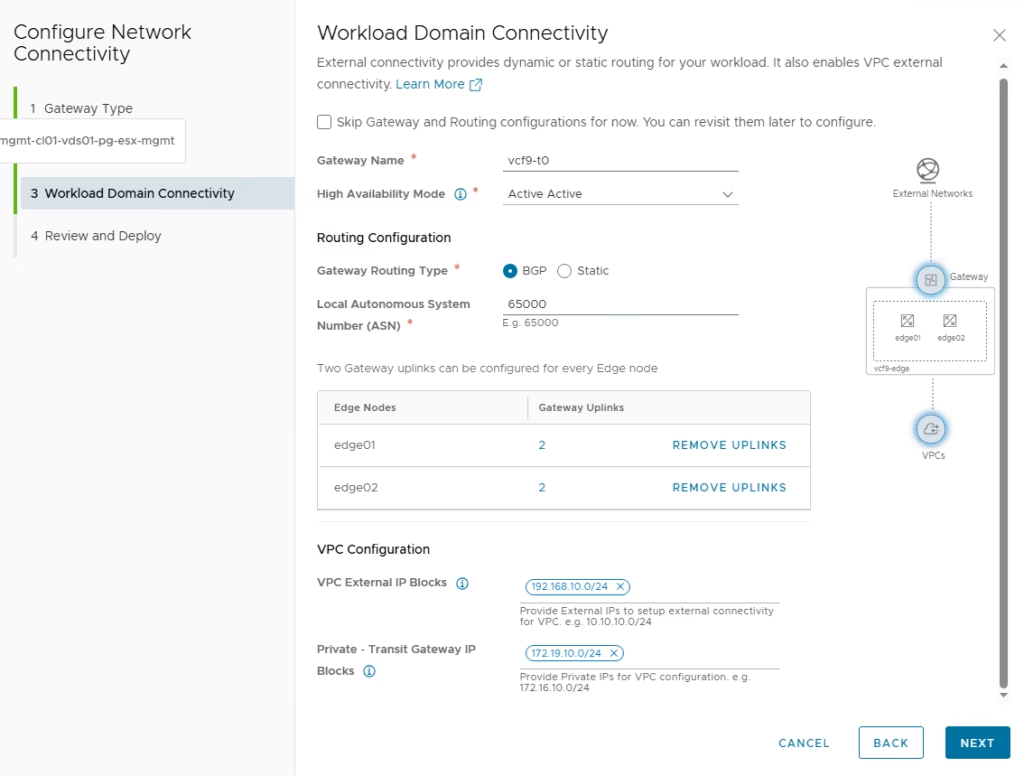
Now, here comes the most vital part of this setup and this is actually the Tier-0 Gateway & BGP Setup
- Name the Tier-0 Gateway
- Choose HA mode – Choose as Active/Active
- Under Routing, select BGP and define the local ASN
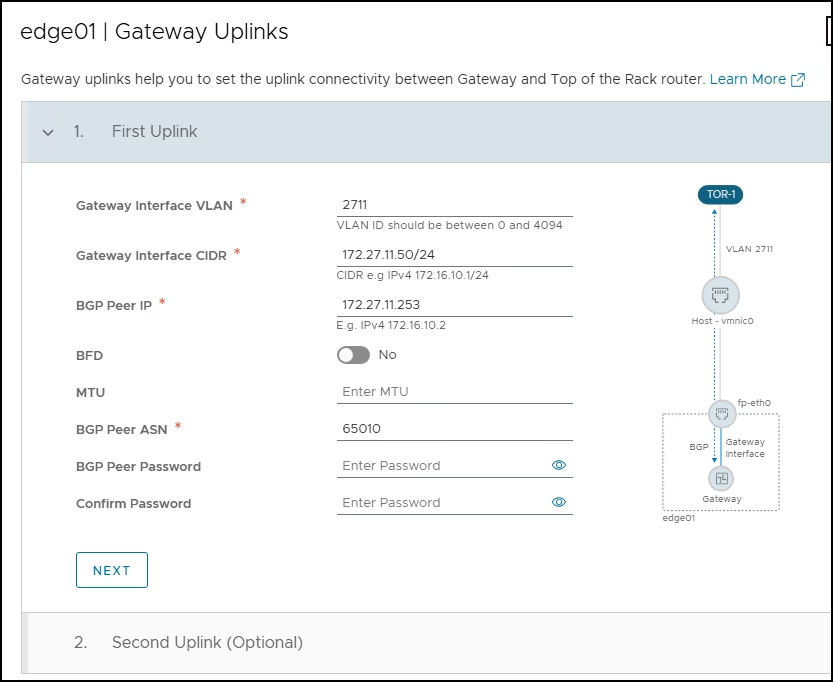
Create Tier-0 interfaces based on your VLANs, this is the uplink 1 and uplink 2 to the outside world so we will use 2711 VLAN for uplink 1 and 2712 VLAN for uplink2 . We dont need to define an MTU here as it will be picked from the switch
The BGP Peer IP will the IP of your top of the rack router or gateway of VLAN 2711 in this example
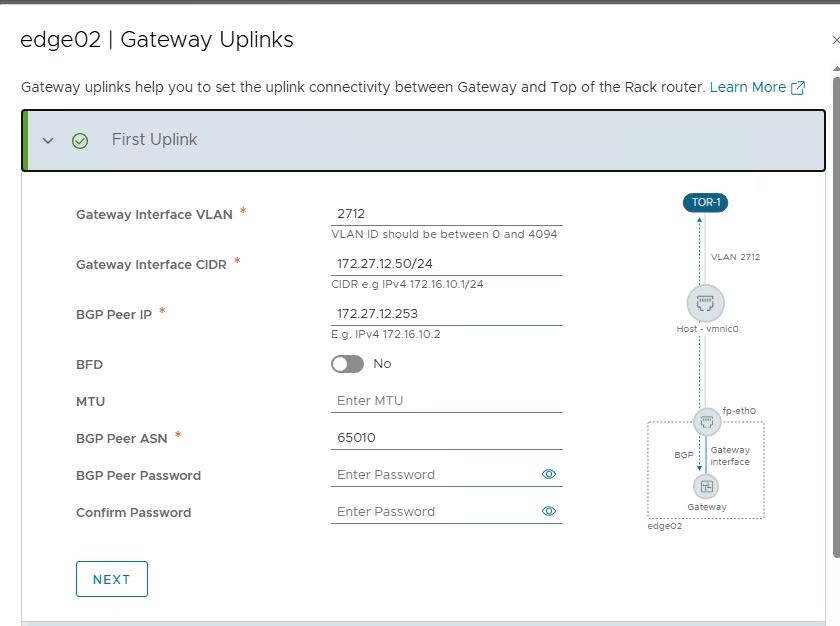
Define uplink 2 on VLAN 2712 and here BGP Peer IP will the IP of your top of the rack route or gateway of VLAN 2712
IP Blocks for VPCs are the new feature introduced in VCF9, You’ll need two types of IP blocks at the project level:
Private Transit Gateway IP Blocks: Used internally within the project. These are not advertised northbound.
External IP Blocks: Advertised via BGP to upstream routers. Must not overlap with physical network ranges.
Review your configuration on the topology page
Click Deploy to begin provisioning
Validate Edge node status in NSX Manager under System > Fabric > Nodes
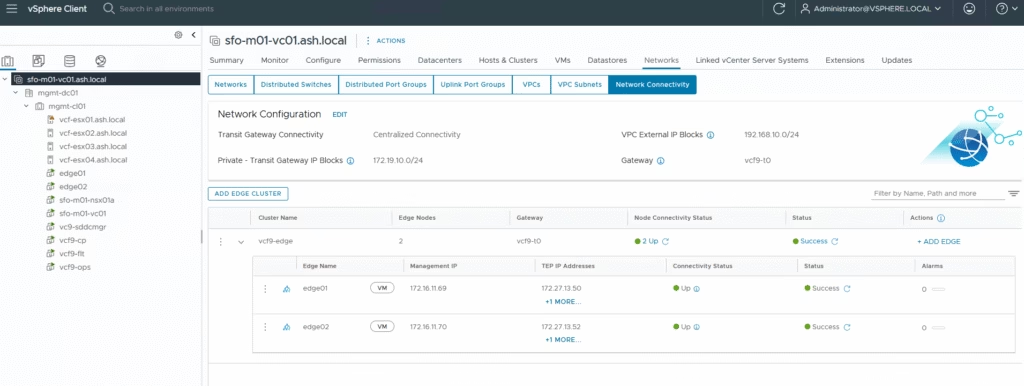
Navigate to NSX UI and we can see it under the VPC Section