

In this blog, we will focus our attention on installing a tool called Chrony on your Ubuntu machine which serves as a perfect replacement for our integrated NTP Server in Windows VM’s.
NTP or Network Time Protocol is a protocol that is used to synchronize all system clocks in a network to use the same time and often if clocks are not in sync then most deployment will fail. Chrony does an excellent job of acting as an NTP server for such lab purposes in keeping all the servers in sync with an accurate time.
Step 1. Install Chrony Server with apt-get

Step2. Enable the Chrony service

Step3. Start the Chrony services

Step 4. Verify that the NTP Server is running

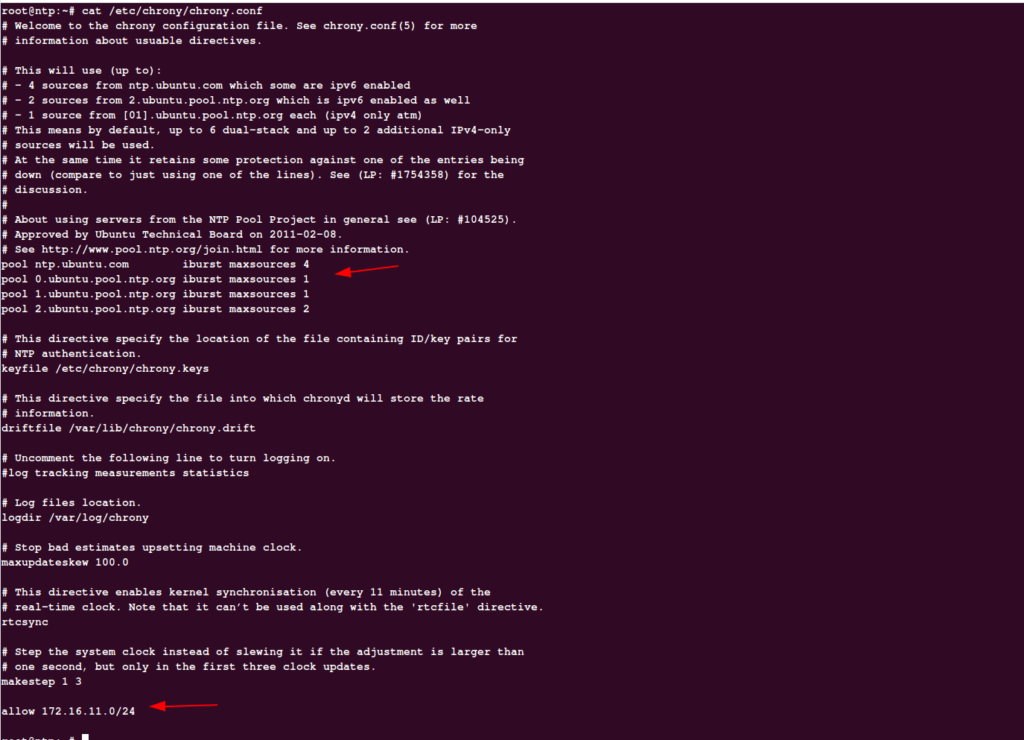
Step 5. To synchronize the time of your local client machines with the Chrony server, edit the /etc/chrony/chrony.conf file. Here is an example we are to allow 172.16.11.X subnet access to NTP sync.
In case you want to add more time servers, you should just add members into the pool as highlighted
Step 7. Once our subnet info is provided, we will just restart the service as shown

Step 8. Run chrony sources -v to check if our Chrony server is syncing properly to our external NTP provider.
If Source State shows as current synced that would mean it’s syncing well.

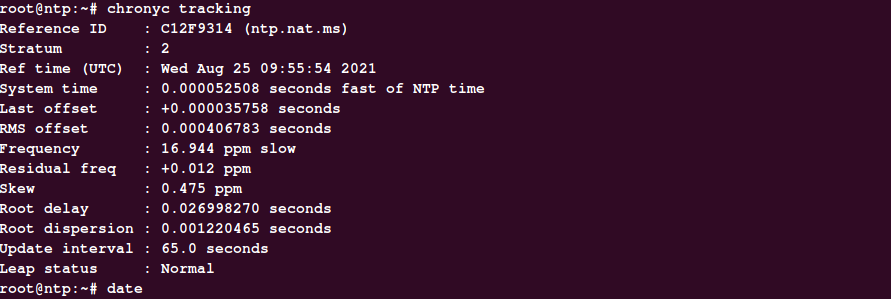
Step 9. Using Chrony tracking we can track the skew level and delay if any
Step 10. Once the clients are configured to use this NTP, we can validate our connections using the command shown below.
