In this blog, we are going to deploy an appliance vCD installation and configuration which provides Elastic and secure virtual data centers (VDCs)
Blog Series
- Deploy vCloud Director 10.X
- Adding HA to vCD 10.X Configuration
- Switch Standby vCD Node to Primary
- Generate CA-Signed SSL Certificates on vCD 10.X
- Unregister a Failed or Unreachable Standby Node
- vCloud Director User Interface not Accessible
- Reset Lost or forgotten vCD 10.x Root Password
- Upgrade vcD from 10.0 to 10.2
- One Page View of all vCD 10.X commands
vCD is deployment, automation and management software for VI resources in multi-tenant cloud environments used by popular cloud providers to operate and manage successful cloud-service businesses. They have the ability to provision cloud resources very quickly just like AWS, Azure etc.
A VMware Cloud Director server group consists of one or more VMware Cloud Director servers installed as appliances. Each server in the group runs a collection of services called a VMware Cloud Director cell. All cells share a single VMware Cloud Director database and a transfer server storage (NFS) and connect to the vSphere and network resources.
VMware vCloud Director provides customers role-based access to a typical vCenter like Web console that allows the members of an organization to interact with the organization’s resources to create and work with vApps and VM workloads.
So In simple words – vCD provides individual customers with their own vCenter URL’s, they can log in and interact with. The backend is usually controlled by an MSP or a service provider that has access to the Cloud director’s backend server pool via which we can provide scalability and elasticity to the customer workload during a spike in demand. This is typically useful for pay as you go types of customers looking just to leverage the core functionality of a VMware vCenter, HCX, Hybrid topology etc wherein they just ask the MSP to provide them with a URL. The customer has no involvement with the upkeep of the backend servers or even the vCenters. Regular patching, upgrades etc. are all done by the MSP.
The VMware Cloud Director appliance is a preconfigured virtual machine that is optimized for running the VMware Cloud Director services.
Prerequisites
It’s always a good idea to do your research before installing or upgrading vCD. Along with reading the release notes, verifying the VMware compatibility Matrix of ESX, vCenter, NSX-V/T. and vRealize Suites
Here are the relevant web links
The following are the high-level steps required for our vCD deployment.
- Download the OVA from VMware portal
- Forward and Reverse Look up zone needs to be setup for our new vCD appliance
- NTP Server is required.
- Verify compatibility matrix
- Each vCloud Director server must support two different SSL endpoints. One endpoint is for the HTTP service. The other endpoint is for the console proxy service. These endpoints can be separate IP addresses, or a single IP address with two different ports.
- Maximum allowable drift is 2 seconds.
- The vCloud Director appliance includes an embedded PostgreSQL database. The embedded PostgreSQL database includes the Replication Manager (repmgr) tool suite, which provides a high availability (HA) function to a cluster of PostgreSQL servers.
- NFS shared transfer server storage.
Types of vCD Hosting
When it comes to hosting with VMware Cloud Director, there are multiple options designed to meet different business needs. Let’s take a look at the three main hosting models:
- Shared Hosting: In the shared hosting model, multiple tenants run their workloads on the same infrastructure. While this is a cost-effective option, there’s no guarantee of performance since resources like CPU, memory, and storage are dynamically shared across tenants. It’s ideal for businesses with flexible performance requirements that can handle resource variability.
- Reserved Hosting: If performance consistency is crucial, reserved hosting is the better choice. With this model, resources are specifically reserved for a tenant’s workloads, ensuring steady and reliable performance. This model is great for businesses that require more predictable and guaranteed resources for their applications.
- Physical Hosting: For those that need dedicated hardware, physical hosting offers a solution where the infrastructure is assigned to a single tenant. The hardware is fully allocated to one customer, performance is assured, making it the perfect fit for organizations with strict security and performance requirements.
Network Topology of Lab
Our network topology is set up as below


Management VM Sizing Requirements
Since we have deployed it in our lab, we have deployed it with bare minimum settings.
| VM | Version | vCPU | Memory GB | Storage | Quantity |
| vCenter | 7.0 U1 | 2 | 10 | 100GB | 1 |
| vCD-Cell-01 | 10.0 | 2 | 12 | 120GB | 1 |
| NFS-01 | NA | 2 | 2 | 40GB | 1 |
Deploying a Transfer Storage for vCD Appliance
We will need an NFS mount to vCD to work. This repo store holds the shared storage for the appliance cluster management and for providing temp storage for catalog items being published, appliance db backups, log bundle, general uploads and downloads etc.
We will just connect an NFS share from Windows VM and use that as our mount point.
You can install Server for NFS Features on Windows with a single Powershell command which is the easiest
Add-WindowsFeature “FS-NFS-Service”
We are going to export a folder E:\vCloud as a shared NFS drive. This is the config and permissions on the windows folder, volume must have write permission for root

With that being done, we are now ready for our vCD Deployment.
Deploying the VMware vCD Appliance
We can deploy the VMware Cloud Director appliance in the following formats:
- Primary cell
- Standby cell
- Application cell
vCloud Director server groups are formed by installing the vCloud Director software on one or more vCloud Director appliance
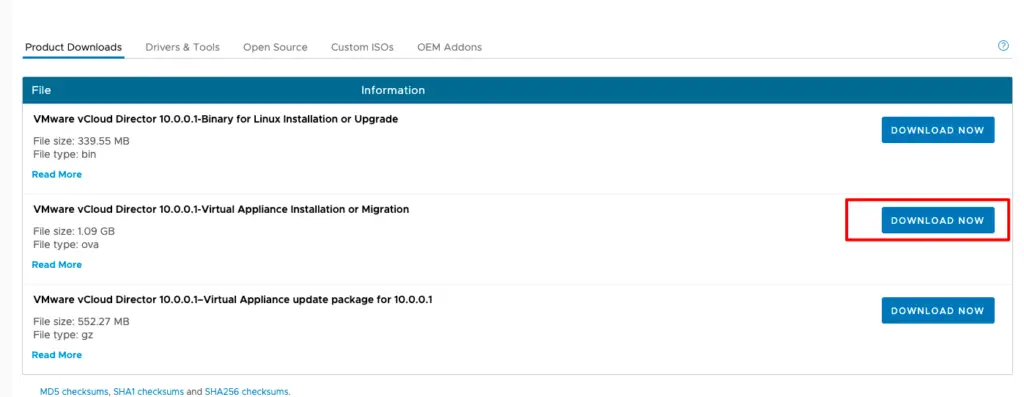
1- Download the vCD appliance from VMware portal
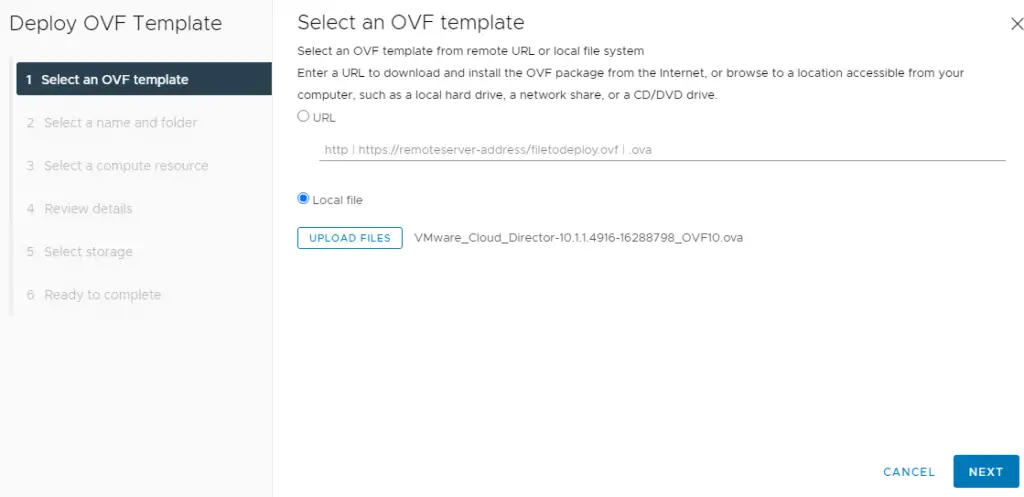
2- Select deploy VM from OVA file and choose the OVA downloaded
3- Give the vCD appliance a name
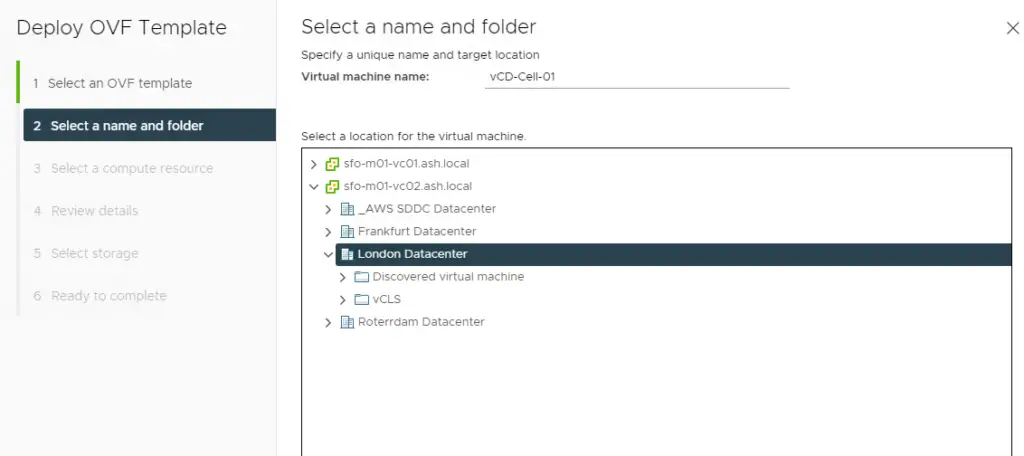
4-Choose the cluster to deploy the VM to

5- Review the details of vCloud Director

6- Accept the license agreements

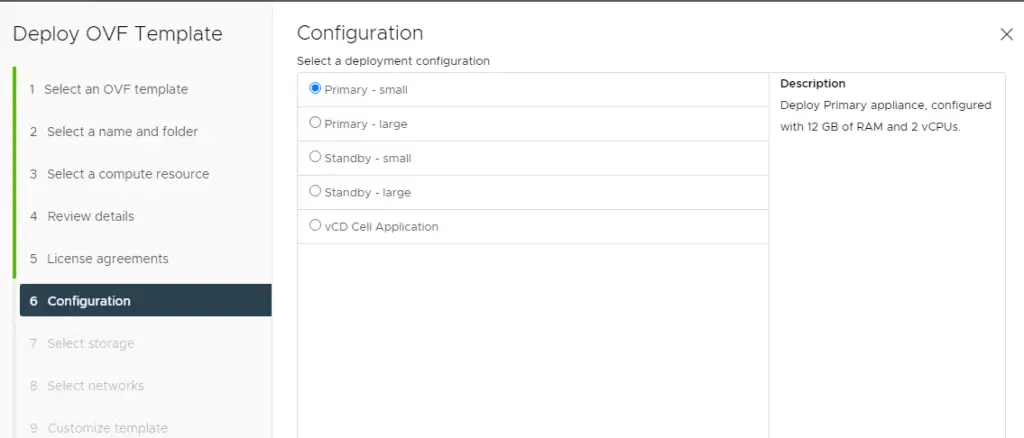
7- Pick the deployment type according to your infrastructure
The Standby option is used to deploy the secondary node when you configure vCD appliances in a HA mode
8- Select the virtual disk format as thin disk and choose datastore location and click Next.

The vCloud Director appliance is deployed with two networks, eth0 and eth1 so that you can isolate the HTTP traffic from the database traffic.
9- Select the management port group from the destination network dropdown and click Next

10- Review the settings and click finish to start the deployment.
- Hostname
- Network 1 IPv4 Address
- Default IPv4 Gateway
- Network 1 Netmask
- Network 2 IPv4 Address
- Network 2 Netmask
- NTP server list
- DNS Servers
- Domain Search Lists
- Transfer Storage Location

11- Untick the option expire password at first login, enable SSH
Under NFS mount we will need to put the NFS server mount we created earlier
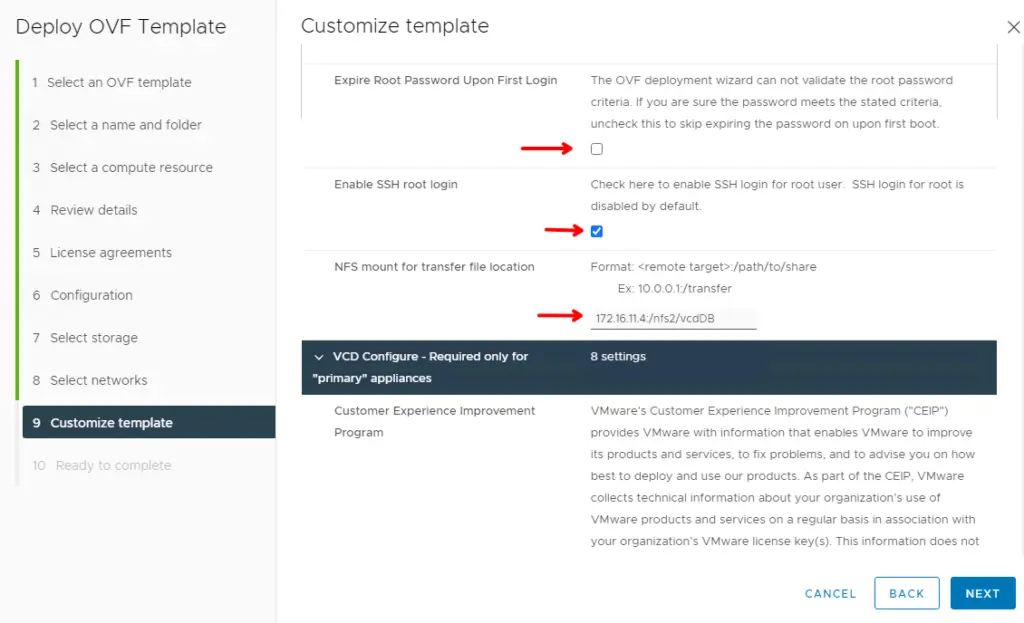
12- Skip CEIP

13- Provide a complex administrator password, give the vCD System a name as vCD01
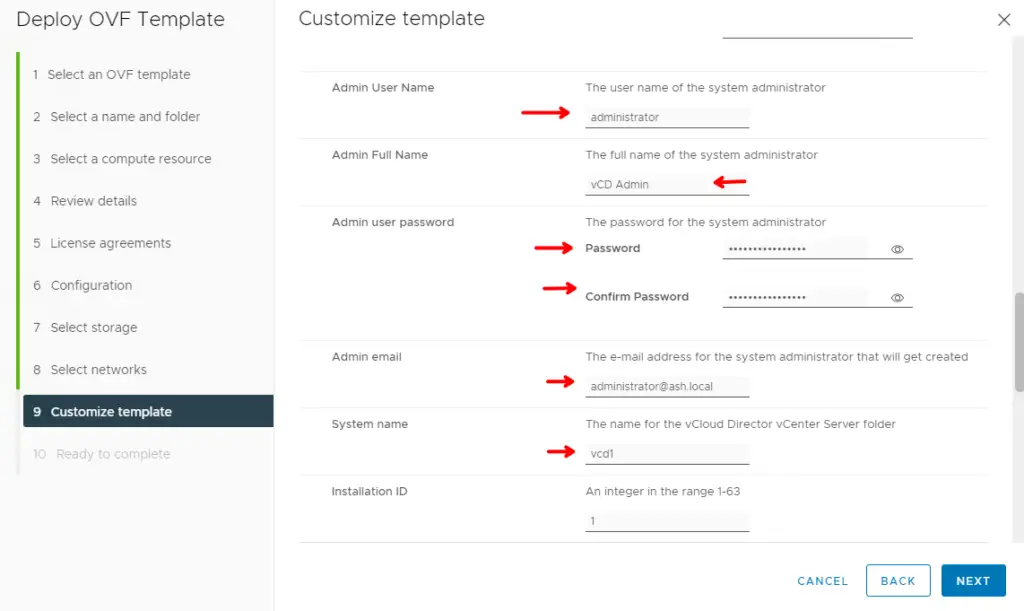
14- This section is only required if you going with static routes

15- Provide all these details
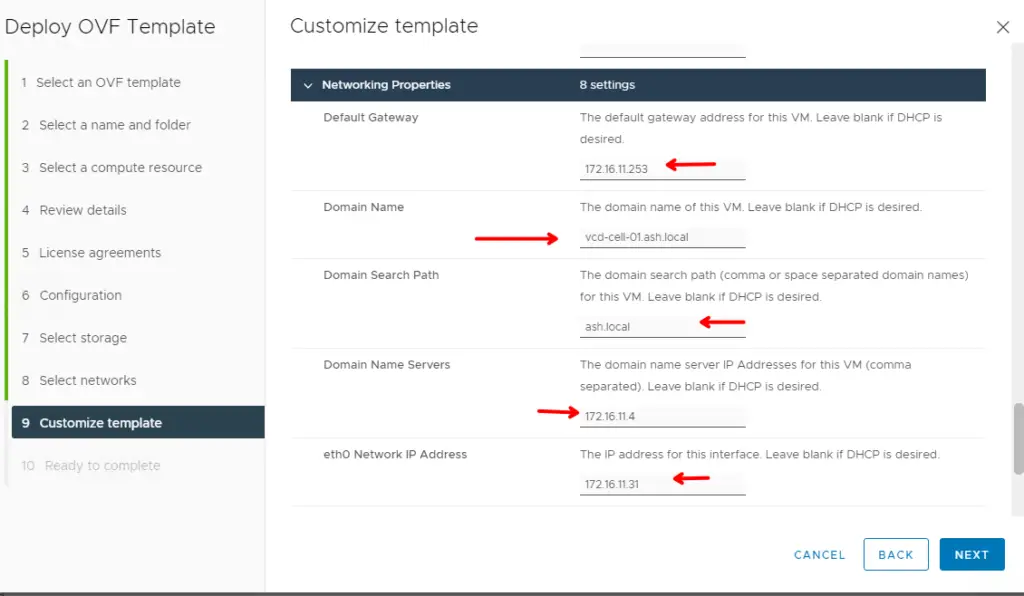
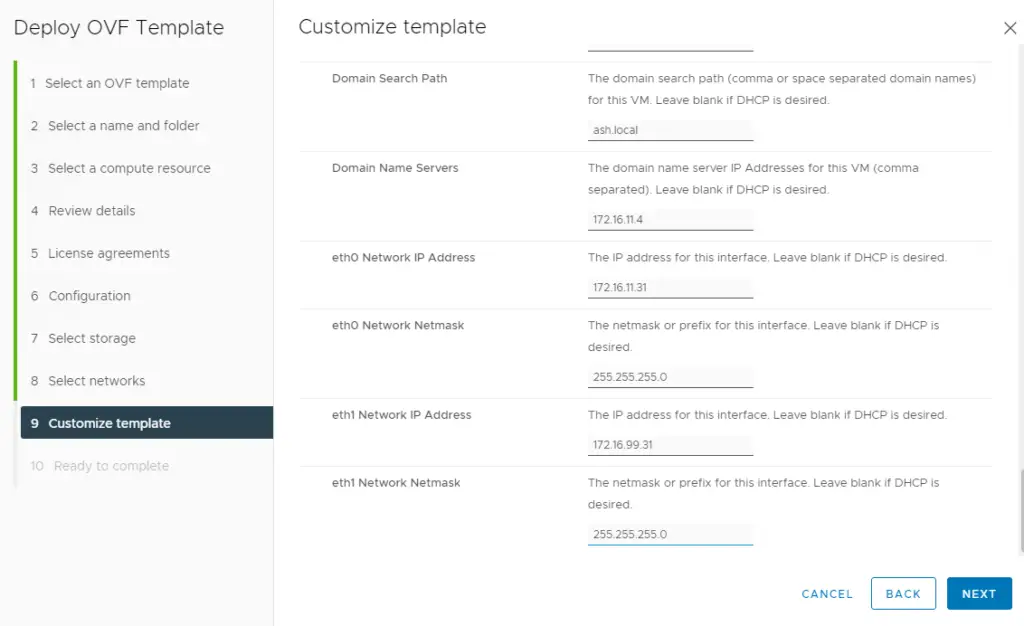
16- Click Finish to complete the installation
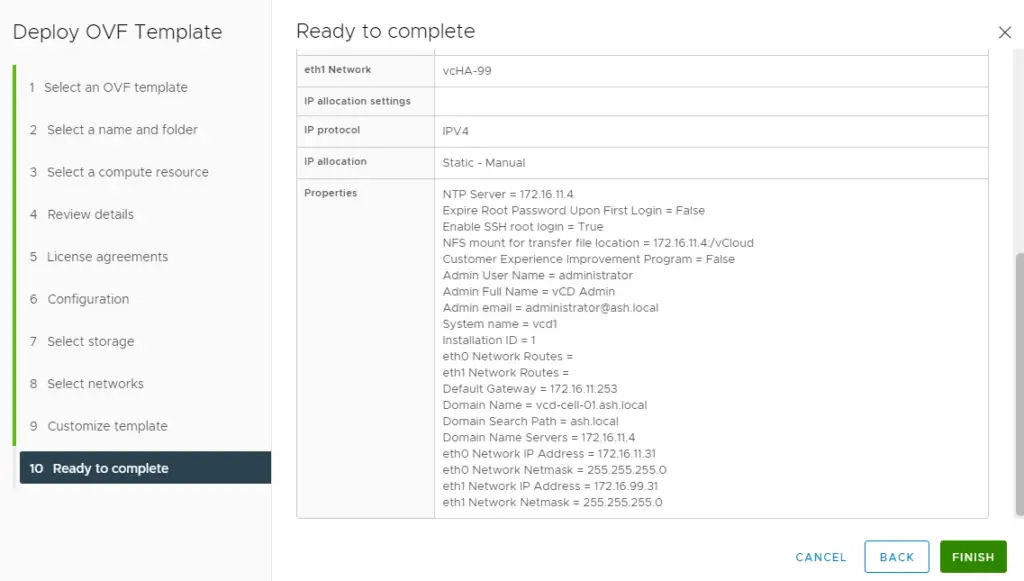
The OVA should start to deploy and once done, power on the VM.
17- Launch a web browser and connect to the VCD management address via https://vcdip:5480 with root/password

18 – As expected, our first vCD appliance is healthy

19- If we now review our transfer storage location we can now see these being created

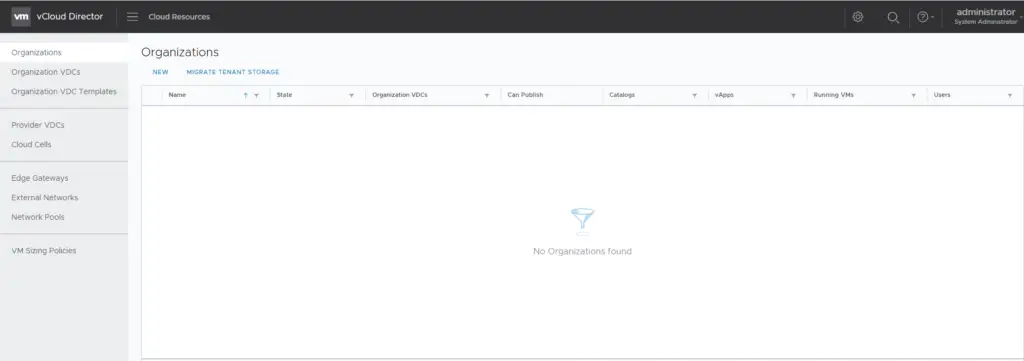
20- To access the vCD use the following link https://IP Address of FQDN/provider Use the administrator username and password provided during installation.

21- We are finally logged in to our vCD
In the next blog, we will connect to the vCenter Server, NSX Manager, configure Active Directory integration

