Azure Firewall is a fully managed highly available, firewall as a service offering that provides the best of breed threat protection for your cloud workloads running in Azure providing both east-west and north-south traffic inspection.
One way you can control outbound network access from an Azure subnet is with Azure Firewall and Firewall Policy. With Azure Firewall and Firewall Policy, you can configure:
- Application rules that define fully qualified domain names (FQDNs) that can be accessed from a subnet.
- Network rules that define source address, protocol, destination port, and destination address.

Prerequisites
- Set up a test network environment
- Deploy a firewall and firewall policy
- Create a default route
- Configure an application rule to allow access to www.google.com
- Configure a network rule to allow access to external DNS servers
- Configure a NAT rule to allow a remote desktop to the test server
- Test the firewall

Create the AzureFirewall Subnet
Under our VPC, we create a subnet as AzureFirewallSubnet
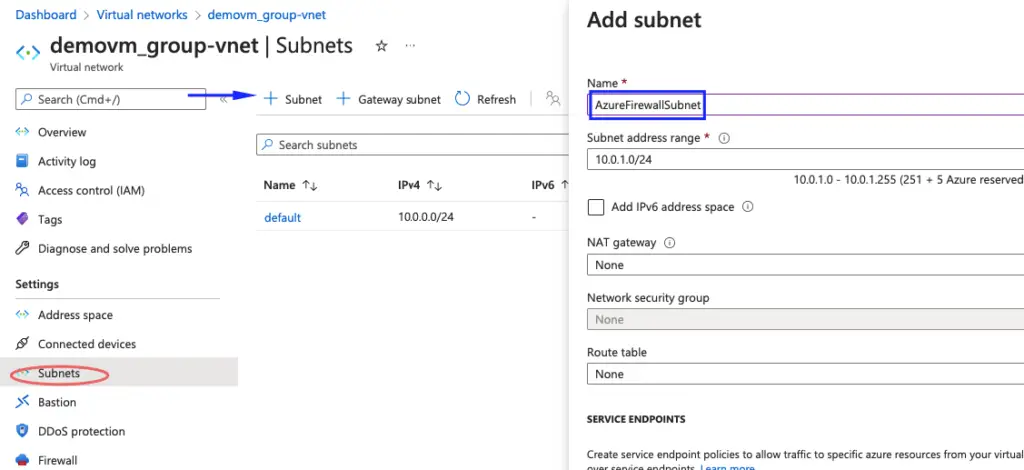
AzureFirewallSubnet is created in the subnet range and we will later use this subnet for our configuration.

Create a virtual machine
Enter these values for the virtual machine:
| Setting | Value |
|---|---|
| Resource group | Test-FW-RG |
| Virtual machine name | demo-vm |
| Region | Same as VPC |
| For Public IP | None |
| Boot diagnostics | Disable |

Deploy the firewall and policy
- On the Azure portal men, type firewall in the search box.

On the Create a Firewall page, use the following table to configure the firewall
| Setting | Value |
|---|---|
| Name | firewall |
| Region | Select the same location as our vpc |
| Firewall management | Use a Firewall Policy to manage this firewall |
| Firewall policy | Add new: firewall-policy your selected region |
| Choose a virtual network | Use existing: VPC |
| Public IP address | Add new Name: firewall-pubic-ip |
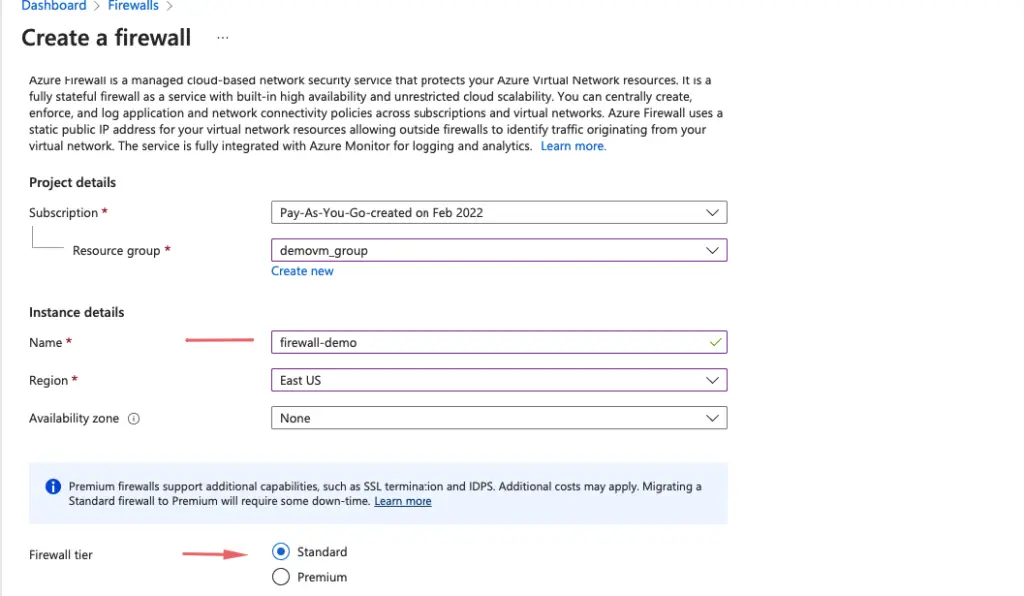
Create firewall policy

Create public ip for our firewall

Accept the other default values, then select Review + create

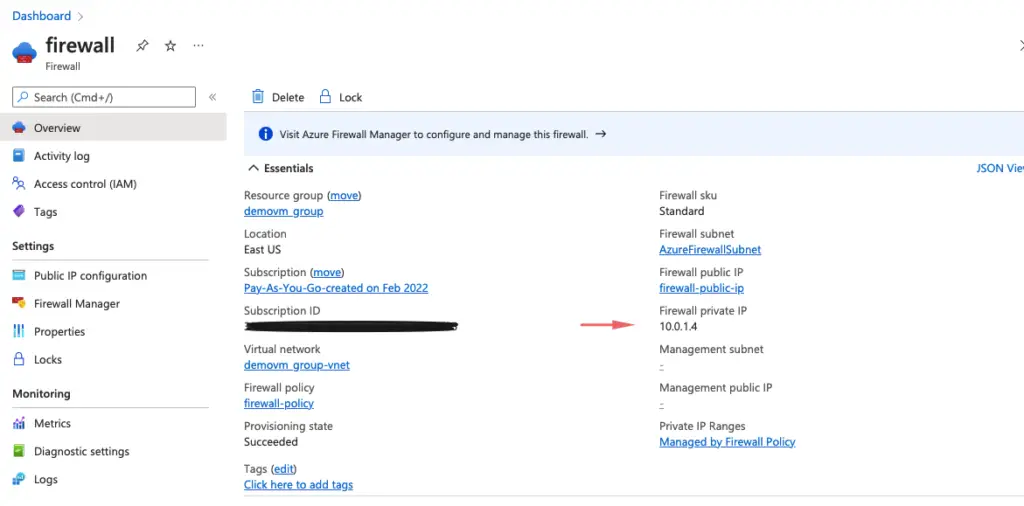
Note the private IP of our firewall
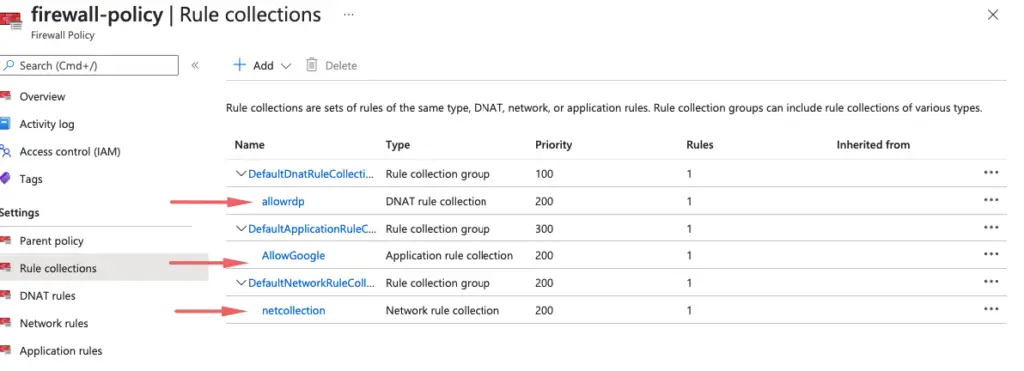
Configure a DNAT rule
This rule allows you to connect via remote desktop to our demo virtual machine through the firewall.
- Access the firewall
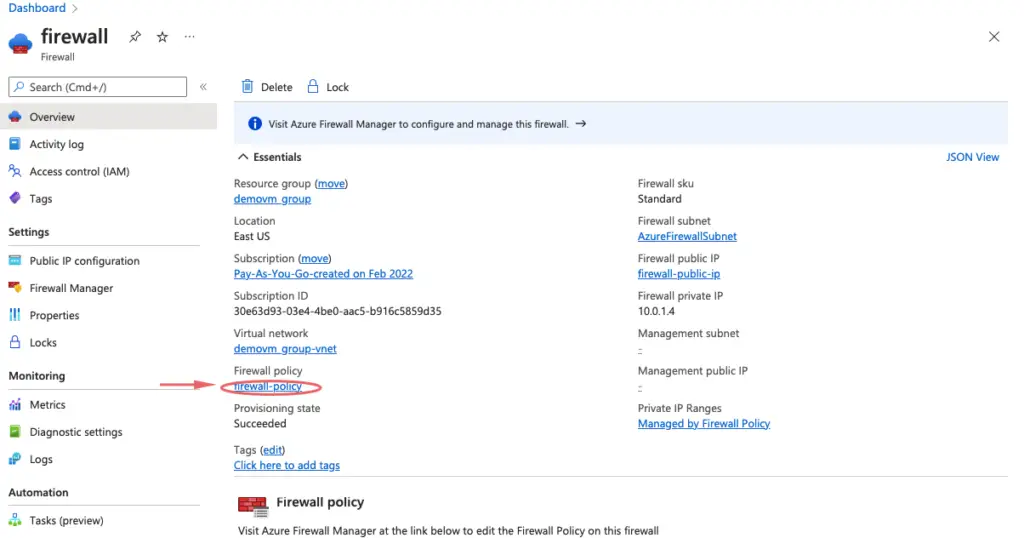
- Select the DNAT rules, add a new rule collection
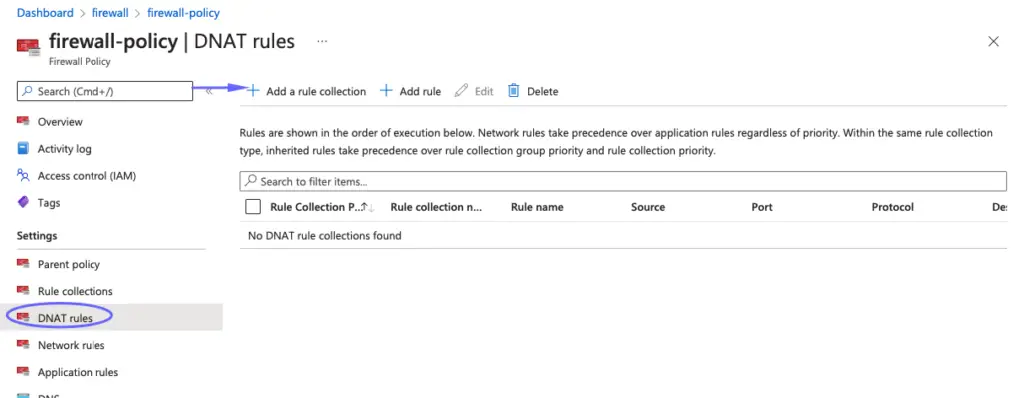
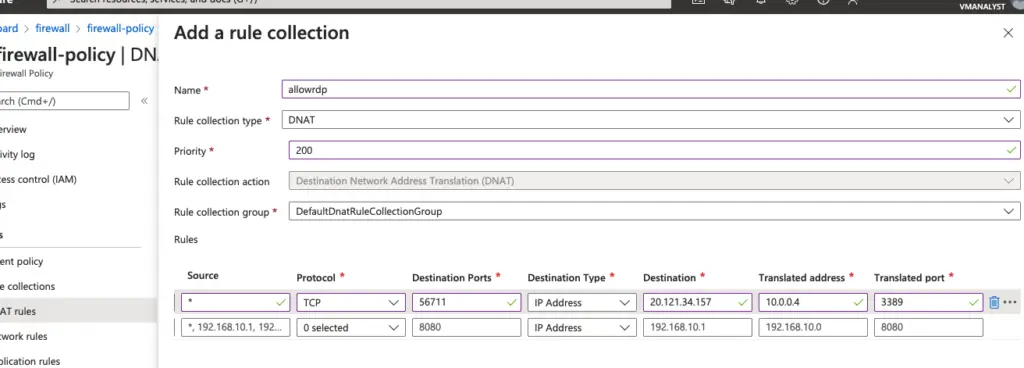
- For Name, type allowrdp.
- For Priority, type 200.
- For Rule collection group, select DefaultDnatRuleCollectionGroup.
- Under Rules, for Name, type rdp-nat.
- For Source type, select IP address.
- For Source, type *.
- For Protocol, select TCP ( ephemeral port )
- For Destination Ports, type 56711 .
- For Destination Type, select IP Address.
- For Destination, type the firewall public IP address.
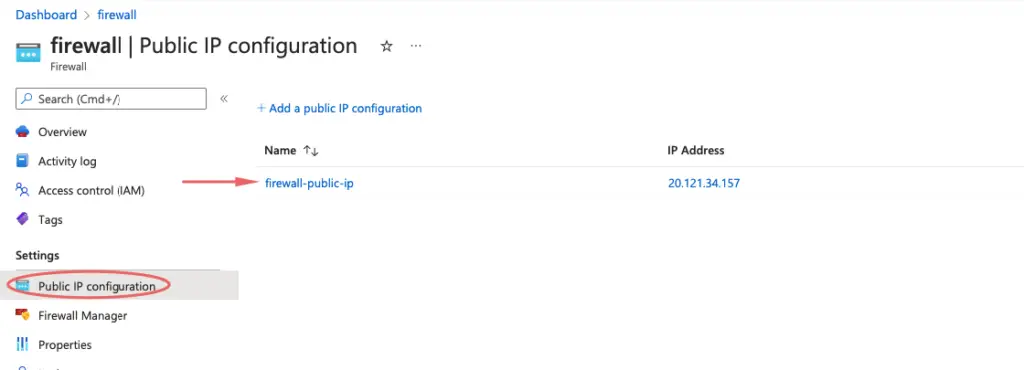
- For Translated address, type our demo VM’s private IP address.
- For Translated port, type 3389.
- Select Add.
Connect to the VM via the firewall public IP

Create a default route
Our VM is still allowing access to the internet so in order for the VM to route all the traffic to the firewall so that any traffic to the internet goes past the azure firewall resource, we will need a default route.
For the Workload-SN subnet, configure the outbound default route to go through the firewall.
- On the Azure portal menu, select All services or search for and select All services from any page.

- For Name, type Test-Firewall-route.

After deployment completes, select Go to the resource.
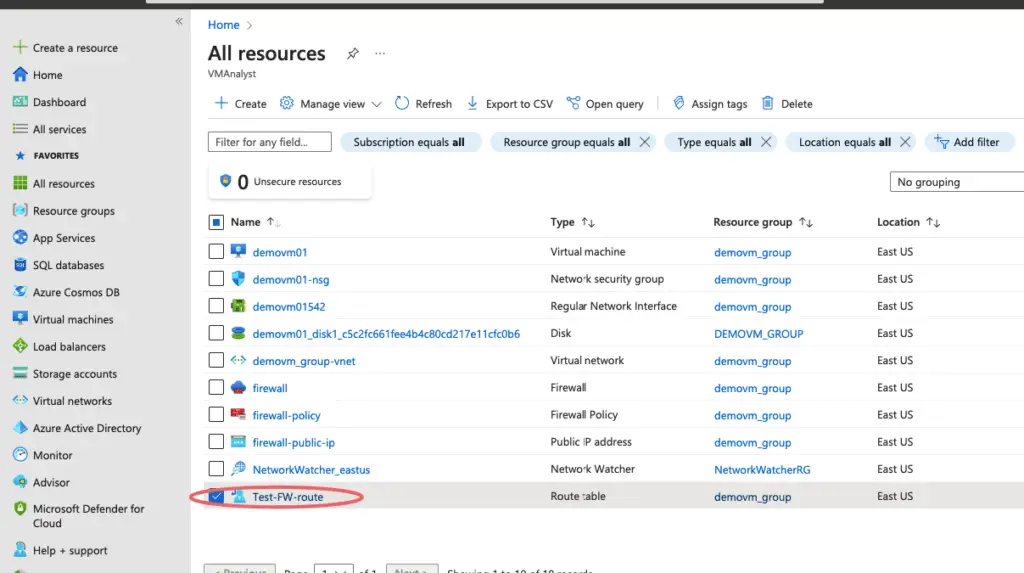
- On the Firewall-route page, select Subnets and then select Associate.
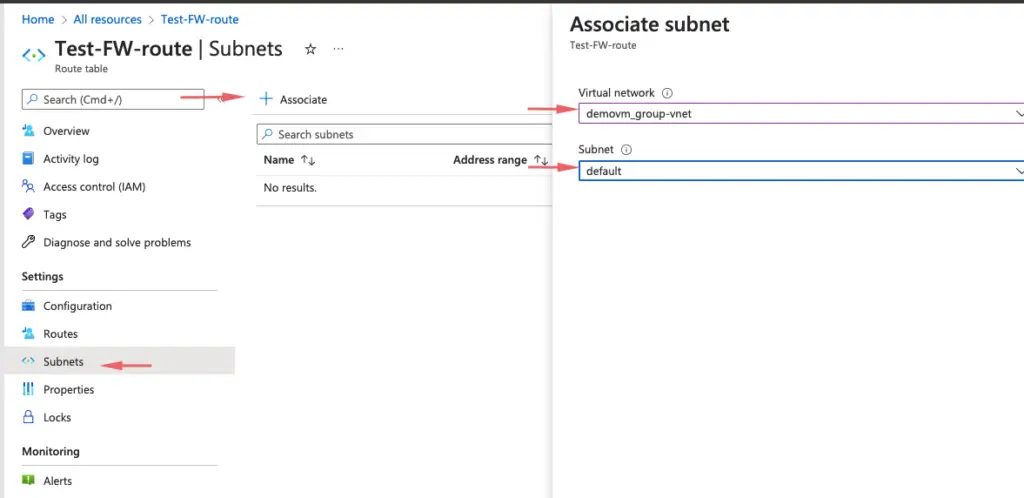
- Select Virtual network > Test-FW-VN.
- For Subnet, select Workload-SN. Make sure that you select only the Workload-SN subnet for this route, otherwise your firewall won’t work correctly.
- Select OK.
- Select Routes and then select Add.
- For Route name, type fw-dg.
- For Address prefix, type 0.0.0.0/0.
- For Next hop type, select Virtual appliance.Azure Firewall is actually a managed service, but virtual appliance works in this situation.
- For Next hop address, type the private IP address for the firewall that you noted previously.
- Select OK.
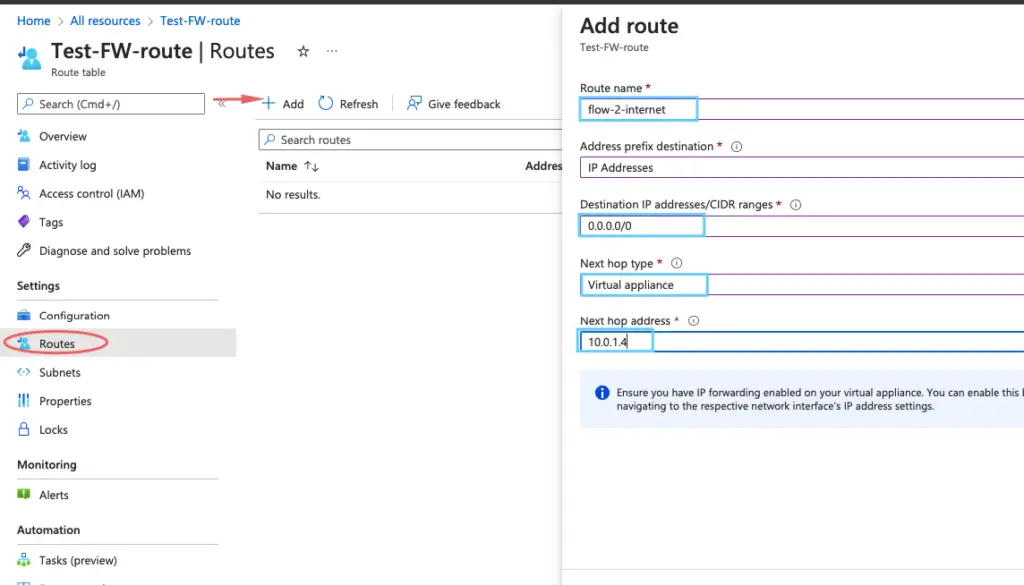

ow all traffic is moving iva the azure firewall

Configure an application rule
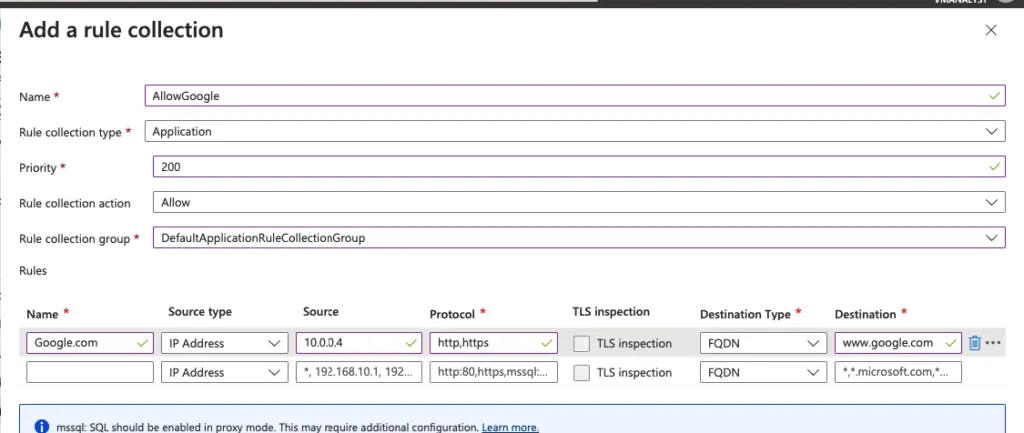
This is the application rule that allows outbound access to www.google.com.
- Open the Test-FW-RG, and select the fw-test-pol firewall policy.
- Select Application rules.
- Select Add a rule collection.
- For Name, type .
- For Priority, type 200.
- For Rule collection action, select Allow.
- Under Rules, for Name, type Allow-Google.
- For Source type, select IP address.
- For Source, type 10.0.2.0/24.
- For Protocol:port, type http, https.
- For Destination Type, select FQDN.
- For Destination, type
www.google.com - Select Add.


Azure Firewall includes a built-in rule collection for infrastructure FQDNs that are allowed by default. These FQDNs are specific for the platform and can’t be used for other purposes. For more information, see Infrastructure FQDNs.
Configure a network rule
This is the network rule that allows outbound access to two IP addresses at port 53 (DNS).
- Select Network rules.
- Select Add a rule collection.
- For Name, type Net-Coll01.
- For Priority, type 200.
- For Rule collection action, select Allow.
- For Rule collection group, select DefaultNetworkRuleCollectionGroup.
- Under Rules, for Name, type Allow-DNS.
- For Source type, select IP Address.
- For Source, type 10.0.2.0/24.
- For Protocol, select UDP.
- For Destination Ports, type 53.
- For Destination type select IP address.
- For Destination, type 209.244.0.3,209.244.0.4.
These are public DNS servers operated by CenturyLink. - Select Add.
