

Managing certificates inside a VMware environment is one of those tasks every VMware admin eventually has to master. Whether you’re replacing the Machine SSL certificate, preparing for a CA‑signed deployment, or building a repeatable workflow for your lab, generating a CSR directly on the vCenter Server Appliance (VCSA) cli gives you full control and avoids the quirks of GUI‑based tools.
This guide walks through a clean, predictable method using a custom OpenSSL configuration file — the exact approach VMware recommends for Machine SSL replacements as detailed in KB Article ID: 385827.
Blog Series
- End‑to‑End Machine SSL Replacement on VVF vSphere 8/9.x with vCert via CLI
- End‑to‑End Machine SSL Replacement on VVF vSphere 8/9.x with vCert via UI
- Walkthrough covers how to install and run the vCert 6.0.0 utility
- Create a CA and Replace vCenter Server SSL certificate with CA signed certificate via vSphere Certificate Manager
- Create Custom CSR for vCenter using OpenSSL
Generate a CSR and Private Key Using a Custom OpenSSL Config File
This workflow is ideal when:
- You want full control over SAN entries and certificate attributes
- You prefer generating the CSR directly on the VCSA
- Your CA requires specific DN or SAN formatting
- You’re preparing for a custom Machine SSL certificate replacement
Step 1 — Create the OpenSSL Configuration File
SSH into the VCSA as root and open a new config file:
vi /tmp/newcert.cfg
Paste your customized configuration:
[ req ]
distinguished_name = req_distinguished_name
encrypt_key = no
prompt = no
string_mask = nombstr
req_extensions = v3_req

[ v3_req ]
basicConstraints = CA:false
keyUsage = nonRepudiation, digitalSignature, keyEncipherment
extendedKeyUsage = serverAuth
subjectAltName = DNS:vcenter01.ash.local,IP:172.16.11.16

[ req_distinguished_name ]
countryName = GB
stateOrProvinceName = London
localityName = Camden
0.organizationName = VMA
organizationalUnitName = IT
commonName = vcenter01.ash.localWhy this config works
- SANs are explicit (
DNS:andIP:), which modern browsers and VMware services require - Key usage and EKU match VMware’s Machine SSL requirements
- prompt = no ensures a fully automated CSR generation
- encrypt_key = no avoids password‑protected keys, which vCenter cannot use
Step 2 — Generate the CSR and Private Key
Run the OpenSSL command:
openssl req -new -nodes -out /root/newcert.csr -newkey rsa:2048 -keyout /root/newcert.key -config /tmp/newcert.cfg
This produces:
/root/newcert.csr— the certificate signing request/root/newcert.key— the private key
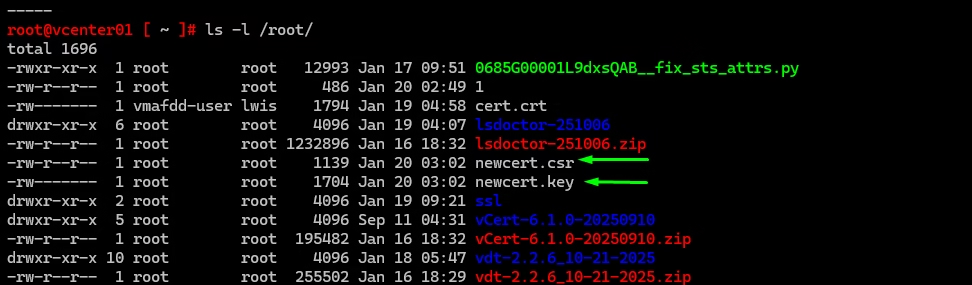
Both files are now ready for CA submission.
Step 3 — Validate the CSR (Optional but Recommended)
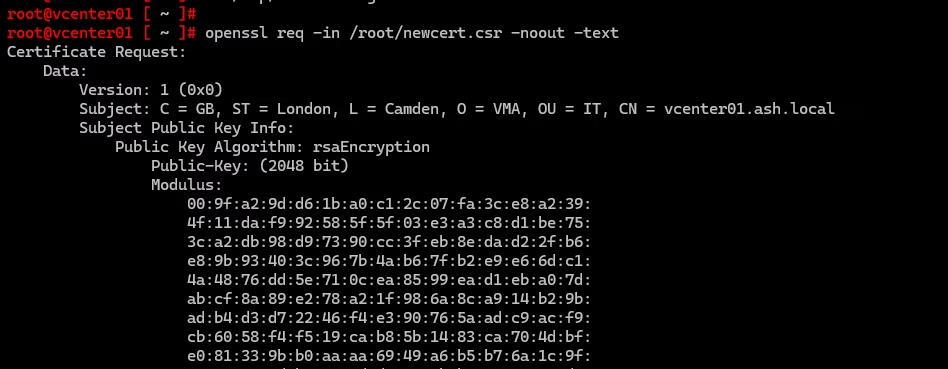
You can decode the CSR to confirm SANs and DN:
openssl req -in /root/newcert.csr -noout -textLook for:
- Subject: matches your DN
- X509v3 Subject Alternative Name: shows your DNS and IP
- Key Usage / EKU: correct for Machine SSL
If everything matches, you’re good to go.
Step 4 — Submit the CSR to Your Certificate Authority
Upload the CSR and request:
- Base64 certificate
- Full chain (root + intermediate)
Replace the Machine SSL Certificate
Once you have:
- Your signed certificate
- The private key
- The full certificate chain
Run: /usr/lib/vmware-vmca/bin/certificate-manager or via vCert
Choose: Option 1: Replace Machine SSL certificate with Custom Certificate
Follow the prompts and restart services when requested.
Useful Commands and WebLinks
If VDT report shows expired CSR after cert replacement, use this Delete an expired CSR from MACHINE_SSL_CERT VECS Store .
Unable to see other Linked-Mode vCenter Servers in inventory
https://knowledge.broadcom.com/external/article/316436/cannot-change-the-vcenter-server-or-plat.html
How to correctly chain custom root/intermediate SSL certificates to import into vCenter
https://knowledge.broadcom.com/external/article/319670/toggling-the-vcenter-server-appliance-de.html
https://knowledge.broadcom.com/external/article/344894/error-the-source-appliance-fqdn-must-be.html
https://knowledge.broadcom.com/external/article/318222/vm-operations-hang-due-to-caseinsensitiv.html
https://knowledge.broadcom.com/external/article/345500
https://knowledge.broadcom.com/external/article/392246/vcenter-services-fail-to-start-when-host.html
https://knowledge.broadcom.com/external/article/399695/updating-the-network-configuration-of-th.html
https://knowledge.broadcom.com/external/article/324990
https://knowledge.broadcom.com/external/article/319670/toggling-the-vcenter-server-appliance-de.html
https://knowledge.broadcom.com/external/article/322262/previous-machinesslcert-subject-alternat.html
https://knowledge.broadcom.com/external/article/387415/pnid-change-causing-wcp-and-managed-serv.html
Manually reviewing certificates in VMware Endpoint Certificate Store for vSphere 6.x and 7.x
https://knowledge.broadcom.com/external/article/305288/unable-to-see-other-linkedmode-vcenter-s.html
Use vmafd-cli to get the PNID value
/usr/lib/vmware-vmafd/bin/vmafd-cli get-pnid --server-name localhost && hostname -fUse below command to confirm the domain-name of the vCenter server. eg: vsphere.local
/usr/lib/vmware-vmafd/bin/vmafd-cli get-domain-name --server-name localhostVerify vCenter SSL cert from command prompt or Verify SSL on port 443
echo | openssl s_client -connect localhost:443To restart all services, first stop then start all the services:
# service-control --stop --all && service-control --start --allCheck PSC Replication Partners
/usr/lib/vmware-vmdir/bin/vdcrepadmin -f showpartners -h localhost -u administrator -w Administrator_PasswordCheck Replication Status
/usr/lib/vmware-vmdir/bin/vdcrepadmin -f showpartners -h localhost -u administrator@vsphere.localRun the following command to check the Subject Alternative Name field of the updated Machine SSL Certificate or the vCenter’s registered DCName
/usr/lib/vmware-vmafd/bin/vecs-cli entry list --store MACHINE_SSL_CERT --text | grep -A1 AlternativeRun the command below to get the output of the TRUSTED_ROOTS certificate store in the VECS:
/usr/lib/vmware-vmafd/bin/vecs-cli entry list --store TRUSTED_ROOTS --text | grep -E "Subject:|Issuer:|Not Before:|Not After|Alias"