
This is by far the easiest way to deploy ESXI for VCF in a home lab environment.
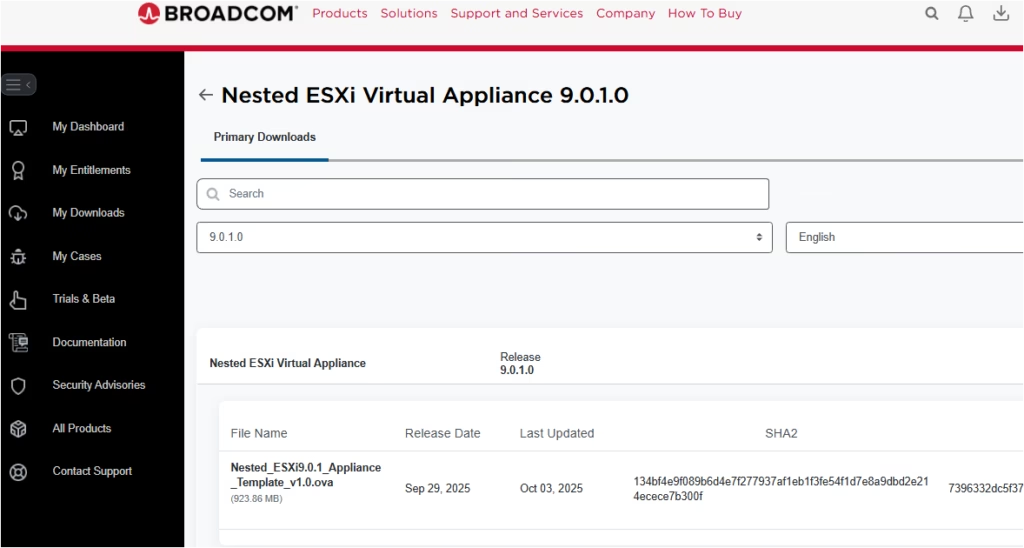
Navigate to Flings and download the Nested ESXi OVA.
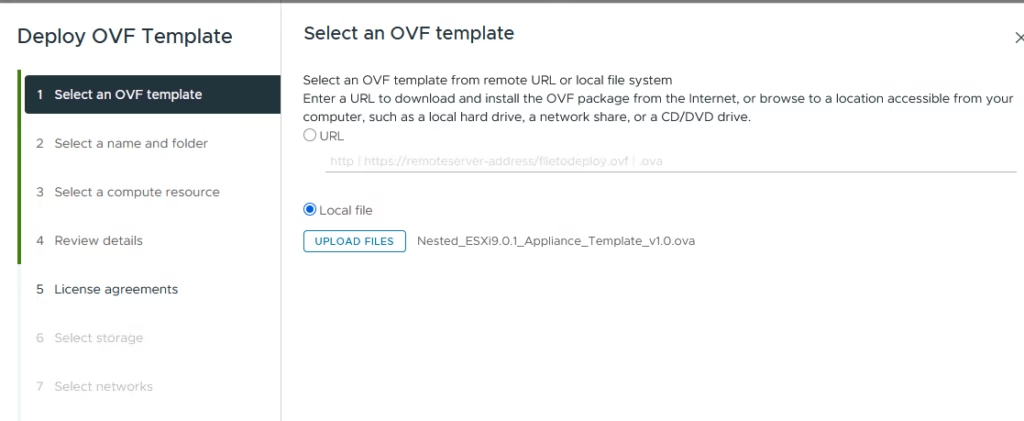
Select the OVA file you downloaded and click Upload
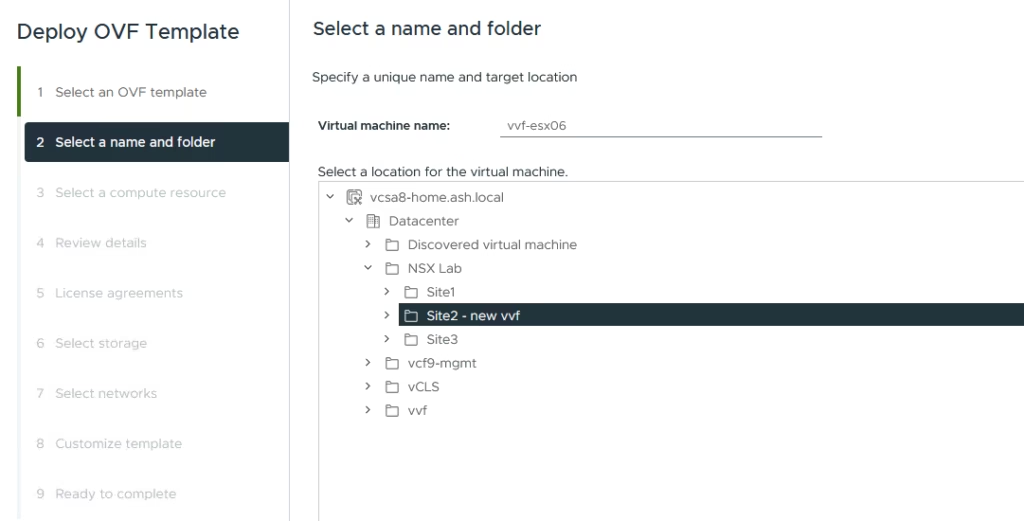
Assign a clear, consistent VM name
Click Next to continue
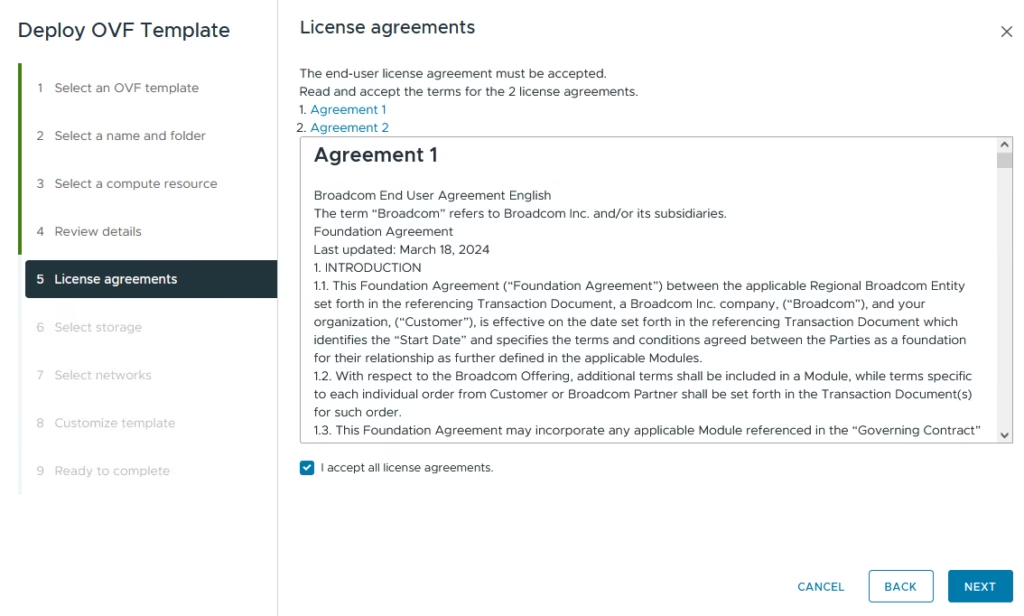
Accept the EULA.
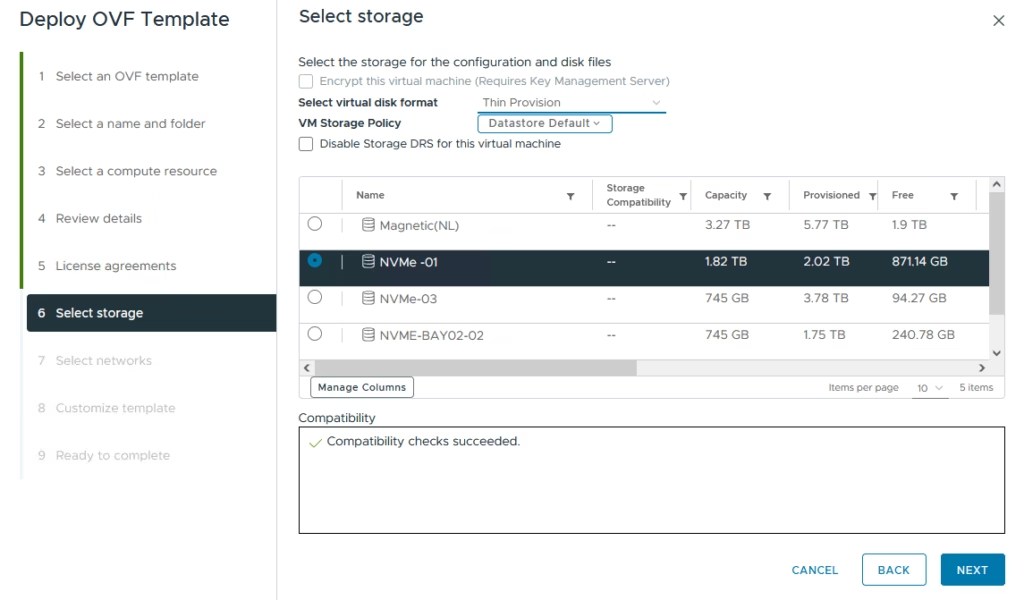
Choose the datastore for deployment.
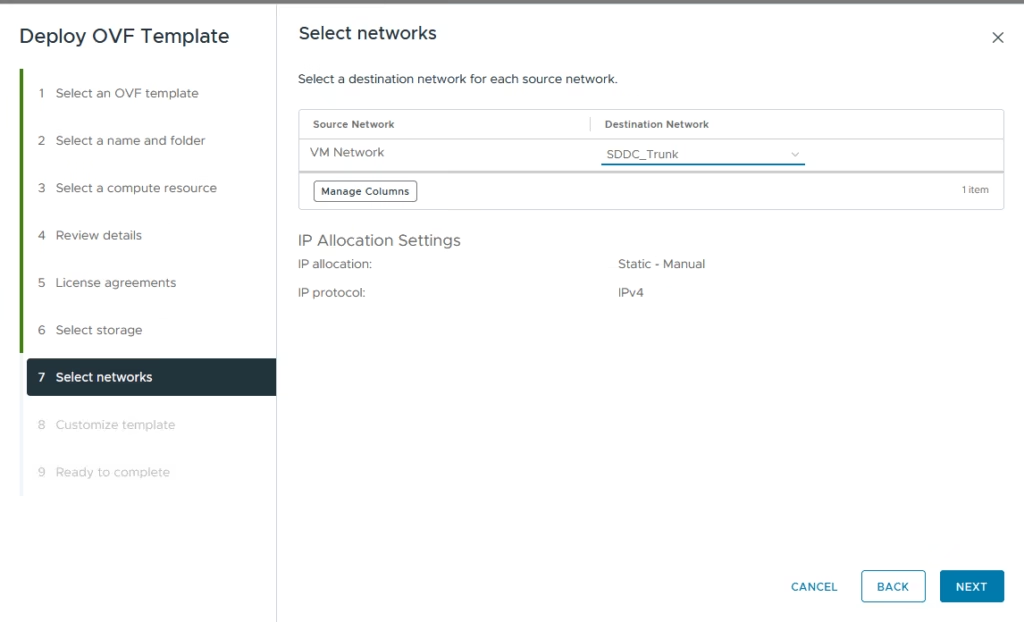
Connect the VM to your trunked port group.
Configure Host Management Settings
Fill in:
- Hostname
- Management IP
- VLAN ID
- DNS
- NTP
- Root password
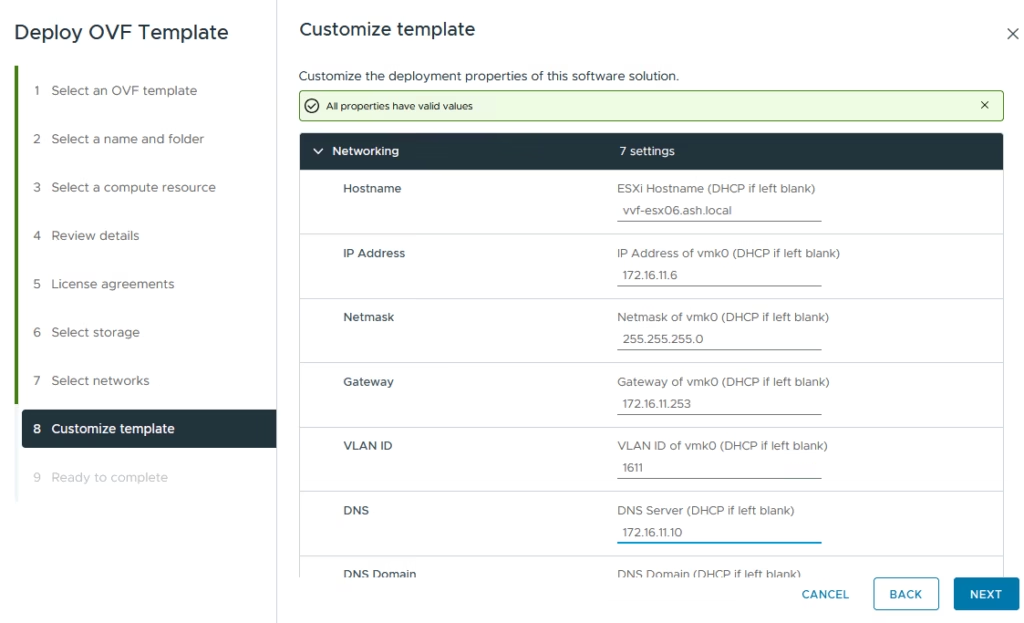
Enter information for host management network such as ntp, dns, root pasword etc
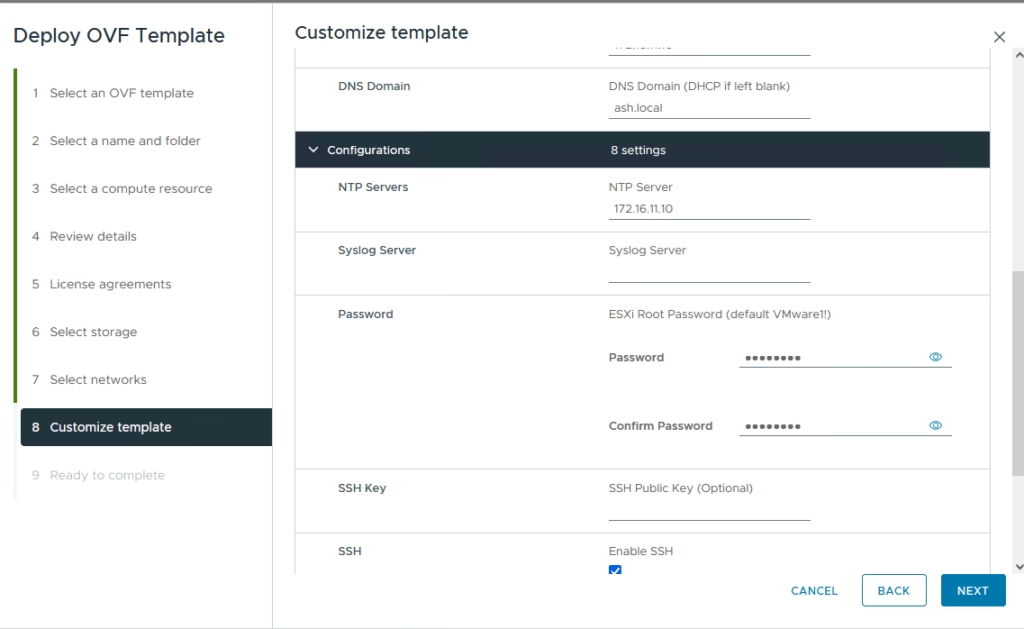
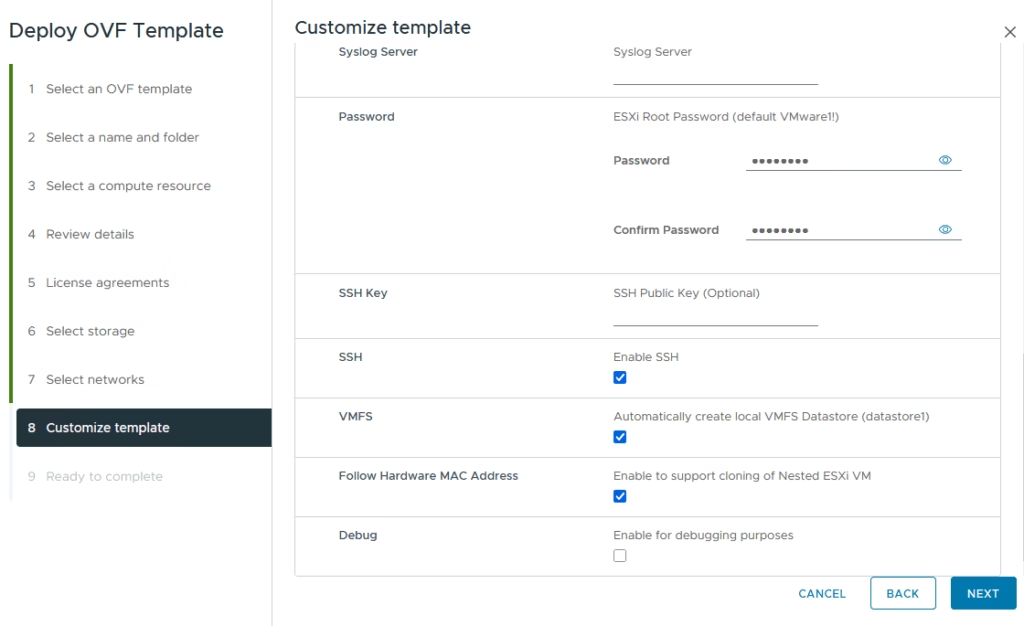
Enable:
- SSH
- VMFS datastore creation for first datastore on esx
- Follow Hardware MAC Address
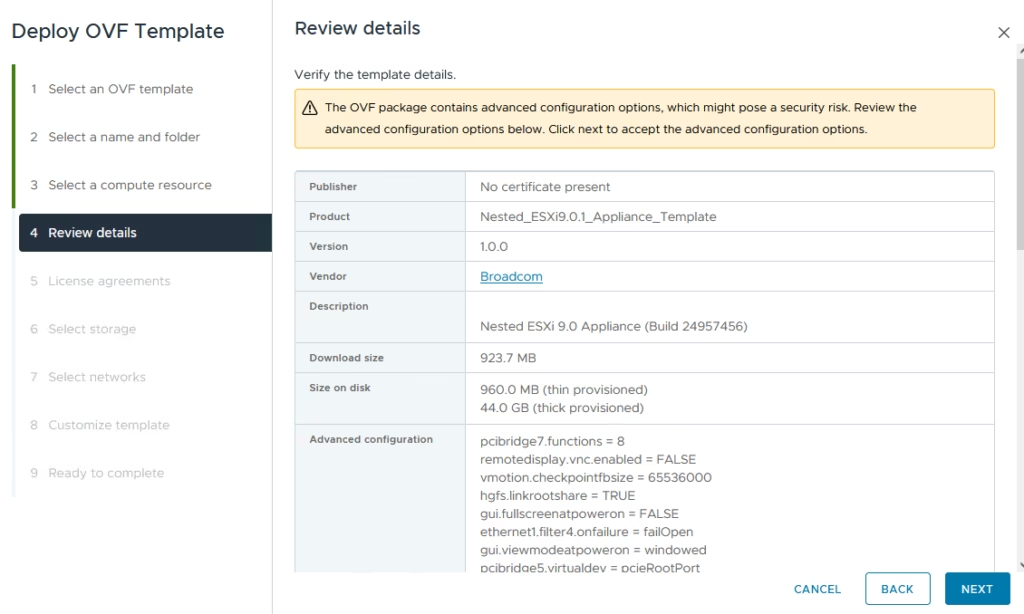
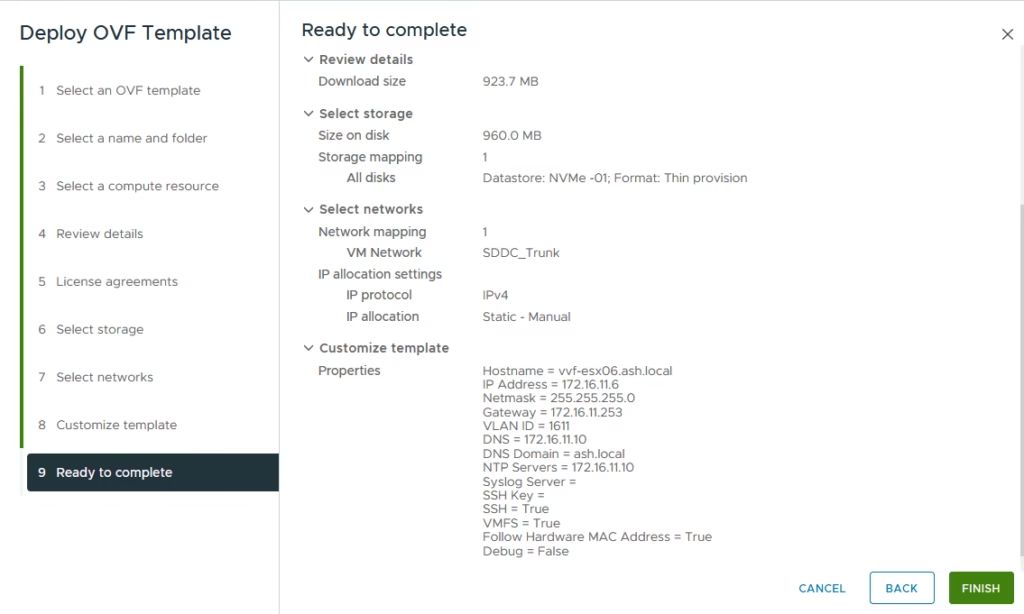
Review and finish the deployment
Review the information you entered and click Finish
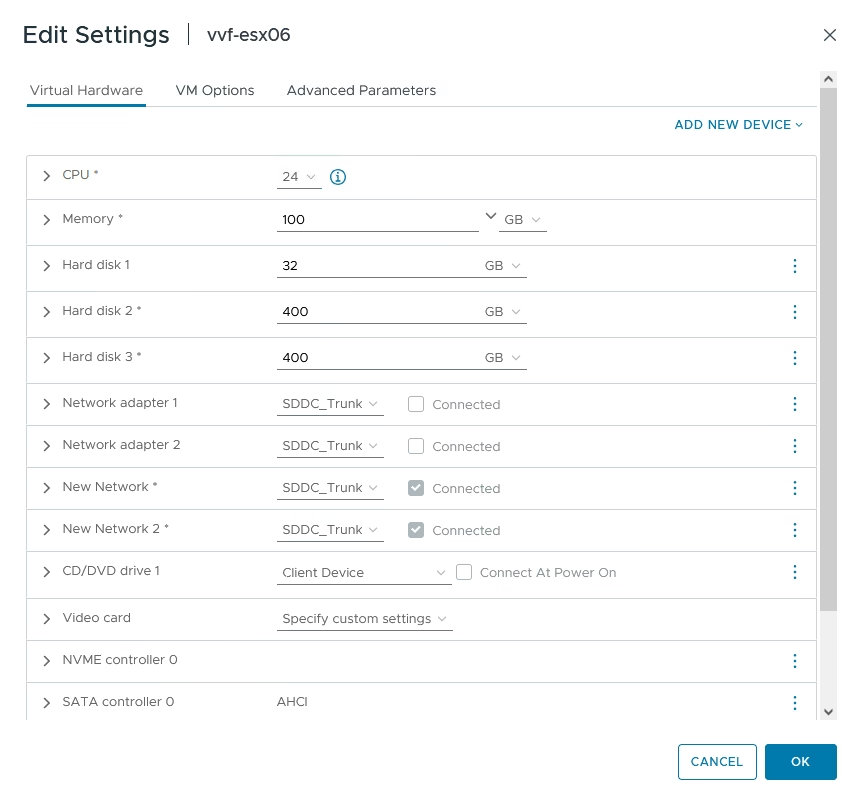
- Increase memory to 100 GB
- Reconfigure the two additional disks for vSA
- Add three more trunked network adapters for VCF traffic separation
Changing the System Certificate
The next issue is that we will need to change the certificates on the template VM.
Set the hostname and fdqn as shown from CLI
[root@sfo01-m01-esx02:~] esxcli system hostname set –host=sfo01-m01-esx02
[root@sfo01-m01-esx02:~] esxcli system hostname set –fqdn=sfo01-m01-esx02.ash.local
To regenerate new certificate on esx, just run the command as shown
/sbin/generate-certificates
Restart hostd and vpxa services by executing the following command:
/etc/init.d/hostd restart && /etc/init.d/vpxa restart At this stage, our template is now fully ready for vvf deployments