

In this blog, we will learn to deploy a DFS server on Windows 2022.
A Microsoft Windows DFS server works on the principle of sending changed (delta) files across the network to keep files on our file servers in sync using the remote Differential Compression Algorithm (RDC). DFS shouldn’t be taken as a disaster recovery solution but it’s a solution meant for full HA of your files. If you delete a file on a write capable DFS server, it’s just replicated across
Thus DFS Replication allows you to synchronize directories with files (replicated folders) between servers that are part of a DFS replication group keeping all files in sync.
Summary of DFS Deployment
The following are the high-level steps required for our DFS deployment.
- DFS replication service to be installed on particpating servers.
- Folders chosen for Replication should be volumes with formatted with the NTFS file system. ReFS, FAT, and Cluster shared volumes are not supported with DFS.
- Servers in the replication group must belong to same AD forest
- Verify if AV Scanners need to allow the folders being replicated to exception lists.
- Install FS-DFS-Namespace,FS-DFS-Replication –IncludeManagementTools roles on file servers
- Create DFS NameSpace
- Add Shared Folders to Root Namespace
DFS VM Sizing Requirements
| VM | OS | vCPU | Memory GB | Storage | Folder to replicate |
| FILE01 | Win 2022 | 2 | 10 | 100GB | C:“`\FIles |
| FILE02 | Win 2022 | 2 | 10 | 60 GB | C:“`\FIles |
| FILE03 | Win 2022 | 4 | 4 | 25GB | C:“\FIles |
Replication Modes on DFS
Stand-alone DFS namespaces – doesn’t use Active Directory services and HA of this namespace is achieved using the usual failover clusters.
Standalone based DFS namespaces will be accessible as

Domain-based DFS namespace – If you have an active directory setup, you should go with a domain-based DFS namespace.
Domain-based DFS namespaces will be accessible as

Types of Distributed File Systems
- Namespace DFS — DFS allows you to create virtual directory trees that unite shared folders across the corporate network. It is possible to configure multiple DFS namespaces. It uses simplified user access to geographically distributed files;
- Replication DFS — creates a replicated shared folder and tracks changes in files.
Install Distributed File System (DFS) with PowerShell
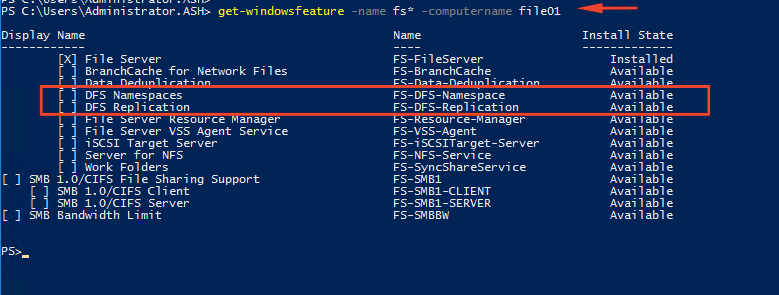
1- Verify if the File server role is installed on the server by running the command below;
“Get-Windowsfeatures -name fs*” -computername file01
2- A DFS Server can be installed on a Windows Server will just one quick PowerShell command
Install-WindowsFeature -Name FS-DFS-Namespace,FS-DFS-Replication –IncludeManagementTools -ComputerName File01

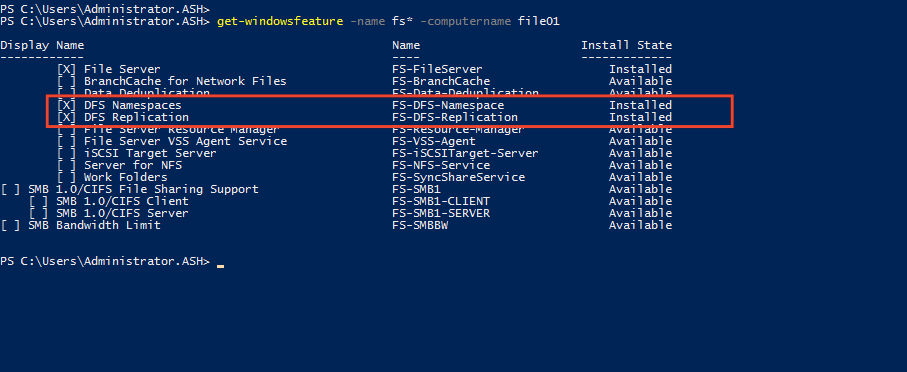
3- Verify if the DFS role is installed on the server by running the below Powershell command.
“Get-Windowsfeatures -name fs*” -computername file01
Install Distributed File System (DFS) with GUI
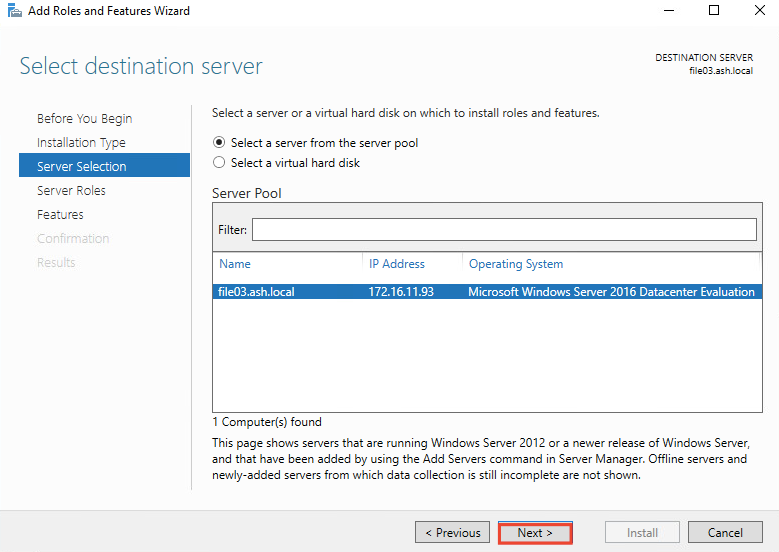
4- Click Manage then click Add Roles and Features. select Rule-based or feature-based installation and click Next.
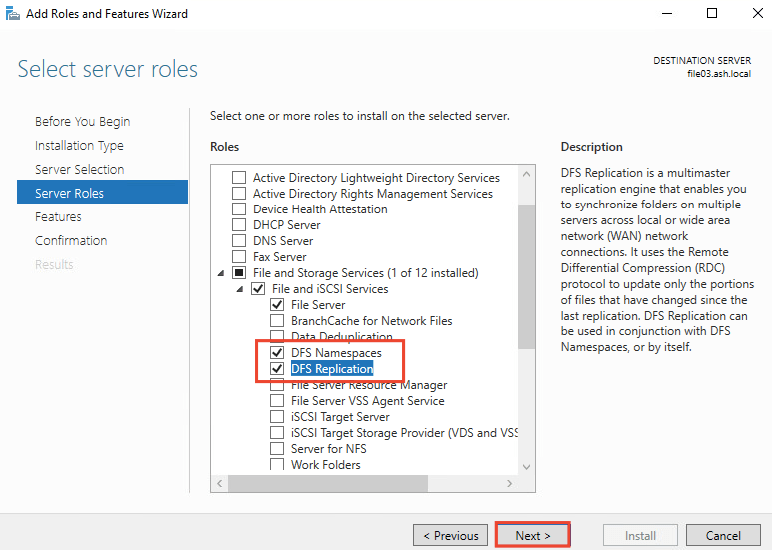
5- Under Server Roles Choose Files and Storage Services then expand File and iSCSI Services and choose DFS Namespace, DFS Replication and Cick Next
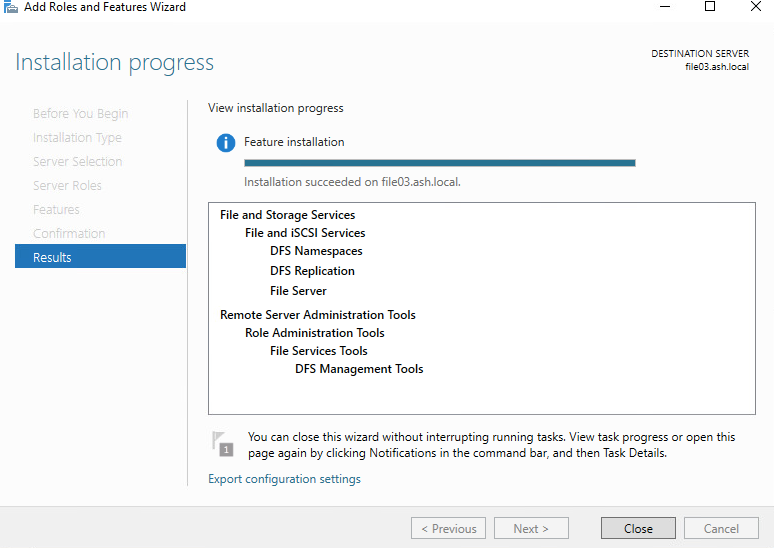
6- Choose Install to begin installation

7- Click Close when the installation process has finished,
Create DFS NameSpace
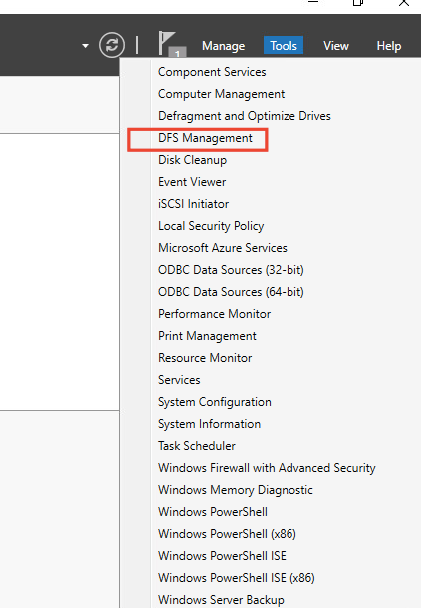
8 – Launch DFS Management to create a domain-based namespace or stand-alone namespace.
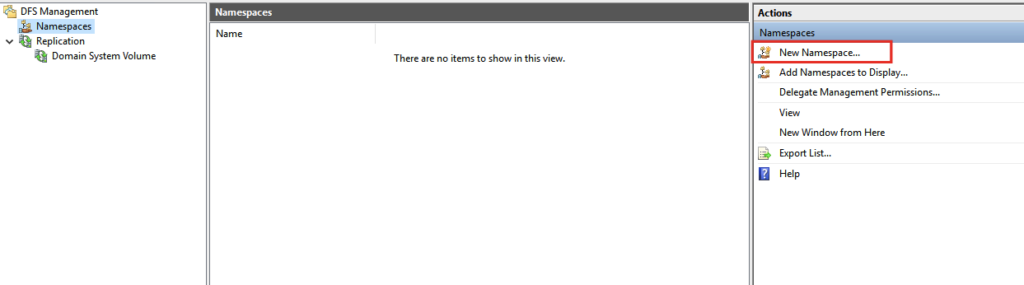
9- On the DFS Management console click New Namespace on the Actions menu to open the New Namespace Wizard.
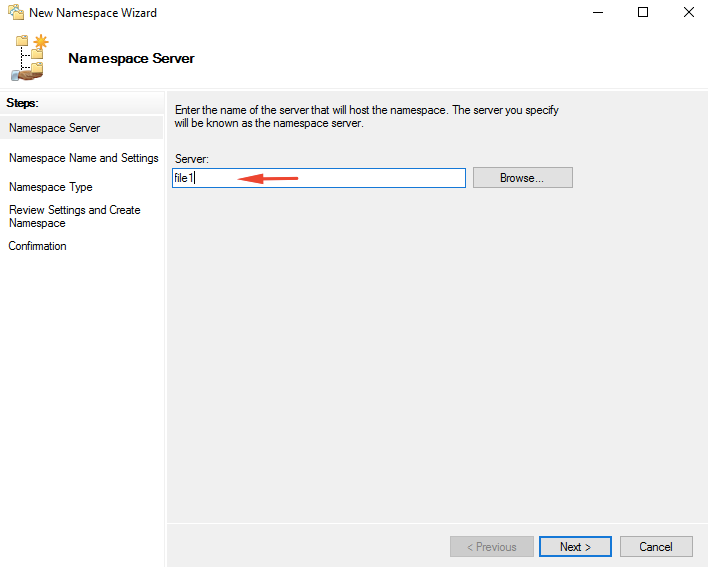
10- Type the server name you want to use as a namespace host and click Next. We will choose file1 server here
11- On the Namespace Name and Settings page, type a name as shown then click Edit Settings.
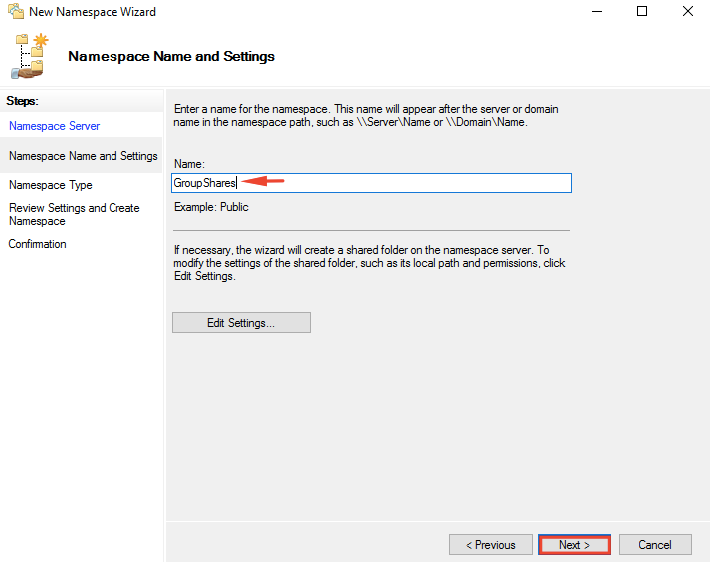
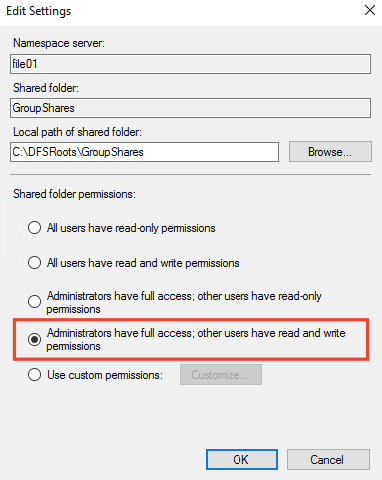
12- Select Administrators have full access: other users have read and write permission on the Edit namespaces settings page
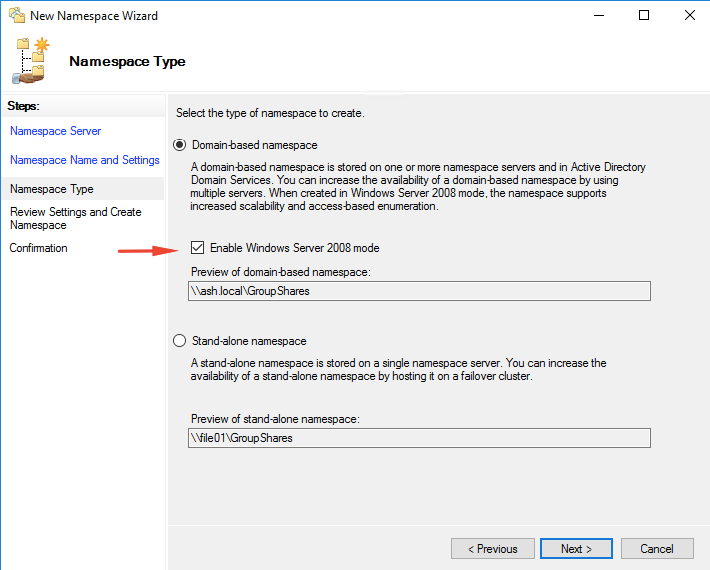
13 – Choose Domain-based namespace on the Namespace Type page and then click Next.
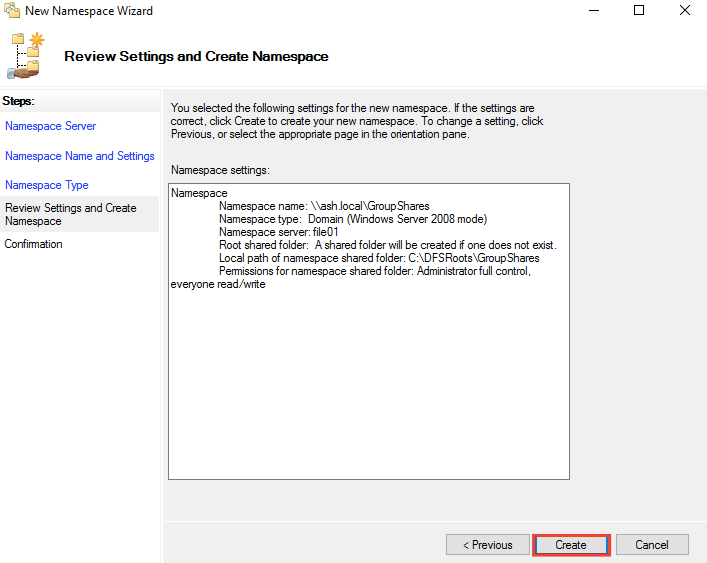
14- Click Create to create the namespace and click Close to close the namespace processing wizard page.
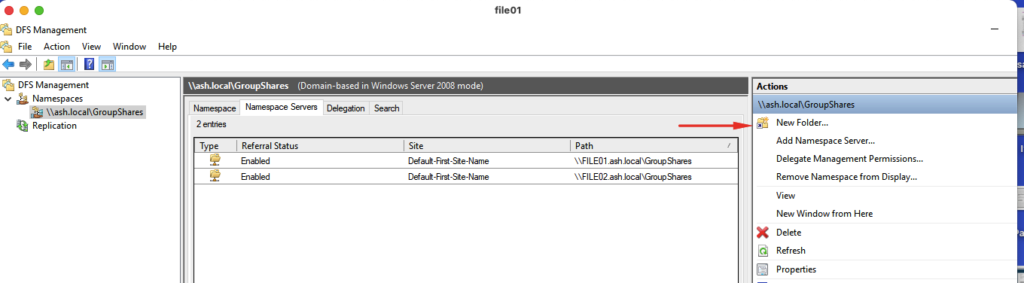
15- The namespace was created successfully. Now we will add another namespace server to replicate with each other.
Add a Namespace Server
Let’s add the second file server in order to replicate the shared resources between file servers.
16- Go to the DFS Management page, expand Namespaces then select the created namespace and Namespace Servers tab. Click add a namespace server from the action menu. Type the name of the second file server and click Edit Settings.

17- Select the Administration have full access: other users have read and write permission on the edit permission settings page
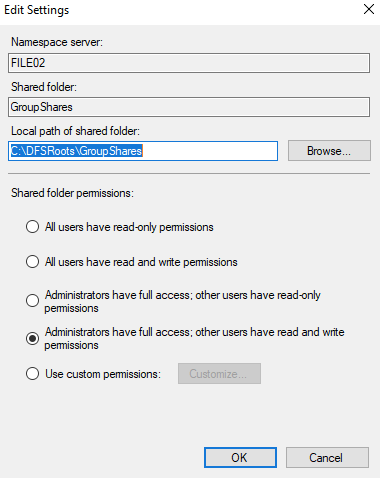
18- Click OK to add the namespace server without any erros.
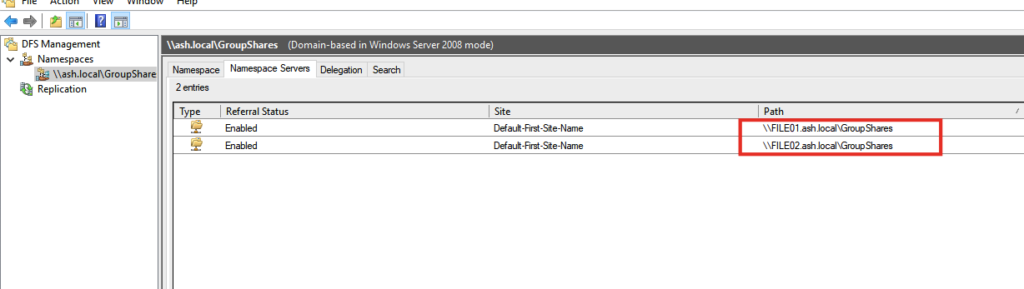
The result should be like the screenshot.
Add Shared Folders to Root Namespace
We need a shared folder within both file servers to replicate data between them. These shared folders keep the shared files and resources so let’s create the folders and share them.
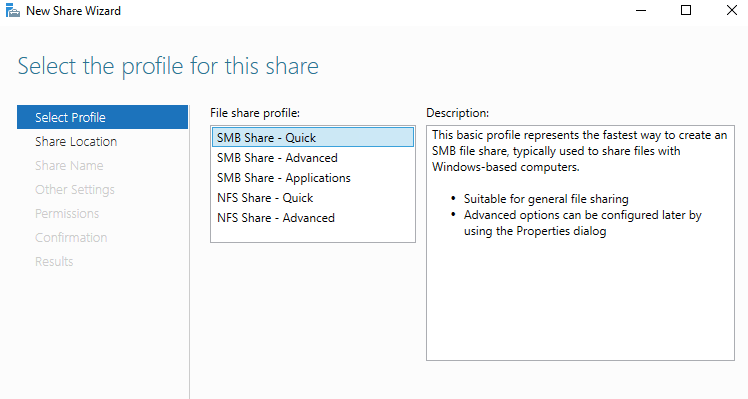
19- From File and Storage Services on Server Manager dashboard, right-click on the main page and click New Share to create a shared folder.

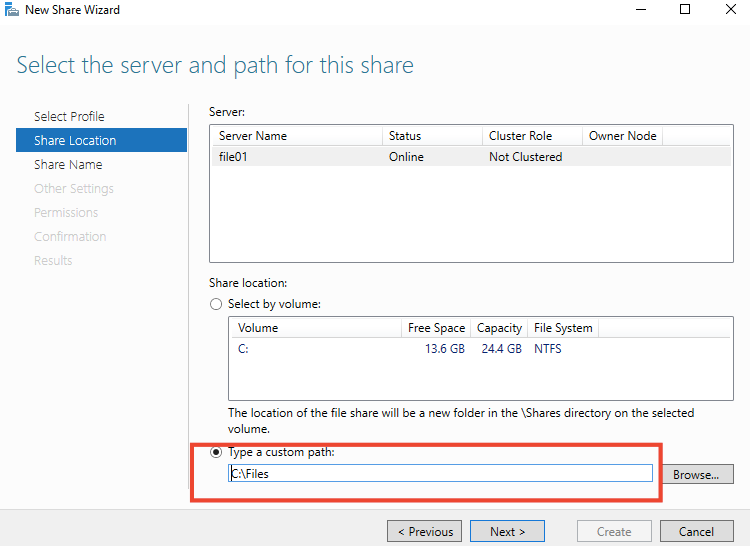
20- Select the Type a custom path on the Share Location page and type the location of the folder in which you want to share it then hit Next.
21- I’m creating a new folder named as files on fileserver1
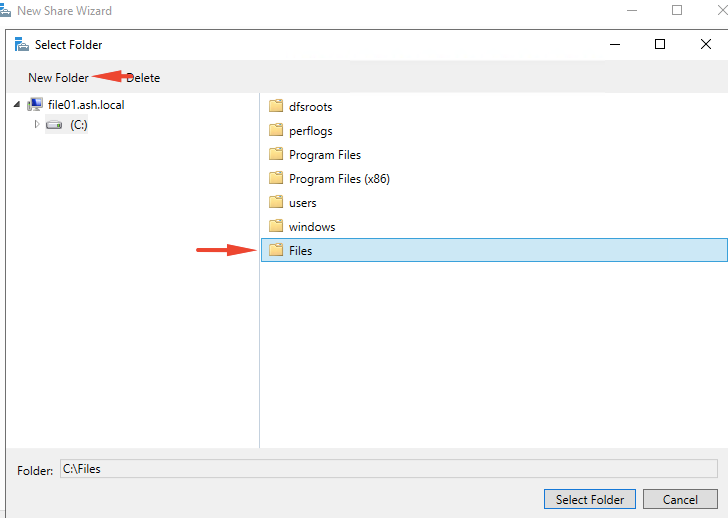
22-Choose the folder we created
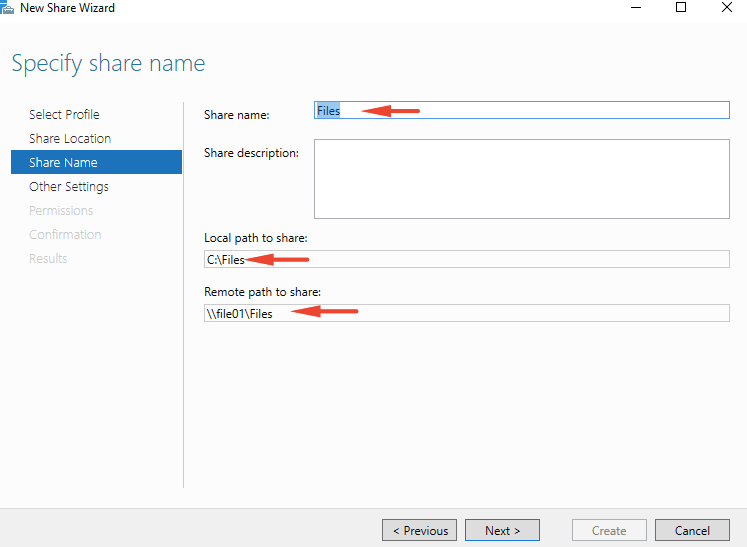
23- Specify the share name and description then click Next. If ask you the path does not exist,
24- Select Enable access-based enumeration option and click Next.

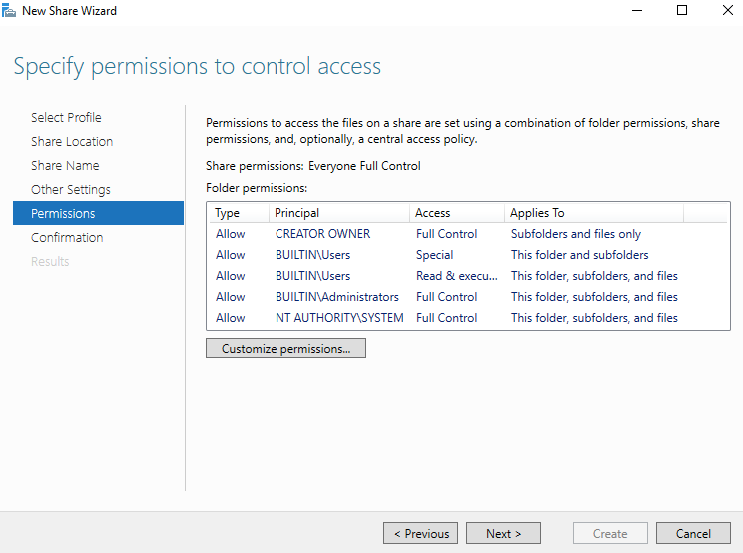
25- On the Permission page click Next. If you want to set permission to a domain user, click customize permissions and set permission for domain users group and domain admins group.
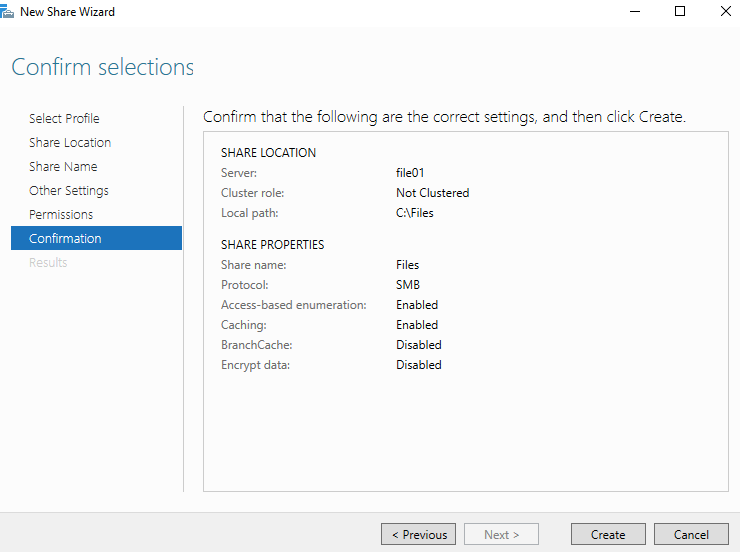
26- Click Next on the Management Properties page. On the Quota page set a quota for the path if you want then click Next. On the Confirmation page click Create then click Close to complete the task.
27- Our Share is thus created
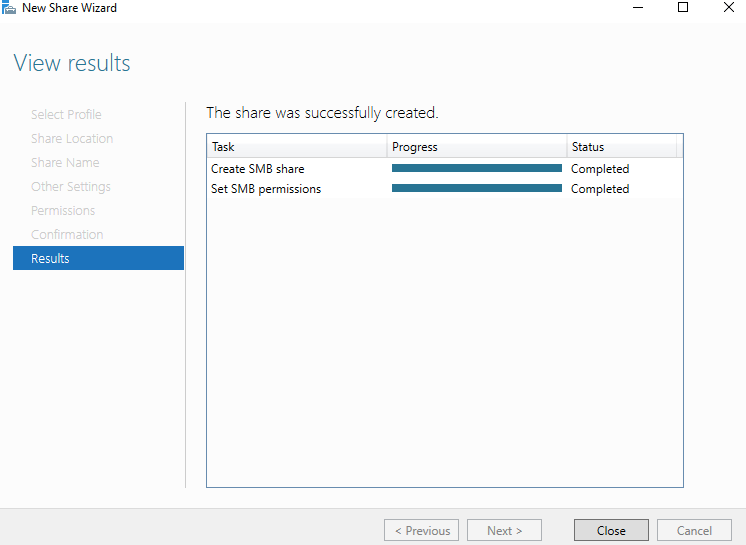
28- The Summary tab shows you have successfully created a share folder for our first file server
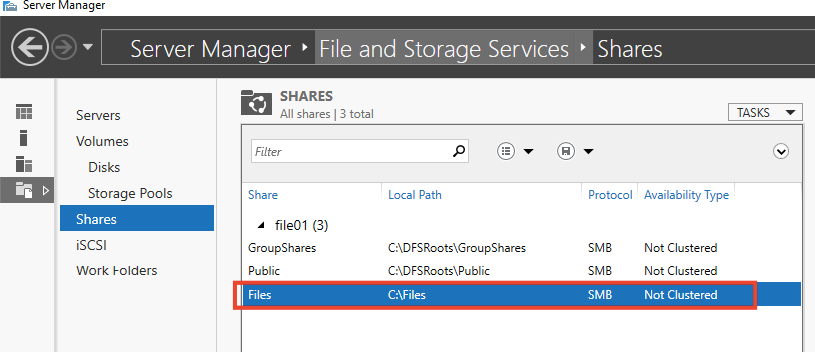
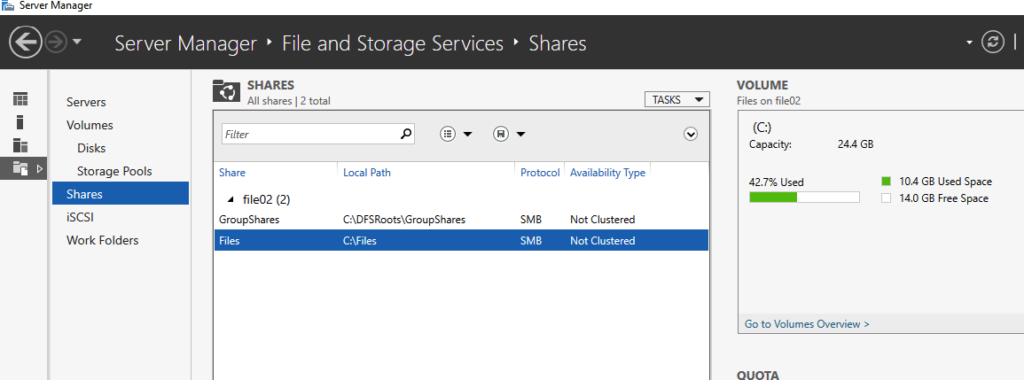
29- We now need to create the same folder for the second file server as well. I’ve repeated the above steps to create an SMB share.
Add Folder to DFS-N and Configure Replication
A replication group is a set of servers (members) that participate in the replication of one or more folders. DFS Replication allows you to synchronize directories with files (replicated folders) between servers that are part of a DFS replication group.
We will now need to add the two shared folders we created to the DFS namespace server for them to keep the shared resources and replicate data between them.
30- From the DFS Management console, click New Folder from the action menu and add the shared folders of both file servers like the screenshot.
31- Add both the folders we created under the file servers
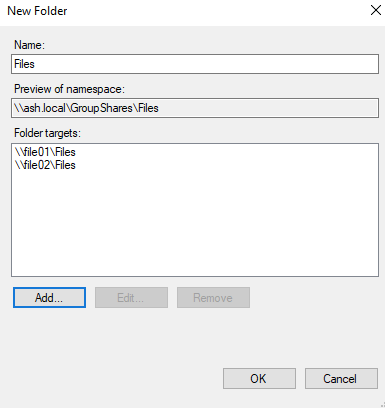
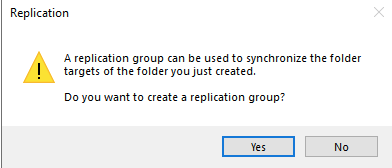
32- Choose to create the replication group
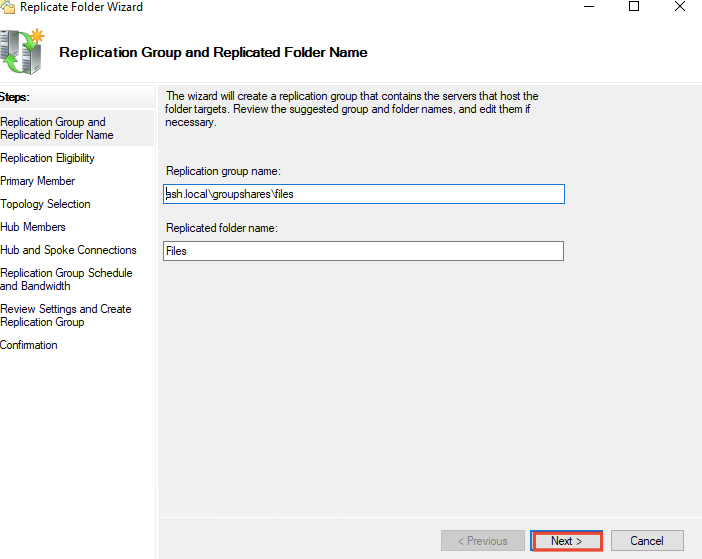
33- Click Next on the Replication Group and Replication Folder Name page.
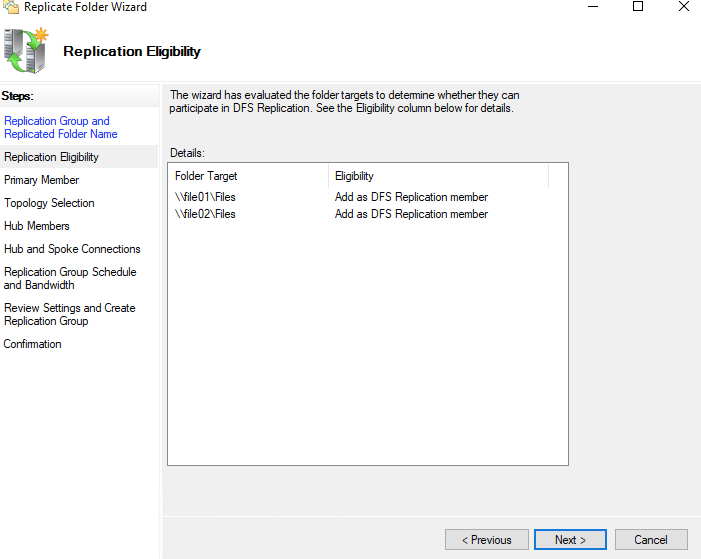
34- On the Replication Eligibility page click Next.
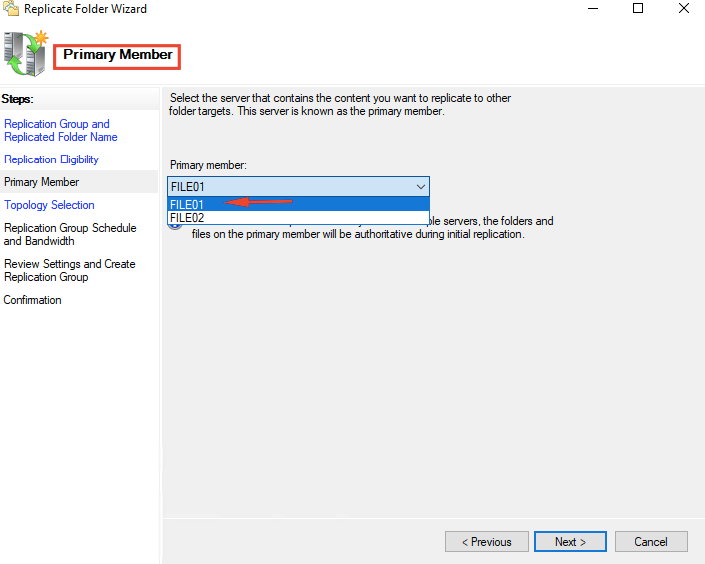
35- Select the first server (file1) as the primary member server and click Next.
36- Select the Full Mesh topology on the Topology Selection page and hit Next.

37- Leave the default setting on the Replication Group Schedule and Bandwidth then click Next.

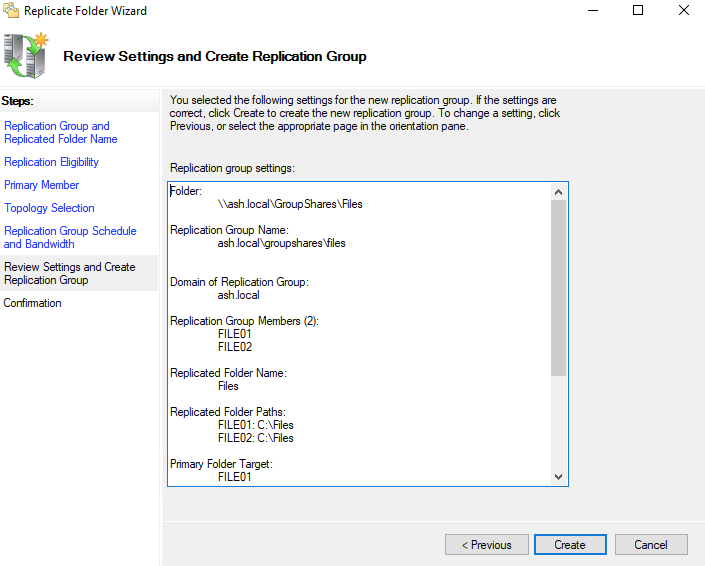
38- Review Settings and Create Replication Group only click Next to go to the next page.
39- On the Confirmation page. Click Close and close the page.

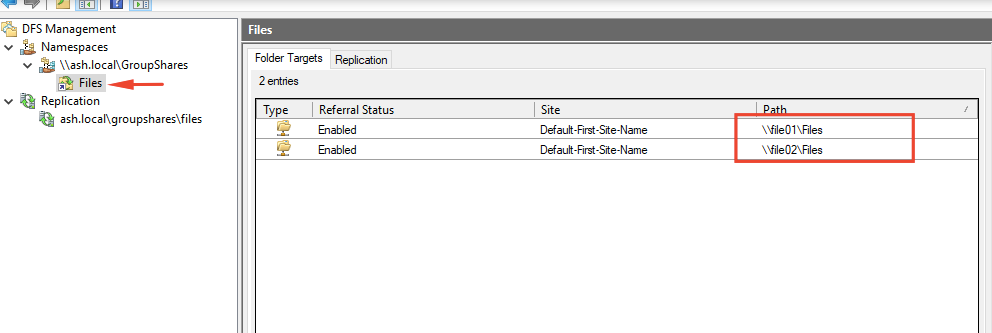
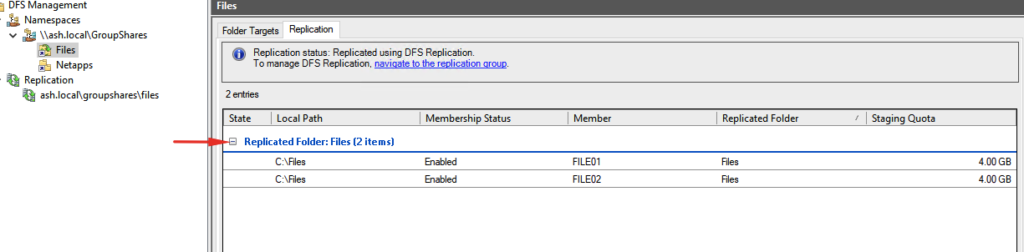
40- Finally, the configuration should finish successfully. Expand namespace to Files and see the result.
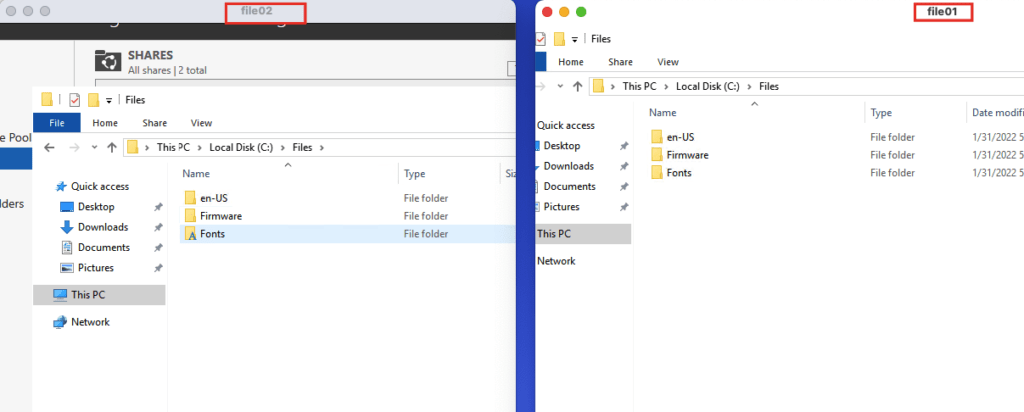
41- To test the replication between the first file server and the second file server, just copy a file to the shared folder (Files) from the first server and see the file should be on the second server as well.
42- The replication status can be viewed from the Status dashboard

That is it, is a simple practice to install and configure Distributed File System on Windows Server 2022