
This is a full-blown guide to cover the on-prem fully hoisted Azure Backup Server ( MARS/DPM ) configuration that we can use to back up our on-prem data onto the Azure Public Cloud. The second phase of this guide will focus on the recovery aspect of the files available in the Recovery Services vault to be restored via MARS. This product was previously known as Microsoft Data protection manager.
Backup is taken using a special agent called MARS (Microsoft Azure Recovery Services) agent installed on client servers. Files thus backed up via MARS will be stored locally and then moved on our Recovery Services Vault in Azure Cloud
Prerequisties
- Create a new Recovery Services Vault in Azure for on-prem only backup vault
- Configure Azure Backup Server
- Push Install Microsoft DPM agent ( backup agent ) to backup files from remote servers to Azure Backup Server
- Stage contents from Azure Backup Server on-prem to Azure Recovery Services Vault.
Creating Azure Backup Server
We begin by setting up a new recovery services vault for on-prem backups
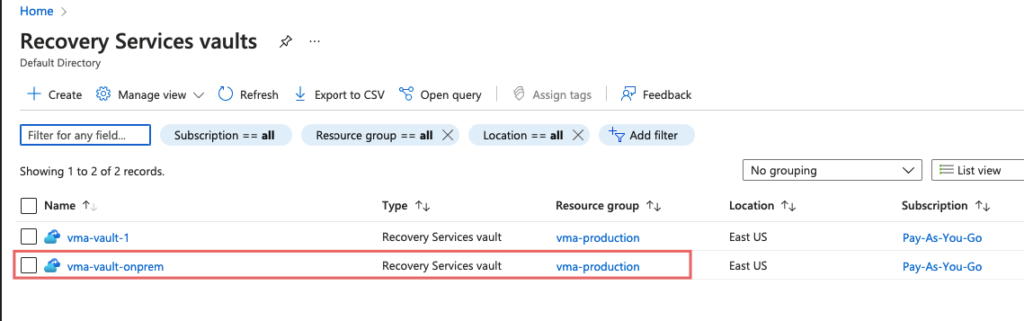
Under Recovery Storage Vault properties Choose our Workload type as On-Premises and Click Prepare Instructure.

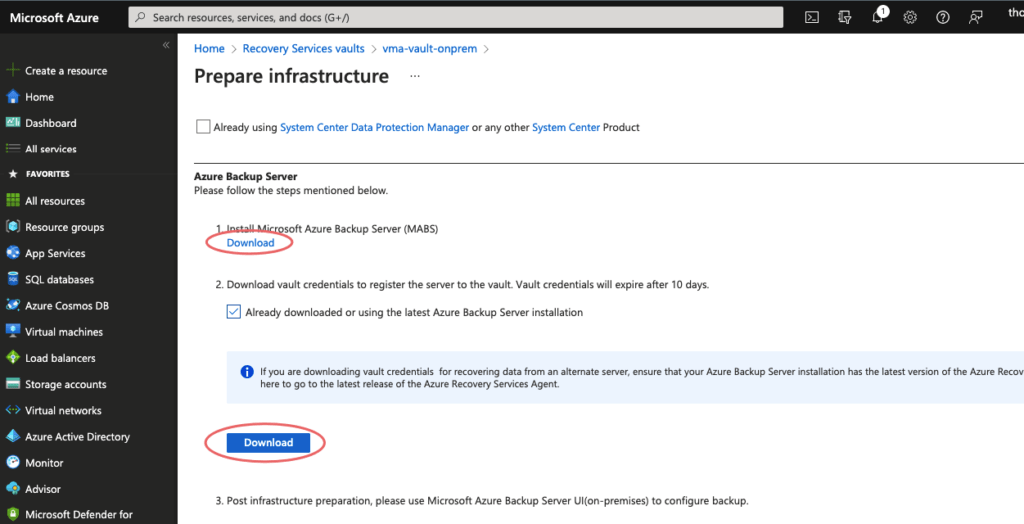
We will first install our Azure Backup Server ( Also called MARS ). We will need to pick up either the hypervisor as VMware or HyperV

Choose to download the Azure Backup Server ( MARS )
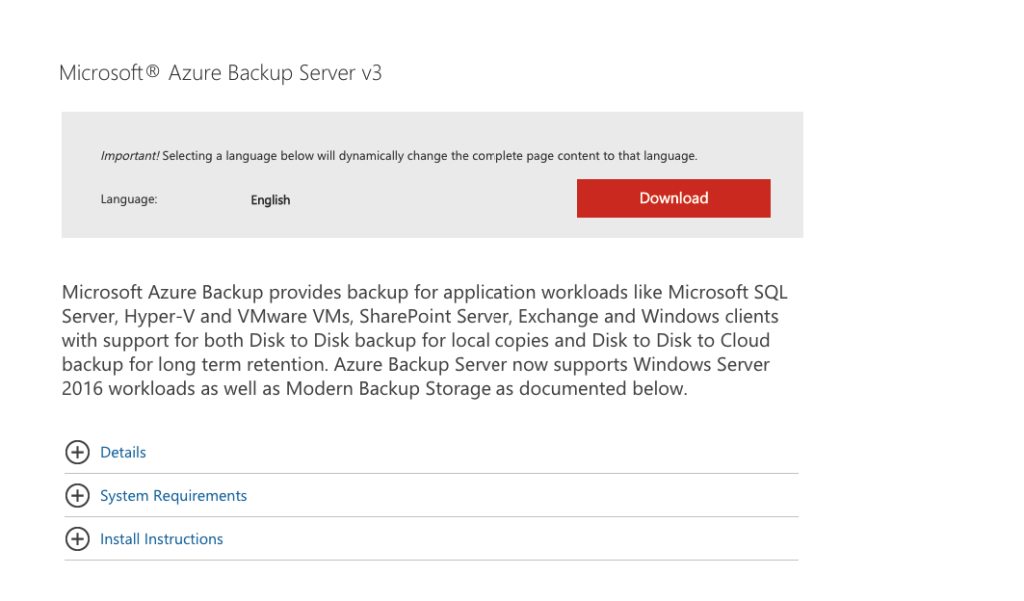
Download the Backup server
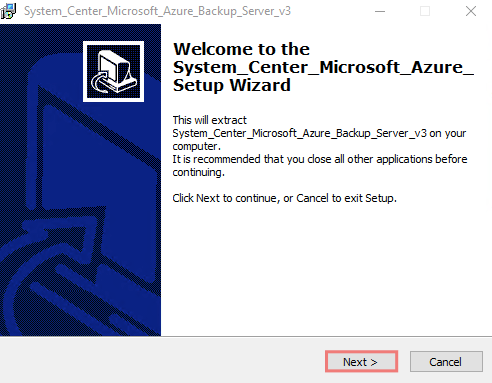
Extract all files from the downloaded bundle by clicking the .exe file

The .EXE will just join all these bin files into an executable setup.exe file format.
Choose a location to store the extracted files to

Click Extract

Finally finish the wizard
Launch setup.exe under the extracted folder and Choose to Install Azure Backup Server

Choose Next to continue

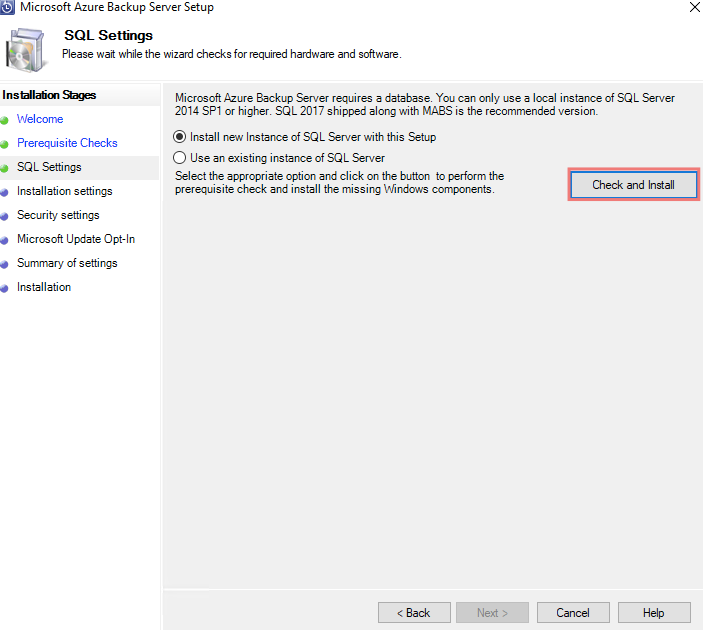
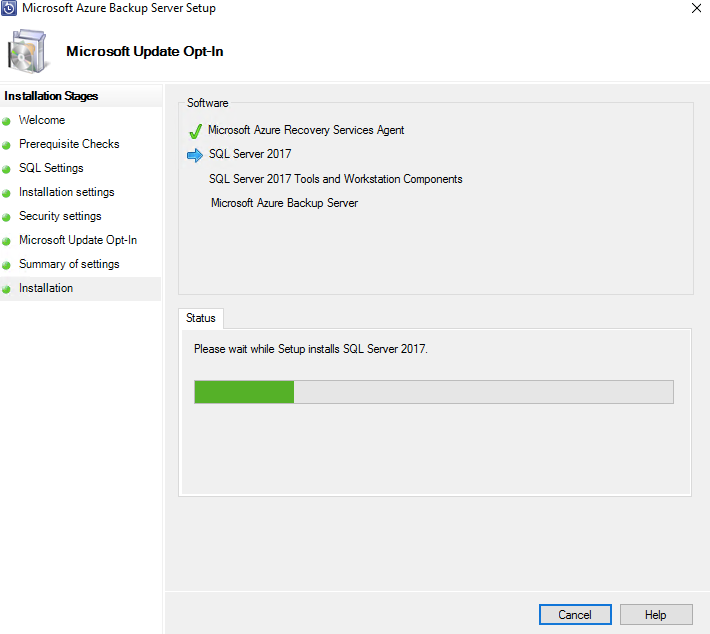
Click Check and Install to do a preinstall check. We will need to ensure we have.NET3.5 installed on our server
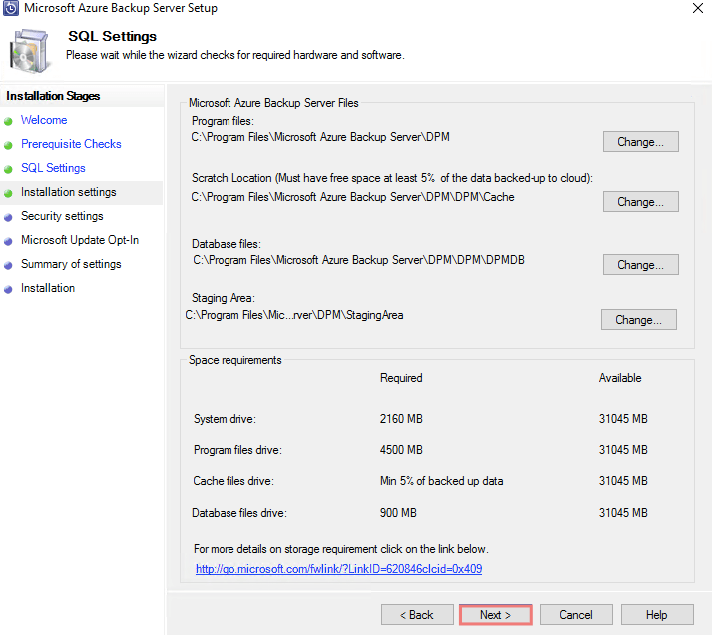
Choose the path to install the SQL server to
Provide a password for the SQL Database

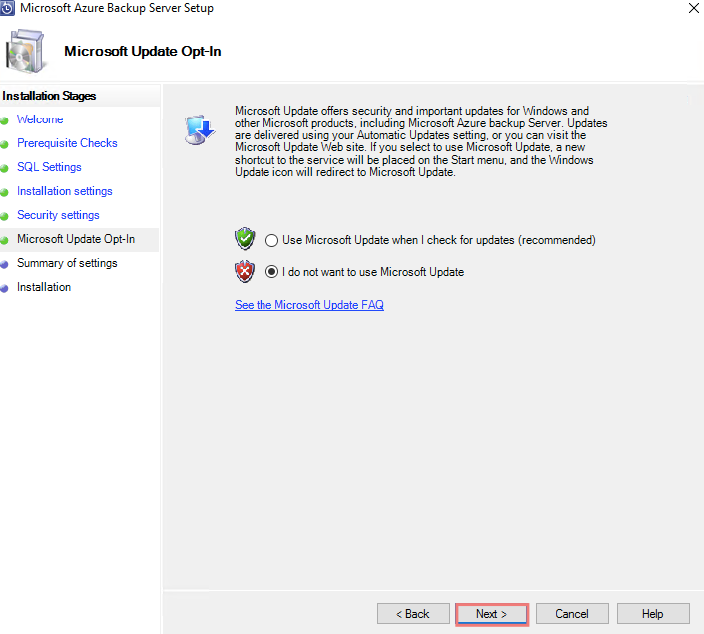
Ignore MS Updates for now
Validate all settings and continue
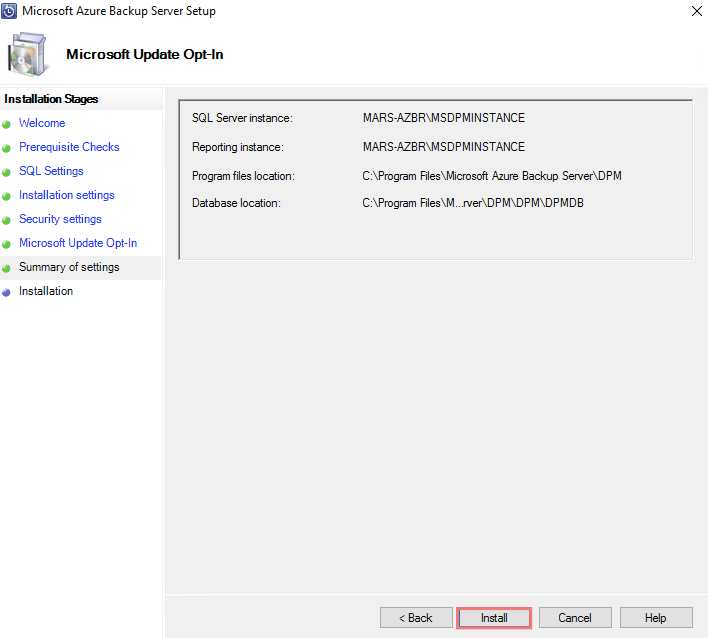
Click install to begin the configuration

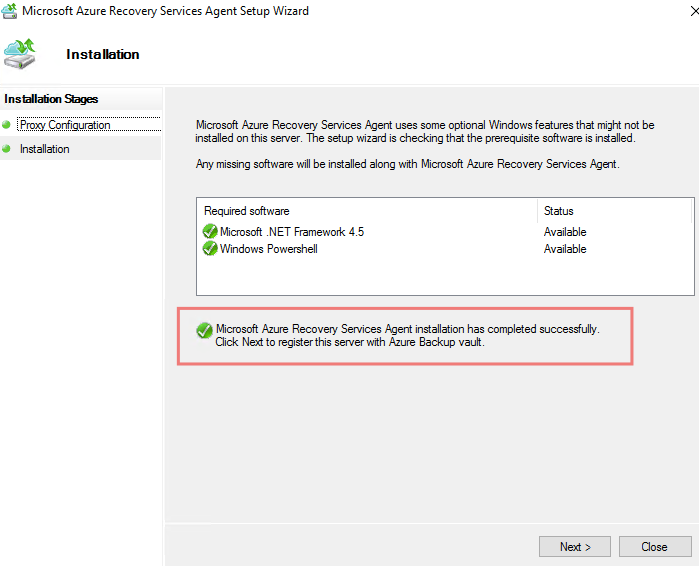
As seen the Backup Server has installed a Recovery Services Agent on our server
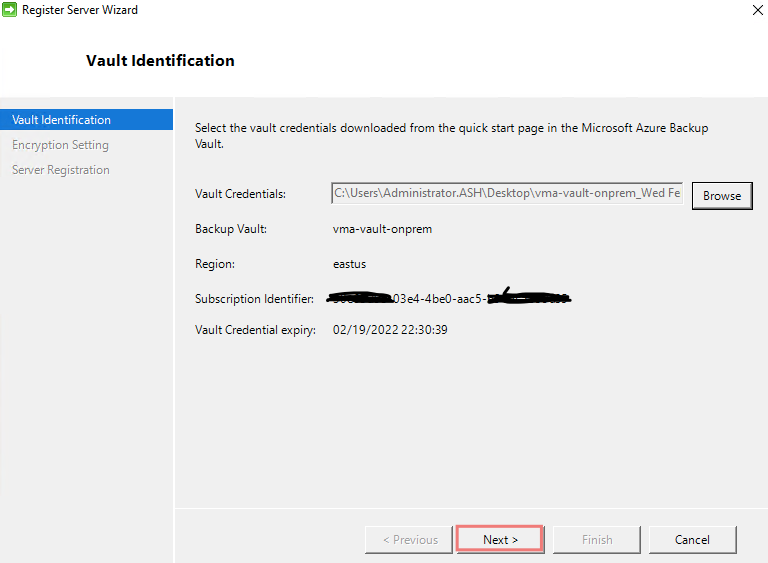
Go back to Azure Portal and download the vault credentials. We need this info to connect to our Azure Recovery Services Vault.

Proceed to the registration window to register the Backup Server with on-prem Azure.

Locate the vault credentials we downloaded earlier and click next
We will now need to provide a super-secret passphrase and ensure this passphrase is saved somewhere like Azure Keyvault

Wait for registration to finish and once done Azure Backup Server will begin its configuration

Our Azure Recovery Services Agent is registered and Azure will need a SQL server to hold all its backup config and catalog database
Click Next to Proceed with the installation

Wait for all services to come back online
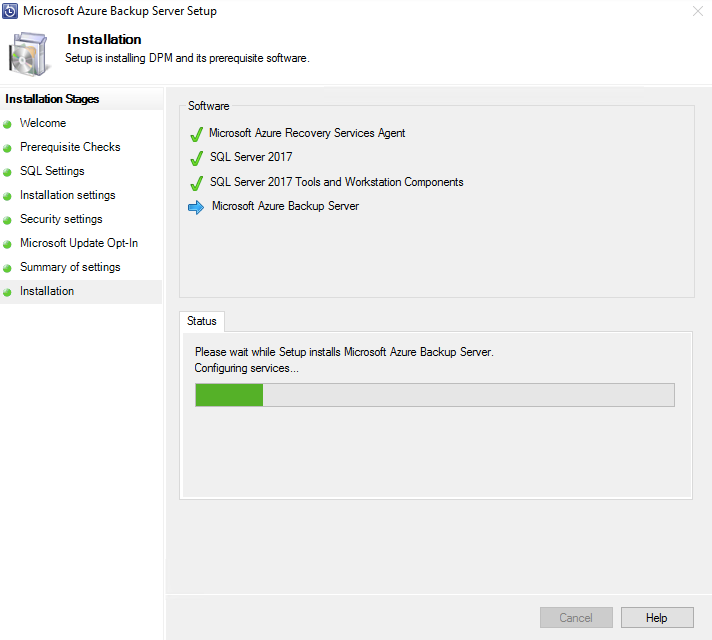
We are now done with Installing Azure Backup Server on our on-premises

How to Do Initial Config on Azure Backup
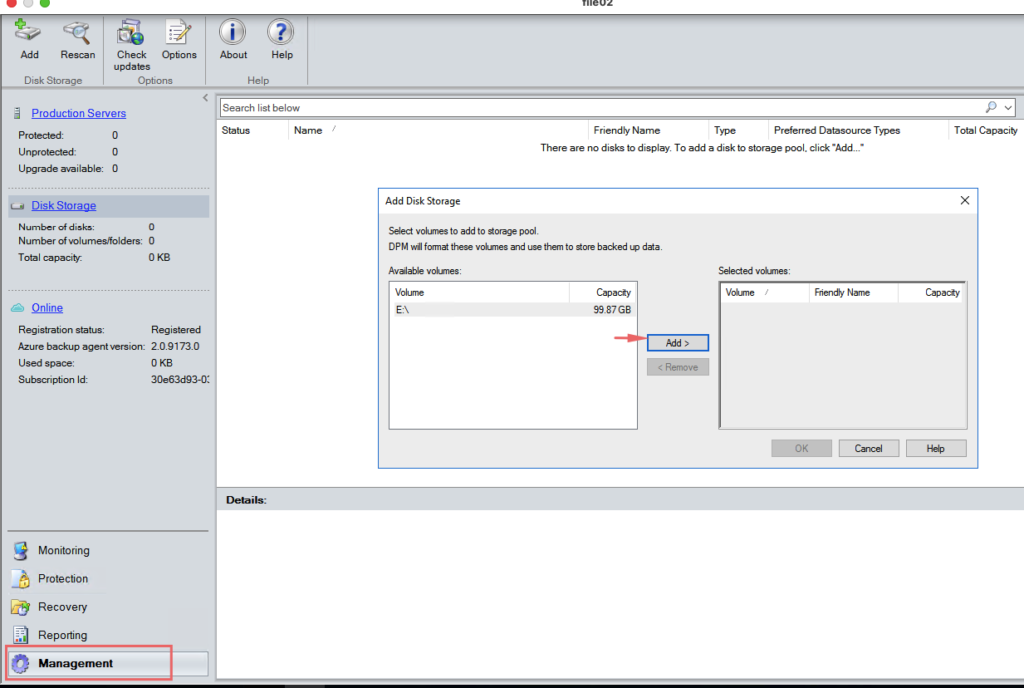
We will now need a backup storage unit on our Azure Backup Server to hold the initial backups we are taking. This is then be staged across to Azure Recovery services vault.
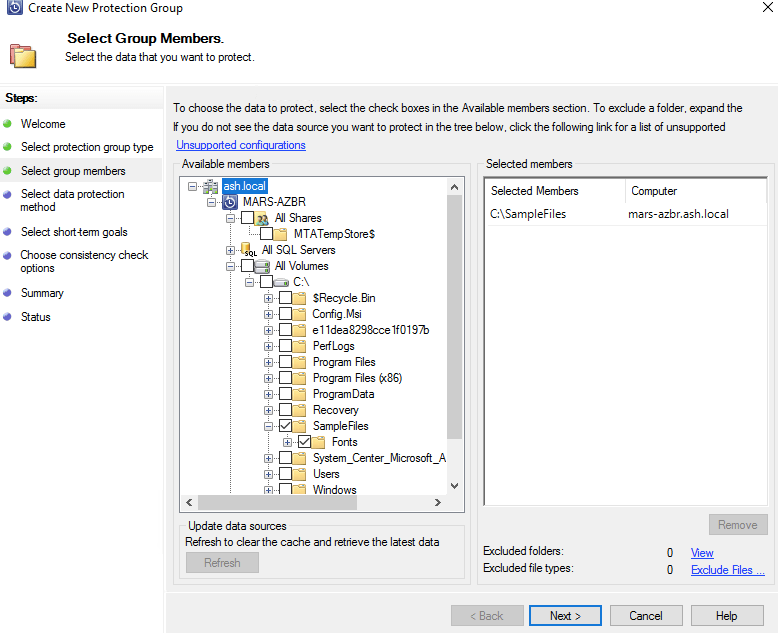
Click New to begin creating a protection group for backing up our servers

Click Next to continue

We will just pick a folder to backup
We have an option of just storing the data locally and/or keeping a copy in the cloud.

Choose the retention required for images to be kept onsite

Pick the disk we created as our Backup to storage disk
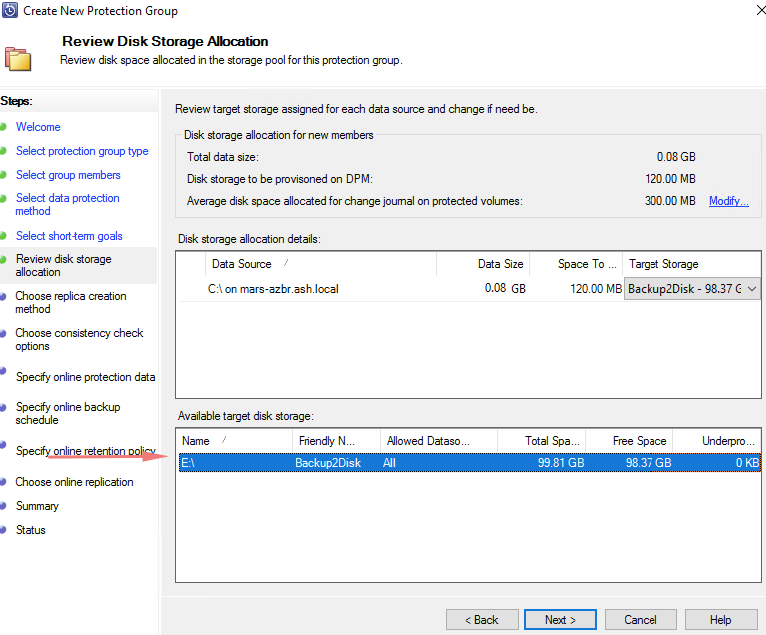
Click Next to continue
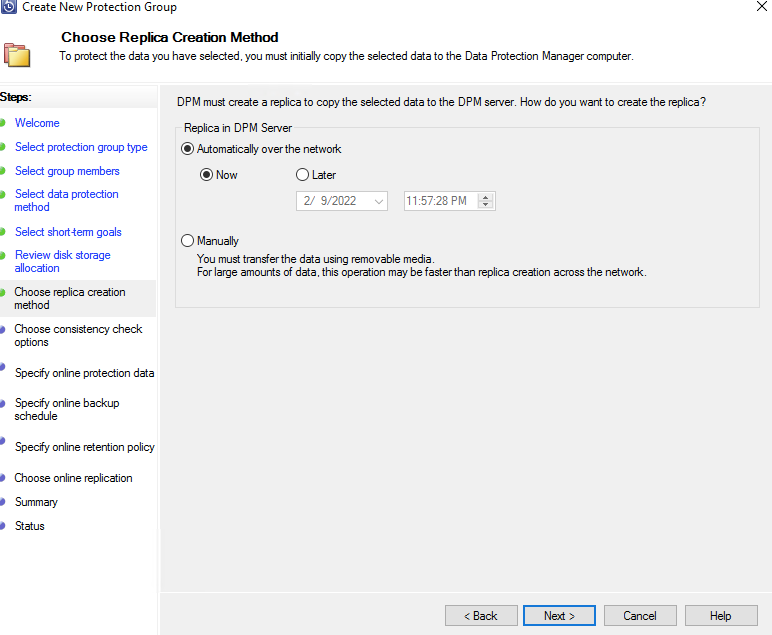
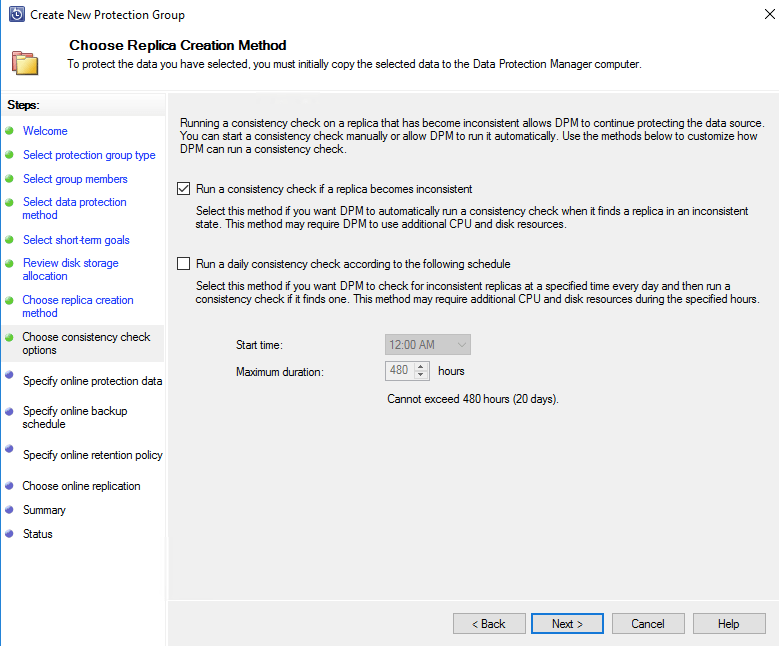
Click Next to continue
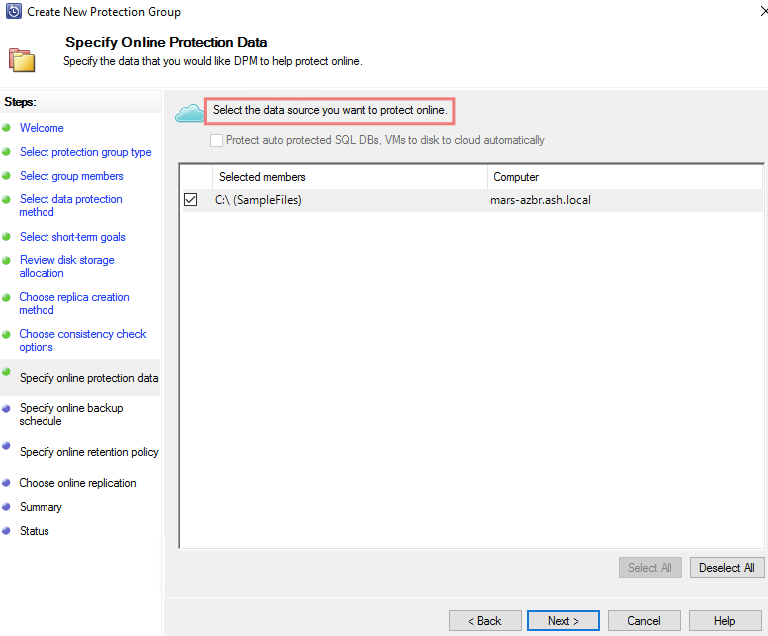
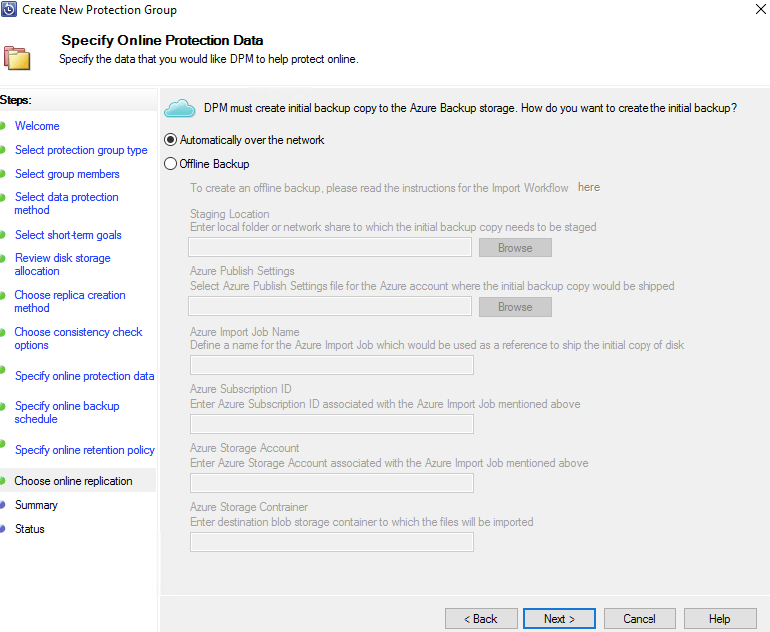
Select the data to be protected online
Pick a backup schedule as needed

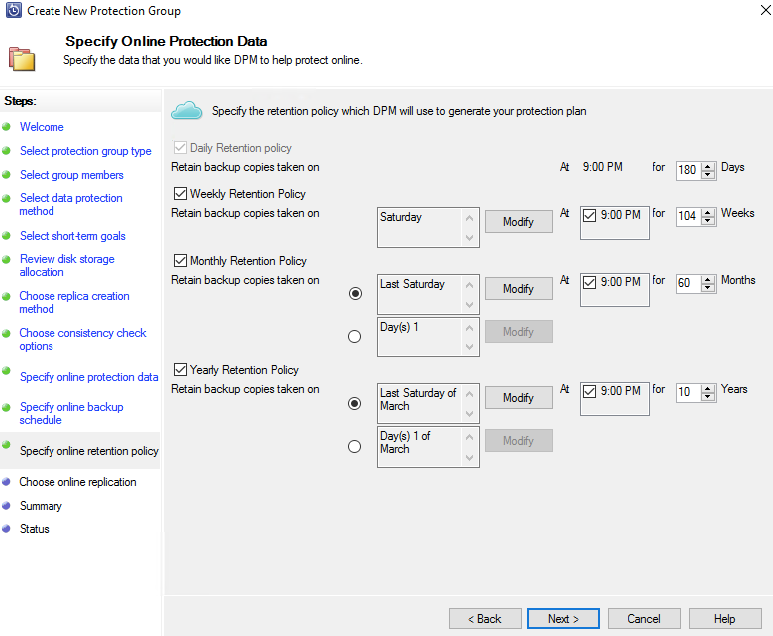
Choose the retention policy as needed
Click Next to continue
Validate all settings and click Finish
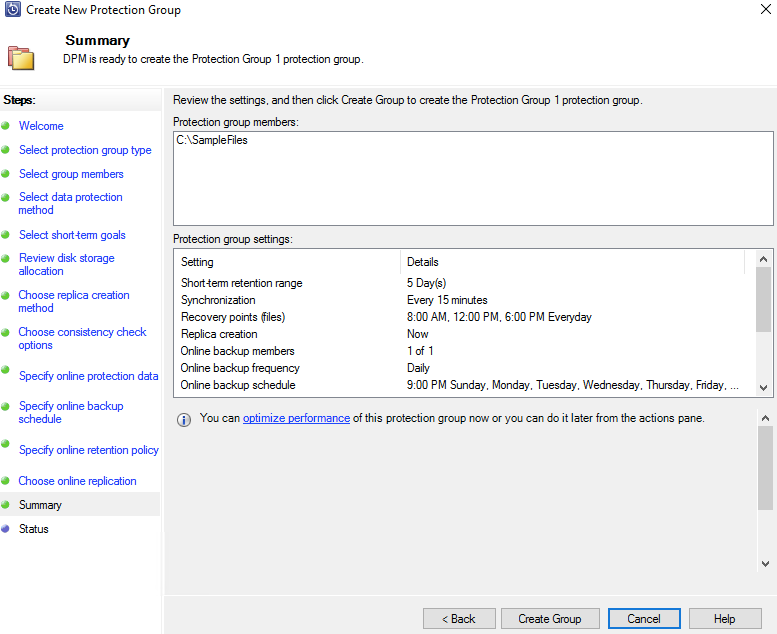
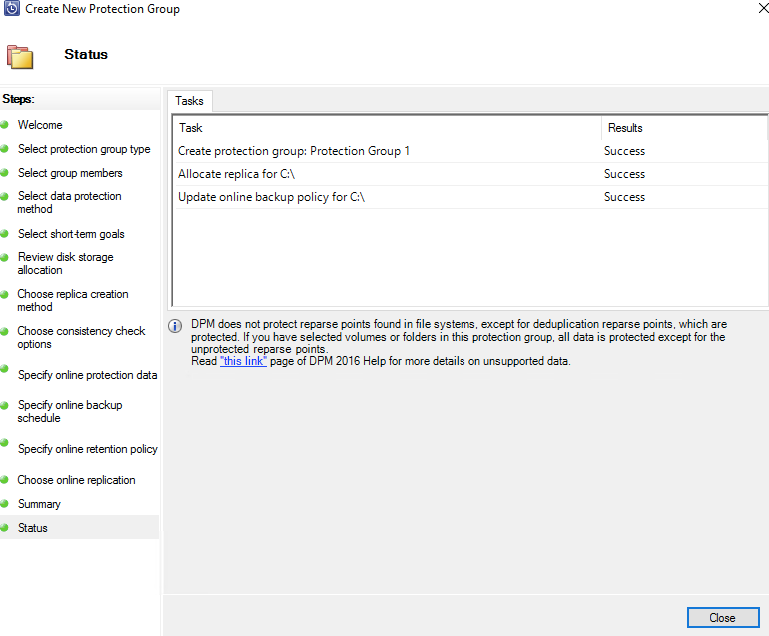
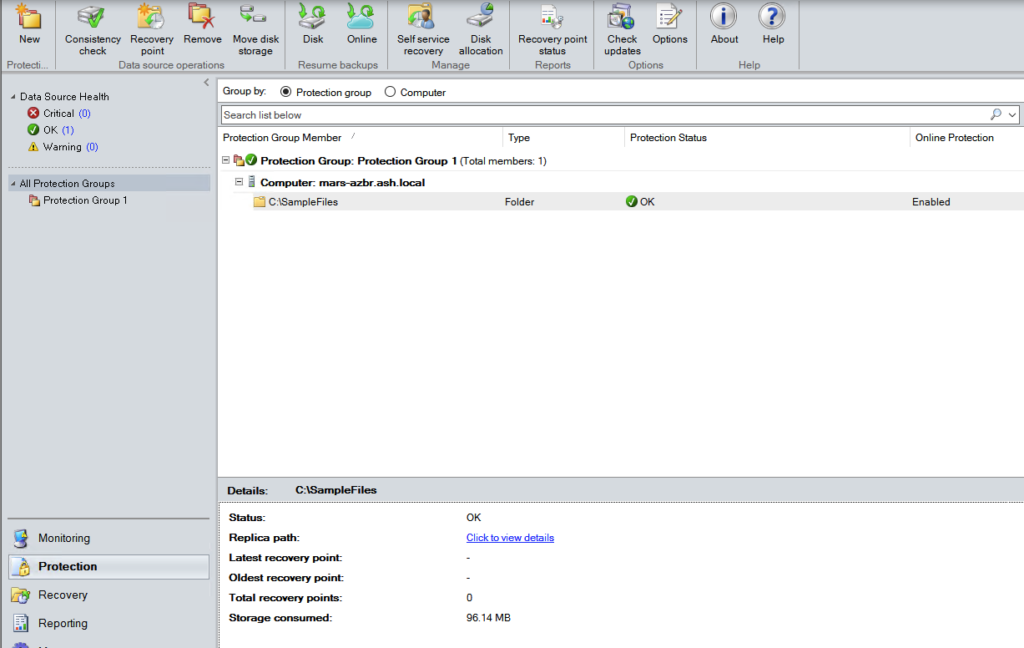
Our Protection Group is created
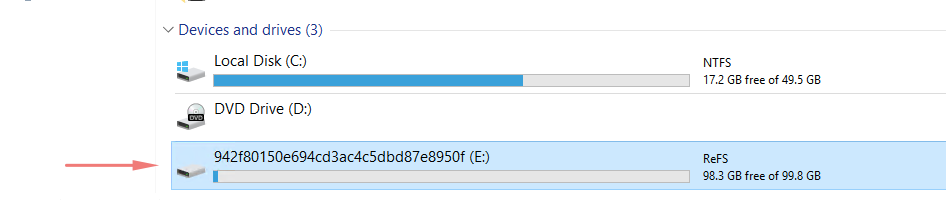
Our Backup Disk will be shown in this format.
How to Backup Data from remote servers using DPM Agent
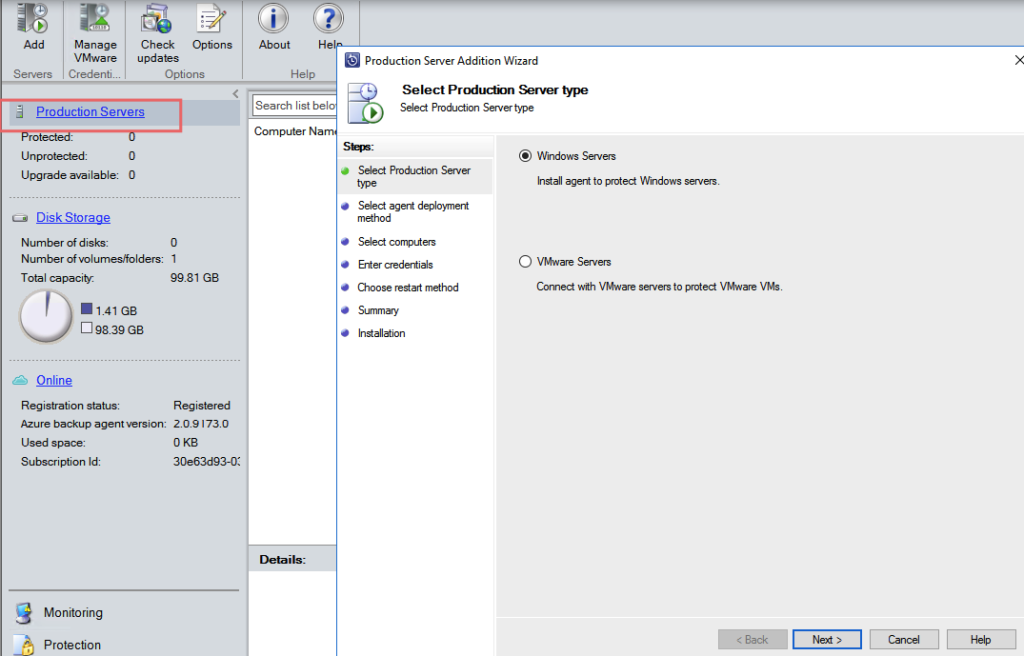
Under production servers, choose Windows or VMware Servers
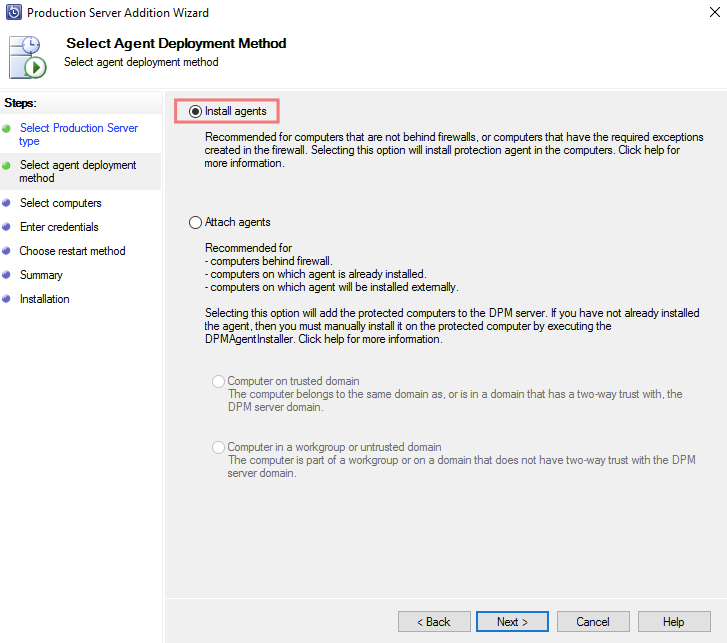
Choose to install agents
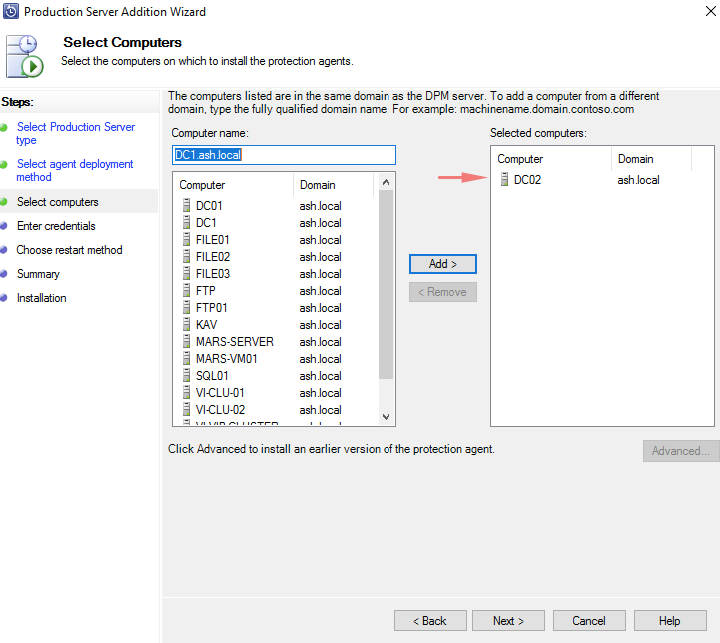
Choose a server to install backup agent to
Provide the DA account details to install software

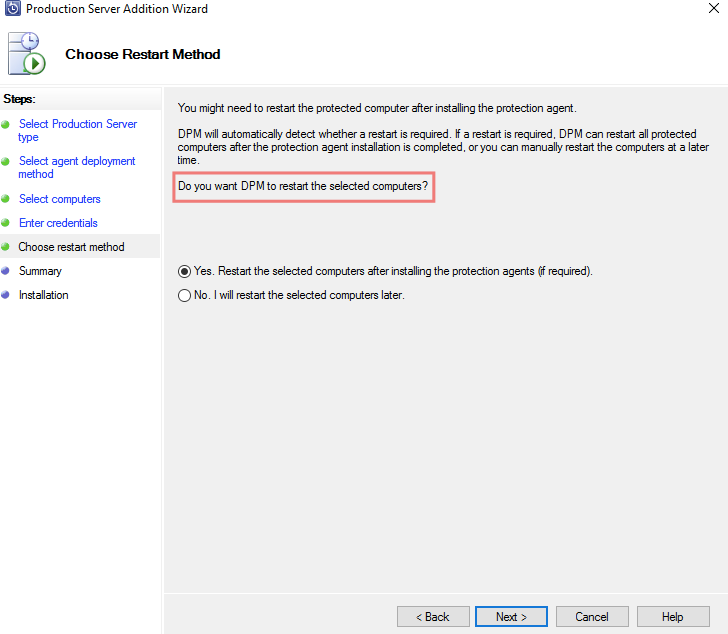
Pick the option to reboot if required.
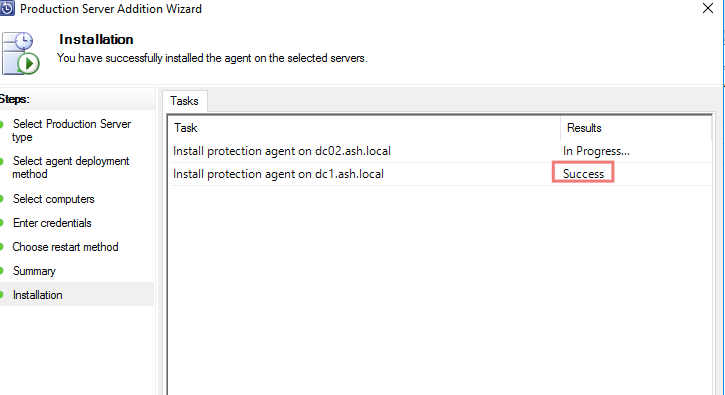
Agent is thus installed
Validate the agent name in control panel

As expected, we can now see our new server in our selection list.

Recover Data Using MARS Agent
Under the recovery tab, choose the server to restore data from.

Choose the missing files to restore

Restore to a location
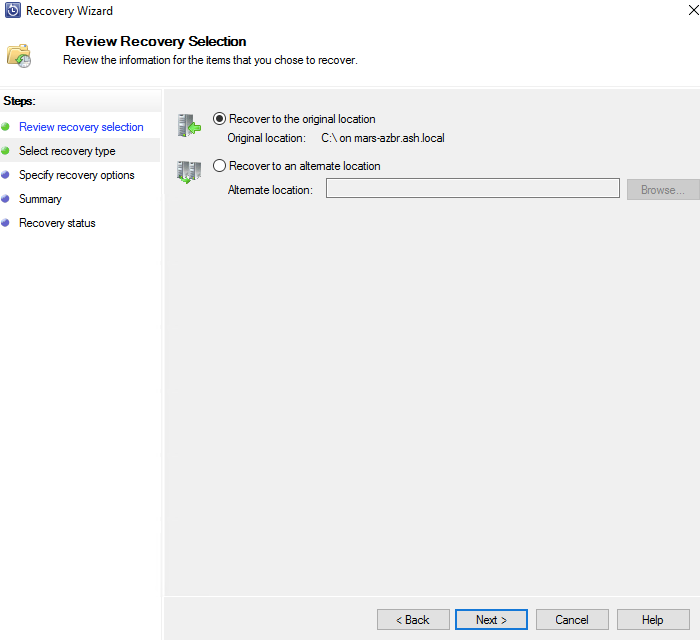
Leave everything as default
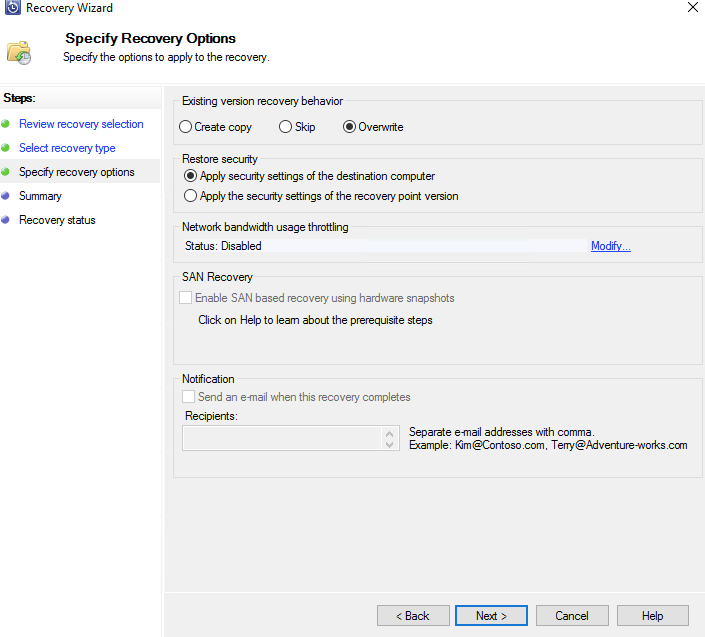
Validate all settings and click Recover

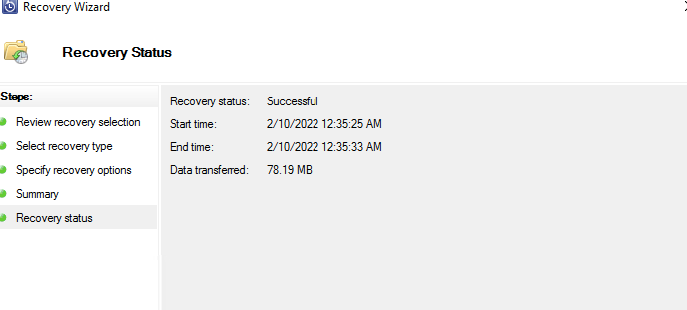
Our files have been recovered
Restore data to Alternate Server
Once the AZ backup agent is installed on the new server, we just need to do the recovery from an alternate server as shown.
