What’s Local DNS
This is the usual on-prem hoisted AD setup. These can be installed on a VM in Azure
Setting a custom DNS server for our VM’s
Custom DNS if needed can be enabled for VMs if necessary to point to an internal DNS server server. On the DNS server, we will need to go to vNET and change the DNS from Azure provided one to our local private IP on the DNS.

On the new VM’s we are creating ensure its set to Custom too

A reboot is required for all the VM’s if we wish to change the DNS.
What’s Azure Private DNS
If you don’t want the burden of managing your own DNS server, we can go for private DNS that can take care of all the internal zone and address records. This fully hoisted Azure service takes care of the internal name resolution.

1- Search for DNS and choose private DNS

2- Choose private DNS

3- Give our private zone a name


4- Click create and we can see our private DNS is now ready

5- We will now need to link it to the vNET that we wish to have dynamic DNS registration enabled to all its subnets.
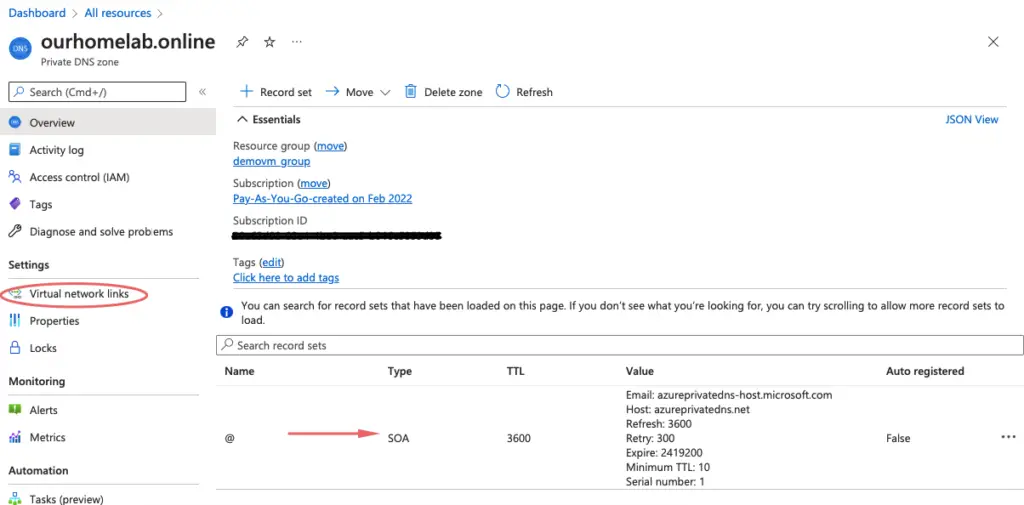
6- Give the virtual network link a name and choose the vNET and enable the auto-registration feature so virtual machines can automatically have a Dynamic dns entry

7- In a few minutes, our virtual network link will be activated

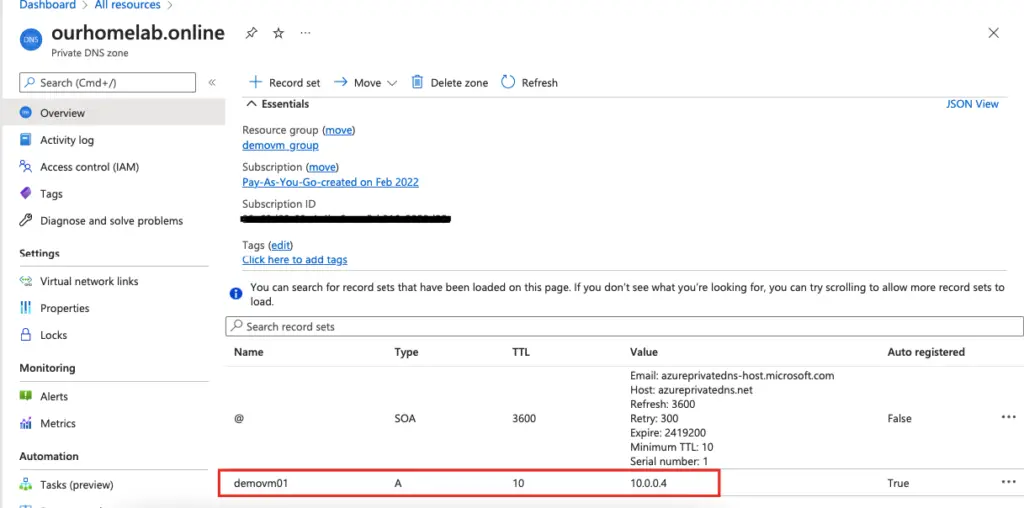
8- Notice that we can now our Virtual machines automatically create an auto-registration in dns.
What’s Azure Public DNS
This is used for hosting your public zones (ie: if we have a domain name “as ourhomelab. online”, registered via our web registrar, the usual DNS records for that domain are handled by the web registrar such as hostinger. Azure Public DNS can handle routing requests from hostinger to azurenameservers

Prerequisites
- Purchase a domain name
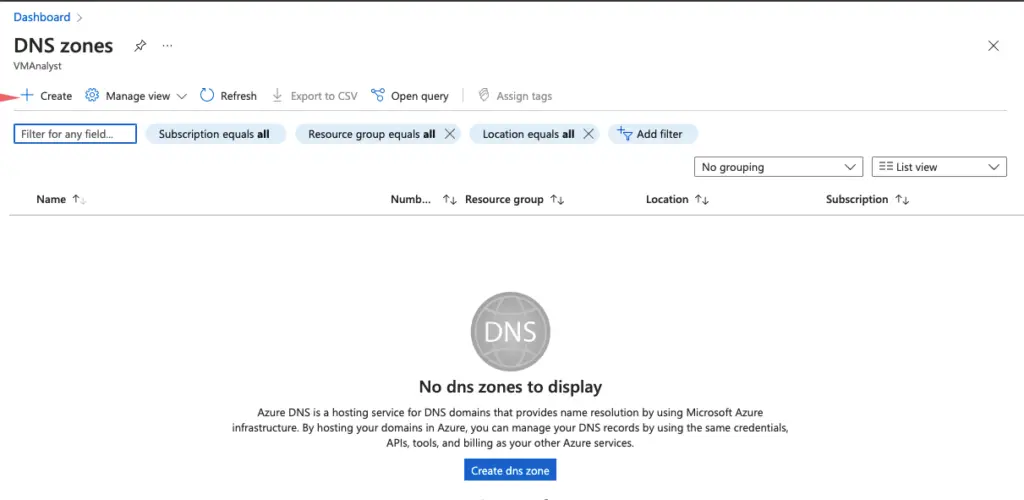
1- Search for DNS and choose DNS zones DNS

2- Create a DNS zones

3- Choose to create DNS zones
4- Give the name of the domain name we purchased

5- Review and create

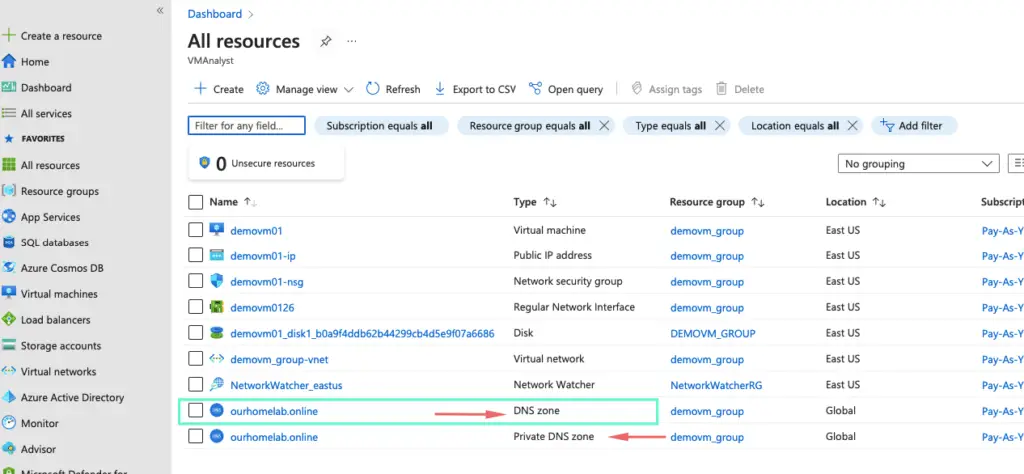
6- Our private and public DNS zone is now ready.
7- Copy all the name servers available under our public DNS
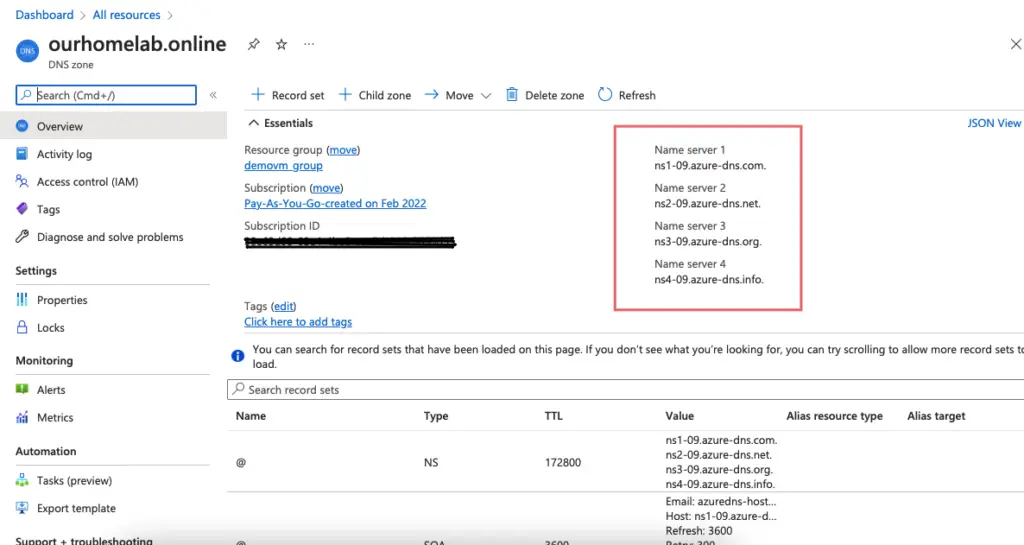
8- Go to our domain registration and change the name servers to point to the Azure name servers
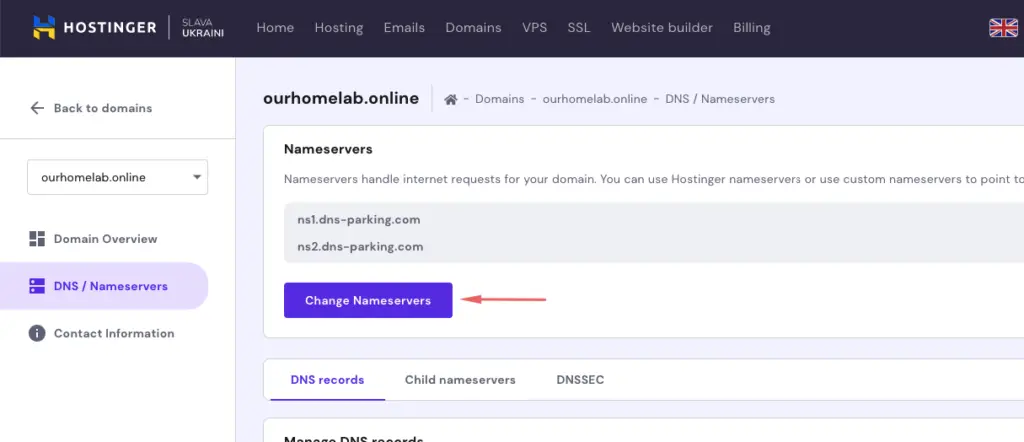
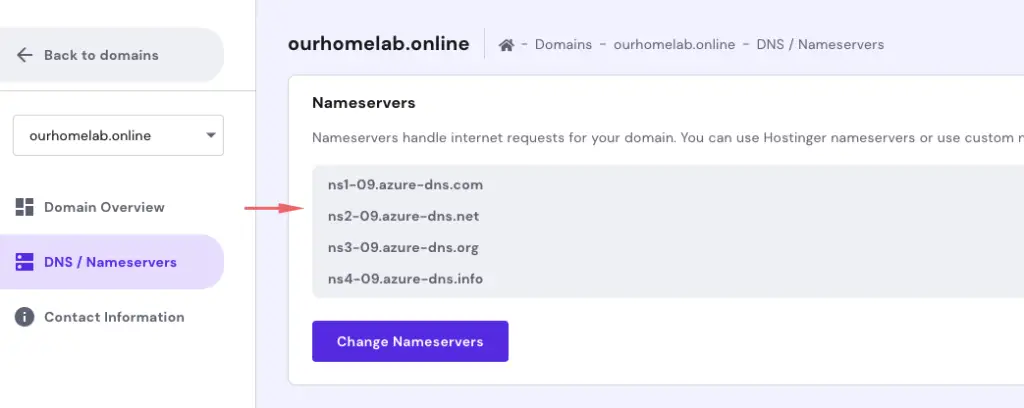
9- Update name servers to Azure NS records to give us a facility to route the new request to Azure zones. As our zone is managed by Azure, we can tell our external provider to route all requests to DNS servers managed by Azure. So now when a request comes to that, it will be routed to Azure name servers rather than our hostinger.com
10- Inorder to test the config and because its a public DNS zone we will copy the public IP of a VM
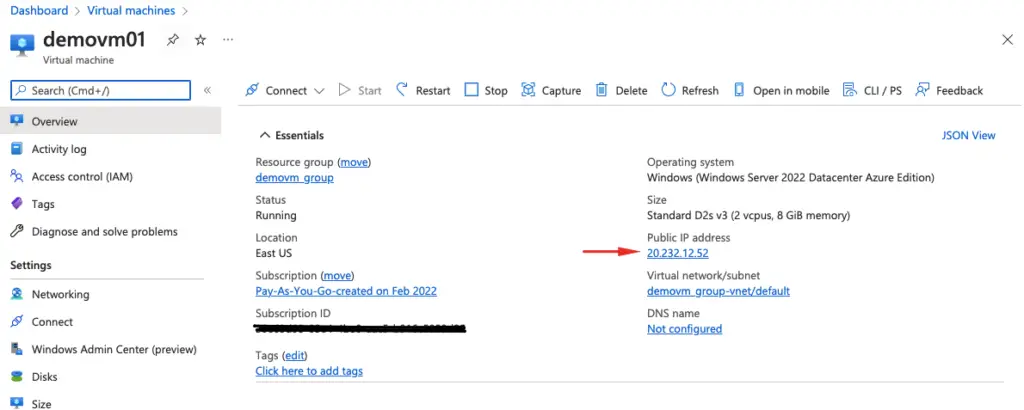
11- Add a new record set.
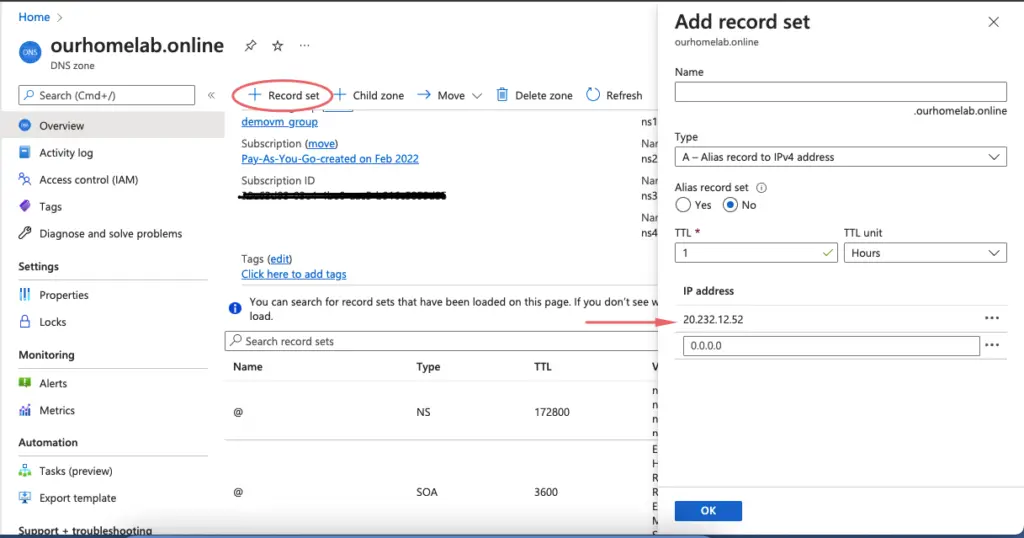
12- Our A records are added now
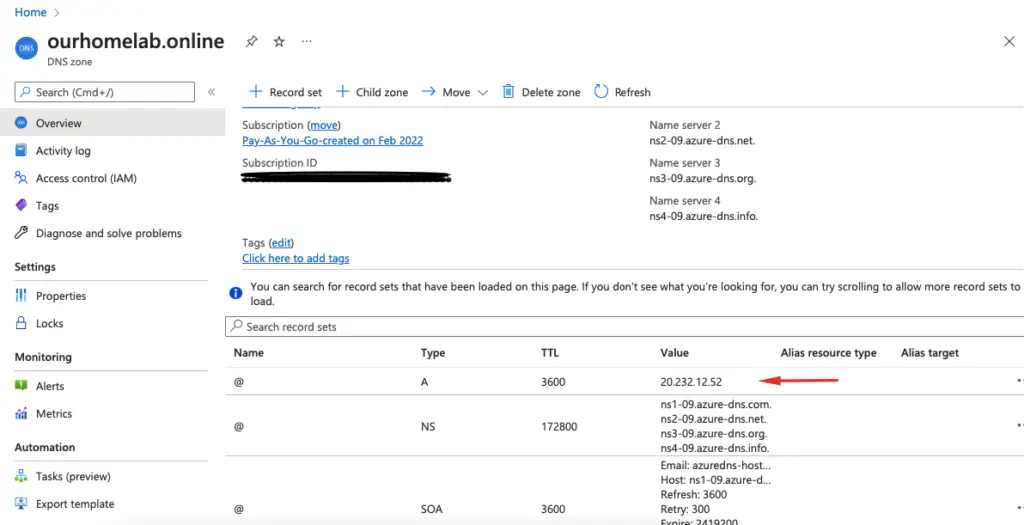
13- Verify connectivity to our web server VM and this time our provider requests connections via DNS servers managed by Azure.


