Application Gateway is a highly available web traffic load balancer based on layer-7 load balancing.AAG allows traffic to be based on the URL based on custom rules defined.
If a user was to connect to grandvm.com/images, he is directed to the virtual machines under an image backend pool. Likewise, If a user was to connect to grandvm.com/videos, he is directed to the virtual machines under a video backend pool. The application gateway thus allows routing us to different VM that are part of the back-end pool.
Below are a few of the benefits of using AAG as an application load balancer
- AAG is a highly available service with redundancy for failure built in.
- Cloud load balancing with AAG ensures maximum throughput in minimum response time, resulting in high-performing applications that can handle sudden traffic spikes.
- Application Gateway can make routing decisions based on additional attributes of an HTTP request, for example, URI path or host headers.
- AAG comes with various industry-grade advanced features such as Web Application Firewall (WAF) with DDOS protection, Autoscaling, Zone redundancy, Multi-Site hosting support, URL-based routing, Session Affinity, Connection Draining, SSL/TLS termination etc.
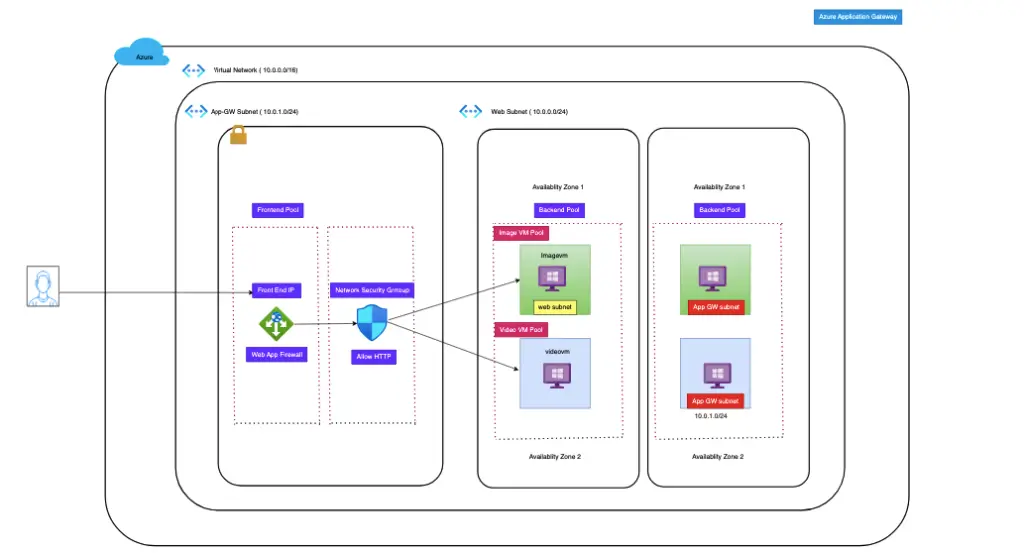
Infrastructure Servers
| ImageVM | used for storing videos |
| VideoVM | used for storing images |
Create two virtual machines in the Default subnet

Create and attach a new NSG to the subnet
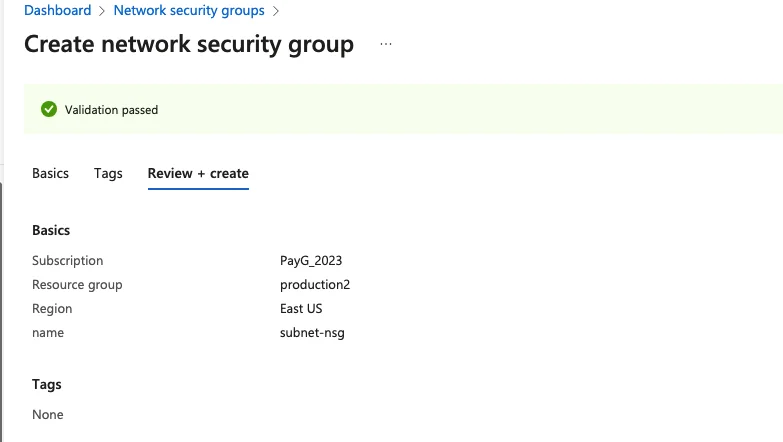
If we need the load balancer to talk to the outside world we need the NSG rules in place
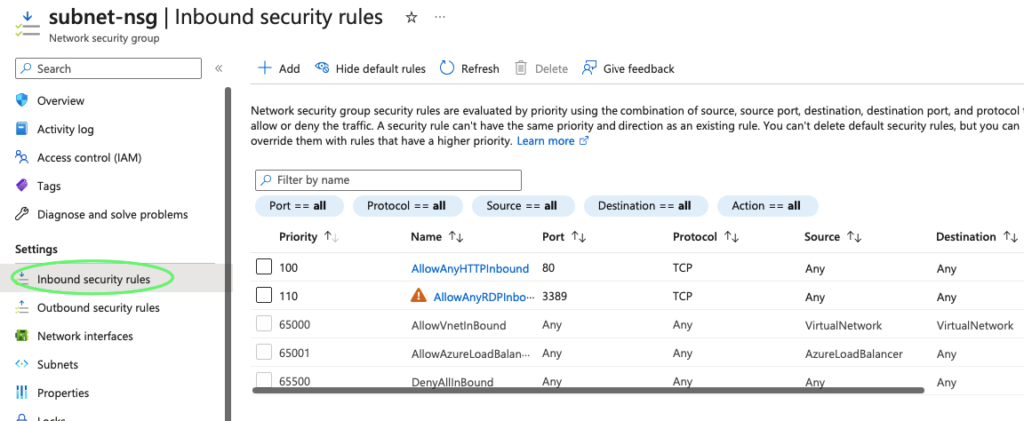
Associate NSG to subnet
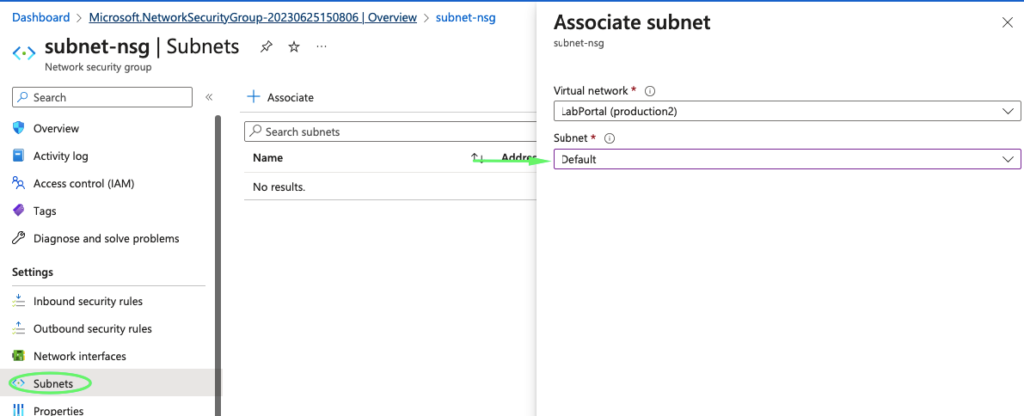
Provisioning App Servers Gateway
Create a new subnet which is required for the app gateway config.

Our two subnets are now ready

In the Search bar look for “Application Gateway” and select it from the list.

In the Application Gateway creation page, Click on the “Create” button

Fill in the appropriate details below
- Subscription
- Resource Group
- Application gateway name
- Region
- Tier – Since we’re not using WAF capability of AAG here, we’ll be going with “Standard V2” as “Tier”
- Autoscaling – No
- Instance count” set to 2 for the load balancer instances.
- Under the subnet config, we will add the subnet App-gw-subnet we created earlier.

Once all the details are properly filled in, Click on Next: Frontends> Button and In the “Add a Public IP” section, provide the appropriate Name for the Public IP address and click OK.

Once all the details are properly filled in, Click on Next: Frontends> Button. On the Frontends configuration page, select the Frontend IP address that will get attached to this AAG.

Once the new Public IP is created, click on Next: Backends. On the Backends page, click on Add a Backend pool

On the Add a backend pool section, provide these details
- Name for the backend pool – web-backend-pool-image
- Choose No for the “Add backend pool without targets”
- Select “Virtual Machine” in “Target Type” and add your backend web server’s VM in the “Target” field.
In this example, we’re adding 2 web servers’ VM (imagesvm and videovm) in the “Target” field.

On the Add a backend pool section, provide these details
- Name for the backend pool – web-backend-pool-video
- Choose No for the “Add backend pool without targets”
- Select “Virtual Machine” in “Target Type” and add your backend web server’s VM in “Target” field.

Once everything looks good, Click on the Next: Configuration > button and both web servers VM (imagesvm and videovm) appears in the “Backend pool” field.

The next step is to “Add a routing rule” button to configure Routing Rules, and add required rules.

On the Routing Rule section, provide these details
- Name for the routing rule – web-pool-routingtable
- Name for Listener – httplistener
- Front IP – Public
- Protocol is a basic HTTP with a single site

For “Backend Targets” configuration, choose the “Backend settings”

Under “Backend settings” click add New for “HTTP Settings”,

Now we will define the path based rules for any requests coming to /images/* they will be redirected to the target-pool-images and for any requests coming to /videos/* they will be redirected to the target-pool-videos

For path-based routing for images, we will now add a path so for any requests coming to /images/* they will be redirected to the target-pool-images
- Target type name – Backend Pool
- Path – /images/*
- Target Name – Backend-settings
- Backend target – web-backend-pool-image

For path-based routing for videos, we will now add a path so for any requests coming to /videos/* they will be redirected to the target-pool-videos
- Target type name – Backend Pool
- Path – /videos/*
- Target Name – Backend-settings
- Backend target – web-backend-pool-video

Review the routing rule set for images and video URL

Click on Next: Tags to add some tags if needed
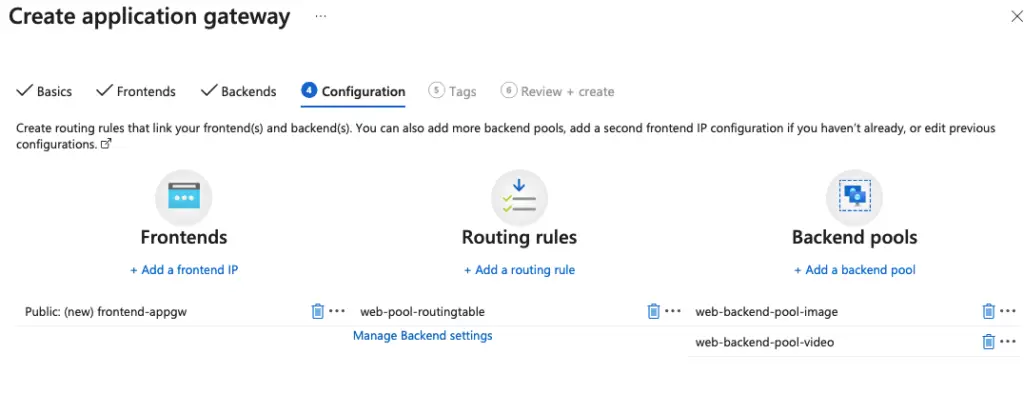
Validate all the details and click on “Create” to create the Application Gateway.

To test out the Application Gateway, copy the “Frontend public IP address” attached to the Application Gateway and test it out in the web browser.
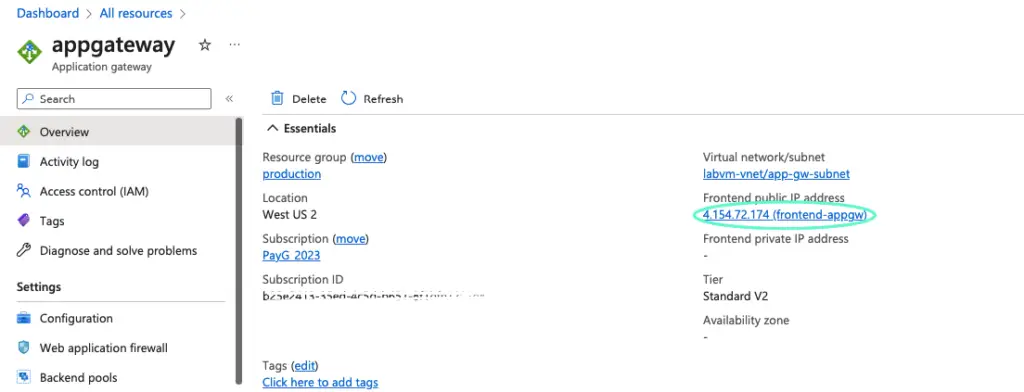
The Frontend public IP address of this Application Gateway fetches web page as below for images . If we refresh the web browser, the Application Gateway sends the request to the next image web server

The Frontend public IP address of this Application Gateway fetches web page as below for vidoes . If we refresh the web browser, the Application Gateway sends the request to the next video web server

So our path based routing works as expected.
Resources Spun up for AAG

Health Checks on AAG
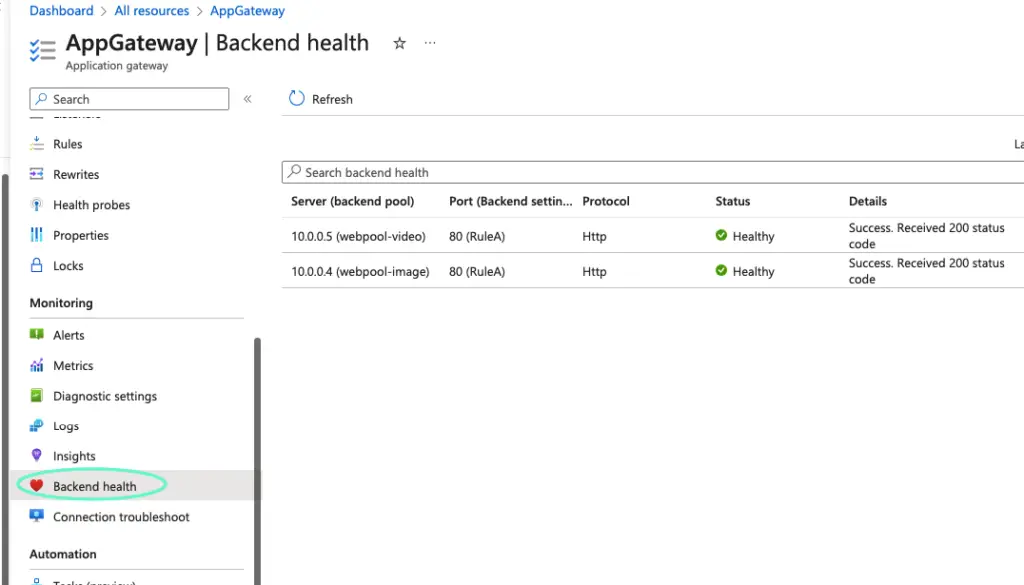
AAG health checks can be performed at the Monitoring > Backend Health tab
