If you work with NSX‑T long enough, you eventually realise something important: the API isn’t optional. Whether you’re deploying a fresh environment, troubleshooting a stubborn configuration, or automating repetitive tasks, the API becomes your closest ally. Some operations require it, and many others are simply faster and more reliable when executed through API calls.
Before diving into NSX‑T‑specific workflows, it helps to get comfortable with a friendly API tool. That’s where Postman comes in — a clean, powerful interface for sending requests, organising environments, and building repeatable workflows.
To warm up, we’ll use a simple “Books” API to practise GET, POST, and DELETE operations. This gives you a safe playground before you start firing requests at NSX‑T Managers.
Step 1 — Install Postman
Install Postman from: https://www.getpostman.comon your workstation and launch the application
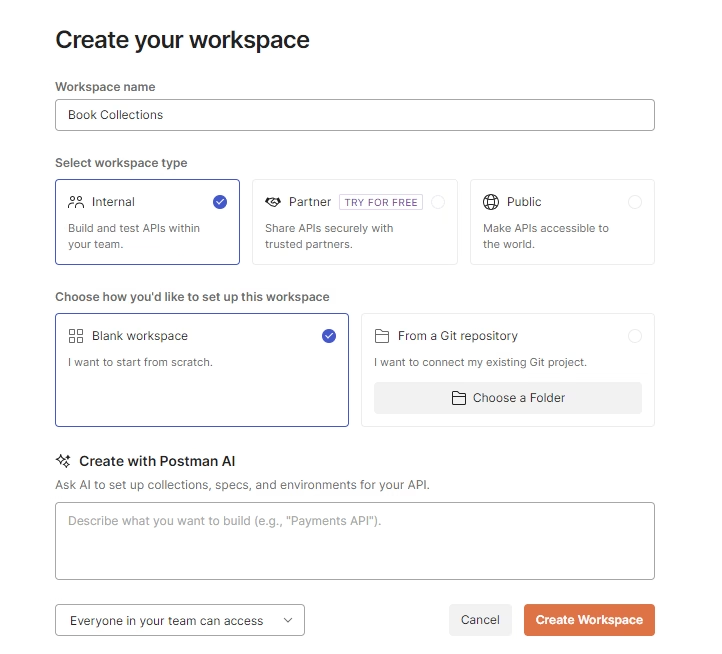
Step 2 — Create a Workspace
A workspace in Postman is your personal sandbox. It’s where you group collections, requests, and environment variables for a specific project.
To create one:
- Go to File > New
- Select Workspace
- Give it a name (e.g., NSX‑T API Lab or Books API Practice)
This keeps your API work organised and avoids clutter when you start building multiple collections.
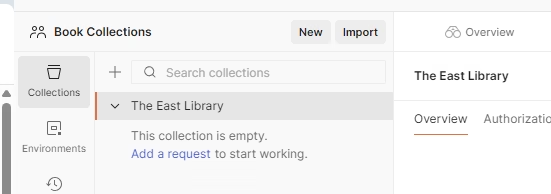
Step 3 — Add a Collection
Collections are where your API requests live.
Inside your new workspace:
- Click New Collection
- Name it something like Books Library API
- Save it
This collection will hold all the requests you create for the sample Books API.
Step 4 — Add Environment Variables (Optional but Recommended)
Postman environments let you store values like:
- Base URLs
- Tokens
- IDs
- Usernames/passwords
For this exercise, you can create variables such as:
base_urlbook_id
This becomes extremely useful when you start working with NSX‑T, where you’ll juggle multiple endpoints and authentication tokens.

Step 5 — Add the API token from the application

Step 6 — Use the Sample Books API
We’ll use the API documented here:
https://documenter.getpostman.com/view/15567703/UVyxRtng#3d4c447b-5369-413d-8ac9-b31426a846ac
This API allows you to:
- Retrieve all books
- Retrieve a book by ID
- Add a new book
- Delete a book
The syntax’s that come handy for our postman are POST,GET,PUT and DELETE so lets do a quick demo
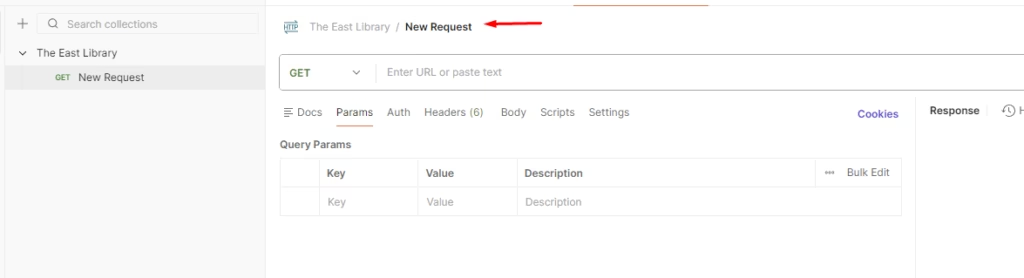
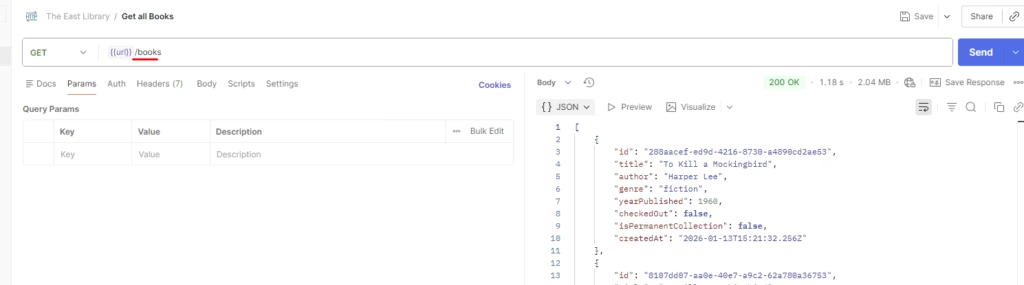
Step 7 — Add Your First Request: GET All Books
Inside your collection:
- Click Add Request
- Name it GET – Get All Books
- Set the method to GET
- Save and send the request
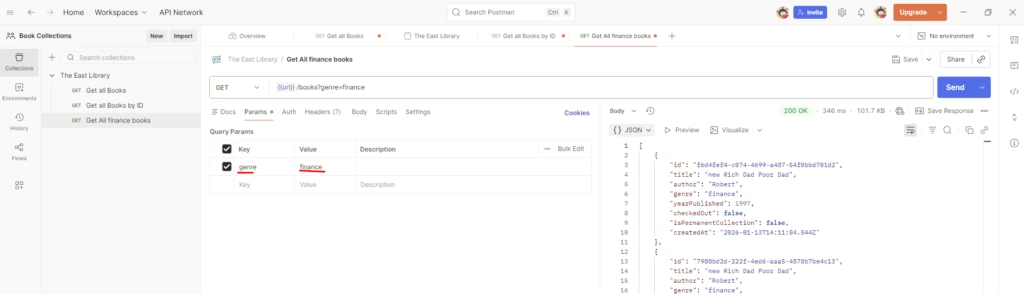
Step 8 — GET a Book by Genre
Add another request:
- Name it GET – Get Book by Genre as finance
- Method: GET
- Use the endpoint that includes the book ID
- If you created a variable like
{{book_id}}, you can use it here
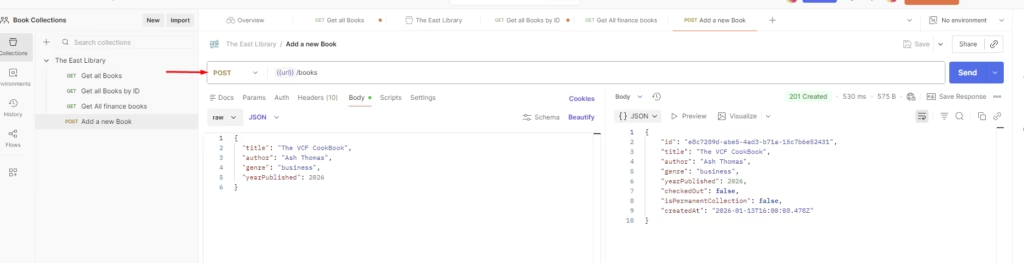
Step 9 — POST a New Book
Now let’s add data.
- Create a new request named POST – Add a Book
- Method: POST
- Select Body > raw > JSON
- Add a JSON payload, for example:
{ “title”: “API Fundamentals”, “author”: “Ash Thomas”, “year”: 2025 }
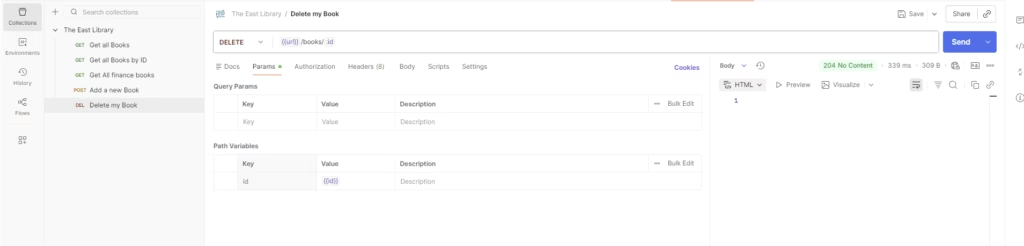
Step 10 — Delete a Book
- Name it DELETE – Delete Book by ID
- Method: DELETE
- Use the endpoint that accepts a book ID
- Declare a variable if required or Insert the ID manually or use your
{{book_id}}variable
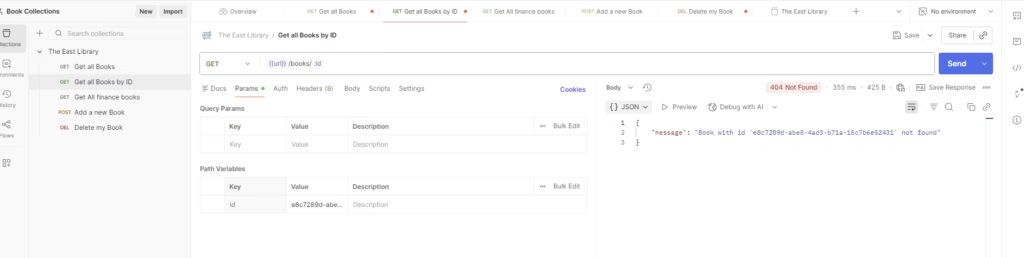
Step 1 1— GET a Book by ID
Add another request:
- Name it GET – Get Book by ID
- Method: GET
- Use the endpoint that includes the book ID
- If you created a variable like
{{book_id}}, you can use it here