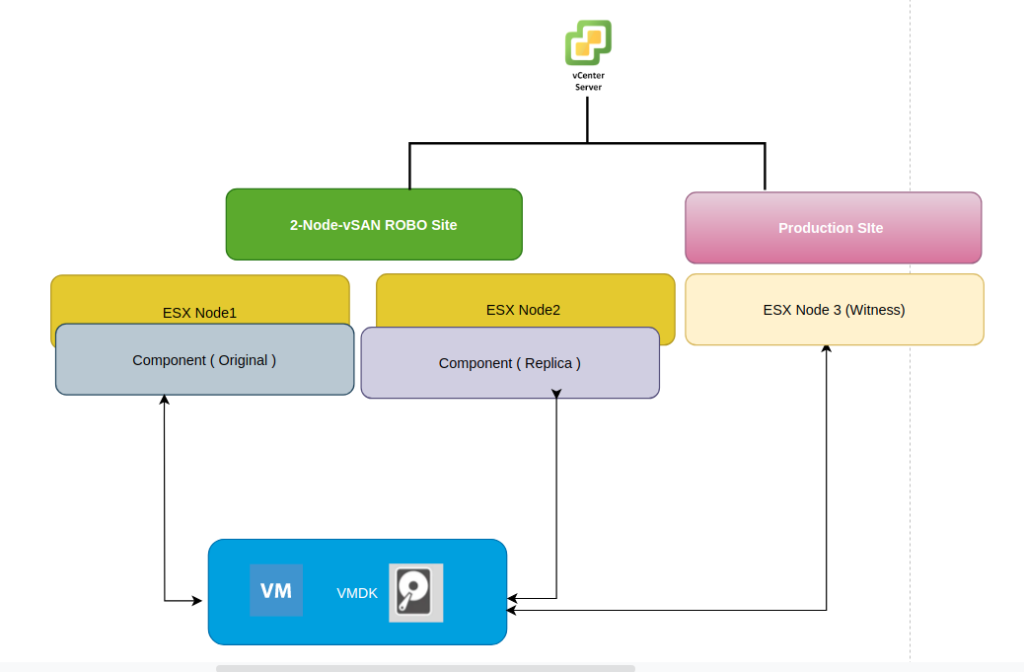
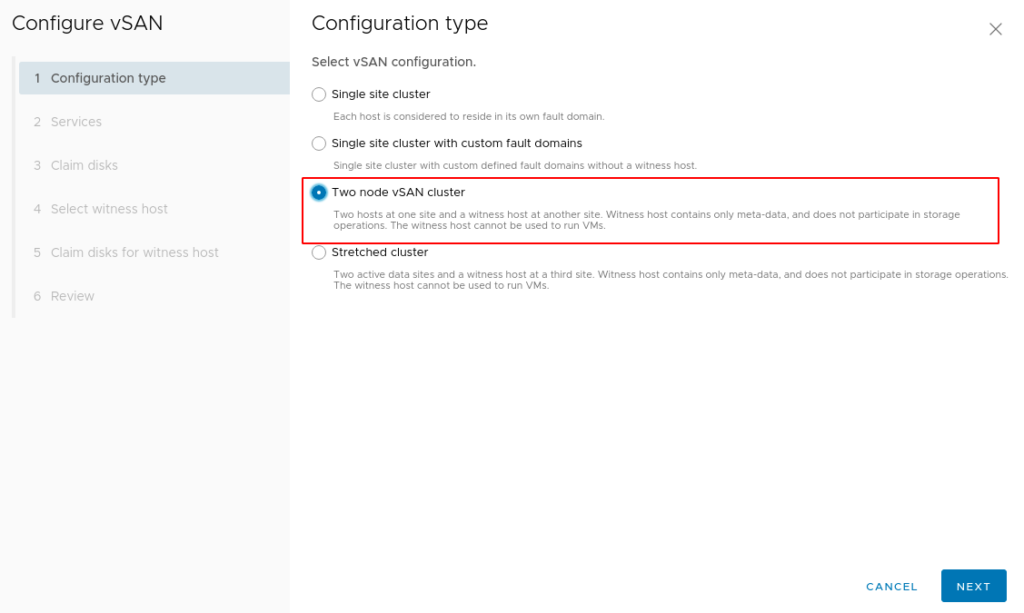
The 2-Node vSAN cluster works similar to a full-blown vSAN cluster except for the fact that it’s made up of 2 nodes in a direct connect configuration. A witness host is then needed which is responsible for maintaining the quorum of a 2-node vSAN cluster that can reside on the same site on an alternate host or a host on an alternate site.
Blog Series
- Confgure vSAN in Single Site
- Create vSAN SSD Disks from HDD
- Remove an esx node from the vSAN cluster
- Scaling vSAN by adding a new esx node
- Two nodes vSAN7 Configuration
- Convert 2-Node vSAN to 3-node configuration
- VMware vSAN Stretched Cluster
This deployment is a good choice for ROBO sites that have limited switch ports or you just need a VMware presence there with limited server/storage footprint and in HA configuration and that can just easily be managed from the central vCenter server from our datacenter.
This diagram is the architecture of 2-Node vSAN cluster.
Requirements for 2 Node VSAN:
2 vSphere ESXi servers with the below config and a vSAN license are required for a vSAN configuration.
- 4GB Memory
- 1Gbps Network card
- 1 SSD for cache disk and 1 SSD for capacity disk
- Directly attached cable between the two hosts which will be used for vSAN and vMotion traffic.
- Jumbo Frames if needed for vSAN traffic
In addition to the above, we will also need a new witness esx host with 1 SSD for cache disk and 1 SSD for capacity disk on the host
Network requirements for 2 Node VSAN:
6x IP addresses are required in total for vSAN 2 node cluster
| vSAN Nodes | vSAN Witness Node |
| 1 x routable management IP per ESX node | 1 x routable management IP for witness node |
| 1 x non-routable vSAN VMKernel IP per node | 1 x routable Witness VMKernel IP for witness appliance |
1. Login with VMware vSphere client. Site 1 represents the Robo Site where we will deploy the vSAN node and under Site 2 we have our witness host which is on our production datacenter

2. Hosts are prepared with one VMkernel adapter for the management network and vSAN network

3. At the time of VSAN cluster creation, do not enable the vSphere HA, vSphere DRS features as these can be enabled after the completion of the VSAN configuration. Select Datacenter, select Menu tab and then click on New Cluster.

4. Under Cluster Actions – Choose Add hosts to the cluster. – Select all 2 hosts for our VSAN 2 node cluster.

5. We can now see all our hosts added to the cluster. Take the host out of maintenance mode

6. To turn on vSAN, select the Cluster – Navigate to Configure tab – vSAN Services and Click Configure
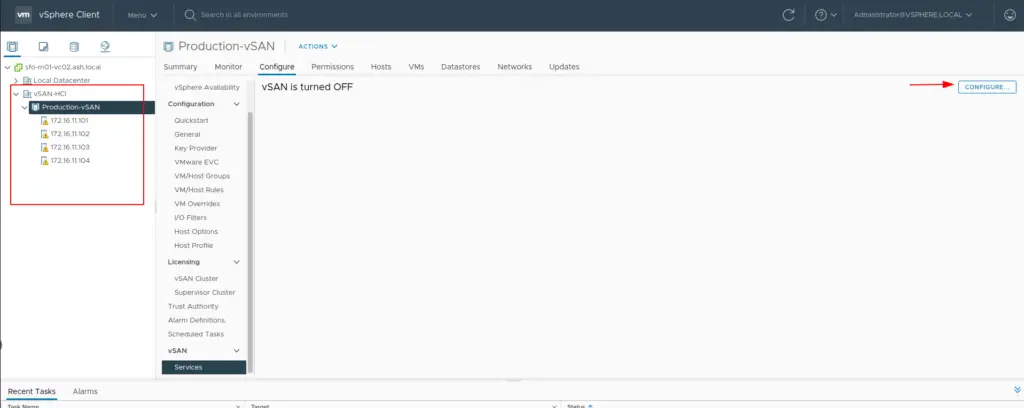
7. Choose the vSAN configuration as a two-node vSAN cluster
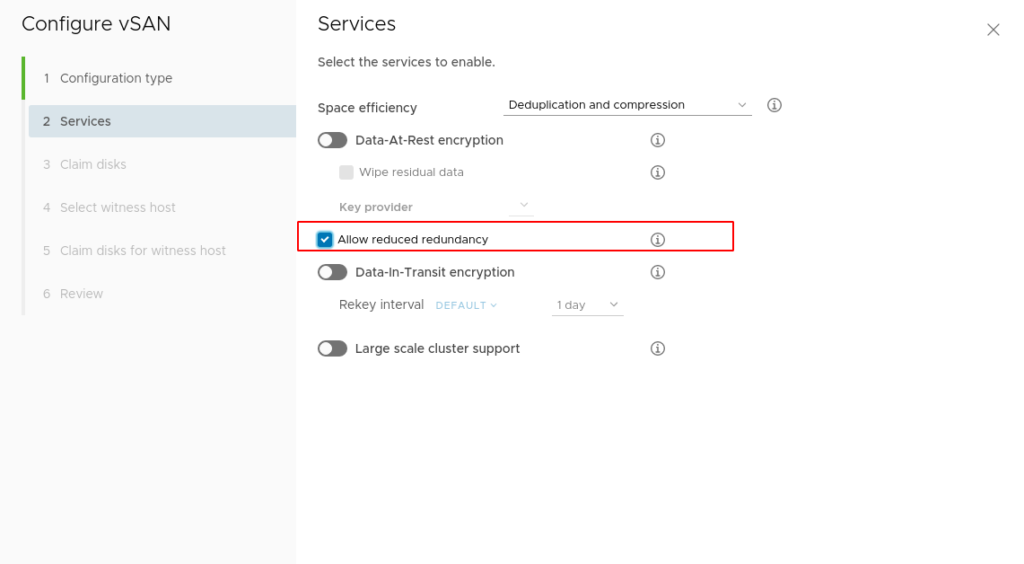
8. In the next screen, we have an option of enabling the following services on vSAN datastore
- Compression only: Compression improves the total cost of ownership by reducing the data stored on your physical disks.
- Deduplication and compression: Deduplication and compression improves the total cost of ownership by reducing the data stored on your physical disks. Deduplication and compression only works for all-flash disk groups. Creating hybrid disk groups is not allowed when deduplication and compression is turned on.
- Allow Reduced Redudancy: By selecting this option, you agree that vSAN can reduce the protection level of your VMs, if needed, during the operations of changing deduplication and compression or Encryption state.
- Large Scale Cluster Support: By default, vSAN cluster can only grow up to 32 nodes. But by setting this option, vSAN cluster is allowed to grow up to large scale, at maximun to 64 nodes.If this settings needs to be applied post the initial configuration of vSAN cluster all hosts in the cluster will need to be rebooted.
Note – For a 2 Node vSAN it is important to Allow reduced Redundancy. This is because any time there is a requirement to create/remove/recreate a vSAN Disk Group on a 2 Node vSAN Cluster, the Allow Reduced Redundancy option is required. Without this setting checked, changes will likely not occur due to the cluster not being able to maintain storage policy compliance.
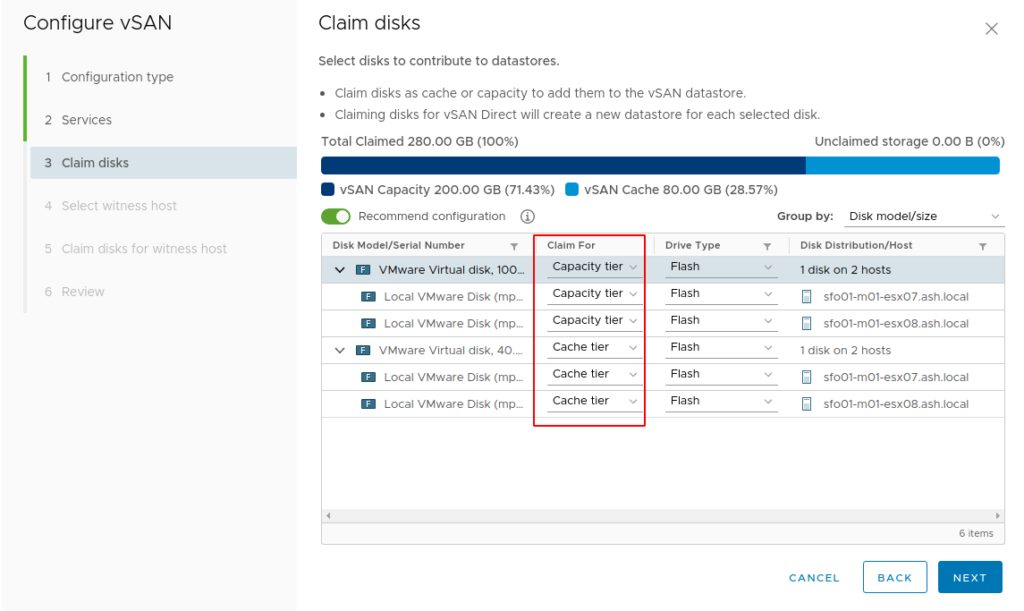
9 – Choose to claim disks (cache and capacity tier) that will contribute to the vSAN datastore and then click next
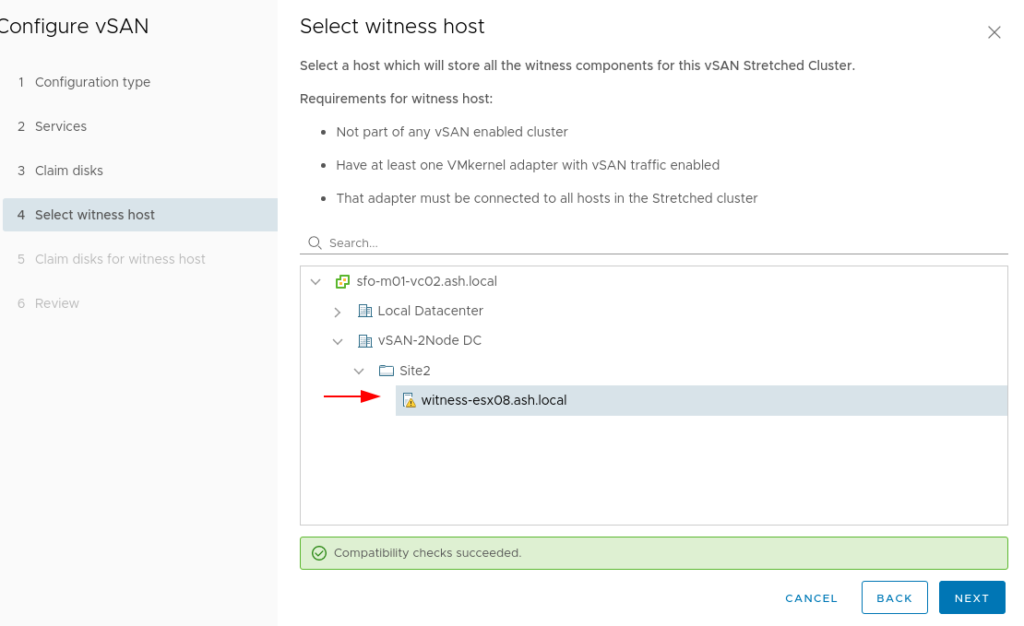
10- Select the vSAN Witness host we deployed earlier to act as the vSAN Witness for the 2 Node vSAN Cluster.
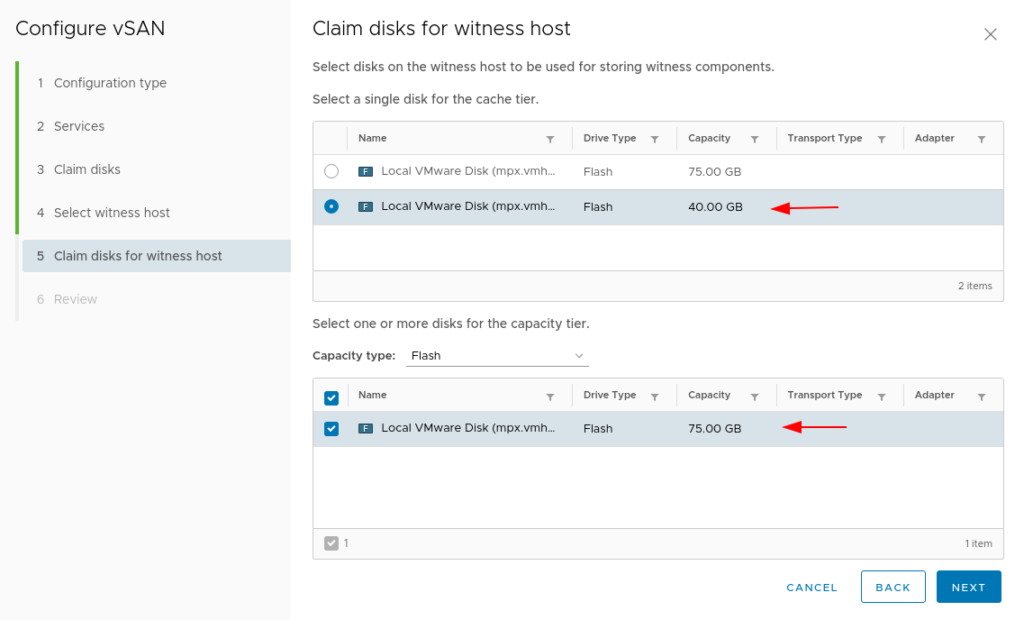
11- Claim storage devices on the witness host. Select one flash device for the cache tier, and one or more devices for the capacity tier.
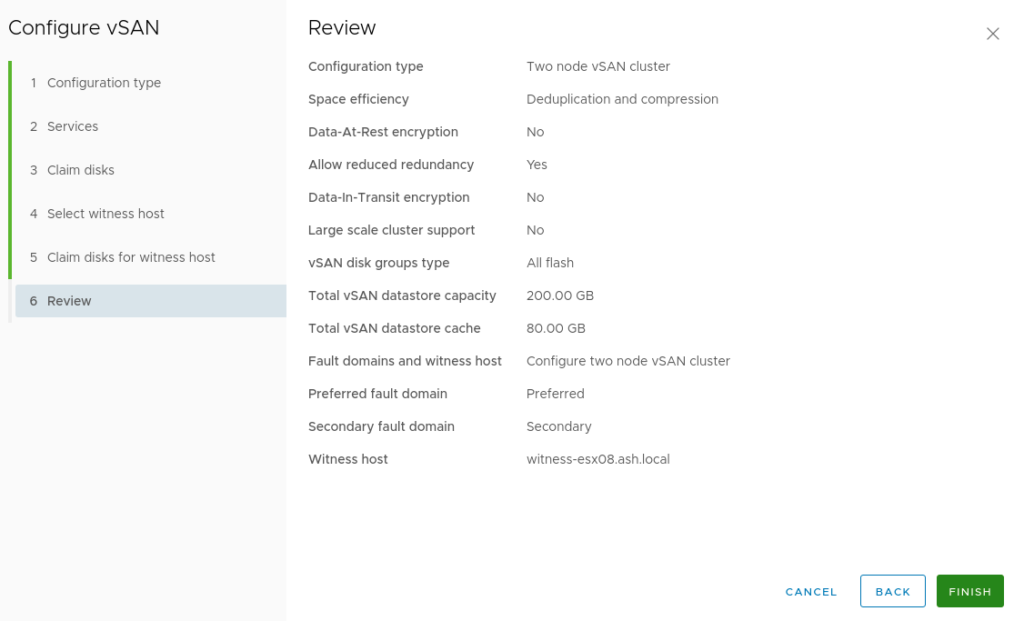
12- Review the vSAN cluster settings and then click finish.
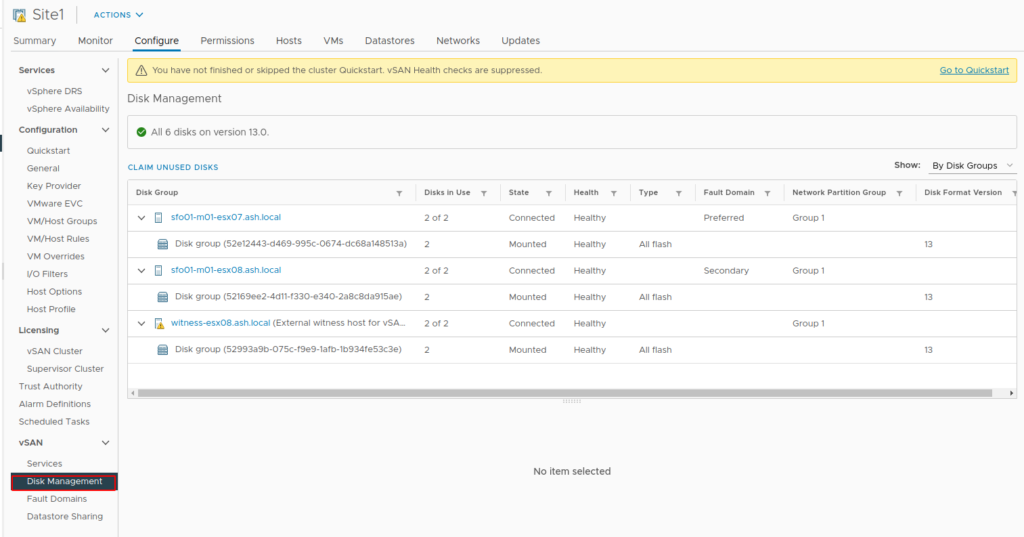
13- Once the vSAN Cluster creation is done, we can see on our hosts side that two disks on the host are participating in the vSAN datastore
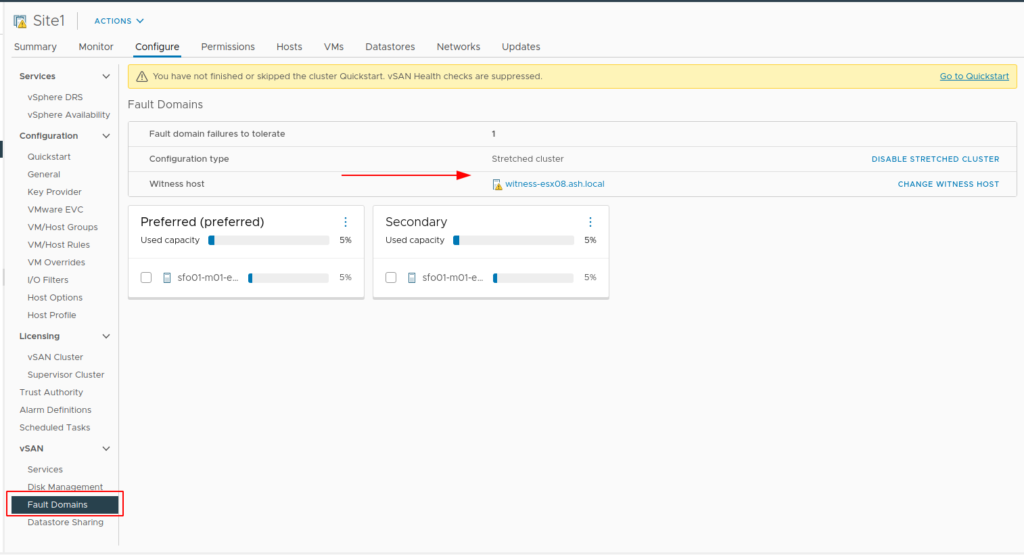
14- Under fault domains, we can now see our hosts
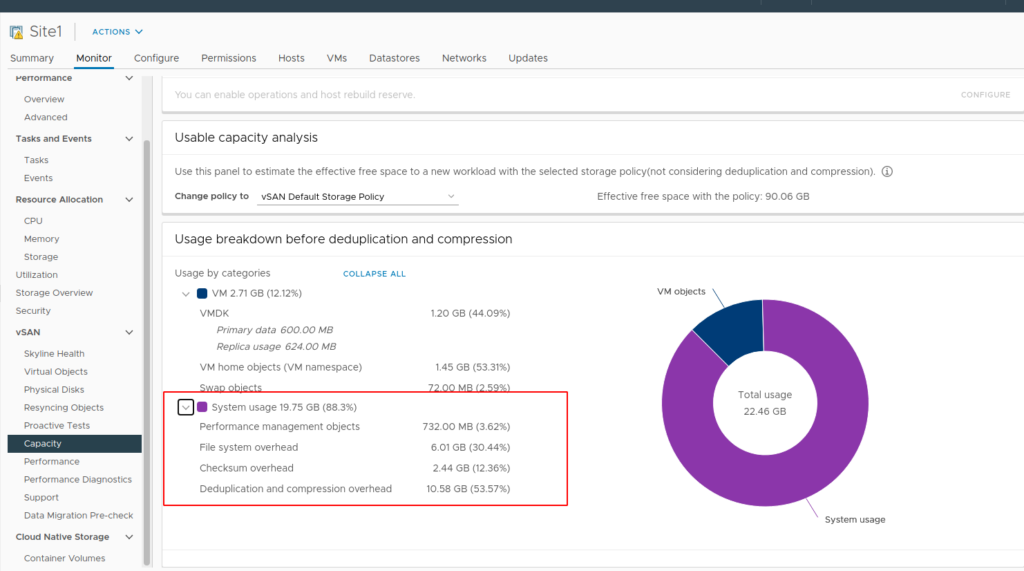
15- vSAN Status can be monitored via the Monitor tab which shows the Capacity used and the Capacity reserved for vSAN Metadata
16- Now you can turn ON DRS

17- LIkewise, we can now turn ON VMware HA as well.

We have successfully configured the two-node VSAN stretched cluster

